
SEO Title: Can You Epoxy a Concrete Patio? (Yes, But Here's What You Need to Know) Meta Description: Yes, you can epoxy a concrete patio, if you use the right formula, prep the surface properly, and add a UV-stable topcoat. Here's how to do it right.
Can You Epoxy a Concrete Patio? DIY Guide & When to Use

Silas Morrison
12 Jul 2026
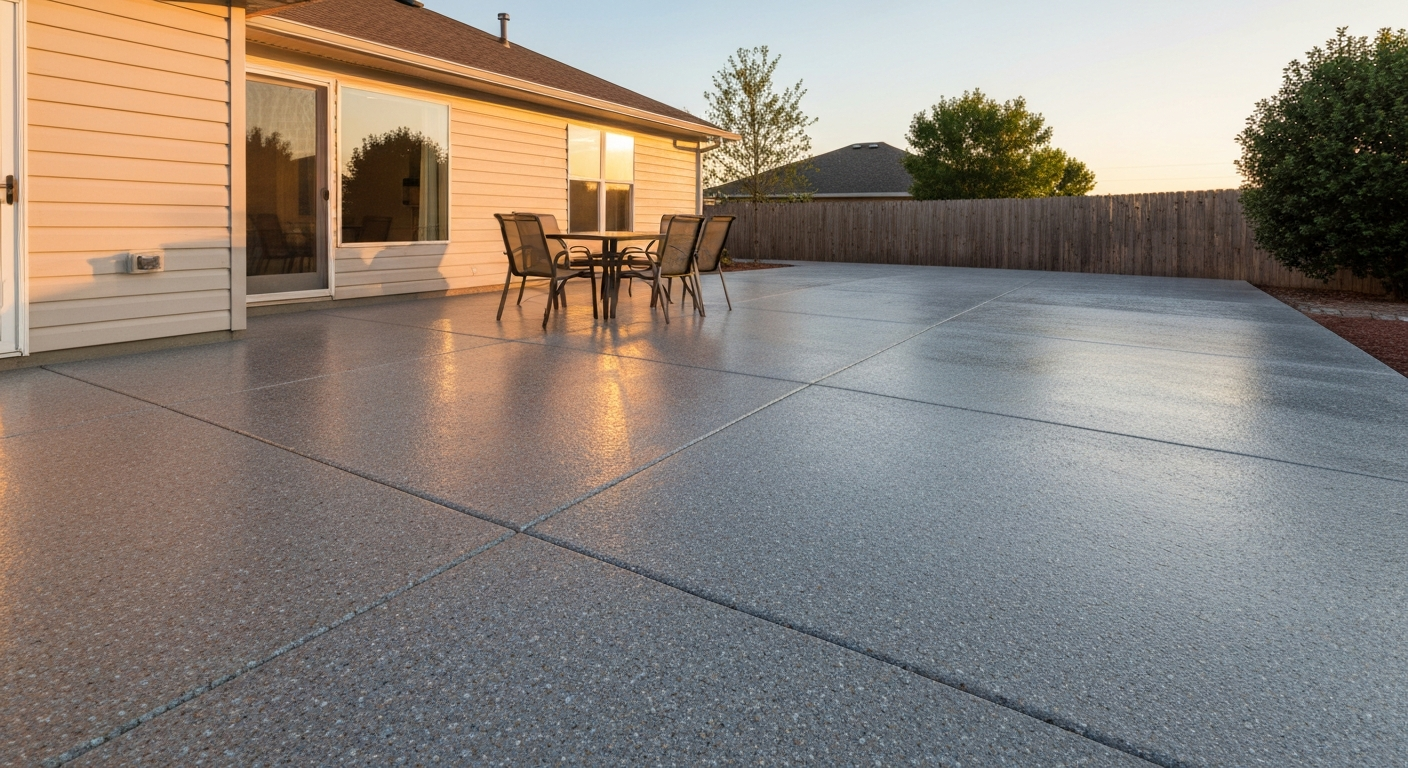
Yes, you can epoxy a concrete patio, but the product you choose matters enormously. Standard garage floor epoxy kits like Rust-Oleum EpoxyShield are formulated for indoor use only. Rust-Oleum explicitly states that EpoxyShield is not UV-stable and will yellow, chalk, and fail outdoors. If you take that kit outside, you will be recoating within a season. The good news is that outdoor-rated epoxy systems do exist, and when you pair a UV-resistant epoxy base coat with an aliphatic polyurethane or polyaspartic topcoat, you get a surface that holds up to sun, rain, and foot traffic for years.
When Epoxy Actually Works on a Patio
Epoxy is a strong candidate for your patio when several conditions line up in your favor. Here is how to think through the key decision points before you commit.
UV and Sun Exposure
Aromatic epoxies (the chemistry behind most budget kits) break down under ultraviolet light, causing the characteristic amber-yellow color shift and chalky surface. A recent review, "Development, Challenges, and Applications of Concrete Coating Technology", review article (MDPI Coatings), summarizes that aromatic epoxies are prone to photochemical yellowing and chalking under sunlight while aliphatic polyurethane or polyaspartic topcoats provide markedly better UV stability and color retention "Development, Challenges, and Applications of Concrete Coating Technology" — review article (MDPI Coatings). If your patio gets direct sun for more than a couple of hours a day, you need either a UV-resistant epoxy base like Sika's Sikafloor-225 N, which is specifically marketed as a premium UV-resistant epoxy, or a standard epoxy base sealed with an aliphatic urethane topcoat. Sika and other industrial manufacturers recommend aliphatic polyurethane or polyaspartic topcoats for any sun-exposed application precisely because those chemistries are non-yellowing and retain color far better in accelerated and real-world outdoor exposure tests.
Moisture and Vapor Transmission
This is the number-one failure point I see on patio projects. Concrete slabs transmit moisture vapor from the ground upward, and epoxy is impermeable, so trapped moisture builds pressure and pops the coating off in sheets. Before you apply anything, you need to test. The ASTM D4263 plastic-sheet method is the quick field screen: tape an 18-by-18-inch sheet of clear poly to the slab, seal all edges airtight, leave it for at least 16 hours, and check the underside for condensation or a darkened concrete area. That tells you whether moisture is actively migrating. For a proper quantitative reading, ASTM F2170 in-situ relative humidity testing is the industry gold standard. If slab RH exceeds the coating manufacturer's limit, you need a two-component resin moisture-mitigation membrane (covered under ASTM F3010) before any epoxy goes down.
Slope and Drainage
Epoxy is slippery when wet unless you broadcast an anti-slip aggregate into the topcoat. On patios that pool water or lack adequate slope toward drainage, that slickness becomes a real safety issue. If your patio has a slope exceeding about 1:10 (a 10% grade), thick epoxy coatings can also be tricky to apply evenly. For sloped surfaces, anti-slip broadcast is non-negotiable, and a thinner, more flexible system like polyaspartic may actually be easier to work with.
Climate and Freeze-Thaw Cycles
In northern climates that see repeated freeze-thaw cycles, the stakes get higher. Water that seeps under a poorly bonded coating will freeze, expand, and delaminate the whole thing come spring. ASTM C666 is the standard test method for concrete resistance to rapid freezing and thawing, and research consistently shows that properly bonded coatings can reduce salt scaling and freeze-thaw damage, but only if adhesion is solid from day one. That means aggressive mechanical surface prep, a compatible primer, and a topcoat flexible enough to move with the slab. Rigid high-build epoxies without a flexible topcoat are the most vulnerable in freeze-thaw climates.
When Epoxy Is NOT the Right Call
There are situations where I would steer you away from epoxy entirely and toward something better suited to the job.
- High moisture vapor emission: If your slab fails the plastic-sheet test and moisture mitigation isn't in your budget, a breathable penetrating sealer or an acrylic stain is a far safer choice than a film-forming epoxy.
- Severely cracked or spalled concrete: Epoxy is a coating, not a structural fix. If your slab has cracks wider than 1/8 inch, significant spalling, or sections that move independently, those problems need to be repaired first — or you should consider a full resurfacing overlay instead.
- Completely shaded, always-damp patios: Constant moisture with no drying time is a recipe for delamination. Penetrating sealers or a properly cured overlay handle these conditions better.
- Very large areas on a tight timeline: Epoxy systems have strict recoat windows and cure times. On a 1,000-square-foot patio, coordinating mixing, application, and curing without runs or lap marks is challenging for a solo DIYer.
- Budget under about $0.50/sq ft: Good outdoor epoxy systems with UV-stable topcoats cost more than cheap indoor kits. If budget is very tight, a quality concrete stain and penetrating sealer delivers a finished look for less money.
- Active efflorescence or hydrostatic pressure: If white mineral deposits are actively pushing through your slab, no surface coating will hold without resolving the source of water pressure first.
Epoxy vs. the Alternatives: Which Finish Is Right for You?
Before you buy anything, it helps to see how epoxy stacks up against the other finishes commonly used on concrete patios. Each has a different strength, and the best choice depends on your specific slab condition, climate, and goals.
| Finish Type | UV Stability | Moisture Tolerance | Durability | DIY Difficulty | Typical Cost (materials) | Best For |
|---|---|---|---|---|---|---|
| Epoxy (aromatic, indoor kit) | Poor — yellows/chalks outdoors | Low — needs dry slab | High indoors, poor outdoors | Moderate | $0.30–$0.60/sq ft | Garages; covered patios only |
| Epoxy (UV-resistant/industrial + aliphatic topcoat) | Good with correct topcoat | Low–Moderate — still needs prep | Very high | Moderate–Hard | $1.50–$3.50/sq ft | Open patios with proper prep and budget |
| Polyaspartic/Polyurea | Excellent — non-yellowing | Moderate — faster cure reduces risk | Very high; more flexible | Hard (fast working time) | $2.00–$5.00/sq ft | Outdoor patios, driveways, high-traffic areas |
| Concrete Stain or Dye | Good (acid stain); Moderate (water-based dye) | High — penetrates, does not film | Moderate — needs sealer topcoat | Easy–Moderate | $0.25–$0.75/sq ft | Decorative look on sound slabs; budget-conscious projects |
| Penetrating Sealer | Good — no film to degrade | Excellent — breathable | Moderate — no abrasion resistance | Easy | $0.15–$0.40/sq ft | Moisture-prone slabs; maintenance coating |
| Concrete Overlay/Resurfacer | Good with proper topcoat | Moderate | High when properly applied | Hard | $1.00–$4.00+/sq ft | Damaged, spalled, or uneven slabs needing a fresh surface |
My honest recommendation: for most open outdoor patios in a climate with real weather, a polyaspartic coating or an acid stain plus quality sealer gives you better long-term results with less risk than a standard epoxy system. If you want the epoxy look and are willing to invest in proper prep and an industrial-grade UV-stable system with an aliphatic topcoat, you can absolutely make it work, just go in with eyes open about the prep requirements and cost.
Choosing the Right Epoxy Product for Outdoor Use
Walk into any hardware store and the shelves are full of epoxy floor kits. Almost none of them belong on an outdoor patio. Here is how to read past the marketing and find what actually works.
Indoor vs. Outdoor Epoxy Formulas
The key difference is the epoxy chemistry. Most consumer kits use aromatic epoxy resins, effective for floors but photochemically unstable under UV light. For outdoor use, look for products that are explicitly labeled UV-resistant, or that specify an aliphatic epoxy or polyaspartic topcoat as part of the system. Sika's Sikafloor-225 N is one example of an industrial epoxy marketed as a premium UV-resistant broadcast or pigmented topcoat. When in doubt, check the product data sheet (PDS), the manufacturer will either specify indoor/outdoor suitability or list UV resistance ratings directly.
Primers
Never skip the primer on an outdoor slab. Primers penetrate the concrete surface, improve mechanical adhesion, reduce outgassing (air bubbles rising through the coating), and often serve as a moisture barrier. The Sikafloor-225 N PDS, for example, specifies using Sikafloor 160, 161, or 1610 primers before the base coat. Whatever epoxy system you choose, use the primer the manufacturer specifies, mixing brands between primer and topcoat layers is a common DIY mistake that voids adhesion warranties.
UV-Stable Topcoats
This layer is what keeps your patio looking good. An aliphatic polyurethane topcoat (like Jotun's Jotafloor PU Ultra) or a polyaspartic topcoat applied over the epoxy base provides the UV and color stability that the epoxy base coat alone cannot offer. These topcoats are promoted as non-yellowing and show markedly better color retention in both accelerated weathering tests and real outdoor exposure compared to aromatic epoxies used without a topcoat.
Anti-Slip Additives
For any outdoor patio, broadcasting anti-slip aggregate into the topcoat is not optional, it is a safety requirement. Common choices include fine aluminum oxide (sharp, long-lasting, slightly visible), colored quartz broadcast flakes (decorative and functional), and shark-grip polymer additives that you mix into the topcoat before rolling. I prefer aluminum oxide for utility areas and colored quartz chips for patios where appearance matters. Broadcast before the topcoat skins over, then back-roll lightly to embed the aggregate.
Surface Prep and Repair: The Work That Actually Decides Success
I cannot overstate this: 90% of epoxy failures happen because of inadequate surface preparation. The coating is only as good as what it sticks to. Follow this checklist in order before mixing a single drop of epoxy.
- Clear and degrease the slab: Remove all furniture, grills, and planters. Apply a concrete degreaser or TSP solution to oil spots, let it dwell per label directions, and scrub with a stiff brush. Rinse thoroughly. Repeat for heavily contaminated areas. Any oil or grease will prevent adhesion.
- Remove laitance and open the concrete surface: Laitance is the weak, dusty layer on the surface of cast concrete. It must be mechanically removed. The Sikafloor-225 N PDS explicitly requires a substrate prepared by shot-blasting or equivalent mechanical means to achieve CSP-3 to CSP-4 per ICRI Technical Guideline No. 310.2R. On a DIY patio, a rented floor grinder with a diamond cup wheel is the most accessible way to hit that surface profile. Shot-blasting rental is also available through specialty tool rental shops for larger areas.
- Repair cracks: Fill hairline cracks (under 1/16 inch) with a low-viscosity epoxy crack filler. For wider cracks, use an epoxy repair mortar like Sika's Sikadur line or a polymer-modified cementitious patch product. Undercut the crack edges slightly with an angle grinder to give the patch material something to grip. Let repairs cure fully — typically 24–48 hours — before proceeding.
- Repair spalled or pitted areas: For shallow surface spalls and pitting, a cementitious skim coat or polymer-modified resurfacer fills voids and gives a consistent surface for the epoxy to bond to. Feather edges and allow a full cure before coating.
- Level significant low spots: If you have low areas that collect water, address them with a self-leveling concrete underlayment before coating. Epoxy does not self-level on outdoor slabs the way it can indoors.
- Conduct moisture testing: After all repairs are dry and cured, test for moisture vapor emission. Start with the ASTM D4263 plastic-sheet test: tape an 18-by-18-inch piece of 4-mil clear poly to the slab with all edges sealed, leave it for a minimum of 16 hours, and check for condensation or darkening on the underside. For a quantitative reading, use ASTM F2170 in-situ relative humidity probes. If RH exceeds the manufacturer's published limit for your chosen epoxy, apply an ASTM F3010-compliant moisture-mitigation membrane before the epoxy base coat.
- Final surface inspection and vacuum: Blow out all cracks and vacuums the entire surface. Check for any remaining soft or delaminated areas by tapping — a hollow sound means a weak bond to the substrate that needs to be addressed. The surface must be clean, sound, and dry.
How to Apply Epoxy on a Concrete Patio: Step by Step
Plan your application day carefully. Ideal conditions are 50–90°F air and slab temperature, low humidity, and no rain in the forecast for at least 24–48 hours after completion. Avoid applying in direct midday sun on hot days, the slab surface temperature can accelerate cure times and cause bubbling.
- Mix the primer: Combine Part A and Part B of your primer at the ratio specified in the PDS. Use a jiffy-style paddle mixer on a low-speed drill (under 400 RPM to minimize air entrainment) and mix for the full recommended time, usually 2–3 minutes, scraping the sides and bottom of the container. Pour into a second clean bucket and mix again (the 'box' technique) to ensure full blending.
- Apply the primer coat: Roll the primer onto the prepared slab with a 3/8-inch nap solvent-resistant roller. Work from the far corner toward your exit point. Cut in edges with a brush. The primer should penetrate and wet out the concrete surface; if it sits on top, your surface profile may be insufficient. Allow the primer to cure to the manufacturer's specified 'recoat window' before applying the base coat — typically 4–12 hours depending on temperature.
- Mix the epoxy base coat: Same procedure as the primer — combine A and B components at the specified ratio, mix thoroughly for 2–3 minutes with a paddle mixer, box into a fresh bucket, and begin application within the pot life window (commonly 20–40 minutes at 70°F, shorter in heat).
- Apply the base coat: Pour epoxy onto the slab in ribbon passes and spread with a squeegee or notched trowel to the specified mil thickness, then back-roll with a spiked roller to release air bubbles. Work in manageable sections. Lap edges while both sections are still wet to avoid lines.
- Broadcast decorative chips or aggregate (optional): If using vinyl color flakes, broadcast them by hand into the wet base coat immediately after rolling a section. For full-broadcast coverage, throw chips generously and back-roll lightly to embed. Let the base coat cure fully, then scrape off any loose, standing chips before applying the topcoat.
- Apply the UV-stable topcoat: Mix the aliphatic urethane or polyaspartic topcoat per PDS instructions. Apply with a clean solvent-resistant roller to the specified thickness. For anti-slip texture, broadcast aluminum oxide or quartz aggregate into the wet topcoat, allow it to set, and apply a second thin topcoat pass to lock the aggregate in place.
- Cure and protect: Follow the manufacturer's cure schedule. Foot traffic is typically allowed after 12–24 hours; full cure for heavy furniture and vehicles is usually 5–7 days. Keep the surface dry and free of traffic during the cure window.
Tools and Safety Gear You Will Need
- Floor grinder or angle grinder with diamond cup wheel (rent if you don't own one)
- Shop vacuum with fine-dust filter
- Low-speed drill with jiffy paddle mixer
- Mixing buckets (at least 2 per batch, for the 'box' technique)
- Solvent-resistant roller covers (3/8-inch nap) and roller frames
- Spiked aeration roller for releasing air bubbles
- Notched squeegee or trowel for spreading base coat
- Chip brush for cutting in edges
- Respirator rated for organic vapors (N95 dust masks are NOT sufficient for epoxy vapors)
- Chemical-resistant nitrile gloves (heavy-duty, not household latex)
- Safety glasses or goggles
- Knee pads for close work
- Disposable Tyvek coveralls if you are working with pigmented systems
- Non-slip footwear with spiked pads if you need to walk on wet coating
- If using a grinder or shot-blaster, hearing protection and a dust mask rated for concrete silica dust (N95 minimum, P100 preferred)
What It Actually Costs and How Long It Takes
Let me give you real numbers rather than vague ranges. Costs vary by region and system, but here is a practical breakdown for a typical 300–400 square foot residential patio.
| Item | DIY Cost (estimate) | Notes |
|---|---|---|
| Industrial UV-resistant epoxy base coat | $180–$350 for 300–400 sq ft | Industrial/commercial products cost more than consumer kits but are required for outdoor use |
| Primer (product-specific) | $60–$120 | Do not skip; use the manufacturer's specified primer |
| Aliphatic urethane or polyaspartic topcoat | $120–$280 | This is the UV-protection layer; required for outdoor longevity |
| Color flakes or broadcast aggregate | $20–$60 | Optional decorative; anti-slip aggregate is a safety necessity outdoors |
| Floor grinder rental (1 day) | $80–$150 | Most rental shops carry them; reserve in advance |
| Concrete repair materials (crack filler, patch) | $30–$80 | Depends on slab condition |
| Sundries (rollers, buckets, brushes, tape) | $30–$60 | Budget for extras; epoxy ruins rollers |
| Total DIY material + rental cost | $520–$1,100 for 300–400 sq ft | Roughly $1.30–$2.75/sq ft all-in for a proper outdoor system |
| Professional installation (labor + materials) | $2,500–$5,500 for same area | Roughly $6–$14/sq ft depending on prep, system, and region |
For timeline: plan on Day 1 for surface grinding, crack repair, and degreasing; Day 2 for moisture testing and primer; Day 3 for base coat and optional flake broadcast; Day 4 for topcoat; and then 5–7 more days before full cure. Realistically, most homeowners spread this over two weekends to avoid rushing any cure windows.
Troubleshooting Problems and Keeping It Looking Good
Common Application Problems
- Blushing (milky, hazy surface): Caused by moisture or humidity during application. Applying epoxy when humidity is above 85%, or when the slab is cooler than the dew point, drives condensation into the wet film. Solution: apply only in appropriate conditions; if blushing occurs, let the coat cure fully, sand lightly, and recoat.
- Bubbling or pinholes: Usually caused by air escaping from the concrete (outgassing) as the slab warms after primer application, or from over-mixing that entrains air. Solution: apply early in the morning before the slab heats up, back-roll with a spiked roller immediately after spreading, and use a proper-speed drill mixer. A primer coat that seals the concrete pores first reduces this significantly.
- Delamination (peeling, lifting): Almost always a preparation failure — oil contamination, insufficient surface profile, excess moisture, or applying outside the recoat window. Delaminated areas must be ground back to sound concrete and recoated from scratch. There is no patch fix for improper adhesion.
- Fish eyes (small craters in the coating): Caused by silicone, wax, oil, or contamination on the surface. Prevention through thorough degreasing is the only solution; fish eyes in a cured coat must be sanded out before recoating.
- Yellowing or chalking (UV degradation): Using an aromatic epoxy without a UV-stable topcoat outdoors. You cannot reverse UV damage; the degraded layer must be abraded off and a proper UV-stable topcoat system applied.
Maintenance and Recoat Schedule
A properly applied outdoor epoxy system with a UV-stable topcoat should last 5–10 years with normal maintenance. Clean the surface regularly with a pH-neutral cleaner and a soft deck brush, avoid harsh solvents and abrasive cleaners that degrade the topcoat. Remove standing water after rain to limit long-term moisture cycling. Inspect the surface each spring: if you see topcoat wear in high-traffic zones, spot-recoat those areas before the base coat is exposed. A full topcoat reapplication every 4–6 years (after light abrasive preparation) is far cheaper than stripping and starting over.
Aesthetic Options: Making Your Patio Look Great
Epoxy is not just functional, it opens up a wide range of design possibilities that plain concrete simply cannot offer.
Color Flake Systems
Vinyl color chips broadcast into the base coat are probably the most popular decorative option for residential patios. They come in hundreds of color blends and size options, from fine speckle to large-chip systems. Full-broadcast coverage hides imperfections in the base concrete, adds depth, and, once sealed under a topcoat, creates a surface that reads almost like terrazzo. Partial broadcast lets the base coat color show through for a more subtle granite effect.
Metallic Pigments
Metallic epoxy pigments mixed into the base coat create swirling, three-dimensional effects that have become very popular on covered outdoor patios and pool decks. The metallic look is created by the interaction between the pigment, the application technique, and the clear topcoat. It is harder to apply consistently than a flake system, uneven spreading shows, so this is one I would genuinely recommend practicing on a small sample board first.
Combining Epoxy with Stains, Dyes, and Decorative Looks
You can apply an acid stain or concrete dye to the base slab for color before sealing with an epoxy or polyaspartic topcoat. This approach gives you the penetrating color of a stain with the protection of a film-forming topcoat. If you want step-by-step instructions on coloring concrete before sealing, see the guide on how to dye concrete patio for techniques and product recommendations. If you want your patio to mimic the look of wood planks or ceramic tile, a decorative overlay system paired with scoring or stamping does that work before the topcoat is applied. These are more involved projects that overlap with resurfacing work, but the results can be stunning.
Finish Sheen Options
Most topcoats come in matte, satin, and gloss finishes. Outdoors, I generally recommend satin over high-gloss: high-gloss shows every scratch, footprint, and water spot, while a satin finish is more forgiving day-to-day and still looks clean and intentional. Matte works well if you want a more natural, understated concrete aesthetic.
DIY or Hire a Pro? An Honest Decision Guide
Epoxy coating a patio is a legitimate DIY project, but it is not a beginner weekend job. Here is how to decide whether to do it yourself or call in a professional.
You Can Probably DIY If...
- Your patio is under about 400 square feet
- The slab is in decent condition — minor cracks and surface wear, not structural damage
- You are comfortable with a floor grinder and have done basic concrete repair before
- You have two full weekends available and can plan around the weather
- You are willing to purchase industrial-grade products rather than hardware-store kits
Call a Pro If...
- Your slab has major structural cracks, significant settlement, or sections that move
- Moisture testing reveals high vapor emission that requires a professional mitigation system
- Your patio is over 600–800 square feet — managing pot life across that area alone is a real challenge for one person
- You want a manufacturer's warranty on the finished system (most require certified installation)
- You are dealing with a pool deck or area with chemical exposure, where coating system spec errors are expensive
- You want a metallic or custom decorative finish — the application skill needed is significant
Getting three quotes from licensed concrete coating contractors is worthwhile even if you plan to DIY, it gives you a reality check on prep requirements, system recommendations, and total cost that can sharpen your own approach.
Photo Suggestions for This Project
- Before/after side-by-side: bare concrete patio with cracks and staining next to the finished epoxy-coated surface
- Plastic-sheet moisture test in progress: poly sheet taped to slab, close-up of condensation on the underside
- Floor grinder in use: operator grinding concrete surface, showing dust collection and surface profile being created
- Mixing step: two-component epoxy being combined with a paddle mixer, showing the two-bucket boxing technique
- Chip broadcast: hand throwing vinyl color flakes into the wet base coat across a section of patio
- Topcoat roll-out: roller applying the clear aliphatic urethane topcoat over the cured chip-broadcast base
- Finished patio with outdoor furniture: completed project showing color-chip finish in satin sheen under natural light
- Delamination failure example: close-up of peeling epoxy from improperly prepared concrete, for troubleshooting section
Related Projects Worth Reading
If you are deciding between coating methods or want to go deeper on a specific part of this process, there are several related guides here that will help. For a broader look at all the ways to apply a finish coat to concrete, the guide on how to coat a concrete patio walks through your full range of options. If you like the idea of color but want a penetrating finish rather than a film-forming one, the guide on how to dye a concrete patio and the piece on staining concrete to look like tile cover those approaches in detail. For a deep dive specifically on the application process for epoxy floor systems, the how to epoxy a patio floor guide goes further into mixing ratios, coverage rates, and system layering. See the detailed how to epoxy patio floor guide for mixing ratios, coverage rates, and system layering. And if you want to take your patio's appearance in a completely different direction, the guide on how to make a concrete patio look like wood is a creative option worth exploring.
FAQ
Can you epoxy a concrete patio?
Yes — you can epoxy a concrete patio, but success depends on choosing the right products and following strict surface‑preparation and moisture guidelines. Standard aromatic epoxies often yellow and chalk outdoors; for sun‑exposed patios use a UV‑stable system (100% solids industrial epoxy with a UV‑stable aliphatic polyurethane or polyaspartic topcoat) or choose alternative coatings better suited to exterior conditions.
When is epoxy a suitable choice for an outdoor patio?
Epoxy is suitable when: the slab is structurally sound, has low substrate moisture (meets the epoxy system’s limits via ASTM F2170 or ASTM D4263 screening), the surface can be prepared to the required ICRI CSP (commonly CSP‑3 to CSP‑4 for high‑build systems), and you plan to protect the epoxy with a UV‑stable topcoat (aliphatic urethane or polyaspartic) for color stability. Epoxy is a good base or broadcast mortar for heavy‑duty wear if you control moisture and UV exposure.
When should you NOT epoxy a concrete patio and consider alternatives?
Avoid epoxy when: the slab has high or fluctuating moisture (fails RH or calcium‑chloride limits), the patio is in full hot sun and you don’t want to add a non‑yellowing topcoat, the slab movement or slope is extreme, or you need a very flexible/resilient finish for freeze–thaw climates. In those cases consider: stains/dyes, acrylic or penetrating sealers, polyaspartic/polyurea systems, cementitious overlays, or stamped/colored overlays.
How does epoxy compare to other patio finishing options (pros and cons)?
Comparison (summary): - Epoxy + UV topcoat: Pros — excellent adhesion, durable, good for broadcast/flake systems; Cons — many epoxies yellow unless topcoated, slower cure, sensitive to moisture. - Polyaspartic/polyurea: Pros — fast cure, better UV/color stability, flexible; Cons — usually more expensive, shorter working time (fast pot life). - Acrylic/penetrating sealers: Pros — inexpensive, breathable options, easier DIY; Cons — less protective, shorter lifespan. - Stain/dye: Pros — long‑lasting color that penetrates concrete, breathable; Cons — won’t bridge defects, less abrasion resistance. - Cementitious overlays: Pros — can fix surface profiles and replicate textures; Cons — more labor, requires proper substrate prep. (See product pros/cons table below for quick view.)
Product pros/cons table: epoxy vs polyaspartic vs stain/sealer
Product | Pros | Cons Epoxy (exterior system with UV topcoat) | Durable, bonds well, supports flakes/metallics | Many epoxies yellow if not topcoated; sensitive to moisture; longer cure Polyaspartic/Polyurea | Fast cure, UV‑stable, flexible to thermal changes | Higher material and application cost; very fast pot life — harder for DIY Stain/Dye | Penetrates, breathable, natural look, low cost | No surface film for heavy abrasion; can be uneven on patched concrete Acrylic Sealer | Cheap, easy recoat, DIY friendly | Shorter life, requires frequent maintenance Cementitious Overlay | Restores profile, texture, color options | More prep, higher labor, needs control joints and professional skills
Which epoxy/products should DIY homeowners consider for outdoor patios?
Choose: 100%‑solids, industrial‑grade epoxies explicitly rated for exterior use or systems that list UV resistance (check PDS). Always plan an aliphatic polyurethane or UV‑stable polyaspartic topcoat for sun exposure. Use manufacturer‑recommended primers for porous or patchy slabs. Avoid consumer garage kits labeled 'indoor use only' (e.g., many EpoxyShield kits are not UV‑stable). Refer to manufacturer PDS (e.g., Sika Sikafloor‑225 N) for system components and primers.