Yes, you can absolutely build a deck over an existing concrete patio, and it's one of the more satisfying weekend-to-weekend DIY projects out there. The concrete slab becomes your foundation, which means no digging footings and no dealing with frost heave in most cases. The two main approaches are a floating deck (sleepers laid directly on the concrete) or a raised deck (posts and beams sitting on the slab or on footings adjacent to it). Either way, the concrete needs to be in decent shape, you need a solid sleeper or joist system to create an air gap, and you need to manage drainage so water doesn't pool under your new deck and rot everything out.
How to Build a Deck Over a Concrete Patio

Silas Morrison
18 May 2026
First, check whether your concrete patio can handle a deck
Before you buy a single board, spend 30 minutes assessing your slab. A deck over concrete is only as good as what's underneath it, and a sleeper system will literally inherit every flaw in the slab, including settling, sinking, and heaving. Here's what to look for:
- Structural cracks: Hairline surface cracks are usually fine. Cracks wider than 1/4 inch, cracks that run through the full depth of the slab, or sections that have shifted at different heights are a problem you need to fix before building.
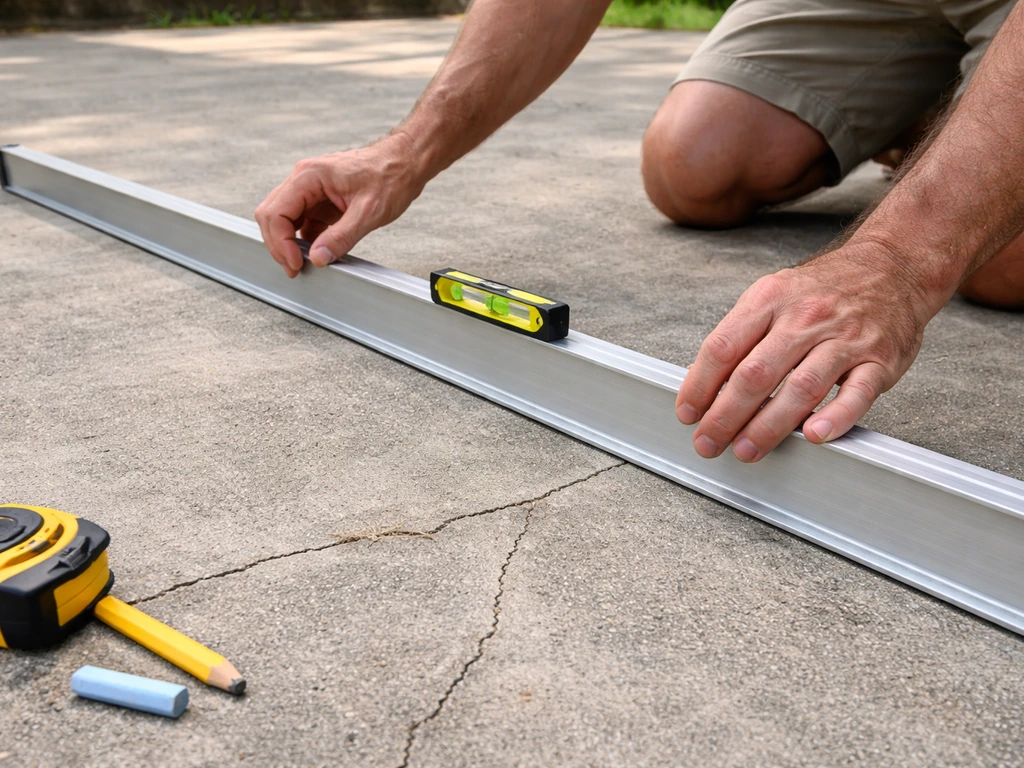
- Settlement or tilt: Set a long level or straightedge across the slab. Slopes up to about 1/8 inch per foot toward the yard are manageable and actually help with drainage. Severe or uneven settlement means the slab is moving, which will throw off your deck framing over time.
- Moisture and efflorescence: White crusty deposits (efflorescence) on the surface mean water is pushing through from below. If your slab is consistently wet or has active efflorescence, that moisture will be trapped under your deck and will accelerate rot or mold. Address this before you frame anything.
- Mold or mildew: Check the surface and the underside edges. Heavy biological growth means a drainage or moisture problem that needs solving first.
- Load capacity: A standard residential concrete slab (typically 4 inches thick with rebar or mesh) can handle the weight of a deck and normal foot traffic without any issues. If your slab is unusually thin, already cracked through, or shows serious structural damage, consult a structural engineer before proceeding.
- Clearance height: If you're building right against your house, think about where the deck surface will land relative to your door threshold and siding. You need the deck surface at least an inch or two below the door threshold, and you must keep wood framing away from direct contact with siding.
If your slab passes these checks, you're good to go. If it has minor cracks or low spots, fix them first (more on that below). If the slab is severely damaged or actively moving, you'll need to either repair it substantially or consider whether a raised deck on independent footings next to the slab makes more sense for your situation.
Which deck style works over concrete
There are a few distinct approaches, and the right one depends on how much height you need, your budget, and what your concrete looks like.
Floating deck with sleepers
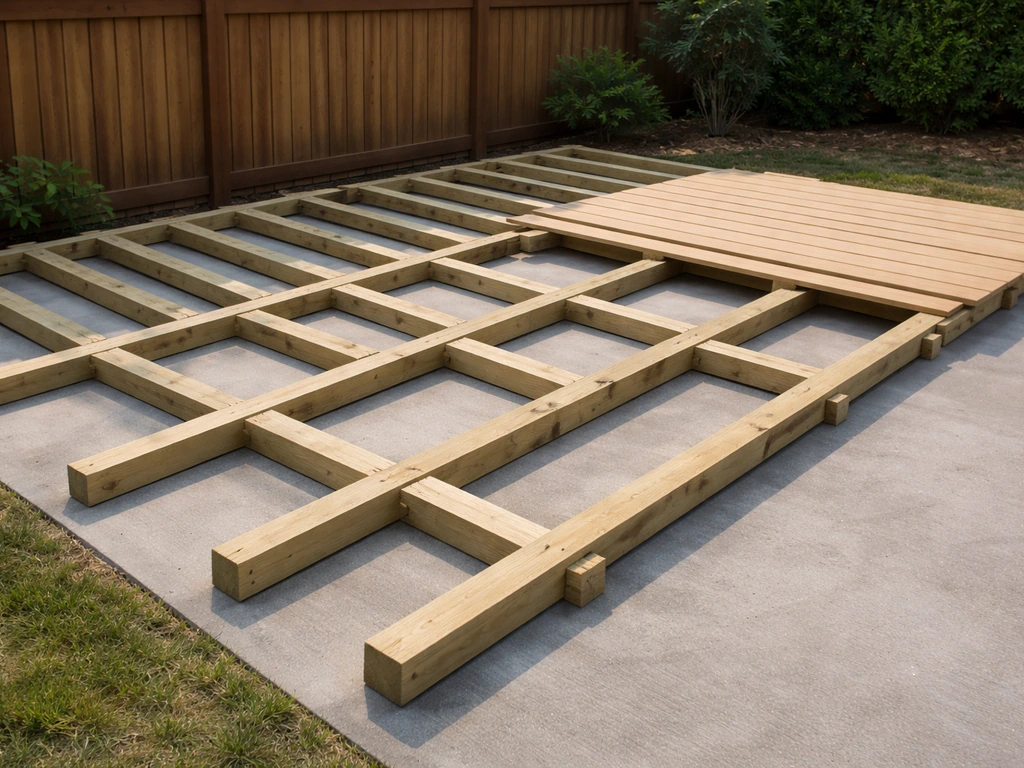
This is the most popular approach for a DIYer building over an existing slab. You lay pressure-treated 2x4 or 2x6 sleepers directly on the concrete (either flat or on edge), space them at your decking manufacturer's required intervals, and then fasten your deck boards on top. It sits low, it's relatively fast to build, and it doesn't usually require a permit if it stays under 30 inches above grade.
The tradeoff is that a low-profile sleeper system has limited airflow underneath, which is why both TimberTech and Fiberon specifically require a minimum 1-1/2 inch air gap between the bottom of the deck board and the concrete surface when installing composite decking in obstructed-airflow situations. That gap is non-negotiable for both moisture management and composite warranty compliance.
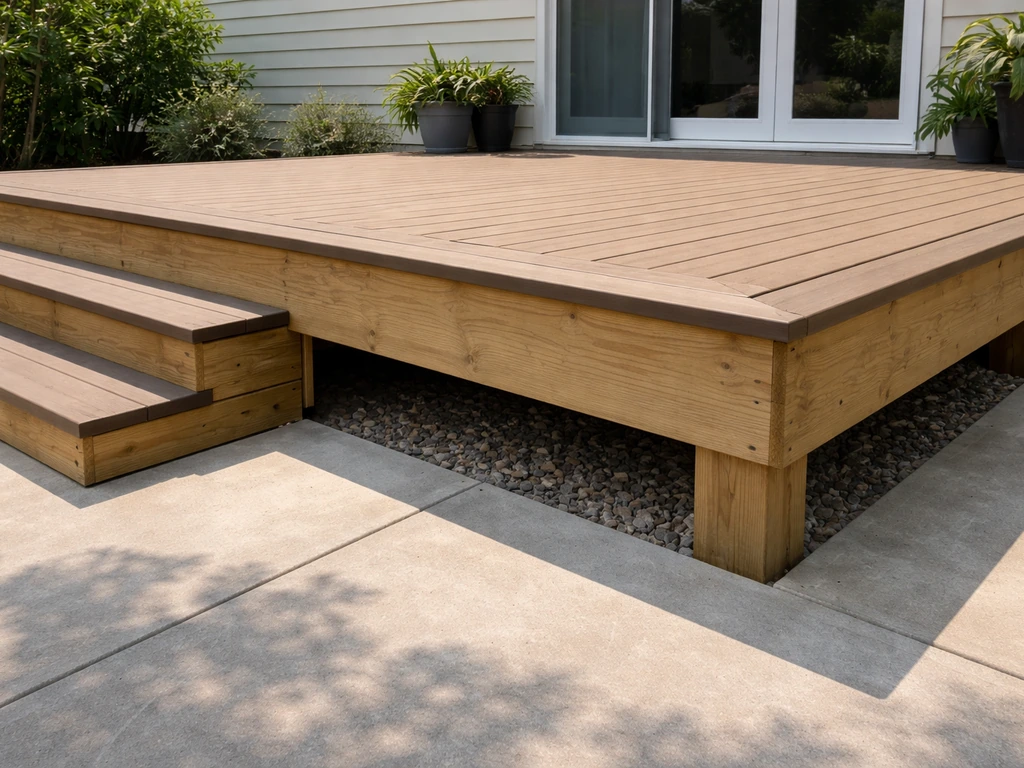
Raised deck over concrete
If you need more height, better drainage clearance, or you want to step up from a lower patio to a higher door threshold, a raised deck using posts or standoff pedestals on the slab makes sense. Posts can be anchored to the concrete with post base hardware (like Simpson Strong-Tie post bases set in epoxy anchors), and the framing goes up from there with beams and joists. Per IRC requirements and basic code guidance, beam ends bearing on concrete need a minimum 3 inches of bearing surface. This approach gives you great airflow underneath and lets you run drainage or even a water management system (like TimberTech's DrySpace) to channel water away from the house.
Wood decking (pressure-treated or cedar)
Pressure-treated lumber is the standard for deck framing regardless of what decking boards you use on top. For the surface boards, pressure-treated pine is the budget-friendly choice, cedar and redwood are mid-range and naturally rot-resistant, and hardwoods like ipe are premium. Wood over concrete works well as long as you maintain that air gap and use proper hardware. One thing to keep in mind: any wood touching or close to concrete should be rated for ground contact (UC4A or UC4B) because concrete holds moisture.
Composite decking
Composite is an excellent choice for a deck over concrete, partly because it handles moisture better than wood and partly because it doesn't need periodic sealing. Brands like TimberTech, Fiberon, and Trex all explicitly support installation over concrete via a sleeper system. Trex also notes that building a deck over a concrete patio is a common approach and provides guidance for doing it with a sleeper system [Trex all explicitly support installation over concrete via a sleeper system. ](https://www.
trex. com/deck-ideas/3-tips-for-building-a-deck-over-concrete/). The key rules: maintain the 1-1/2 inch minimum clearance under the boards, follow the brand's specific gapping requirements (Fiberon recommends 1/4 inch side-to-side in on-grade applications; TimberTech's CONCEALoc system specifies 1/8 to 3/16 inch between boards), and use only approved fasteners. One heads-up from TimberTech's installation guide: avoid letting airborne concrete dust settle on composite boards during installation, as it can affect the surface finish and potentially void warranty coverage.
| Style | Best For | Typical Height | Airflow | Permit Likely? |
|---|---|---|---|---|
| Floating / sleeper deck | Low-profile, budget builds, level slabs | 2 to 6 inches above slab | Low (requires managed air gap) | Often no, if under 30 in above grade |
| Raised deck on posts | Higher clearance, uneven slabs, drainage needs | 12 inches and up | Excellent | Usually yes |
| Pressure-treated wood surface | Budget-conscious, natural look | Either style | Depends on system | Depends on height/attachment |
| Composite decking surface | Low maintenance, moisture resistance, longevity | Either style (with 1.5 in min gap) | Requires managed clearance | Depends on height/attachment |
Materials and tools you'll need
Lumber and decking
- Pressure-treated 2x4 or 2x6 lumber for sleepers or joists (ground-contact rated, UC4A minimum)
- Pressure-treated 4x4 or 4x6 posts if building raised (ground-contact rated)
- Pressure-treated or engineered lumber beams/headers for raised builds
- Decking boards: pressure-treated, cedar, redwood, hardwood, or composite (sized per your plan and manufacturer specs)
- Composite decking starter/end clips or hidden fastener track if using a brand like TimberTech CONCEALoc or Fiberon's system
Fasteners and hardware
- Hot-dipped galvanized or stainless steel structural screws and lag bolts (corrosion resistance is critical near concrete)
- Concrete anchors: wedge anchors or epoxy-set threaded rod for attaching post bases or sleeper hold-downs
- Post base hardware (Simpson Strong-Tie or equivalent) for raised deck posts
- Joist hangers, hurricane ties, and angle brackets appropriate to your framing layout
- Decking screws or composite-approved hidden fasteners (use only fasteners approved by your composite brand)
- Flashing tape or metal flashing if attaching a ledger to the house
Tools
- Circular saw or miter saw
- Drill/driver and impact driver
- Hammer drill with masonry bits (for concrete anchors)
- 4-foot level and long straightedge or string lines
- Tape measure and chalk line
- Speed square
- Pry bar and chisel (for concrete prep)
- Shop vacuum and stiff-bristle broom (for cleaning slab)
- Safety glasses, hearing protection, and dust mask (concrete dust is a serious respiratory hazard)
Getting your existing concrete patio ready
This is the step most people rush, and it's where most problems start. Take the time to do it right and your deck will stay solid for decades.
Clean the slab thoroughly
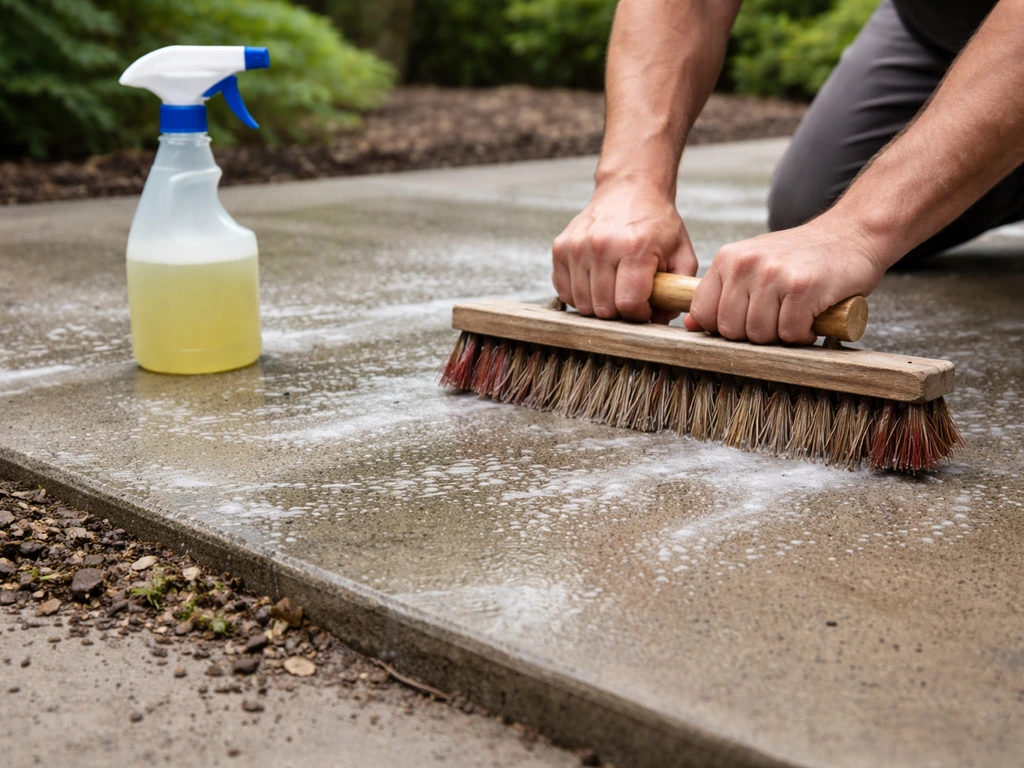
Sweep off all debris, then scrub the entire surface with a concrete cleaner or degreaser. If you see efflorescence (white chalky mineral deposits), treat it with a dilute muriatic acid solution or a commercial efflorescence remover, then rinse thoroughly. Mold or mildew needs a bleach-based cleaner. This isn't just cosmetic: you want to see the true surface condition under all the grime, and you want the concrete clean before any patching compound goes down.
Repair cracks and low spots
Fill cracks wider than a hairline with a concrete crack filler or hydraulic cement, depending on depth. Chip out loose material first so the patch bonds to solid concrete. For low spots or uneven areas that will cause your sleepers to rock, use a self-leveling concrete resurfacer to bring things closer to flat. You don't need perfection, but you do need sleepers that sit without wobbling, because a rocking sleeper will loosen fasteners and make your deck feel spongy. Let any repairs cure fully (usually at least 24 to 48 hours) before building.
Address moisture before you frame
If your slab shows any signs of moisture intrusion, apply a penetrating concrete sealer to the top surface before laying sleepers. This slows moisture vapor from migrating up through the slab and into your framing. For extra protection, especially under wood sleepers, lay a strip of closed-cell foam backer rod or a membrane tape under each sleeper to break direct concrete-to-wood contact. This small step dramatically extends the life of your pressure-treated lumber even when it's rated for ground contact.
Step-by-step build process
Step 1: Layout and planning
Snap chalk lines on the slab to mark your sleeper or joist positions. For most decking, sleepers run perpendicular to the deck boards. Standard spacing is 16 inches on center for wood decking and commonly 12 to 16 inches on center for composite decking (check your specific product's installation guide, as some composites require tighter spacing at 12 inches on center for on-grade applications). Mark the perimeter of your deck and verify it's square using the 3-4-5 triangle method: measure 3 feet along one edge, 4 feet along the adjacent edge, and the diagonal should be exactly 5 feet. Double-check square by measuring both diagonals end to end; they should match.
Step 2: Install the support system

For a sleeper system, lay your sleepers along the chalk lines and check each one with a level. Shim low spots with composite shims or pressure-treated wood shims (never use cedar or untreated wood as shims directly on concrete). Once each sleeper is level and sitting solid, anchor it to the concrete. You can use powder-actuated fasteners, Tapcon concrete screws, or wedge anchors depending on your slab thickness and local code. Space anchors roughly every 24 to 36 inches along each sleeper. For a raised deck, set your post bases with epoxy anchors per the manufacturer's instructions, allow the epoxy to fully cure (usually 24 hours minimum), then set and plumb your posts.
Step 3: Frame the deck
If you're doing a simple sleeper deck, your sleepers essentially are the framing. For a raised deck, install your beams on the posts (ensure minimum 3-inch bearing on any concrete/masonry surface per IRC guidance), then hang joists with proper joist hangers. All joist hangers and structural connectors should be rated for the load and compatible with your pressure-treated lumber's preservative chemistry. Check that every joist is level and there are no protruding nails or screws that could interfere with decking installation. Warped joists should be straightened and secured before you move on.
Step 4: Plan for drainage
Water management under a deck over concrete is critical. The concrete slab itself will shed water somewhere, and you need to make sure that somewhere is away from your house foundation. If your slab slopes toward the house, address this before covering it with a deck. For raised decks, a water management system like TimberTech's DrySpace channels rainwater that falls between deck boards away from the substructure and toward the yard. The DrySpace panels must be installed so water runs away from the house. For low sleeper decks, rely on the slab's existing slope plus open board gaps to let water pass through and drain off the edge.
Step 5: Install the decking boards
Start at one end and work across. For composite decking, follow your brand's specific gapping rules exactly. Fiberon recommends 1/4 inch side-to-side gaps in on-grade applications (maximum 3/8 inch). TimberTech's CONCEALoc hidden fastener system specifies 1/8 to 3/16 inch between boards and a minimum 3/16 inch gap where a board meets a post or structure. For wood decking, a 1/8 inch gap between dry boards (or tight for green lumber that will shrink) is standard. Leave a 1/2 inch gap at any wall or fixed structure to allow for expansion. Use a chalk line periodically to make sure your courses are running straight. Pre-drill near board ends to prevent splitting.
Step 6: Weatherproofing and finishing
If you used wood decking boards, apply a penetrating deck sealer or stain within a few weeks of completion (let new pressure-treated lumber dry out first, usually 2 to 4 weeks in warm weather). Sealer protects against UV damage, water absorption, and surface checking. Composite decking doesn't need sealing, but you should clean it periodically and make sure gaps stay clear of debris. At the perimeter of the deck, add fascia boards to cover the exposed framing edges. Caulk or flash any connection point where the deck frame touches the house, and make sure flashing directs water away from the structural connection and away from your siding.
Permits, safety, and ongoing maintenance
Do you need a permit?
This varies by municipality, but the general rule under the IRC is that a freestanding deck 30 inches or less above grade often doesn't require a permit, while anything higher typically does. If you're attaching the deck to your house with a ledger board, expect to pull a permit regardless of height. Ledger attachment is one of the most structurally critical connections on any deck and the IRC (Section R507) has specific requirements for fastening and flashing.
Don't skip this step: improperly flashed or fastened ledgers are a leading cause of deck failures. Call your local building department before you start, describe what you're building, and find out what's required. It takes 10 minutes and can save you a lot of headaches.
Guardrails and safety
If any part of your deck is more than 30 inches above grade, the IRC requires a guardrail. Residential guardrails must be at least 36 inches high measured from the deck surface to the top of the rail. Balusters must be spaced so a 4-inch sphere cannot pass through. These aren't just code requirements: they're real safety measures, especially if you have kids or elderly family members using the space.
Movement and settling
A deck over concrete is relatively stable, but check it annually for any signs of movement. Look for sleepers or posts that have shifted, fasteners that have backed out, or deck boards that have developed a noticeable bounce or flex. Composite decking does expand and contract with temperature changes, so don't be alarmed by minor seasonal movement, but do make sure gaps haven't closed up completely in summer heat.
Ongoing maintenance
- Clear debris from between deck boards every spring and fall to prevent moisture retention and keep drainage clear.
- Inspect the framing from the side or below annually for signs of rot, especially at any point where wood contacts or is near concrete.
- Re-seal or re-stain wood decking every 2 to 3 years depending on sun exposure and your climate.
- Check all visible hardware annually for corrosion, and replace any fastener that shows significant rust.
- Make sure the edges of the concrete slab and the area around the deck perimeter continue to drain water away from the house.
A few common mistakes to avoid
- Skipping slab prep: covering a cracked or settling slab without repairs will cause your deck to become uneven within a season or two.
- Using untreated lumber on or near concrete: even in a dry climate, concrete holds moisture, and untreated wood in contact with it will rot.
- Insufficient air gap under composite decking: both Fiberon and TimberTech require a minimum 1-1/2 inch clearance from the bottom of the board to the concrete surface in on-grade applications. Skipping this voids the warranty and traps moisture.
- Ignoring drainage direction: if the slab drains toward the house, covering it with a deck concentrates that water at your foundation. Fix the slope or install a drainage channel before building.
- Using the wrong fasteners for composite: composite decking brands specify approved fastener types and sizes. Using random screws can cause cracking, surface damage, or warranty issues.
- Not accounting for expansion at fixed structures: composite boards especially need that 3/16 inch gap at walls, posts, and house structures, or summer expansion will cause buckling.
Building a deck over a concrete patio is genuinely one of the more forgiving DIY deck projects because you already have a flat, level-ish foundation to work from. If you are working out how to build a deck next to a concrete patio, the key is matching the right support style to your height and drainage needs build a deck over a concrete patio.
If you're planning to lay the decking boards yourself and want more detail on fastening patterns and layout techniques, that process has its own nuances worth digging into. If you want to see a complete walkthrough of the process, check out how to lay deck flooring on a concrete patio. If you're thinking about pushing the deck beyond the slab edge and combining wood framing with your existing concrete, that opens up a whole separate set of planning considerations.
To really plan a smooth extension, confirm your height transitions, sleeper or post layout, and drainage so the new wood deck integrates safely with the existing concrete patio extend concrete patio with wood deck. Make sure you plan the extension around the patio-to-deck height transition, keeping the right sleeper or post layout and drainage so the two sections work as one. And if composite is your material of choice, the specific installation steps for composite over concrete are worth reviewing in detail before you buy your materials, since brands vary on spacing, fastener type, and substructure requirements.
If you want the exact order of work for how to install composite decking on concrete patio, follow the composite-specific layout, gapping, and fastener steps from this guide. Take the prep seriously, use the right hardware, manage your drainage, and this project will serve you well for 20-plus years.
FAQ
Can I still build a deck over concrete if the slab has hairline cracks or some low spots?
If you have cracks or shallow settlement, you can usually proceed with a sleeper system as long as the concrete is not actively moving and your sleepers can be made rock-solid with shims. The practical check is to press on each prospective sleeper location and verify there is no rocking after repairs and leveling, then recheck for level across the whole run before anchoring.
Do I need a permit if my deck is freestanding and not attached to the house?
Not always. Some jurisdictions require permits based on overall height, railings, and whether any portion is attached to the house. A ledger connection typically triggers permitting more often, but even freestanding decks may require paperwork if they change stormwater patterns, touch a property line, or include stairs.
Should I seal the concrete before building, and can sealer cause problems?
Concrete sealer helps slow moisture vapor, but it should not trap water or interfere with patching or adhesion where you are bonding repairs. Use it only after cleaning, after repairs have cured, and only on the slab surface where the system will be dry. If the slab is failing, sealer will not correct structural issues.
What type of anchor should I use for raised deck posts on a concrete patio?
For post-based systems, you generally need to anchor through stable concrete into competent depth using code-appropriate post base hardware (epoxy anchors, wedge anchors, or similar). The key is to confirm your slab thickness and edge distances, and to use the post base and anchor system as a matched kit, not random mix-and-match parts.
How important is the air gap, and what mistakes cause it to get accidentally eliminated?
Keep an air gap for drainage and warranty compliance, but also consider insect and debris control. A common mistake is installing sleepers directly against the concrete or compressing the gap with foam or shims. Use a gap spacer approach (for example, backer rod or membrane) only under sleepers, not in a way that eliminates the required clearance under the deck boards.
Can I build the deck over a concrete patio edge and extend beyond it?
Yes, but only when the joist or board can be properly supported and fastened. If boards overhang and you try to “bridge” a void without framing, you can end up with bounce, fastener pull-out, and uneven gapping. Plan the transition so framing carries the load across the change in support.
When is the right time to stain or seal wood deck boards after installing over concrete?
Typically, wood deck boards need a penetrating stain or sealer after the pressure-treated lumber has had time to dry, usually a few weeks depending on weather and product. Don’t seal too early, especially if boards still feel wet, because trapped moisture can increase checking and reduce stain performance.
If I switch composite brands, can I keep using the same spacing and fasteners from my previous project?
Follow a composite brand’s spacing and approved fasteners exactly. Even if the deck feels stable, wrong fastener types can affect warranty and long-term performance, and incorrect gaps can create surface issues as materials expand and contract seasonally.
What should I inspect each year, and what are the early warning signs of trouble under the deck?
Annually is a good baseline, plus after major weather. Look for backed-out anchors, shifting sleepers, new efflorescence or dampness under the deck edge, and any change in deck board movement (more bounce or scraping). Also check that fascia and flashing are still directing water away from framing and siding.
Do I really need to worry about concrete dust on composite decking during installation?
Yes. Debris and fine concrete dust can settle on composite and interfere with finish. Control this by covering composite boards during cutting, using vacuum rather than sweeping when dust is created, and doing a thorough cleanup before installing fasteners and final caps.
What shims can I use under sleepers if the slab is uneven, and what should I avoid?
You can use shims, but choose the right material and placement. Use composite shims or pressure-treated shims, place them so sleepers sit fully supported, and avoid untreated or unsuitable wood that can degrade when it stays damp against concrete.