Yes, you can stain your concrete patio, whether it's brand new, years old, or even stamped, and do it yourself in a weekend. If you want the full process and a clear checklist, learn how to stain cement patio from prep to sealing stain concrete patio. The basic process is: clean and prep the surface thoroughly, apply your chosen stain (acid-based or water-based), let it react or dry fully, then seal it to lock in the color. The prep is where most DIYers either win or lose the project, so that's where we'll spend the most time.
How to Stain a Concrete Patio Step by Step DIY Guide

Silas Morrison
7 May 2026
Can you actually stain your patio? New, old, and existing concrete
Most concrete patios are great candidates for staining, but the condition and age of the slab matter. New concrete needs to cure for at least 28 days before you apply any stain or decorative coating. That 28-day mark is the industry benchmark tied to when concrete reaches close to its full compressive strength, and it's when the surface chemistry is ready to accept penetrating stains without problems. Rush it and the stain won't bond or react properly.
Old or existing concrete is usually fine to stain, sometimes even easier because it's had years to cure. The challenge is what's on the surface. If your patio has been painted, sealed, or coated, that layer has to come off before staining, especially if you're using acid stain, which needs to chemically react directly with the concrete minerals. Oil stains, tire marks, grease, adhesive residue, and old curing compounds are all barriers that will cause your stain to look blotchy or fail entirely.
The honest answer on whether your patio qualifies: do a simple water drop test. Pour a small amount of water on the surface. If it soaks in within a few seconds, the concrete is open and ready. If it beads up or just sits there, there's a sealer or coating blocking the pores, and you'll need to remove it before staining.
Choosing your stain: acid stain vs water-based stain vs paint
This is the biggest decision you'll make, and it affects everything else about the project. Here's how the main options compare:
| Option | How it works | Color result | Durability | DIY difficulty |
|---|---|---|---|---|
| Acid stain | Chemical reaction with concrete minerals (iron salts + hydrochloric acid) | Variegated, mottled, earthy tones — looks natural and unique | Permanent once sealed | Moderate — requires careful prep and safety gear |
| Water-based stain | Penetrates and deposits pigment into concrete pores | More consistent, wider color range including blues and greens | Long-lasting once sealed | Easier — less hazardous, more forgiving |
| Concrete paint/coating | Surface coating that sits on top | Solid, opaque, uniform | Can peel or chip over time | Easiest — but least authentic look |
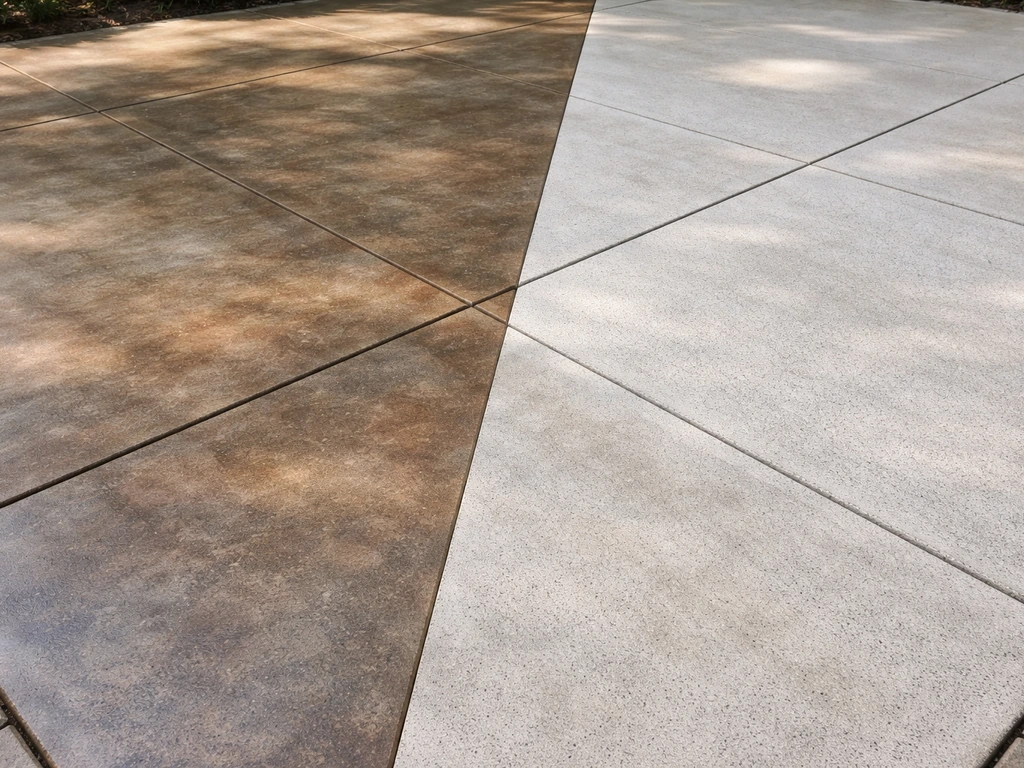
Acid stain is the classic choice when you want that rich, variegated look, think warm browns, tans, and terra cotta tones with natural variation across the slab. No two patios look exactly the same, which is the appeal. The downside is it's more demanding on prep, requires handling diluted hydrochloric (muriatic) acid safely, and the color palette is limited to earth tones. If you want blue, gray, or a more consistent color, water-based stain is the better call.
Paint is technically a valid option, and some people ask about how to paint or stain a concrete patio because both give color. But paint sits on top of the surface and tends to peel, especially outdoors where freeze-thaw cycles and UV hit it hard. Stain penetrates into the concrete, so it doesn't peel. For a patio that needs to hold up to weather and foot traffic year after year, stain wins.
My recommendation for most DIYers: if you love the earthy, stone-like look and you're willing to do the prep carefully, go acid stain. If you want more color control and an easier application process, pick a quality water-based concrete stain. Either way, you'll get a result that looks dramatically better than bare gray concrete.
Prep work: the part that actually determines your results
I've seen a lot of DIY concrete stain projects go sideways, and almost every time the culprit was skipped or rushed prep. The stain can only do its job if the concrete surface is completely clean, open, and free of anything that would block penetration. Here's the full prep sequence.
Step 1: Clear and inspect the surface
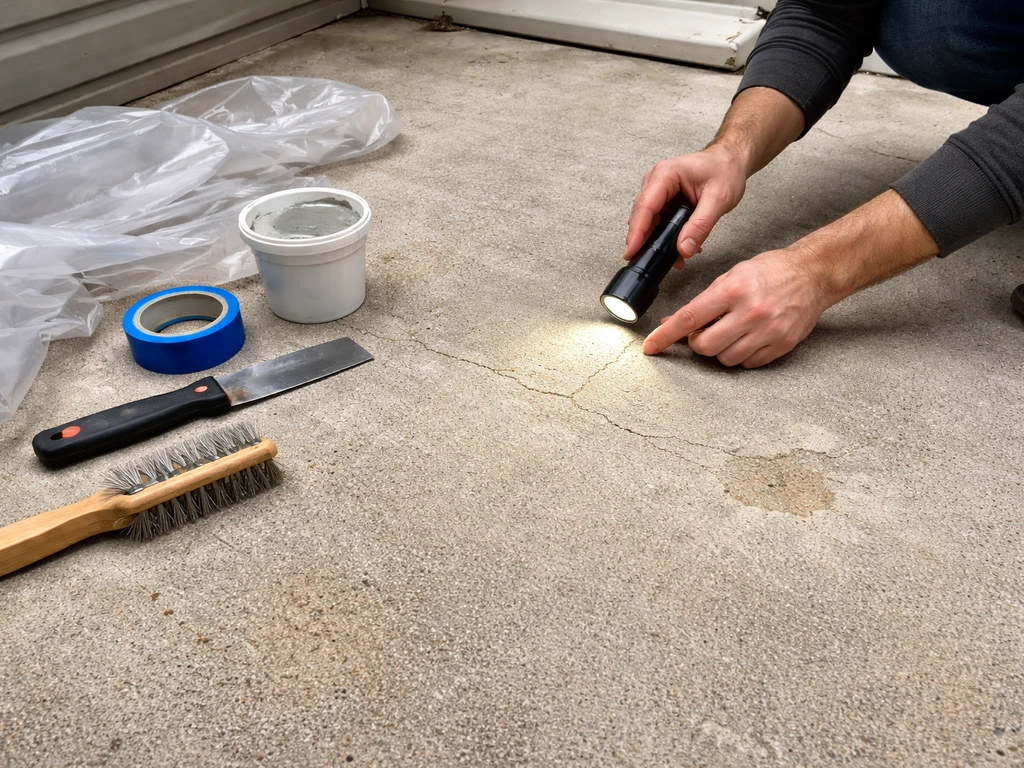
Move everything off the patio and do a good visual inspection. Look for cracks, spalling, oil spots, old paint, and any areas where a previous sealer is peeling or bubbling. Make a mental map of what needs to be dealt with before you touch a bottle of stain.
Step 2: Repair cracks and damage
Fill any cracks or spalled areas with a concrete patching compound and let it cure fully before moving on. Keep in mind that patched areas may absorb stain differently than the surrounding concrete, so they can show. If you're planning to stain to look like stone or tile, you can use that variation strategically, the different tones can actually add to the natural look. If you're planning to stain to look like stone or tile, you can use that variation strategically, the different tones can actually add to the natural look how to stain concrete to look like stone.
Step 3: Strip any existing coatings or sealers
If your water drop test showed the surface is sealed, you need to remove that coating. Use a chemical stripper formulated for concrete sealers, apply it per the label, scrub, and rinse. For paint, you may need a floor grinder or shot blaster to get it fully off. This step is non-negotiable for acid stain, the chemical reaction literally cannot happen through a sealer or paint layer.
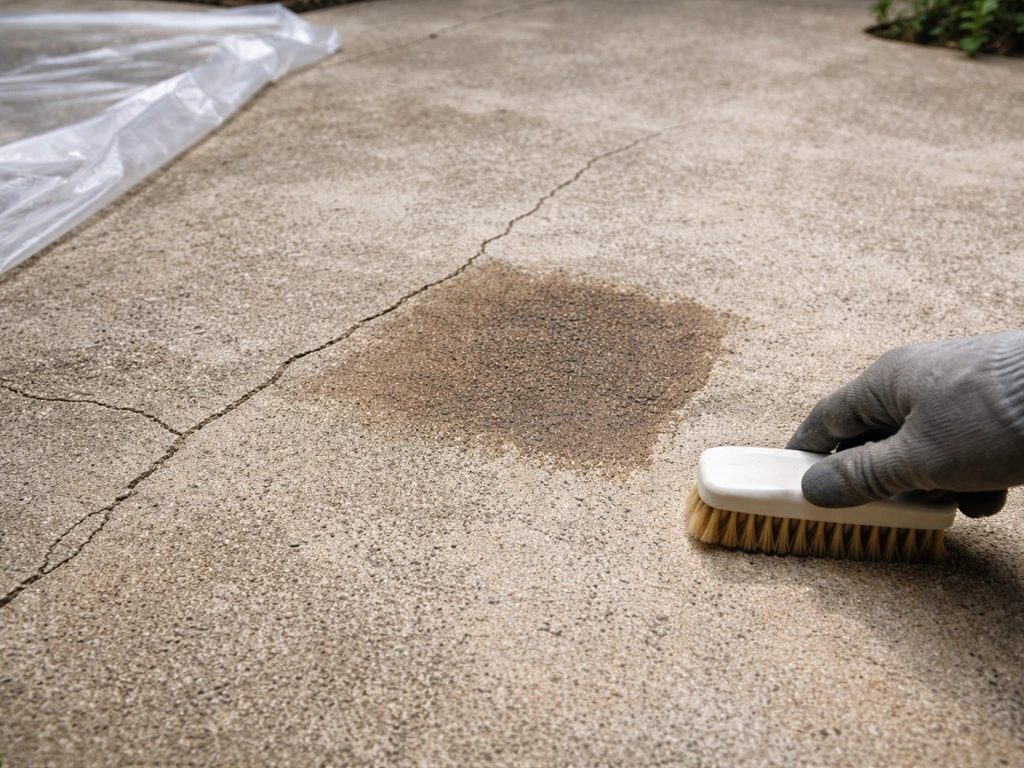
Step 4: Deep clean the concrete
Scrub the entire surface with a concrete degreaser to remove oil, grease, dirt, and grime. Rinse thoroughly. For oil stains, you may need to apply degreaser multiple times and use a stiff brush. Any remaining contamination will show up as uneven, blotchy color after staining, so take your time here.
Step 5: Etch the surface (especially for acid stain)
Etching opens up the pores of the concrete to improve penetration and adhesion. For acid stain, you're often applying the stain itself to a lightly etched surface. For water-based stain or any situation where you want to ensure maximum penetration, a separate acid etch (diluted muriatic acid or a phosphoric acid product) beforehand is a good move.
Apply the etching solution, let it fizz and work for 5 to 10 minutes, scrub, neutralize with a baking soda and water solution, and rinse thoroughly. Originalcolorchips’ muriatic acid instructions note that you can neutralize remaining acid using a sodium carbonate solution in water (baking soda), including example ratios [W. R. Meadows / 1?
](https://www. originalcolorchips. com/data-sheets/muriatic-acid-instructions. pdf).
The surface should feel like fine sandpaper when it's properly etched, smooth but slightly gritty. Let it dry completely before staining.
How to stain a concrete patio: step-by-step application
Once your prep is done and the surface is completely dry (give it at least 24 hours after any wet cleaning or etching), you're ready to apply stain. Here's the process that works for most flat outdoor concrete patios and slabs.
What you'll need
- Concrete stain (acid-based or water-based) — calculate 1 coat per 200-400 sq ft per gallon depending on product
- Plastic pump sprayer (for acid stain) or roller/brush (for water-based stain)
- Acid-resistant gloves, safety glasses, and old clothes you don't mind ruining
- Plastic sheeting or painter's tape to protect adjacent surfaces, plants, and structures
- Stiff-bristle brush for working stain into textured areas
- Baking soda and water solution for neutralizing acid stain residue
- Concrete sealer (penetrating or topcoat, depending on your preference)
Applying acid stain
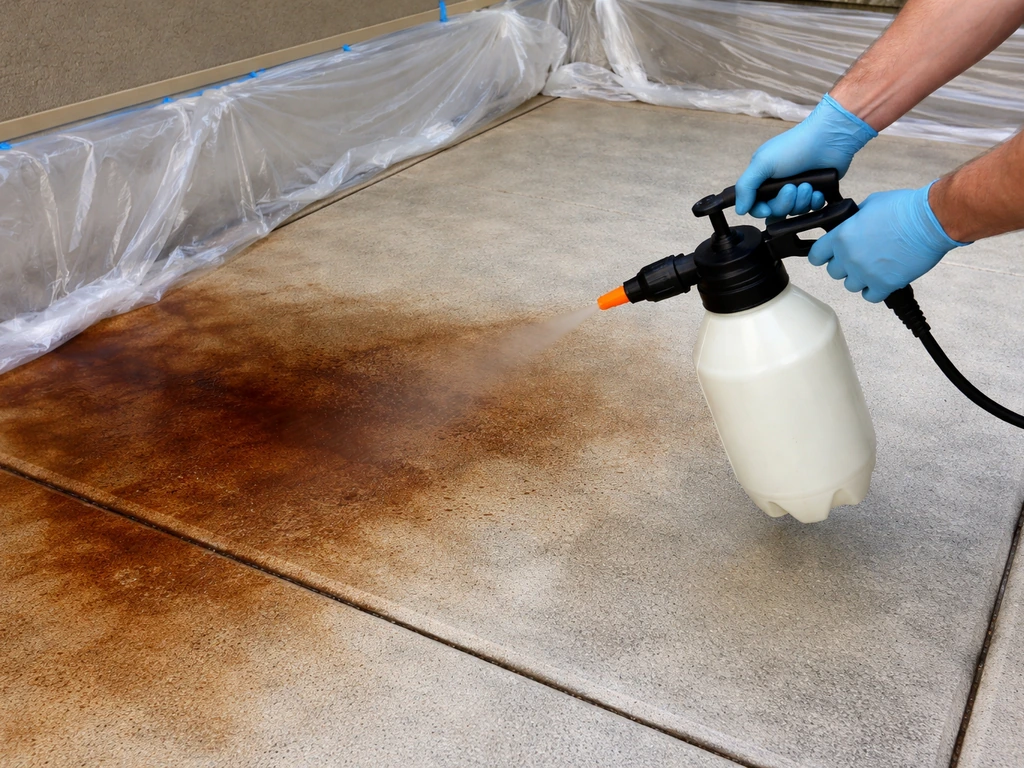
- Mask off adjacent surfaces — walls, edging, plants — with plastic sheeting. Acid stain will discolor almost anything it contacts.
- Pour stain into a plastic (not metal) pump sprayer. Acid will corrode metal equipment.
- Apply the stain in a circular or figure-eight motion, working in small sections. Don't let puddles form — move it around so coverage is even but not overly saturated.
- Let the stain react for 2 to 4 hours, or per the manufacturer's instructions. You'll see the color develop and the surface will look slightly wet and mottled.
- Once the reaction is complete, neutralize the surface: mix 1 cup baking soda per gallon of water, apply it, scrub, and rinse thoroughly. This stops the acid reaction and removes residue.
- Let the surface dry completely — at least 24 hours — before inspecting the color and deciding if a second coat is needed.
- Apply a second coat if you want deeper color, following the same steps.
Applying water-based stain
- Stir the stain thoroughly — don't shake it, as that creates bubbles.
- Apply with a roller, brush, or sprayer, working in small sections to maintain a wet edge.
- Use a brush to work the stain into any control joints, texture, or surface detail.
- Let the first coat dry per the label (usually 2 to 4 hours).
- Apply a second coat if you want richer, more opaque color. Most water-based stains benefit from two coats.
- Let it dry fully before sealing — usually 24 hours.
Work in shaded conditions or on a cooler day if possible. Direct sun and high heat cause the stain to dry too quickly, which leads to lap marks and uneven color. Early morning is usually the best window for outdoor patio work.
Staining stamped concrete patios
Stamped concrete is a little more involved because of the texture, joints, and the fact that many stamped patios already have a release agent color baked in from when they were poured. Before you stain a stamped patio, you need to know whether there's an existing sealer on it, and almost all stamped concrete is sealed at installation. That sealer needs to be stripped before any new stain will penetrate.
Once you've stripped the sealer and cleaned the surface, the staining process is similar to flat concrete, but you need to pay more attention to working the stain into the recessed grout lines and texture details. A smaller brush is your best friend here, use it after your main application tool to work color into every crevice. This is actually where acid stain shines on stamped concrete because the natural variation it creates makes the pattern look even more like real stone.
You can also use a two-tone technique on stamped concrete: apply a base stain color to the entire surface, let it dry, then use a dry-brush technique with a second, darker color to highlight the raised portions of the pattern. If you want that marble effect, focus on creating realistic veining and color variation before you seal two-tone technique. This gives a genuine stone or aged tile look. If that's the direction you're going, the guide on how to stain concrete to look like stone covers the technique in more detail.
After staining, stamped concrete absolutely needs to be resealed, not just for color protection but to restore the surface protection the original sealer was providing. Use a sealer rated for stamped concrete that also provides the sheen level you want (matte, satin, or high gloss).
Sealing after staining: how to lock in the color

Staining and sealing are a package deal, you don't skip the sealer. The stain changes the color, but the sealer is what protects it from UV fading, moisture, foot traffic, and staining from spills. Without sealer, your acid stain will fade and weather within a season outdoors.
Wait until the stain is fully dry and cured before applying sealer, typically 24 hours minimum, longer in humid conditions. You have two main sealer categories to choose from:
- Penetrating sealers (silane, siloxane, or silicate-based): soak into the concrete without forming a surface film. They protect without changing the look or sheen of the stain. Best if you want a natural, low-sheen appearance.
- Topcoat sealers (acrylic, epoxy, or polyurethane): form a protective film on the surface. These enhance color depth and sheen, and they're the standard choice for stamped concrete or any situation where you want the color to really pop.
Apply sealer with a roller in thin, even coats. Two thin coats beats one thick coat every time, thick sealer applications trap bubbles and go milky white when they cure. Let the first coat dry fully before applying the second. Most acrylic sealers are ready for a second coat within 2 to 4 hours.
Plan to reseal your stained patio every 1 to 3 years depending on traffic and weather exposure. High-use patios or those in harsh climates need more frequent attention. When the water stop beading on the surface, it's time to reseal.
DIY tips, the best approach, and mistakes to avoid
I'll give you the honest version here based on what actually goes wrong on these projects.
Tips that make a real difference
- Always test your stain in an inconspicuous corner first. Concrete is not uniform — the same product can look very different on different slabs, or even in different spots on the same patio.
- Work with the concrete's natural variation, not against it. Acid stain in particular is unpredictable, and that's the point. Embrace the imperfection.
- Don't rush the dry times. Stain applied over damp concrete will be uneven. Sealer applied over damp or incompletely cured stain will go milky or bubble.
- Wear gear you don't care about. Acid stain will ruin clothes, shoes, and anything else it touches.
- Check the weather before you start. Don't stain if rain is in the forecast within 24 hours — water hitting fresh stain ruins the finish.
Most common mistakes
- Skipping the water drop test and applying stain over a sealed surface — results in stain that sits on top, beads, and peels
- Not neutralizing acid stain residue before sealing — the acid continues reacting under the sealer and causes adhesion failure
- Applying sealer too thick in one coat — causes bubbles, white haze, or peeling
- Staining too soon on new concrete (before the 28-day cure) — results in weak color and poor adhesion
- Using metal tools or sprayers with acid stain — corrodes equipment and contaminates the stain
- Skipping a second coat of stain when the first coat looks light — most stains need two coats to reach their full depth of color
The best overall method for most homeowners
For a standard outdoor concrete patio slab, the most reliable DIY approach is: strip any existing sealer, clean and degrease thoroughly, etch if needed, apply two coats of a quality water-based concrete stain in the color of your choice, and seal with a UV-resistant acrylic topcoat sealer. This process gives you the most control, the widest color range, and the most forgiving application window. If you want that distinctive acid-stained, stone-like look, go the acid stain route, just be honest with yourself about the prep work it requires and give yourself a full weekend to do it right.
If you're interested in taking the look even further, techniques like stenciling over a stained surface or adding texture before staining can create results that look like high-end hardscape for a fraction of the cost. If you want texture to show through, focus on how to texture concrete patio surfaces before you apply your stain stenciling over a stained surface or adding texture before staining. If you want a pattern that stands out, learn how to stencil a concrete patio over a stained surface for crisp, repeatable design stencil concrete patio. Those are great follow-on projects once you're comfortable with the basic staining process.
FAQ
What should I do if my stained patio looks blotchy or hazy?
If you see bubbles, milky haze, or cloudiness after staining, it usually means the slab was still wet, contaminated, or the stain dried too fast from heat or sun. Let it dry completely, then evaluate color uniformity. For most water-based products, you can often clean with the recommended neutral cleaner and recoat. For acid stain, haze can be more stubborn because reaction residues may remain. In that case, a light re-etch or thorough rinse and another properly timed coat may be needed before sealing.
How can I tell early whether my stain is penetrating correctly?
A quick test is “surface vs. depth.” If you pour a few drops of water and it soaks in, penetration is likely, and the stain is working. If it beads up but the color already looks dark, you may still have a coating or over-spray in spots. Also, check one hidden corner for color consistency after dry, then again after sealing. Sealer can make defects look worse or mask them slightly, so do your evaluation after the final cure window.
What are the signs I didn’t prep the slab well enough?
Don’t rely on just “looks clean.” Use the water drop test, then do a wipe test with a white rag after degreasing and rinsing, it should come up clean. If it leaves dark smears, you still have oils, residue, or dust that will create mottling. For oil-prone areas (near grills, cars, or pets), plan for multiple degreaser rounds and stiff brushing before you even consider etching.
Can I stain over an existing stained patio without stripping?
Yes, but it changes the workflow. If you stain over a previous stain that was not properly sealed or stripped, you can get uneven color and weak bonding because the new stain cannot reliably react or penetrate. For acid stain especially, any remaining sealer or old coating must be removed first. For water-based stain, you still should strip or thoroughly abrade coatings to prevent peeling and patchy results.
When exactly should I apply the sealer after staining?
Sealing timing depends on both dryness and curing. If the surface feels dry but still feels chalky or dusty, wait longer. Typical guidance is at least 24 hours after wet cleaning or etching, and at least 24 hours after staining, longer in high humidity. If you seal too early, you can trap moisture, which may cause premature fading, hazing, or a tacky surface.
Why do patched spots look different after staining, and how do I prevent it?
Patch color mismatch is common because new patch material often absorbs differently than the surrounding slab. To reduce the difference, feather and texture the repair edges, use the correct patching product for exterior and follow its cure time fully, then consider applying a stain “rework coat” only to patched areas. If you want minimal contrast, avoid over-etching patch areas, since aggressive etching can intensify them.
How do I prevent lap marks when staining outdoors?
Water-based stain generally forgives temperature better, but both stain types can lap when worked in full sun or when you pause too long. The practical approach is to keep a wet edge, work from one end to the other, and reapply stain in small sections. If the forecast is hot, plan for early morning and avoid windy conditions that speed drying and cause overspray or uneven coverage.
Does sealer sheen level change the look of the stained patio?
Yes, the sheen you choose can affect appearance and maintenance. Matte sealers tend to hide minor imperfections better and reduce glare, satin is a middle ground, and gloss usually makes color richer but can show surface texture inconsistencies. Whatever you pick, make sure the sealer is UV resistant and rated for exterior concrete, and apply in thin coats (two is better than one) to avoid milky spots.
Should I stain immediately if I have cracks or spalling?
Yes, on certain patios the best option is to correct the surface before you stain. If there are structural issues, active spalling, or cracks that are moving, staining will not fix them and may highlight them. Use repair products suitable for exterior slabs, but if the cracking is heaving or widening, address drainage or structural causes first, then patch after stability is restored.
How do I know when my stained patio needs resealing again?
For best results, reseal based on performance, not just a calendar. When the surface no longer resists water (water stop beading) or you notice the color looking dull faster, it is time. In harsh climates or high-traffic areas, resealing may be closer to the earlier end of the range, and heavy cleaning can shorten the interval.