
The best way to cover an existing concrete patio depends on what's wrong with it and how much work you want to do. For a patio that's stained, dull, or lightly scaled, a concrete overlay or resurfacer (applied at 1/4 inch or less) is the fastest and cheapest fix.
How to Cover a Concrete Patio: DIY Steps for Old Slabs

Silas Morrison
28 May 2026
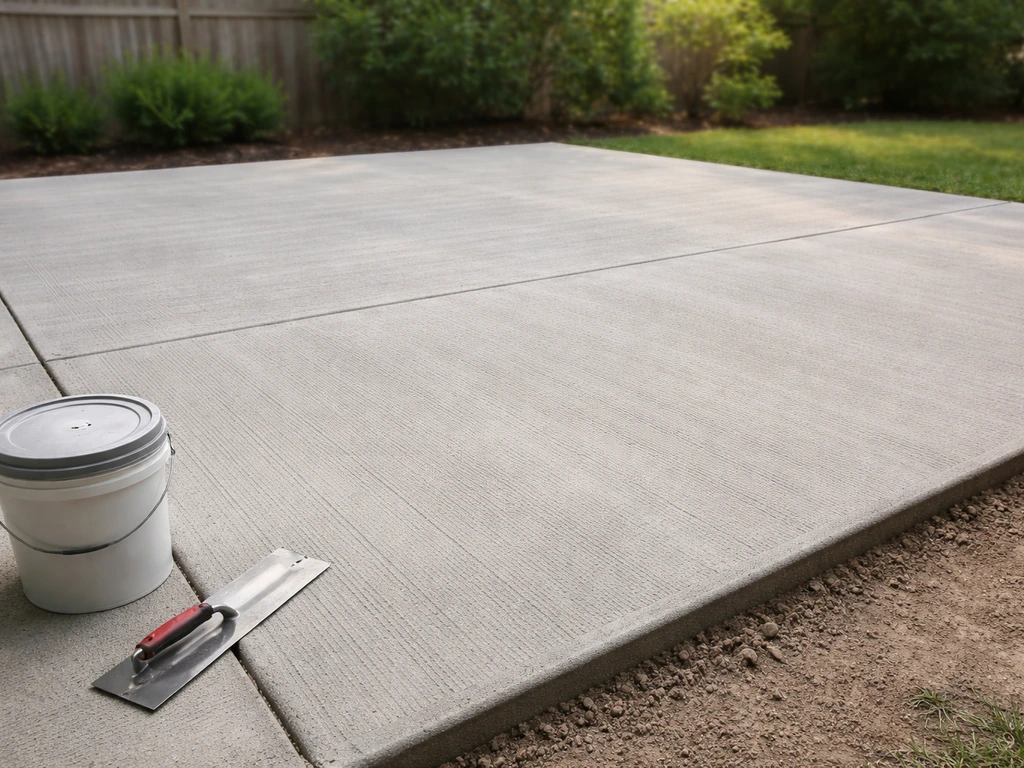
For cracked, uneven, or heavily spalled slabs, you'll want to repair first and then choose between a thicker overlay, tile, pavers laid over the concrete, or a wood deck system built on top. If you want a warm, natural finish, you can also cover the concrete patio with a wood deck system built over the slab. Any of these can look great and last for years, but every single one depends on good prep.
Skip the prep and whatever you put on top will peel, crack, or shift within a season.
Choosing the right covering for your patio
Before you buy anything, you need to match the covering to the actual problem. A lot of people pick a product they like the look of and then wonder why it failed after one winter. The condition of your existing slab is the real deciding factor.
If your patio is structurally solid but just looks terrible (faded color, oil stains, minor surface pitting, old paint), a resurfacer or decorative overlay is your best friend. Products like QUIKRETE Re-Cap or Sakrete's resurfacing mix go on thin, bond directly to the existing concrete, and can be textured or stamped. They're affordable, DIY-friendly, and can completely transform the look in a weekend.
If the slab has significant cracking, deep spalling, or sections that move when you step on them, you need to deal with those issues before covering. A thin overlay won't bridge a moving crack. In that case, you're either repairing and then overlaying, or you're going over the top with a thicker system like pavers, tile, or a wood deck that can tolerate a bit of imperfection underneath.
Here's a quick way to think about it: ugly but stable means overlay or coating. Cracked but stable means repair then overlay, or go with tile/pavers. Cracked and moving means pavers or a wood deck system laid over the top, with proper drainage underneath. Severely heaved or sinking concrete means you may need to address the subgrade first before any covering will last.
Assess the slab before you do anything else
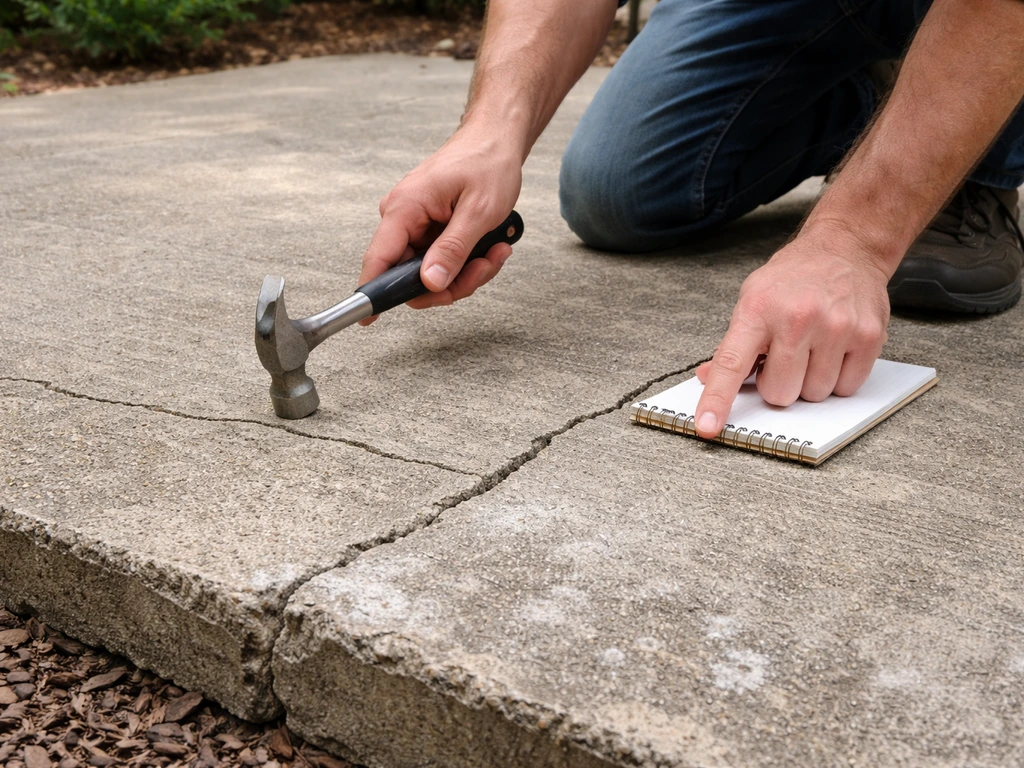
Walk the entire patio and take notes. You're looking for five things: cracks, spalling or flaking surfaces, efflorescence (the white chalky deposits), moisture issues, and unevenness. Each one affects your covering options differently.
Tap the surface with a hammer or coin across different areas. A solid thud is good. A hollow sound means the concrete has delaminated underneath, which is a serious problem for overlays because the overlay will debond along with it. Any hollow sections need to be removed and patched before you go further.
For moisture, tape a 2-foot square of plastic sheeting flat against the concrete and leave it for 24 hours. If moisture beads up underneath, you have active vapor transmission. That matters a lot for epoxy coatings and adhesive-set tiles, both of which can blister or pop off with moisture pressure underneath. Overlays and pavers are more forgiving, but you still want to know.
Check your drainage too. Water should run away from the house, with roughly a 1/8 to 1/4 inch drop per foot. If the slab pitches toward the house or pools in the middle, plan to address that with your covering system. A paver or tile install over a poorly draining slab will just trap the water and accelerate the damage.
Prep the existing slab properly (this is where most projects succeed or fail)
I've seen more overlay and coating failures caused by bad prep than by anything else. People spend money on quality products and then skip the surface prep, and the whole thing peels off in sheets six months later. Don't do this.
Step 1: Strip existing coatings, sealers, and paint
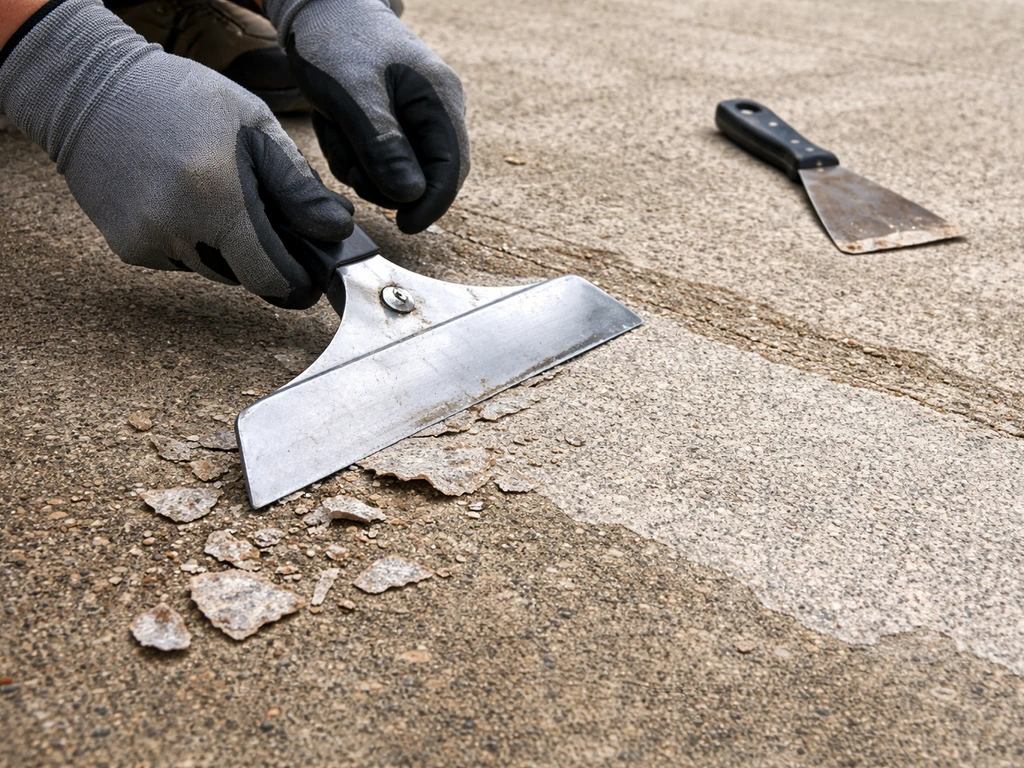
If there's any existing sealer, paint, or coating on the concrete, blank" rel="noopener noreferrer">it has to come off before you apply an overlay or resurfacer. New material won't bond to old sealer, period. Use a chemical stripper or a floor grinder with diamond tooling to remove it. Don't guess whether there's a sealer. Drip a few drops of water on the surface. If it beads up, there's a sealer present and it needs to go.
Step 2: Repair cracks and damaged sections
Fill cracks that are stable (not moving) with a polyurethane or epoxy crack filler. For hairline cracks, a liquid crack filler works well. For wider cracks (1/4 inch or more), clean out loose material, undercut the edges slightly with a grinder to create a mechanical lock, and pack with a cement-based repair mortar. Sakrete's guidance is clear here: repair any damage deeper than 1/2 inch with an appropriate repair product before applying the resurfacer. Don't try to fill deep voids with a thin resurfacer. It won't hold.
Step 3: Deal with efflorescence and stains
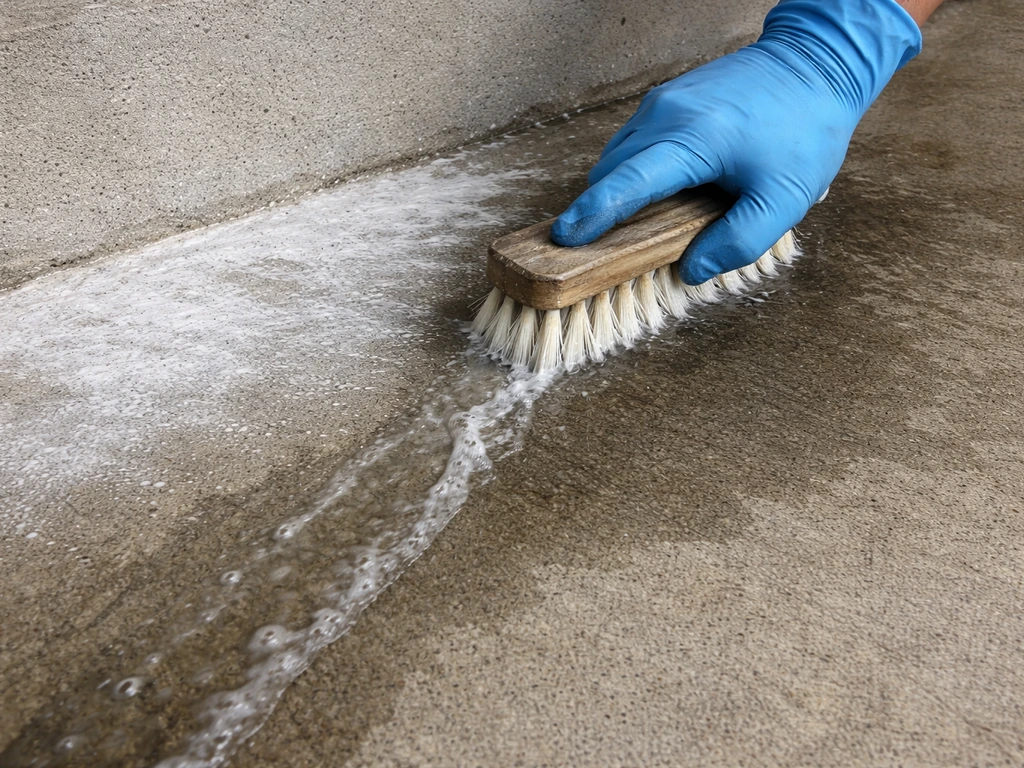
Efflorescence (white chalky deposits) needs to be scrubbed off with a stiff brush and a diluted muriatic acid solution (1 part acid to 10 parts water), then thoroughly rinsed. For oil stains, use a concrete degreaser and scrub well. Grease and oil will prevent bonding just as much as a sealer will.
Step 4: Profile the surface
This step is underrated and often skipped. For overlays and coatings, you need what's called a blank" rel="noopener noreferrer">Concrete Surface Profile (CSP), typically a CSP-2 to CSP-3. That basically means the surface should feel like 80-grit sandpaper. You achieve this either by mechanical grinding or by acid etching. Grinding is more consistent and my preference. A rented angle grinder or floor grinder with a diamond cup wheel takes 30 to 60 minutes on a standard patio. Acid etching (muriatic acid solution) works too but requires more safety precautions and thorough rinsing. After profiling, the surface should be clean, slightly rough, and visually uniform.
Step 5: Clean and dry
Pressure wash the entire patio and let it dry completely. For overlays, the concrete should be damp but not wet when you apply the product (called SSD condition, or saturated surface dry). For epoxy coatings and adhesive-set systems, you want it bone dry. Read the product instructions carefully on this point.
Covering options and when each one makes sense
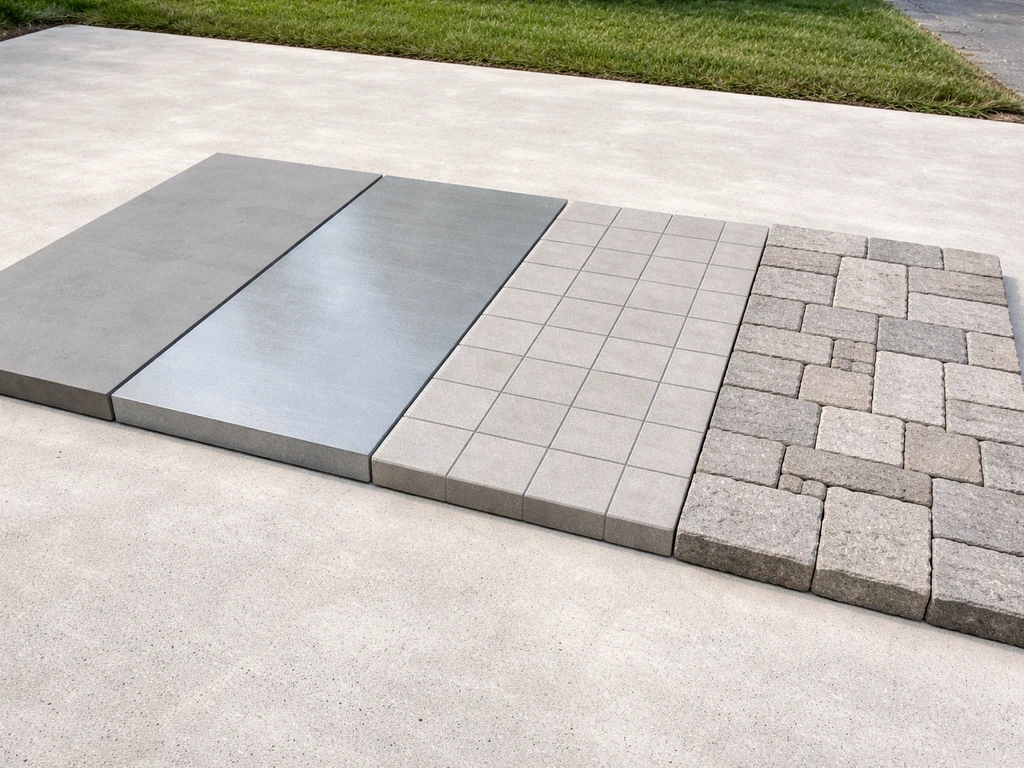
Here's a side-by-side comparison of the main covering systems so you can quickly see which fits your situation.
| Option | Best For | Typical Thickness | DIY Difficulty | Approximate Cost (materials) |
|---|---|---|---|---|
| Concrete resurfacer/overlay | Stable slabs, cosmetic issues, stains, scaling | 1/16" to 1/4" | Moderate | $1–$3 per sq ft |
| Decorative overlay (stamp/texture) | Stable slabs, want a new decorative look | 1/4" to 1/2" | Moderate–Hard | $2–$5 per sq ft |
| Epoxy or coating system | Garages, stable slabs, want color/gloss/durability | 1/16" or less | Moderate | $2–$4 per sq ft |
| Concrete tile (mortar-set) | Stable slabs, want a clean tiled look | Tile + 1/2" bed | Hard | $3–$8 per sq ft |
| Pavers over concrete | Cracked/uneven slabs, want flexible coverage | Paver height + sand or adhesive | Moderate | $3–$10 per sq ft |
| Wood/composite deck over concrete | Any condition slab, full coverage, raised look | 2"–6" above slab | Moderate–Hard | $5–$15 per sq ft |
Concrete resurfacers and overlays
This is the most common DIY approach for covering ugly concrete. QUIKRETE Re-Cap is a polymer-modified, shrinkage-compensated resurfacer that goes on at 1/16 to 1/4 inch and bonds directly to the existing slab. It's designed specifically for horizontal surfaces and gives you a clean, uniform gray surface that can be broom-finished, troweled smooth, or stamped. Sakrete makes a similar product. Both require the surface prep steps described above and benefit from a diluted bonding primer (usually the same product mixed with water) applied before the resurfacer.
Decorative overlays
If you want to go beyond plain gray and get a stamped, textured, or colored finish, a thicker decorative overlay system is the way to do it. These go on at 1/4 to 1/2 inch and can be stamped to mimic stone, brick, or wood patterns. The complexity is higher, there's a narrow working window before the material sets, and the tools (stamps, rollers, margin trowels) add cost. Worth it for a dramatic transformation, but I'd recommend practicing the stamping technique on a scrap piece first.
Epoxy and coating systems
Epoxy coatings add color, gloss, and surface protection without adding meaningful thickness. They work well on sound, dry slabs. The trade-off is sensitivity to moisture, UV exposure (standard epoxy yellows outdoors, so you need a UV-stable topcoat), and surface prep requirements. For an outdoor patio, a water-based polyurethane or polyaspartic topcoat over a primer/base is more durable than standard epoxy alone. These systems are very sensitive to moisture in the slab, so run the plastic sheet moisture test before committing.
Tile over concrete
Tile gives you a beautiful, durable result if the slab is solid and flat. If you are wondering how to cover a concrete patio with tile, start by verifying the slab is solid and flat, then use the right exterior mortar and crack isolation where needed. For outdoor use, choose a porcelain or natural stone tile rated for exterior and freeze-thaw conditions. The slab needs to be within 3/16 inch of flat over a 10-foot span. Mortar-set tile is not forgiving of cracks that move, so use a crack isolation membrane over any cracks in the slab before tiling. This is covered in more detail if you're planning a full tile install.
Pavers over concrete
Pavers are a great option when the slab has significant cracking or unevenness because they're tolerant of imperfection underneath. You can dry-lay them on a sand setting bed, or adhere them directly with mortar or a paver adhesive. The dry-lay method works well but adds height (typically 2 to 4 inches depending on paver thickness plus sand bed), which can create a step-up issue at doors. Dry-laid pavers also shift over time if the edge restraints aren't solid.
Wood or composite deck over concrete
Building a wood or composite deck frame over the slab completely hides the concrete and gives you a totally different look and feel underfoot. It adds the most height (at least a couple of inches for sleepers, more for a framed deck), but it works over virtually any condition of concrete since the frame carries the load, not the slab. Drainage underneath becomes important to prevent rot (for wood) or mildew. Composite decking is a better long-term choice for ground-level applications.
Installation walkthrough for the most popular option: concrete resurfacer
Since a resurfacer or thin overlay is what most people will choose for an old or ugly patio, here's the full process from start to finish. If you’re ready to take this approach, follow the steps in how to overlay concrete patio to get the best bond and a smooth finish. If you're going with tile, pavers, or a wood deck, the prep steps are the same but the installation sequence will differ.
What you'll need
- Concrete resurfacer (QUIKRETE Re-Cap, Sakrete Flo-Coat, or similar), roughly 1 bag per 20–40 sq ft at 1/8" thickness
- Bonding primer (or diluted resurfacer per product instructions)
- Drill with paddle mixer or a rented mortar mixer for larger areas
- Long-handled squeegee or gauge rake
- Concrete finishing brush or broom (for texture)
- Pressure washer
- Angle grinder with diamond cup wheel (or muriatic acid for etching)
- Crack filler and patching mortar for repairs
- Plastic sheeting and tape for protecting edges
- Knee pads and rubber boots
Step-by-step process
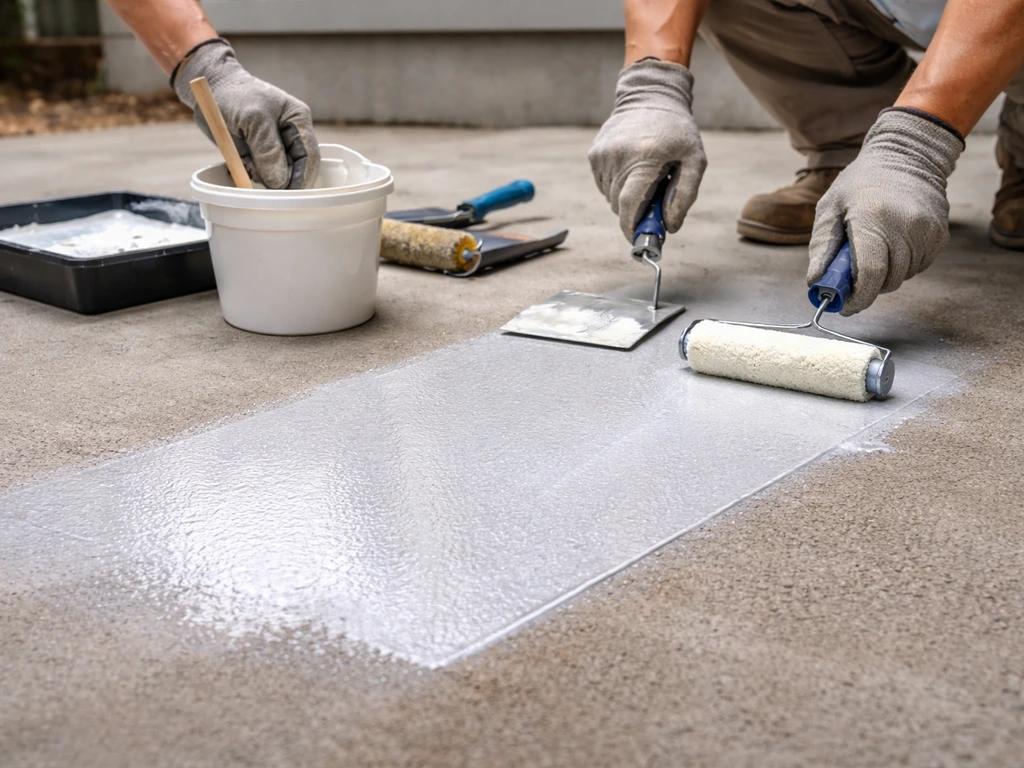
- Complete all prep: strip coatings, fill cracks, profile the surface, pressure wash, and allow to dry to SSD (damp but not puddling).
- Mix and apply the bonding primer. Most products call for diluting the resurfacer mix with water at a higher water ratio for the primer coat. Apply it by brush or roller over the entire surface and let it become tacky but not dry (usually 10–20 minutes depending on temperature).
- Mix the resurfacer in small batches (follow the water-to-powder ratio on the bag exactly). Consistency should be like thick pancake batter. Don't over-water it.
- Pour the mix onto the patio and spread it quickly with a long-handled squeegee or gauge rake at your target thickness (typically 1/8"). Work in manageable sections of 10–15 square feet so it doesn't set before you spread it.
- Before the surface loses its sheen, drag a concrete finishing brush or broom across it for a slip-resistant texture. Work consistently in one direction for a clean, uniform look.
- Keep traffic off the surface for at least 24 hours. Full cure for heavy use or sealing takes 28 days, but it will be walkable and usable in 24–48 hours under normal conditions.
Temperature matters. Work between 50°F and 90°F. Too cold and the mix won't cure properly. Too hot and it'll set faster than you can spread it. Early morning is the best time in summer.
Edges, drainage, slip resistance, and curing
The finishing details are what separate a patio that looks professional from one that looks like a DIY job. Don't rush these.
Edges
The edge of a resurfaced patio is its most vulnerable point. A sharp, thin edge will chip and crack quickly. Use a margin trowel or edge tool to round or bevel the perimeter edges slightly (about a 1/4" radius). For tile and paver installs, finish exposed edges with a matching bullnose tile, a metal edge trim, or tuck the edge under a fascia board.
Drainage
Your covering system shouldn't trap water against the house. If you're adding thickness with pavers or a wood deck, make sure water can still drain away from the foundation. For overlays, you're essentially following the existing slope, so check that it still pitches away from the house (at least 1/8" per foot) after the overlay is applied.
Slip resistance
A smooth, troweled finish on a patio surface is a hazard when wet. Always finish with a broom or brush texture on resurfacers. For coatings and epoxy systems, add anti-slip aggregate (fine silica sand or aluminum oxide) to the final topcoat. For tile, choose a porcelain or stone with a rated slip coefficient of friction of 0.6 or higher for outdoor wet conditions.
Curing timelines
Thin resurfacers are walkable in 24 hours but take 28 days for full strength. During the first few days, protect the surface from rain, direct sun, and freezing temperatures. In hot, dry weather, a light mist of water over the surface 2 to 3 times during the first day (wet curing) helps the resurfacer achieve full strength without shrinkage cracks. Don't seal a resurfacer until at least 28 days after application.
Sealing, maintenance, and fixing what goes wrong
Sealing
Sealing is optional but strongly recommended for resurfaced and overlaid patios. A penetrating silane-siloxane sealer protects against moisture, freeze-thaw damage, and staining without changing the appearance much. A film-forming acrylic sealer adds a sheen and enhances color. Apply sealer after the full 28-day cure, reapply every 2 to 3 years depending on traffic and weather exposure. For tile patios, grout joints should be sealed annually.
Basic maintenance
- Sweep or blow off debris regularly to prevent staining and surface abrasion.
- Rinse with a garden hose or light pressure wash seasonally.
- Reapply sealer every 2–3 years or when water no longer beads on the surface.
- Address new cracks immediately with a flexible polyurethane filler before they grow.
- Keep planters and furniture with metal feet from sitting in standing water on the surface.
Troubleshooting common failures
Peeling or delamination almost always means the surface wasn't properly prepped. If you have patches lifting, remove the loose material, re-profile the exposed concrete, and patch with fresh resurfacer or repair mortar. If large sections are delaminating, you may need to remove the entire overlay and start over.
Hairline cracks in a new overlay within the first few weeks are usually shrinkage cracks caused by drying too fast (too hot, too sunny, or too thin an application). Fill them with a flexible crack filler and seal over. To prevent it next time, work in cooler conditions or mist the surface during cure.
Blistering or bubbling under a coating almost always points to moisture in the slab pushing up from underneath. There's no good fix other than removing the coating, letting the slab dry fully, confirming it passes the plastic sheet moisture test, and reapplying with a moisture-tolerant product or a moisture vapor barrier primer.
If your patio had deep structural problems (major shifting, frost heaving, serious settlement) and you covered it without addressing the root cause, no surface covering will hold long-term. That's the one situation where calling in a pro to assess the subgrade is genuinely worth it before you spend money on materials.
Your action plan for this weekend
Here's the order of operations if you're ready to move on this. First, assess your slab this week using the tap test and the moisture test. Identify what's wrong. Second, buy your repair materials and fix cracks and damaged areas. Give repairs 3 to 5 days to cure. Third, do your surface prep (grinding or etching, cleaning). Fourth, choose your covering system based on what you found during assessment, and buy materials. Fifth, apply your covering on a weekend when temps are moderate and no rain is in the forecast for 48 hours. Sixth, let it cure fully before sealing, and seal before the first winter.
The covering you choose matters less than doing the prep right. A simple resurfacer applied over a properly prepped slab will outlast an expensive overlay slapped down over dirty, sealed concrete. Start with the condition assessment, be honest about what you find, and the rest of the process is very manageable as a DIY project.
FAQ
Do I need to remove the old concrete paint or sealer before covering my patio?
Yes. Even if it looks clean, you should remove paint and sealers fully because overlays and coatings can’t bond reliably to film-forming layers. If water beads on the surface, treat it as “sealer present,” then strip or grind until you get an evenly roughened, clean concrete surface profile.
Can I cover hairline cracks with a thin resurfacer without repairs?
Only if the cracks are stable and you still profile and clean the slab properly. Hairline shrinkage cracks often show up early, so fill them first with a flexible crack filler, let it cure, then apply the resurfacer. If the crack widens or steps up, you need a different system, not a patch-over approach.
What should I do if my slab passes the plastic moisture test, but the patio still feels damp?
Don’t rely on “feels damp.” Use the full 24-hour test and look for beads or dampness at the plastic interface. For coating and adhesive-set tile, if you have any doubt, extend verification (another plastic test in a different season or after wet weather) because moisture-related failures are common even when the slab seems mostly dry.
How do I tell hollow delaminated areas from normal surface soundness?
Use the tap test systematically, not randomly. Walk the whole patio in a grid and note any areas with a hollow sound, then mark them for removal. Delamination typically requires removing the detached layer back to solid concrete, re-profile the exposed area, and patch with an appropriate repair mortar before overlaying.
What’s the easiest way to confirm my patio slope will work with an overlay?
After the overlay is planned, check that the finished surface still drains away from the house at about 1/8 to 1/4 inch per foot. If the existing slab pools water, overlaying usually preserves the problem and traps moisture under tile, pavers, or coatings. In that case, consider a system that improves drainage, like pavers over a properly draining base.
How can I prevent edge chipping on a resurfaced patio?
Treat the perimeter as a separate detailing step. Bevel or round the overlay edge slightly (about a 1/4 inch radius) while it is being finished. Also avoid thick “feathering” at the edges, because a razor-thin section is the first place to chip and crack when traffic and freeze-thaw happen.
Is there a way to reduce shrinkage cracking during overlay curing?
Yes. Work in moderate temperatures and avoid direct blasting sun and wind. If conditions are hot and dry, lightly mist the surface during the early cure window so it reaches the intended strength without drying too fast, then protect from rain and freezing until fully cured.
How long should I wait before sealing a resurfaced concrete patio?
Wait at least 28 days for full cure before applying a sealer, even if it seems hard sooner. Sealing early can trap moisture and increase the chance of discoloration, failure at weak spots, or adhesion problems.
Can I apply epoxy or adhesive-set tile if I’m not sure the slab is bone dry?
For epoxy and adhesive-set systems, moisture tolerance is limited, and “maybe dry” is not enough. If the plastic sheet test shows active vapor movement, plan on a different covering method, or use a moisture vapor barrier approach designed for that product. Otherwise, blistering and pop-off failures are likely.
Do pavers over concrete still require bonding, or can I just dry-lay them?
You can dry-lay, but only if you handle edge restraint and base construction correctly, because pavers can shift over time without solid containment. Dry-laid also increases patio height (commonly a couple of inches plus sand), which can create a trip step at doors and transitions.
What slip-safety options work best for an overlay or coating?
Use a broom or brush texture for resurfacers so the surface isn’t slick when wet. For coatings, add approved anti-slip aggregate into the final topcoat so it remains durable. For tile, choose an outdoor-rated tile with a high wet slip rating and consider grout color and sealing for easier maintenance.
My resurfacer is peeling in patches, what’s the likely cause and what’s the fix?
Peeling usually means poor surface profile, leftover contaminants (sealers, paint, grease), or missed hollow areas. Remove all lifting sections back to solid concrete, re-profile the exposed areas to the correct roughness, patch, then reapply only after the slab is clean and dry enough for bonding.
When would it be worth hiring a pro before covering a patio?
If your patio shows signs of movement beyond cosmetic cracking, such as major shifting, frost heaving, or significant settlement, covering will likely fail no matter how good the product is. A pro can assess the subgrade, drainage, and stability so you don’t pay for a surface system that can’t outlast the underlying issue.