
You can install a railing on a concrete patio yourself in a weekend, but getting it right means choosing the correct mounting method, drilling into concrete properly, picking the right anchors, and hitting the code minimums your inspector will actually check. Miss any of those pieces and you end up with a wobbly post, a cracked slab, or a failed permit, none of which are fun to fix after the fact. This guide walks you through every step: planning, code requirements, material selection, anchor types, and installation, so you can put up a railing that is solid, legal, and built to last.
How to Install Railing on Concrete Patio: DIY Guide & Steps

Silas Morrison
23 Jul 2026
Who This Guide Is For (and What You'll Be Able to Do)
This is written for DIY homeowners with a concrete patio that already exists, whether it's a raised deck-style porch, a ground-level pad with a step or two, or anything in between. You don't need to be a carpenter or concrete contractor, but you should be comfortable using a hammer drill, following measurements carefully, and working around a live concrete slab. If you've ever hung a ceiling fan or assembled flat-pack furniture, you can handle this. I'll be honest about where things get tricky and when it genuinely makes sense to bring in a pro.
Plan Before You Buy Anything
The four things that drive every other decision here are: where the railing is going, how much load it needs to handle, how much you want to spend, and what the space is supposed to look like when you're done. Get these straight before you touch a drill or order materials.
Location and Load
A railing on a ground-level patio that sits less than 30 inches above grade is technically optional by code, but adding one for safety or aesthetics is still completely reasonable. Once your patio surface is more than 30 inches above the ground below it, a guard rail is required by the IRC (Section R312). See blank" rel="noopener noreferrer">IRC §R312 and commentary (UpCodes viewer summary of guard loads and opening limits) for the model-code guard requirements, including when guards are required and the reference guard load and opening limits used by inspectors. blank" rel="noopener noreferrer">The load requirements are real: the top rail must be able to resist a 200 lbf concentrated load applied in any direction, and the infill (balusters or panels) must handle 50 lbf applied to any one-square-foot area. Those numbers come directly from the model code and are what your inspector uses as a baseline, so your anchors and posts must be sized to meet them.
Budget
A basic pressure-treated wood railing with surface-mounted post bases runs about $25 to $50 per linear foot in materials. Aluminum railing kits with pre-assembled sections land around $60 to $120 per linear foot. Glass panel systems start around $150 per linear foot and go up quickly from there. Factor in anchor hardware, concrete bits, and any patching materials and add roughly $50 to $150 to your total depending on post count. Labor to hire this out typically runs $200 to $400 per linear foot installed, so even a modest patio railing can save you $800 to $2,000 by doing it yourself.
Aesthetics and Permitted Uses
Think about sight lines, maintenance commitment, and whether the railing matches the house. A wood railing on a craftsman bungalow looks great but requires regular sealing or painting. Aluminum is low-maintenance but has a modern profile that can look out of place on older homes. Glass panels give you an open view and work especially well on elevated patios where you don't want to lose the scenery. Also check your HOA rules and local zoning before you commit to a style, some neighborhoods restrict materials, colors, or heights beyond what code requires.
Code Requirements You Actually Need to Know
Building codes for patio railings are not complicated once you know what to look for. The model code (IRC for residential) sets the floor, and your local jurisdiction either adopts it as-is or amends it. Always call your local building department to confirm which edition they use and whether they've made any local changes before you finalize your design.
| Requirement | IRC Residential (R312) | IBC Commercial (§1015) | Notes |
|---|---|---|---|
| When guards are required | Open sides >30 in above grade/floor | Open sides >30 in above grade/floor | Measure from walking surface to ground below |
| Minimum guard height | 36 in (914 mm) | 42 in (1067 mm) | Measured from walking surface to top of rail |
| Stair open side height | 34 in minimum | 42 in minimum | Measured from stair nosing |
| Baluster/opening limit | 4-inch sphere must not pass through | 4-inch sphere must not pass through | Applies from walking surface to required guard height |
| Top rail concentrated load | 200 lbf in any direction | 200 lbf in any direction | Applied at any point on top rail |
| Infill load | 50 lbf per 1 sq ft | 50 lbf per 1 sq ft | Horizontal, applied locally to balusters/panels |
A few things worth flagging from experience: the 36-inch height is the bare residential minimum, and many inspectors will tell you off the record that 42 inches looks better and is safer anyway. If your patio is attached to a business, a vacation rental, a home office with clients, anything commercial, you're in IBC territory and 42 inches is the mandatory minimum. When in doubt, go taller. Also note that the 4-inch sphere rule applies to balusters all the way down to the walking surface, not just at mid-rail height, so your bottom baluster spacing matters as much as the top.
Permits: When You Need One and How to Get It
Most jurisdictions require a permit for any guard rail or railing added to a raised surface. The process is usually straightforward: submit a site sketch showing the patio dimensions, railing location, post spacing, and material type, plus the anchor specification sheet or manufacturer's ESR (evaluation report) for the anchors you're using. Many building departments have a simplified residential railing permit that costs $50 to $150 and gets approved in a few days. Skipping this on a raised patio is a genuine liability risk, if someone falls and there was no permit, your homeowner's insurance may not cover it. Pull the permit. It's not worth the risk.
Comparing Railing Materials
The material you choose affects installation difficulty, long-term maintenance, and overall cost more than almost any other decision. Here's a straight comparison of the four most common options for concrete patio installations.
| Material | Upfront Cost (per LF) | Lifespan | Maintenance | DIY Difficulty | Best For |
|---|---|---|---|---|---|
| Pressure-treated wood | $25–$50 | 15–25 years | Seal/paint every 2–3 years | Low | Traditional look, budget builds |
| Aluminum | $60–$120 | 30–50 years | Rinse occasionally | Low–Medium | Low-maintenance, modern homes |
| Steel (powder-coated) | $80–$150 | 20–35 years | Touch up chips, rust-check annually | Medium | Industrial/modern, heavy-use areas |
| Composite | $70–$130 | 25–30 years | Rinse occasionally | Low–Medium | Wood look without the upkeep |
| Glass panels | $150–$300+ | 20–30 years (hardware) | Clean glass, check hardware annually | Medium–High | Open views, contemporary patios |
Wood
Pressure-treated lumber is the most forgiving material to work with and the easiest to cut and adjust on the fly. The downside is ongoing maintenance, if you don't seal it every couple of years, it will crack, warp, and gray out. Cedar and redwood are better-looking options but cost more. For concrete patio installations, wood posts set in surface-mounted post bases are a solid, code-compliant approach that I've used many times with good results. Just make sure the base keeps the post end off the concrete surface so moisture can't wick up into the end grain.
Aluminum and Steel
Aluminum railing kits are probably the most popular DIY choice right now because the systems are designed to go together without custom fabrication. Most come with pre-cut rails, pre-drilled post bases, and clear installation instructions. Powder-coated aluminum won't rust and holds up well in coastal environments. Steel is heavier and stronger but requires more attention to surface chips and rust spots, especially in humid climates. Both mount to concrete using the same post base hardware as wood, so installation is essentially the same.
Composite
Composite railing (PVC or wood-plastic composite) gives you the look of painted wood with almost no maintenance. It's a good choice if you have composite decking already, since systems are designed to match. The main limitation is that composite can't be field-cut as freely as wood without looking sloppy at the ends, and some systems have limited post base options that may not suit every concrete mounting scenario.
Glass Panels
Glass railing systems use either a channel-mounted base (a continuous aluminum channel anchored to the concrete) or individual post-and-clamp systems. They look fantastic on elevated patios where you want to preserve views, but the installation is less forgiving, glass panels are heavy, the channels must be perfectly level, and any out-of-square post placement is visible. Budget more time and get a helper. The glass itself is tempered safety glass and genuinely durable; the hardware is usually the maintenance concern.
My Recommendation
For most DIY homeowners on a concrete patio, aluminum railing kits with surface-mounted post bases hit the best balance of cost, durability, and ease of installation. If you want a more traditional look and are willing to paint or seal every few years, pressure-treated wood is perfectly solid. Glass is worth the extra effort and cost if the view matters to you. Composite is a strong mid-range option when aesthetics are a priority but maintenance isn't.
Tools and Materials Checklist
Pull this list together before you start. Missing a tool halfway through a concrete drilling job is a frustrating interruption, especially once you've started laying out post locations.
Tools
- Rotary hammer drill (SDS-plus) — not a standard drill driver; concrete demands it
- Hammer drill bits or SDS carbide bits in the diameter specified by your anchor manufacturer
- Core drill bit (if embedding posts in a sleeve or installing glass channel base)
- Vacuum or compressed air for hole cleaning (required for adhesive anchors)
- Wire brush sized to the hole diameter
- Torque wrench (for setting anchor bolts to spec)
- Level (4-foot level and a torpedo level)
- Tape measure and chalk line
- Speed square
- Circular saw or miter saw (for wood or composite railing cuts)
- Hacksaw or angle grinder with metal cutting disc (for aluminum or steel)
- Socket set and impact driver
- Caulk gun
- Safety glasses, hearing protection, dust mask (N95 minimum for concrete dust), work gloves
- Knee pads (you will be on the ground a lot)
Materials
- Railing system: posts, top rail, bottom rail, balusters or infill panels
- Post bases or standoff anchors (surface-mount) or anchor bolts for embedded post sleeves
- Anchors: wedge anchors, sleeve anchors, concrete screws (Tapcon or equivalent), or epoxy/chemical anchor system
- Anchor adhesive and mixing nozzle if using chemical anchors (Hilti HIT-HY 200 or equivalent)
- Threaded rod (for epoxy anchor installations)
- Stainless steel or hot-dip galvanized hardware for exterior use
- Concrete patching compound (if slab edges or existing damage need repair)
- Polyurethane or silicone sealant (for sealing around post bases)
- Self-leveling concrete crack filler if needed
- Painter's tape and pencil for layout marking
Two Ways to Mount Posts on Concrete: Surface-Mount vs. Embedded
There are really only two fundamental approaches to getting a post to stand up on a concrete slab. Everything else is a variation on one of these two. Understanding the difference upfront saves you from buying the wrong hardware.
Surface-Mounted Anchors (Post Bases)
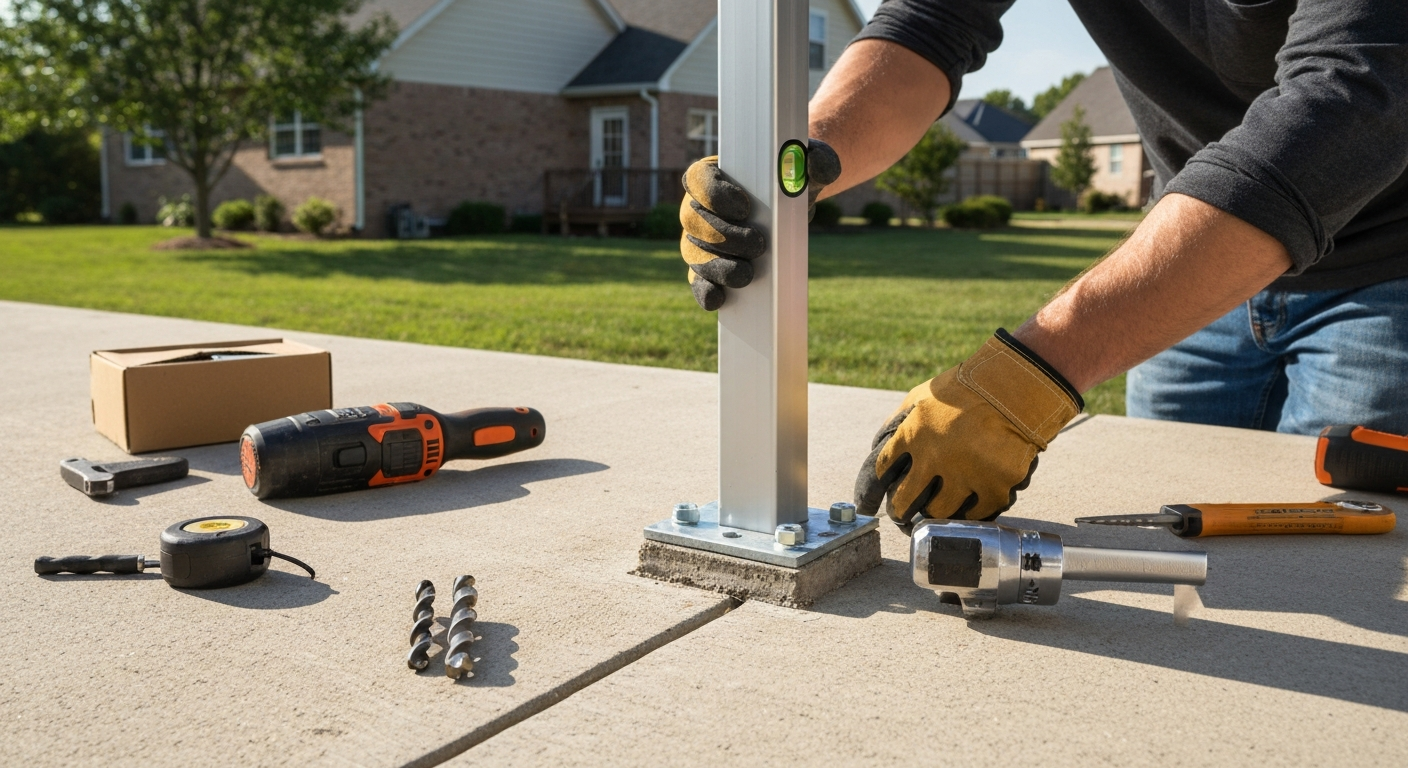
A surface-mounted post base is a metal bracket that sits on top of the concrete and is bolted down with anchors. The post slips into or bolts onto the bracket. This is by far the most common DIY approach, and for good reason: it doesn't require core-drilling into the slab, it's easier to get perfectly plumb, and it's reversible if you ever want to change the railing layout. For step-by-step guidance on how to install a patio post on concrete, see the dedicated guide. The anchor bolts go 2 to 3.5 inches into the concrete depending on the anchor type, so the slab only needs to be about 3.5 to 4 inches thick, which covers most residential patios.
- Pros: Faster to install, no deep core drilling, post is fully accessible, hardware is replaceable, works on thin slabs
- Cons: Base plate is visible at the post foot, slightly more exposed to water intrusion if not sealed, lower moment resistance than a deeply embedded post
- Best for: Standard residential railing on patios 4 inches or thicker, aluminum or wood railing kits, any situation where you want a clean installation without cutting into the slab
Embedded Posts (Core-Drilled or Cast-In)
An embedded post installation means you core-drill a hole through the concrete slab (or through it into a footing below), set a post sleeve or anchor bolt cluster in that hole, and fill it with epoxy or non-shrink grout. The post then slides into the sleeve or threads onto the anchor pattern. This method provides maximum rigidity and moment resistance, the post can't rock at the base because it's locked into the slab. It's the right call for glass railing systems, commercial or high-load situations, and any installation where the top rail height or post spacing pushes the structural demands past what a surface-mount bracket can handle.
- Pros: Maximum rigidity, cleaner appearance at the post base, better for tall posts and high-load situations, preferred for glass panel systems
- Cons: Requires core drilling (3- to 4-inch diameter holes), mistakes are harder to correct, requires slab thickness of at least 5 to 6 inches for full embedment, creates permanent penetrations
- Best for: Glass panel railings, high-traffic or commercial patios, tall posts (over 42 inches), or installations where post wobble at the base is not acceptable
If you need to cut or core-drill into your existing slab for an embedded post installation, that process overlaps with some of the same work covered in guides on how to cut concrete patio slabs and how to install a patio post on concrete, both of which go deeper on those specific tasks.
Drilling and Fastening Into Concrete: What You Need to Know First
Concrete is not wood. A standard drill will spin its bit endlessly against a concrete surface and accomplish nothing useful. You need a rotary hammer drill (also called a hammer drill in SDS-plus format) for any anchor work on a patio. The rotary action combined with the hammering percussive motion is what breaks up the aggregate and lets the bit advance. Rent one if you don't own one, they're available at any equipment rental shop for about $40 to $60 per day. If you need to break up or remove an old slab, see our step-by-step guide on how to jackhammer a concrete patio for safe demolition and prep.
Key Rules Before You Drill
- Mark your rebar before drilling — use a rebar scanner (rented or borrowed) to locate rebar and avoid drilling through it; hitting rebar can damage your bit and compromise the slab
- Use the exact drill bit diameter specified by the anchor manufacturer — going even 1/16 inch too large will reduce anchor holding capacity significantly
- Drill to the depth required by the anchor's ESR (evaluation report) or data sheet — mark your bit with tape at the correct depth
- For adhesive anchors, clean the hole thoroughly: blow out dust with compressed air, brush with a wire brush, blow again — most adhesive anchor failures in the field trace back to dirty holes
- Check your concrete thickness before committing to an anchor type — if your slab is only 3 to 3.5 inches thick, certain anchors won't have enough embedment depth
- Keep minimum edge distances: most mechanical anchors require at least 1.5 to 2.5 inches from a slab edge to the hole center — check your anchor's ESR for the exact value
Dealing With Thin or Damaged Slabs
A lot of residential concrete patios are only 3 to 3.5 inches thick, which is right at the limit for standard mechanical anchors. If yours is thin, use concrete screws (Tapcon-style) with verified embedment, or switch to an epoxy anchor with a shallow all-thread rod profile. If the slab is cracked or hollow-sounding under the post location, knock on it with a hammer and listen for a dead thud rather than a ringing knock, you need to repair or reinforce that area before installing any anchor. Patch cracks with a hydraulic cement or epoxy injection and let it cure fully before drilling. On a seriously damaged slab, it may be worth cutting out the damaged section and pouring a new patch section; that's more work but it gives your anchor something solid to bite into.
Surface-Mounted Anchor Types and How to Install Each One
Surface-mounted post installations use one of four anchor types: wedge anchors, sleeve anchors, concrete screws (like Tapcon), or epoxy chemical anchors. Each works differently and suits different conditions. Here's how to choose and install each one.
Wedge Anchors
Wedge anchors are the heavy-duty standard for post base attachments. They consist of a threaded bolt with a wedge-shaped clip at the tip, as you tighten the nut, the clip expands against the drilled hole wall and locks the anchor in place. They're extremely strong in tension and shear, and their holding values are well-documented in manufacturer ESRs (for example, Simpson Strong-Tie publishes clear allowable load tables by anchor diameter and embedment depth). They require a minimum concrete thickness of about 6 inches for full embedment, which makes them less ideal for thin residential slabs.
- Mark post base locations using a chalk line and confirm measurements twice
- Drill holes at the diameter and depth specified by the anchor manufacturer using an SDS rotary hammer — typical wedge anchor installation requires hole depth equal to the embedment depth plus the combined thickness of the fixture and nut
- Clear dust and debris from the hole with compressed air
- Slide the post base over the anchor bolts before inserting into the hole, or insert anchors through the base plate holes
- Drive the anchor into the hole with a hammer until the clip end is below the base plate
- Thread the nut on by hand, then use a torque wrench to tighten to the manufacturer's specified torque — do not over-torque, as this can crack the concrete around the hole
- Check that the post base is level in both directions before the anchor fully sets
- Seal around the base plate perimeter with polyurethane sealant to prevent water infiltration
Sleeve Anchors
Sleeve anchors work on a similar expansion principle to wedge anchors but use an external sleeve that expands outward against the hole wall as the bolt is tightened. They're slightly easier to install in tight spaces and work well in medium-duty applications. They perform best in 3,000 psi concrete or stronger, and like wedge anchors, they need clean, accurately sized holes. They're a good choice for post bases on patios of average thickness (4 to 5 inches) where full wedge anchor embedment isn't possible.
- Lay out and mark all post base locations; use a template if the base has multiple anchor holes
- Drill holes to the exact diameter called out on the anchor packaging using an SDS hammer drill
- Blow dust out of each hole with compressed air
- Insert the sleeve anchor through the post base hole and into the drilled hole
- Tap the anchor flush with a hammer so the sleeve is seated at the correct depth
- Thread on the nut (or use the integral bolt head depending on anchor style) and tighten with a wrench until snug
- Continue tightening to the specified torque — the sleeve expands as you do this, locking the anchor
- Test by attempting to pull the base upward by hand and checking for any movement; a properly installed sleeve anchor should be completely rigid
- Seal the base plate perimeter with exterior-grade silicone or polyurethane caulk
Concrete Screws (Tapcon and Similar)
Concrete screws like Tapcon are the fastest and least invasive anchoring option. For step-by-step instructions on installing concrete screws, including drill bit selection, hole-cleaning, and recommended torque, see how to screw into concrete patio. They thread directly into a pre-drilled hole in the concrete without any expansion mechanism, the hardened threads cut into the concrete as you drive the screw. They work well for lighter-duty post bases and are ideal when you need to keep embedment shallow (2 to 1.75 inches is achievable with the right screw). The Simpson Strong-Tie Titen HD, which has an ICC-ES Evaluation Report (ESR-2713), is a higher-capacity version of this concept with documented performance in both cracked and uncracked concrete, useful if your inspector asks for anchor data. Standard Tapcon screws are adequate for wood post bases at normal residential loads.
- Select the screw diameter and length based on post base hole size and required embedment — minimum embedment for most concrete screws is 1 inch, with 1.75 to 2.25 inches being the working sweet spot for load capacity
- Drill pilot holes using the bit diameter specified on the anchor packaging — for most Tapcon screws this is 3/16 inch for 1/4-inch screws or 5/32 inch for 3/16-inch screws; use the exact size
- Blow out drill dust completely — concrete dust packed in the hole will prevent the screw from threading to full depth
- Place the post base in position over the holes
- Drive the concrete screw with an impact driver or drill set to a controlled torque — do not over-drive, which strips the threads cut into the concrete
- If a screw spins without resistance or won't seat, the hole is oversized or damaged — move to a new location at least 1.5 inches away and re-drill
- Check that the base is flat and level after all screws are driven
- Apply a bead of sealant around the base perimeter
Epoxy and Chemical Anchors
Epoxy (chemical) anchors are the most technically demanding option but offer the highest load capacity and flexibility. Instead of mechanical expansion, you inject a two-part adhesive into the drilled hole, then set a threaded rod or rebar into the adhesive before it cures. The cured adhesive bonds the rod to the concrete at a molecular level. Systems like the Hilti HIT-HY 200 have published cure and work times by temperature, at 68°F the working time is roughly 5 minutes and full cure takes about 24 hours, but at 40°F working time stretches to around 30 minutes while full cure can take 48 hours or more. Never load an epoxy anchor before full cure. ICC-ES evaluates adhesive anchor systems under Acceptance Criteria AC308, so if your inspector wants documentation, the manufacturer's ESR is the document to hand them.
- Drill holes to the exact diameter and depth shown in the adhesive anchor's technical data sheet — for Hilti HIT-HY 200, typical hole diameter is 1/16 inch larger than the rod diameter
- Clean the hole thoroughly: blow with compressed air, brush with the correctly sized wire brush (use the brush that comes in the kit), blow again with compressed air — repeat this sequence at least twice; dirty holes are the leading cause of adhesive anchor failures
- Allow the hole to dry completely; epoxy adhesives lose significant strength in saturated concrete
- Attach a fresh mixing nozzle to the cartridge and dispense the first 1 to 2 inches of adhesive into waste until the color is uniform — mixed adhesive should be a consistent shade, not streaked
- Fill the hole from the bottom up to about 2/3 full — insert the nozzle to the bottom of the hole first and pull back as you inject to avoid air pockets
- Insert the threaded rod with a slow rotating motion to distribute the adhesive evenly and expel any remaining air
- Align the rod or post sleeve immediately and support it in the correct position — do not disturb it during the cure window
- Mark the start of cure time and do not apply any load until the full cure time listed for the ambient temperature has passed
- Once cured, thread on the post base nut and torque to spec; seal around the base with exterior sealant
Anchor Selection at a Glance
| Anchor Type | Best Concrete Thickness | Load Capacity | Install Speed | Reversible | Notes |
|---|---|---|---|---|---|
| Wedge anchor | 5.5 in or more | High | Medium | No | Best for thick slabs; most widely documented |
| Sleeve anchor | 4–5 in | Medium–High | Medium | No | Good general-purpose option for mid-thickness slabs |
| Concrete screw (Tapcon/Titen HD) | 3 in or more | Medium | Fast | Yes | Best for thin slabs; ESR-2713 covers Titen HD loads |
| Epoxy / chemical anchor | 3 in or more | Very High | Slow (cure time) | No | Best for max load, thin slabs, edge conditions; AC308 evaluated |
Assembling and Installing the Railing
Once your post bases are down and the anchors are fully cured or set, the actual railing assembly is relatively straightforward. The sequence is: install posts, cut and attach bottom rail, space and attach balusters, install top rail.
- Set posts into bases and plumb them in both directions using a level; tighten base hardware once plumb is confirmed
- Snap a chalk line at the top of all posts to check that they are at a consistent height; trim any that are high using a miter saw or reciprocating saw
- Attach bottom rail to posts at the correct height — bottom rail should be close enough to the walking surface that a 4-inch sphere cannot pass under it at any point; most systems run the bottom rail 2 to 4 inches above the slab
- Space balusters evenly between posts so that no gap exceeds 4 inches (use a 3.75-inch spacer block to make this fast and consistent)
- Secure each baluster to the top and bottom rail using the hardware supplied with your railing system
- Install the top rail and confirm it is level across the full run
- Torque all connection hardware to the manufacturer's specified values — under-torqued connections allow the railing to rack over time
- Apply sealant at the post-to-base joint and at any cut ends of wood or composite material
Sealing and Flashing Around Post Bases
Water pooling around post bases is one of the most common reasons railings fail early, it corrodes the hardware, rots wood posts, and can migrate into cracks in the slab and freeze-thaw cycle your concrete apart over a few winters. Once every post base is installed and the railing is assembled, go back with a high-quality polyurethane or silicone sealant and run a bead around the full perimeter of every base plate, pressing it into the gap between the plate and the concrete. Smooth it with a wet finger. If there are gaps or slight voids under the plate (common on uneven older concrete), pack them with hydraulic cement before sealing. This step takes 20 minutes and adds years to the installation.
Troubleshooting Common Problems
Post Feels Wobbly After Anchoring
If a post moves at the base even after you've torqued the anchors, the most common causes are an oversized drill hole, an anchor that's seated in a hollow or cracked section of concrete, or an anchor that wasn't set to full depth. Try tightening the anchor further, but stop immediately if you feel the nut spinning freely, which means the threads are stripped or the anchor is spinning in the hole. If that happens, remove the anchor, fill the hole with epoxy, let it cure fully, and re-drill in the same location with the correct bit size. Never leave a loose post in service on a raised surface.
Anchor Lifting the Concrete or Causing Surface Cracks
This usually means the hole was drilled too close to a slab edge, the concrete is weaker than expected, or the anchor was over-torqued. Stop tightening the moment you see surface cracking. Remove the anchor, patch the cracked area with epoxy repair compound, and relocate the anchor at least 3 inches further from the edge. If the slab keeps cracking under anchor load, it may be thinner or weaker than a surface inspection suggested, switch to adhesive anchors with a larger bearing plate to distribute the load, or consider having the slab evaluated before proceeding.
Hollow-Sounding Concrete Under Post Location
A dead, hollow thud when you tap the concrete with a hammer indicates either a void under the slab (from soil erosion or a poorly compacted sub-base) or a delaminated surface layer. Anchoring into this section gives you a fraction of the expected holding strength. The right fix is to inject expanding polyurethane foam through small drilled ports to fill the void (mudjacking or foam lifting), then re-drill for your anchors once the foam has cured. For small isolated voids, epoxy injection works. Either way, don't skip this, an anchor in hollow concrete can fail at a fraction of its rated load.
Railing Not Plumb After Installation
If the post base has slotted holes (which most do), you may still be able to shift the post slightly before fully torquing the anchors. Loosen the anchor nuts, adjust, re-check plumb, and re-tighten. If the anchors are set and the post is still out of plumb, adjustable post bases or shim plates can correct minor lean of up to 2 to 3 degrees. Anything beyond that usually requires removing the base and starting over.
When to Call a Pro
Most railing installations on residential concrete patios are genuinely DIY-able if you follow these steps carefully. Call a licensed contractor or structural engineer when: your slab is badly cracked or shows signs of structural movement; you're installing on a patio elevated more than 6 feet above grade; you need to cut or core-drill through a post-tensioned slab (cutting a PT tendon is a serious structural event); your local code requires a stamped engineer's letter for the anchor design; or you're working on a commercial property where IBC applies and inspection requirements are more rigorous. Knowing when to hand it off is part of being a good DIYer, not a failure.
Time and Cost Summary
| Task | Estimated Time | Notes |
|---|---|---|
| Layout and planning | 1–2 hours | Includes permit research and material ordering |
| Slab prep and crack repair (if needed) | 2–4 hours + cure time | Allow 24–48 hours for patching compounds to cure before drilling |
| Drilling and setting anchors | 1–3 hours | Depends on post count; epoxy anchors add 24-hour cure wait |
| Post installation | 1–2 hours | |
| Rail and baluster assembly | 2–4 hours | Longer for glass panel systems |
| Sealing and cleanup | 30–60 minutes | |
| Total (standard surface-mount aluminum) | 6–10 hours over 2 days | First day: prep and anchors. Second day: assemble after cure. |
| Total materials (10 LF, aluminum kit) | $700–$1,400 | Includes post bases, anchors, railing kit, sealants, and bits |
Installing a railing on a concrete patio is one of those projects that looks intimidating on paper but comes together very logically once you understand why each step exists. Get the code measurements right, pick your anchor type based on your slab thickness and load requirements, drill clean holes to the correct depth, and seal everything when you're done. Do those things and you'll have a railing that's solid, code-compliant, and built to outlast the slab it's sitting on.
FAQ
What are the basic steps a DIY homeowner should follow to plan and install a railing on an existing concrete patio?
1) Measure the patio edge height and length and check local guard height and opening rules (IRC typically 36 in residential). 2) Choose material (wood, metal, glass, composite) and mounting method (surface‑mounted vs embedded posts). 3) Locate utilities and check slab thickness/condition. 4) Select approved anchors or sleeve/core details and confirm loads with manufacturer ESRs or an engineer. 5) Lay out post locations, drill/cut for anchors or core footings, install posts per anchor instructions, assemble rails/balusters, seal flashings and patch concrete. 6) Inspect, test, and obtain any required final permit sign‑off.
How do I decide between surface‑mounted anchors and embedded posts?
Surface‑mounted anchors: faster, less invasive, best when slab is thick (typically >=4–6 in) and in good condition; use ICC‑ES‑rated post‑installed anchors or wedge/sleeve anchors. Embedded posts (set in concrete footings or core‑drilled sleeves): stronger and better for thin/damaged slabs or heavier rail systems (glass, heavy metal); require coring or concrete removal and new concrete or sleeves. Choose embedded when code or load requirements demand higher capacity, when the slab is too thin/weak, or for aesthetics.
What railing materials are best for concrete patios and what are their pros/cons?
Wood: warm, easy to customize, but needs flashing, anchors protected from moisture, and periodic maintenance. Metal (aluminum/steel): durable, low maintenance (aluminum), high strength; steel may need corrosion protection and heavier anchors. Glass panels: modern look, higher loads at posts and heavier anchors/footings required, more expensive and often requires embedded posts. Composite: low maintenance, looks like wood, moderate strength. Match material choice to load needs, mounting method, and local climate.
What code requirements should I check before installing a patio guard?
Confirm the adopted code edition and local amendments with your AHJ. Typical model requirements: residential guard height 36 in (IRC R312), stair guard heights sometimes 34 in, opening limitation: 4‑in sphere rule for residential infill (IRC R312.1.3), and structural loads: 200 lbf concentrated at top rail and 50 lbf/ft2 for infill or 50 lbf over 1 sq ft. Verify applicable limits and whether a higher (42 in) commercial height applies.
How do I choose the correct anchor type for mounting posts to concrete?
Select anchors with ICC‑ES evaluation reports (ESRs) or manufacturer data: mechanical anchors (wedge, sleeve, screw anchors like Titen HD) for many retrofit surface mounts; adhesive (chemical) anchors for higher loads, cracked concrete, or where edge distances/embedment control is critical. Use manufacturers’ ESR tables for allowable loads, required embedment/edge distances, and installation steps. For anything close to limits or for cracked/very thin slabs, consult an engineer.
How do I drill and install mechanical anchors (wedge, sleeve, screw) into concrete correctly?
1) Use correct drill bit diameter and hammer drill/masonry bit per anchor instructions. 2) Drill to specified depth and keep hole perpendicular. 3) Clean hole thoroughly of dust (brush + compressed air or three‑step clean). 4) Insert anchor and tighten to manufacturer torque; follow embedment and edge‑distance requirements. 5) For hollow or delaminated concrete, don’t rely on mechanical anchors—use adhesive anchors with proper embedment or provide a core footing.