
You can smooth a rough concrete patio by grinding down high spots, filling low areas and surface defects with a polymer-modified resurfacer or skim coat, and then sealing the finished surface. The right method depends entirely on what kind of rough you're dealing with: light surface texture and trowel marks call for a thin resurfacer or skim coat; deeper pitting, spalling, or aggregate exposure needs grinding first, then patching; and significant unevenness across the slab may require a self-leveling overlay. Once you know which category your patio falls into, the work is very doable as a weekend DIY project.
How to Smooth Rough Concrete Patio: DIY Steps

Silas Morrison
6 Jul 2026
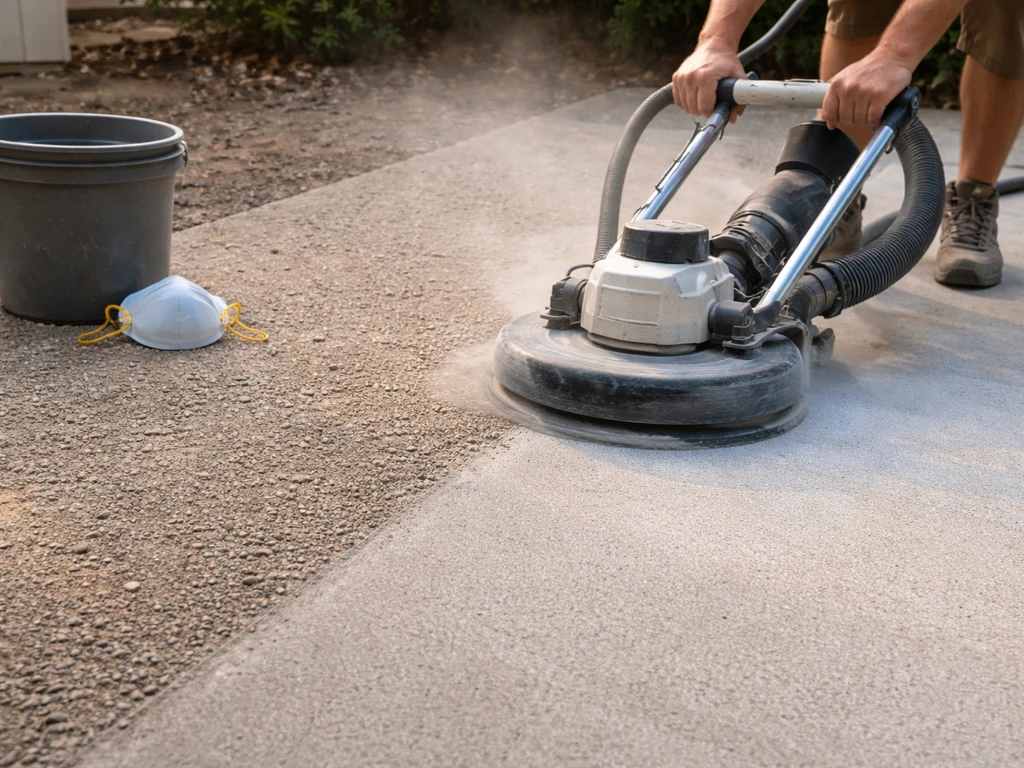
First, figure out what kind of rough you actually have
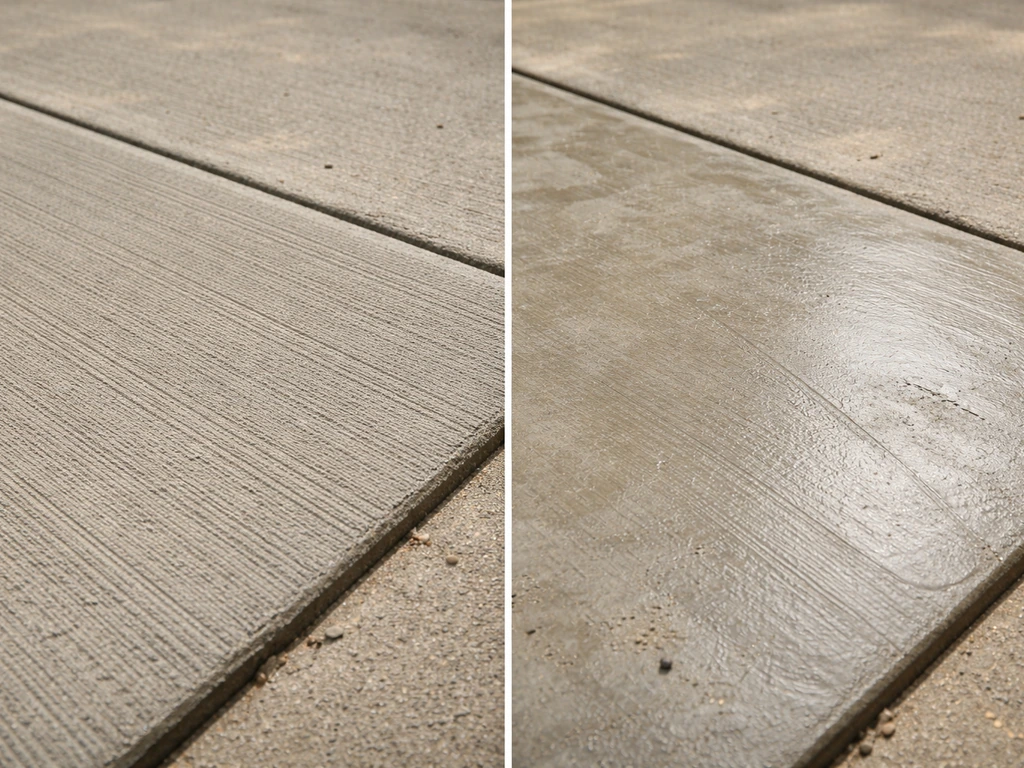
Not all roughness is the same, and treating the wrong type with the wrong method is how people end up frustrated, wasting money, or making the slab worse. Stand on your patio barefoot and walk around. Run your hand across the surface in a few spots. Then get down and look at it at a low angle with a flashlight.
Here are the most common types you'll find:
- Broom finish texture: Intentional parallel grooves left by dragging a broom over fresh concrete. This is the most common patio finish and is designed to be slightly rough for traction. If this is what you have and it's uniform, it's not damage — it just needs smoothing.
- Trowel marks and swirl patterns: Circular or arc-shaped marks from a hand or power trowel. The surface is hard but uneven in feel.
- Surface pitting and popouts: Small craters where aggregate has pulled out or paste has spalled. Usually caused by freeze-thaw cycles, deicing salts, or a weak surface layer from overworking the pour.
- Scaling and spalling: Flat flaking of the top layer of concrete, often in patches. Freeze-thaw damage and salt exposure are the main culprits. If the flaking is deeper than about 1/4 inch, you have a structural surface issue, not just a cosmetic one.
- Exposed aggregate: Coarse stone is showing through the surface, which happens when the cement paste wore away. The surface feels like sandpaper.
- High spots and lippage: One area of the slab is noticeably higher than its neighbor, creating a bump or ridge you can feel underfoot.
- Efflorescence: White powdery deposits on the surface caused by moisture migrating through the slab and depositing mineral salts. This is a surface contamination issue that must be resolved before any coating or overlay.
The cause matters too. Pitting and spalling caused by salts and freeze-thaw cycles can keep recurring if you don't seal the finished surface properly. Trowel marks and broom texture are cosmetic. Knowing which you're dealing with tells you whether you're doing a quick skim or a more involved repair-and-resurface job.
Safety gear and tools you'll need before you start
Grinding concrete is genuinely hazardous if you skip the respiratory protection. If you want to learn how to sand and grind concrete correctly, follow a step-by-step approach and match the grit to the kind of rough you’re fixing Grinding concrete is genuinely hazardous. Concrete dust contains respirable crystalline silica, which causes serious, permanent lung disease with repeated exposure. OSHA's silica standard (29 CFR 1926.1153) requires specific dust controls for grinding tasks, including either a continuously fed water delivery system at the grinding surface or a close-capture shroud connected to a HEPA-filtered vacuum. For DIYers, a dust shroud on your angle grinder or floor grinder plus a HEPA vacuum is the practical route. On top of that, wear a properly fitted respirator rated at least N95, and ideally a half-mask with a P100 filter. A loose dust mask is not sufficient.
Here's a full checklist of what you'll need, organized by task:
| Category | Item | Notes |
|---|---|---|
| Safety | Half-mask respirator with P100 filters (or minimum N95) | Must fit tightly — no gaps at the face seal |
| Safety | Safety glasses or goggles | Flying chips and slurry are common |
| Safety | Hearing protection | Angle grinders are loud |
| Safety | Knee pads | You'll be on the ground a lot |
| Safety | Chemical-resistant gloves | For resurfacer and cleaner contact |
| Grinding | Angle grinder with dust shroud + diamond cup wheel (16–30 grit for heavy work, 50–80 grit for smoothing) | Rent a walk-behind floor grinder for large patios |
| Grinding | HEPA-filtered shop vacuum with hose connection for shroud | Standard vacs recirculate fine silica dust — HEPA only |
| Cleaning/Prep | Pressure washer (1,500–3,000 PSI) | For degreasing and opening the surface |
| Cleaning/Prep | Concrete degreaser or TSP substitute | Removes oil and grease before any overlay |
| Cleaning/Prep | Wire brush and stiff scrub brush | For working cleaner into cracks and edges |
| Cleaning/Prep | Plastic sheeting (12x12 inches) | For ASTM D4263 moisture test |
| Patching/Resurfacing | Polymer-modified concrete resurfacer (e.g., SikaQuick Concrete Resurfacer) | Feather edge to 1/2 inch depth coverage |
| Patching/Resurfacing | Skim coat / feathering compound (e.g., Sika Level SkimCoat) | For very thin transitions and light surface leveling |
| Patching/Resurfacing | Self-leveling overlay (if applicable) | For larger low areas; has edge behavior limits |
| Patching/Resurfacing | Concrete bonding primer | Critical for overlay adhesion |
| Patching/Resurfacing | Drill with mixing paddle | For consistent resurfacer mixing |
| Application | Rubber squeegee, flat trowel, and gauge rake | For spreading and feathering overlays |
| Sealing | Penetrating concrete sealer or acrylic sealer | Applied after full cure |
For large patios (over 200 square feet), seriously consider renting a walk-behind floor grinder. It covers ground faster and gives you more consistent pressure than an angle grinder, which takes real practice to use without leaving swirl marks.
Surface prep: clean it like you mean it
This is the step most DIYers rush, and it's the one that determines whether your resurfacer bonds permanently or peels off in two years. No overlay or coating will stick well to a dirty, oily, or sealed surface. Budget at least half a day just for prep.
Step 1: Clear and inspect
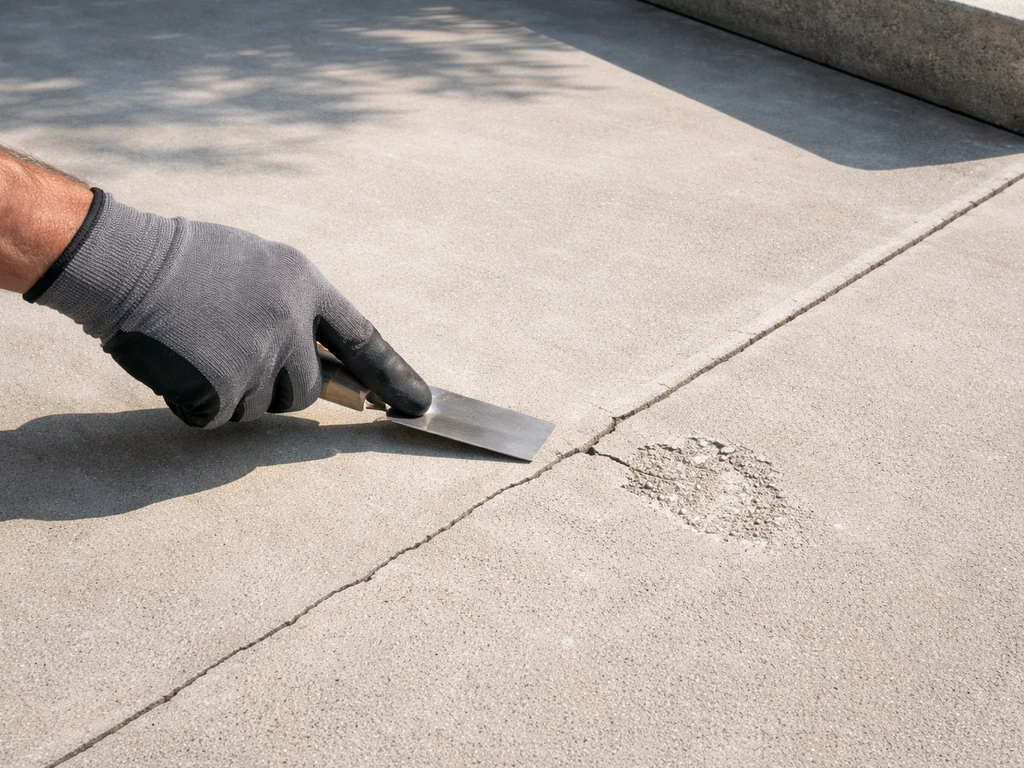
Move all furniture off the patio and sweep it clean. Do a full visual inspection in good light. Mark any cracks wider than a hairline, any spalled areas, and any high spots with chalk so you know exactly where to focus your work.
Step 2: Degrease and clean
Apply a concrete degreaser or TSP substitute to the whole surface, scrub it in with a stiff brush, and let it dwell for 10 to 15 minutes. Then pressure wash the entire slab at 2,000 to 3,000 PSI. If you can see oil stains (from cars, grills, or old furniture feet), hit those spots a second time. Any oil contamination under a resurfacer causes delamination.
Step 3: Remove old paint, sealers, and coatings
If there's an existing sealer or paint on the slab, it must come off before you apply anything new. A chemical stripper works for most coatings; apply it, let it dwell, then scrape and pressure wash. For stubborn coatings, grinding is the most reliable removal method. The goal is bare, open concrete. To check if a sealer is still present, drip a few drops of water on the surface: if it beads up instead of absorbing, there's still a sealer there.
Step 4: Test for moisture
Moisture migrating up through the slab is a silent killer for overlays and sealers. Use the ASTM D4263 plastic sheet test: tape a 12x12-inch piece of plastic sheet flat to the clean, dry concrete with all edges sealed, leave it for 16 to 24 hours, then check underneath for condensation. If moisture has collected, you have a vapor drive issue. Address it with a moisture-tolerant primer or a breathable penetrating sealer rather than a film-forming coating that will trap moisture and blister. LATICRETE’s TDS 230 primer guide also uses a water response timing test to categorize substrate suction as High, Normal, or Non-suction.
Step 5: Open the surface profile
Overlays and resurfacers need a roughened surface to bond to. The ICRI Concrete Surface Profile (CSP) system defines the texture levels required: most thin overlays and resurfacers need at least a CSP 3 to 5 profile, which looks like 60-grit sandpaper. If the slab was previously sealed or has a very smooth trowel finish, you need to mechanically profile it before applying anything. A pass with a coarse diamond cup wheel or a light scarify achieves this quickly. If you're already planning to grind for smoothing, this step is built in.
Choosing the right smoothing method for your situation
There are three main approaches, and picking the wrong one wastes time and money. Here's how to choose:
| Method | Best for | Thickness range | DIY difficulty | Quick take |
|---|---|---|---|---|
| Grinding + polishing | High spots, trowel marks, broom texture, aggregate exposure, prep for overlay | Removes 1/16" to 1/4" or more depending on grit and passes | Moderate — equipment rental needed | Best for leveling bumps and opening the surface; pairs well with a skim coat after |
| Polymer-modified resurfacer | Pitting, scaling, spalling, worn surfaces with low spots up to 1/2" | Feather edge to 1/2" (13 mm) per SikaQuick specs | Easy to moderate — mix and spread | Workhorse method for most DIY smoothing projects |
| Skim coat / feathering compound | Very light surface imperfections, final leveling over resurfaced area, thin transitions | Feather edge to 1/2" (e.g., Sika Level SkimCoat) | Moderate — thin application requires technique | Great finishing layer; don't use as the only layer over serious defects |
| Self-leveling overlay | Larger low areas, significant unevenness across the slab, when you need a truly flat floor | Typically 1/8" to 1" depending on product | Moderate — fast set time, must work quickly | Note: self-levelers do not feather at edges; you'll need a skim coat at transitions |
For most homeowners with a broom-finished or lightly scaled patio, the practical answer is: grind any high spots or raised trowel ridges, then apply a polymer-modified resurfacer across the whole surface, feathering the edges. That combination handles 80% of rough patio situations.
How to grind for a uniform finish
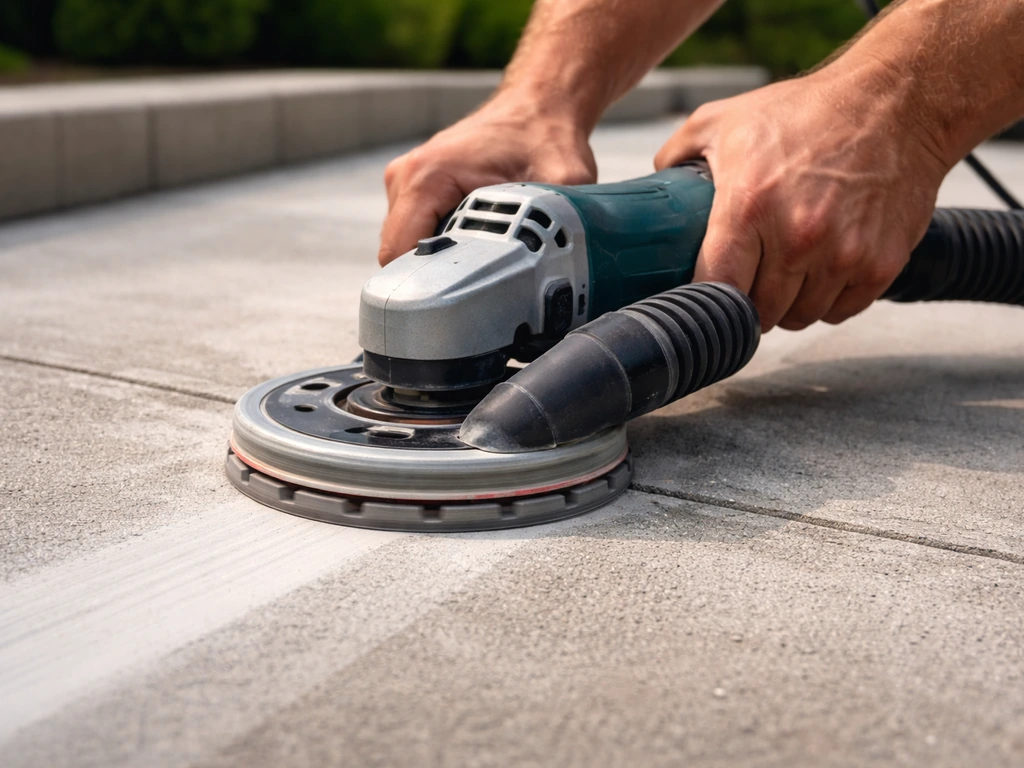
Grinding is the most physical part of this project, but it gives you the most control over the final flatness. The key is grit progression: start coarse to remove material, then step up through finer grits to refine the surface. Skipping grits leaves deep scratches that show through sealers and thin overlays.
- Set up dust control first. Attach your dust shroud to the angle grinder and connect the hose to a HEPA-filtered vacuum. Put on your respirator, safety glasses, and hearing protection before you turn anything on.
- Start with a 16 to 30 grit diamond cup wheel for heavy material removal — trowel ridges, high spots, aggregate bumps. Work in slow, overlapping passes in one direction. Don't bear down hard; let the weight of the tool do the work. Moving too fast leaves chatter marks; moving too slow can burn or glaze the wheel.
- After the first pass, sweep and vacuum the surface and check your progress. Use a long straightedge (a 4-foot level works well) laid across the slab to spot remaining high areas.
- Switch to 50 to 80 grit and make a second pass over the whole surface, this time going perpendicular to your first pass direction. This cross-hatching removes the deep scratches from the coarse grit and evens out the surface profile.
- For areas needing fine smoothing — like if you want a semi-polished finish without an overlay — follow up with 100 to 120 grit. For a basic smooth surface before applying a resurfacer, 50 to 80 grit is usually the stopping point.
- Vacuum and wet-wipe the surface. Check it one more time with the straightedge. Any remaining low spots that grinding won't fix (you'd have to remove too much material) are candidates for patching with resurfacer.
For a walk-behind floor grinder, the same grit progression applies but you'll move in long parallel passes across the full width of the slab, then come back perpendicular. The bigger machine is much faster for open areas but less maneuverable at edges, so finish the perimeter 12 to 18 inches with the angle grinder.
If grinding is the main focus of your project rather than just a prep step, the full technique walkthrough overlaps closely with what you'd find in a dedicated guide on how to grind a concrete patio, the approach and grit progression are the same whether you're just prepping or going for a finished grind.
Applying resurfacer and skim coat for a smooth finish
Once grinding is done and the surface is clean, dry, and profiled, it's time to apply the smoothing material. This is where your patio actually starts to look and feel different.
Prime the surface
Always apply a bonding primer before a resurfacer or overlay. This is non-negotiable. Primer increases bond strength, reduces suction variation across the slab (which causes uneven absorption and blotchy curing), and improves overall performance of whatever you put on top. Mix the primer per the manufacturer's instructions, apply it with a roller, and let it become tacky but not fully dry before you lay down the resurfacer. If it dries completely, apply a second coat.
Mixing the resurfacer
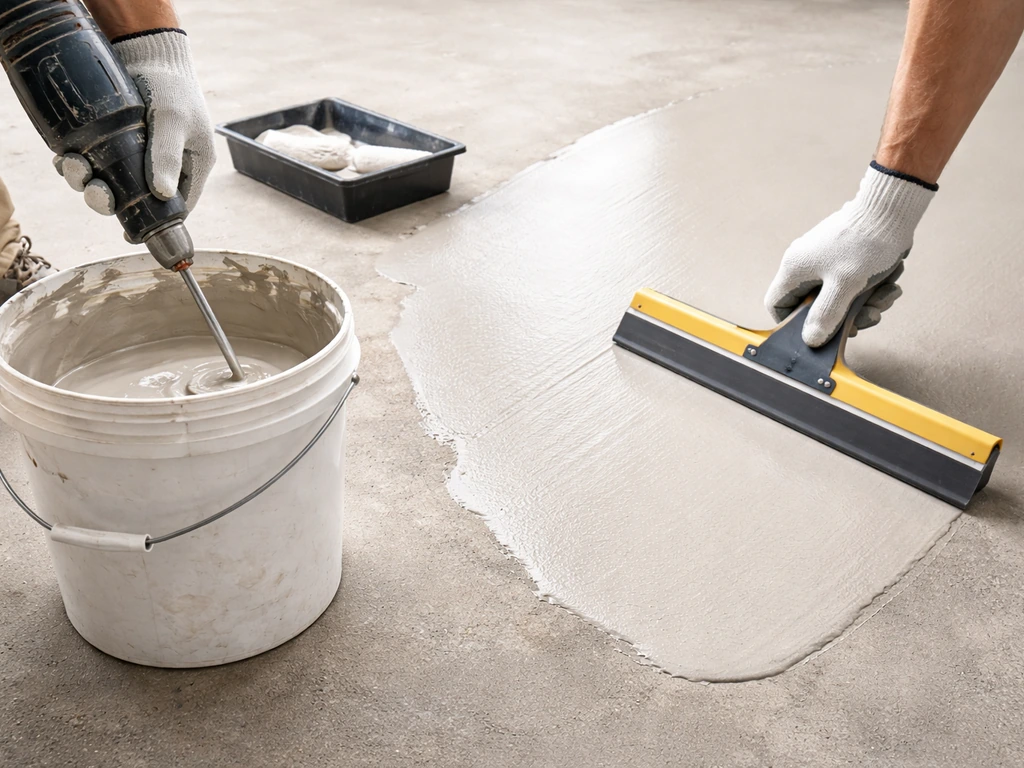
Use a drill with a mixing paddle, not a hand stir. Pour the correct amount of water into your bucket first, then add the dry resurfacer powder while mixing. Scrape the sides and bottom of the bucket. The goal is a lump-free, pourable but not soupy consistency. Most polymer-modified resurfacers (like SikaQuick) specify the water-to-powder ratio on the bag; follow it exactly. Too much water weakens the finished surface and increases shrinkage cracking.
Applying and feathering
Pour the mixed resurfacer onto the slab and spread it with a rubber squeegee or gauge rake, working in sections of about 50 to 100 square feet at a time. Keep a wet edge, don't let the leading edge dry before you get back to it. At the slab edges and anywhere the material transitions to nothing, feather it down to a true thin edge using a flat trowel. This is the part that takes practice. The goal is a gradual taper, not a hard line or a bump.
Products like SikaQuick Concrete Resurfacer are designed to go from a feather edge up to 1/2 inch thick in a single application. For very thin repairs (1/32 to 1/16 inch), a dedicated skim coat product like Sika Level SkimCoat gives you better workability at those thin applications. Butterfield Color's MT Resurfacer applies a base coat at 1/16 to 1/8 inch and a finish coat at 1/32 to 1/16 inch, that two-coat system is a good model for getting a very refined finish on a whole patio.
Working with self-leveling overlays
If you're using a self-leveling compound for larger low areas, keep in mind that self-levelers do not form true feather edges at their perimeter. The material will pool and create a visible ridge or bump where it ends. You need to either contain it with edge forms, or plan to skim coat the transition zones with a hand-applied feathering compound afterward. This is a common mistake that causes a visible line across the patio floor.
Curing
Keep foot traffic off the resurfaced surface for at least 24 hours, and keep it misted lightly if the weather is hot and dry to prevent too-fast surface drying, which causes shrinkage cracks. Full cure and hardness typically take 28 days for cementitious products, though most are ready for sealing and light use within 3 to 7 days. Check your specific product data sheet for exact times.
Seal it to keep it smooth
Sealing is not optional if you want the smoothness to last. If you want a cooler concrete patio in hot weather, focus on reflective or breathable surface options and add a proper heat-reducing finish Sealing is not optional. An unsealed concrete surface, especially one that's been resurfaced, is vulnerable to the same freeze-thaw damage, water infiltration, and salt attack that roughened it in the first place.
Choose your sealer based on your priorities:
- Penetrating silane-siloxane sealer: Soaks into the concrete and provides invisible water repellency without changing the surface appearance or texture. Best for patios where you want natural-looking concrete with maximum freeze-thaw protection. Reapply every 3 to 5 years.
- Acrylic sealer (solvent or water-based): Forms a thin film on the surface, gives a slight sheen, and enhances color. Easier to apply than epoxy, and a good choice for resurfaced patios. Reapply every 2 to 3 years as it wears.
- Epoxy or polyurethane coating: Durable, high-gloss finish that provides excellent protection. More involved to apply (two-part mixing, strict temperature and moisture requirements), but significantly longer lasting. Check product data sheets for recoat windows — for example, Rust-Oleum EpoxyShield specifies tack-free time and recoat windows that vary with temperature.
Before applying any sealer or coating, the concrete must be fully cured, clean, and dry. Recheck with the plastic sheet moisture test (ASTM D4263) if you have any doubt. Sealing over a wet slab traps moisture and causes the sealer to blister or peel. Apply sealer with a roller in thin, even coats, two thin coats always outperform one thick coat.
Ongoing maintenance to stay smooth
Once the patio is smooth and sealed, keeping it that way is mostly about regular inspection and not ignoring small problems. Reseal on schedule (check the surface annually, if water is no longer beading, it's time). Avoid using metal-bladed scrapers or wire brushes on the surface. In winter, use sand or kitty litter for traction instead of rock salt or calcium chloride, which accelerate surface scaling. If you need to remove ice, avoid rock salt and calcium chloride because they can accelerate surface scaling and contribute to roughening over time rock salt or calcium chloride. Sweep regularly to keep abrasive grit from grinding into the surface under foot traffic and furniture. Catch hairline cracks early and fill them with a concrete crack filler before they open up and let water in.
If you're in a cold climate, sealing is especially important since freeze-thaw cycles are the leading cause of concrete patio roughening over time. A penetrating sealer that repels water prevents it from saturating the slab, freezing, and expanding, which is exactly the mechanism that causes pitting and spalling to start all over again.
Common mistakes to avoid
- Skipping the primer: Resurfacer applied directly to unsealed concrete with variable suction will absorb unevenly, creating blotchy hardness and weak spots. Always prime.
- Applying resurfacer too thick in one pass: Most products have a maximum single-application thickness. Going thicker causes cracking as the material shrinks during cure. Build it up in layers if needed.
- Stopping the feather instead of tapering it: A hard edge at the end of a resurfaced area will be visible and will eventually delaminate. Take extra time to feather it down to nothing.
- Grinding in one direction only: Single-direction grinding leaves parallel scratch lines that telegraph through thin overlays. Always cross the passes.
- Working in direct hot sun: Resurfacers and overlays dry too fast in the sun and heat, causing surface cracking. Work in the morning, provide shade if possible, and mist the slab beforehand.
- Using a regular shop vac for silica dust: Standard vacuums blow fine silica particles back into the air. HEPA filtration only.
- Sealing before the concrete is truly dry: Trapped moisture causes blistering. Always do the plastic sheet test first.
FAQ
Can I smooth a rough concrete patio without grinding?
Sometimes, but only if the roughness is mostly cosmetic (light broom texture, minor trowel ridges) and the slab is otherwise sound. If you have pitting, spalls, exposed aggregate, or uneven highs, skipping mechanical profiling usually leads to a patchy look or coating peeling. Also confirm the surface is unsealed or properly stripped and fully clean before using any resurfacer.
How do I tell if I have a “soft” or “dusty” concrete surface that will fail underneath resurfacer?
After cleaning and drying, rub a gloved hand across the concrete or tape a small area with clear tape and peel it up. If you see chalky residue transfer, the surface likely has weak paste or contamination, and resurfacer bond will be poor. The fix is mechanical profiling plus a bonding primer designed for marginal concrete, and in some cases replacement of severely degraded areas.
What’s the difference between patching cracks and smoothing the whole patio?
Filling cracks stops water pathways, but it does not correct global flatness. If the patio has widespread height differences, you still need profiling and resurfacing or leveling. As a rule, address cracks and spalled spots first, then do the broad smoothing, otherwise the resurfacer will telegraph voids or crack edges.
Do I need to worry about expansion joints before resurfacing?
Yes. Do not bridge active control or expansion joints with rigid resurfacer. Typically you either leave joints unfilled, pre-treat them with the correct joint filler, or use a system that accommodates movement. If you cover joints like normal concrete, you can create visible cracking or debonding right along the seams.
Can I use a self-leveling compound to make a smooth, feather-edge finish all over?
Not usually. Self-levelers tend to form a thicker perimeter ridge because they are not designed to feather to zero at edges. For a seamless look, either contain the pour with temporary forms and then skim the transitions afterward, or use a feather-capable resurfacer for the full surface.
How thin is too thin for a single resurfacer pass?
Most polymer-modified resurfacers can bridge up to a specified minimum and maximum thickness, but the “thin end” matters for workability and coverage. If your plan involves extremely thin application at feather edges, use the product’s stated feathering capability or switch to a dedicated skim coat. Otherwise you may end up with pinholes, weak areas, or visible scratch marks.
Why do resurfaced patios sometimes show pinholes or tiny bubbles?
Common causes are moisture trapped in the slab, mixing water added beyond the labeled ratio, insufficient primer, or pouring in hot, windy conditions that skin over too fast. The fix is to follow the exact water-to-powder ratio, ensure the primer reaches the tacky state you expect, and cure properly by keeping it lightly misted when conditions are hot and dry.
How long should I wait before sealing resurfacer, and what if rain hits during cure?
Don’t rely on guesswork, follow the product data sheet. In general cementitious resurfacing often reaches “light use” in days, but full strength is closer to weeks. If rain contacts the surface before it sets, you can get surface defects or poor bond, so plan on protecting the work area and monitoring the weather closely during the cure window.
Should I seal if the patio gets very hot, like in direct sun?
Yes, but choose the right type for heat and slip resistance. Some coatings get slick or change gloss when they cure. If you want a cooler feel, look for reflective or breathable options and confirm the product is rated for exterior freeze-thaw if you’re in a cold climate.
What do I do if the resurfacer peels after a season?
Peeling usually points to inadequate surface prep, contamination (oil, sealers, paint), or moisture problems. The practical next steps are to remove failing material back to sound concrete, re-profile the bonding surface, rerun the moisture test, and use a compatible primer system. Avoid trying to “patch over failure,” because the new layer bonds to the same weak substrate.
Is it safe to use rock salt or de-icers after smoothing?
Best practice is to avoid rock salt and calcium chloride because they accelerate scaling and surface roughening over time. For traction, use sand or kitty litter. If you must use an alternative de-icer, test it in a small area first and keep up with periodic cleaning so abrasive grit does not grind into the finish.