
You can make a concrete patio look dramatically better without tearing it out, and in most cases you can do it yourself over a weekend or two. The right approach depends on what's actually wrong: surface grime, stains, cracks, uneven slabs, or just a dull, dated appearance. Start by cleaning and assessing the slab honestly, then choose from cosmetic fixes, targeted repairs, or a full refinish. Most patios just need a deep clean, a few crack repairs, and a fresh coat of sealer to look years younger. The more complex jobs, like lifting a settled slab or applying a decorative overlay, take more prep but are still within reach for a patient DIYer. For a step-by-step how-to on how to fix ugly concrete patio problems, from cleaning and stain removal to repairs and refinishing, see our detailed guide on how to fix ugly concrete patio.
Making Concrete Patio Look Better: DIY Fixes, Finishes & Costs

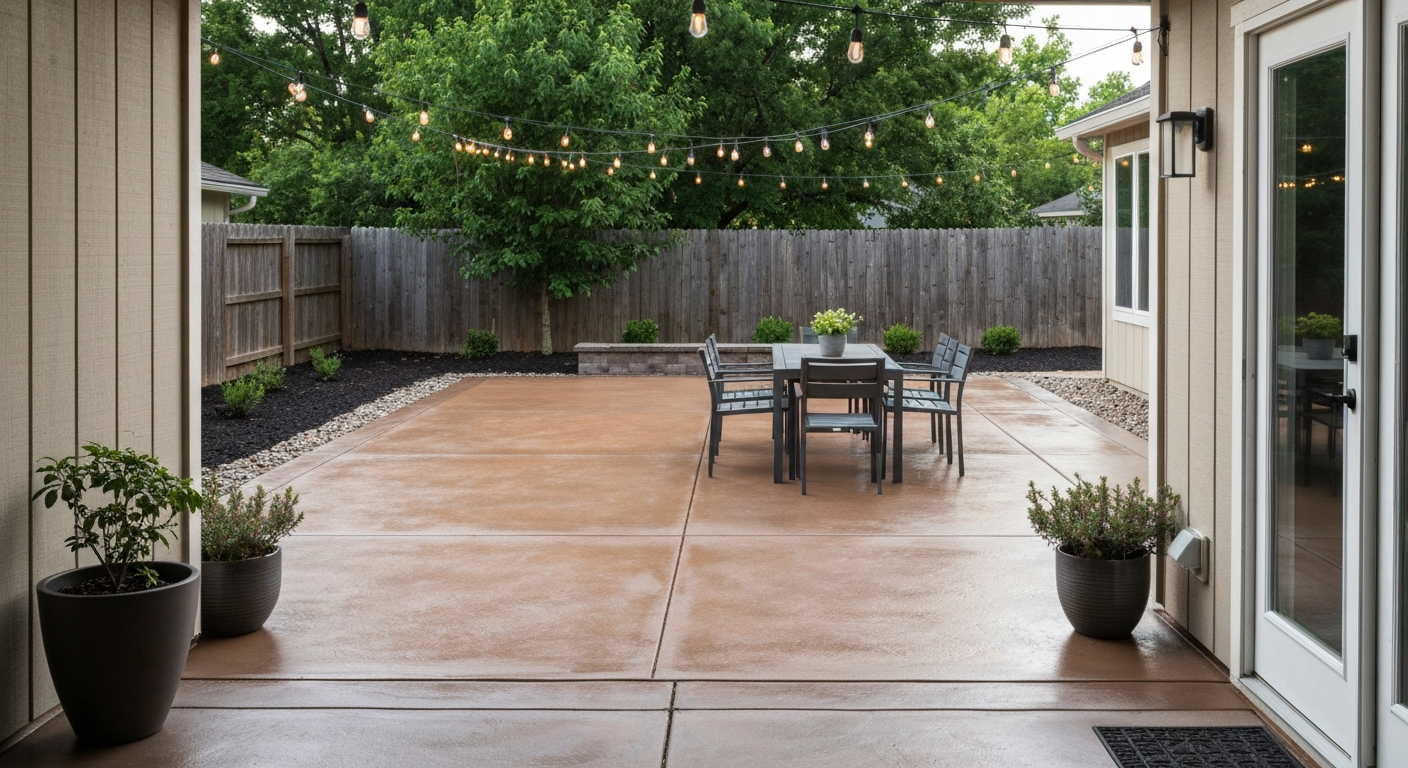
Pick your path: refresh, repair, refinish, or cover
Before you spend a dollar or rent a tool, spend 20 minutes walking the slab and asking yourself one honest question: what is actually making this patio look bad? The answer almost always points you toward one of four routes.
| What you see | Best route | DIY-friendly? | Rough cost range |
|---|---|---|---|
| Grime, algae, dullness, clutter | Refresh: clean, brighten, seal, redecorate | Yes | $50–$300 |
| Stains (oil, rust, paint, mildew) | Repair: targeted stain removal + seal | Yes, with care | $30–$150 |
| Surface cracks, spalling, pitting | Repair: patch, fill, resurface | Most cases yes | $100–$600 |
| Settled slabs, trip hazards, large cracks | Repair: foam lift, mudjacking, or pro call | Partial DIY | $500–$3,000+ |
| Sound slab, just ugly or plain | Refinish: stain, paint, overlay, microtopping | Yes with prep | $200–$1,500 |
| Crumbling, heaved, or structurally shot | Cover: pavers, tiles, or deck over it | Depends on scope | $1,000–$8,000+ |
I'd encourage you to resist jumping straight to the "refinish" bucket if you haven't cleaned the slab first. I've seen patios that looked like they needed a full overlay turn beautiful after a proper pressure wash and a gallon of stain. Clean first, then decide.
Inspect, measure, and document before you touch anything
A good inspection takes about 30 minutes and saves you from buying the wrong materials or starting a repair that needs a different fix entirely. Grab a notepad, a tape measure, a screwdriver, and your phone camera.
- Photograph the entire slab in good light before you clean anything. You'll want a "before" reference and you'll notice things in photos you miss walking on it.
- Measure the patio's total square footage (length x width). Write it down — you'll need it for every material calculation.
- Probe cracks with a screwdriver. Hairline cracks that don't widen or deepen are cosmetic. Cracks wider than 1/4 inch, cracks with vertical displacement, or cracks that run the full width of a slab are structural concerns.
- Check for spalling: surface flaking or pop-outs. Note the depth. Shallow spalls (under 1/4 inch) are patch-and-seal jobs. Deep spalling down to aggregate usually means the surface has failed and needs a full overlay.
- Test for settled slabs by placing a 4-foot level across joints. More than 1/2 inch of vertical displacement is a trip hazard and may need lifting or grinding.
- Look for efflorescence (white powdery deposits) near edges or joints — a sign of moisture migration from below.
- Check drainage by running a hose. Water should sheet off the slab, not pool. Pooling water causes more staining and biological growth.
- Note any existing sealer by dripping water on the surface. If it beads, there's sealer present. If it soaks in within 30 seconds, the slab is unsealed or the sealer has failed.
Once you've documented everything, group your findings into the four categories from the roadmap above. A single patio can have multiple issues, and that's normal. Just handle them in the right order: cleaning first, then stain removal, then structural repairs, then cosmetic work. Skipping that sequence is the most common DIY mistake I see.
Safety prep and permits: what you actually need to know
PPE and ventilation
Concrete work involves chemicals that can hurt you if you're careless. This isn't scare-talk, it's just practical. The biggest hazards are acid-based cleaners, alkaline degreasers, and coating fumes. Here's a straightforward PPE list for each scenario.
| Task | Gloves | Eye/face protection | Respiratory protection | Other |
|---|---|---|---|---|
| Pressure washing | Nitrile or rubber | Safety glasses | Not required | Non-slip footwear |
| Oxygen bleach cleaning | Nitrile | Safety glasses | Not required | Keep off skin |
| TSP degreasing | Chemical-resistant rubber | Safety goggles + face shield | Dust mask if mixing powder | Alkaline — rinse skin immediately |
| Muriatic acid etching | Chemical-resistant rubber | Safety goggles + face shield | Acid-gas respirator (NIOSH-approved) | Work outdoors only, neutralize runoff |
| Epoxy or coating application | Nitrile | Safety glasses | Organic vapor respirator | Ventilate enclosed areas |
| Grinding/shot-blasting | Work gloves | Safety glasses + dust mask | N95 minimum (silica dust) | Wet-vac or HEPA vac required |
Muriatic acid deserves special mention because it's sold at every hardware store and people underestimate it. Hydrochloric acid fumes are a serious respiratory and eye hazard. OSHA and NIOSH guidance is clear: if you're using it outside in still air, an acid-gas respirator is required, not optional. I switched to phosphoric-acid-based etchers years ago for most concrete prep work and I haven't looked back. They're slower but much safer to handle.
Waste disposal
Acid rinse water, paint stripper residue, and chemical cleaners should not go down storm drains. Neutralize acid wash water with baking soda until it stops fizzing, then dispose per your local municipality's guidelines. Many areas require you to collect and dispose of chemical wastewater rather than letting it run off to the street.
When you need a permit
For cosmetic work on an existing slab (cleaning, sealing, staining, patching) you generally do not need a permit. However, if you're planning to pour a new slab, build a deck or pergola over the patio, install a permanent covering structure, or do significant drainage regrading, check with your local building department first. Rules vary by municipality, and some HOAs have their own restrictions on surface colors and materials. A quick phone call or online permit search takes 10 minutes and can save a major headache.
Tools, materials, and cost checklist
I'm going to give you a realistic shopping and rental list organized by task. You don't need everything on this list, buy for the job in front of you, not the job you might do someday.
| Item | Used for | Buy or rent | Rough price |
|---|---|---|---|
| Pressure washer (2,500–3,500 psi) | Cleaning, prep | Rent or buy | $60–$120/day rent; $200–$400 purchase |
| Surface cleaning attachment (12–15 inch) | Even pressure washing | Rent or buy | $30–$80 |
| Stiff-bristle brush or deck scrub brush | Hand scrubbing | Buy | $10–$20 |
| Oxygen bleach (sodium percarbonate) | Mildew, algae, general grime | Buy | $15–$30 for 2 lbs |
| TSP or TSP substitute | Heavy grease and grime | Buy | $8–$15 |
| Concrete degreaser (commercial) | Oil stains | Buy | $15–$35 |
| Oxalic acid or rust remover (Bar Keepers Friend, Singerman) | Rust stains | Buy | $10–$25 |
| Concrete crack filler (polyurethane caulk or hydraulic cement) | Hairline to medium cracks | Buy | $8–$20 |
| Polymer-modified concrete patch (Quikrete Fast-Set, Ardex) | Spalls, divots, medium repairs | Buy | $15–$40/bag |
| Epoxy injection kit | Structural dormant cracks | Buy | $25–$80 |
| Concrete sealer (acrylic or penetrating) | Protection and sheen | Buy | $25–$80/gallon |
| Acid stain or water-based concrete stain | Color and appearance | Buy | $30–$80/gallon |
| Concrete paint or epoxy floor coating | Full surface color change | Buy | $40–$120/kit |
| Concrete overlay or microtopping | Resurfacing worn slabs | Buy | $50–$150/bag |
| Angle grinder with diamond cup wheel | Crack prep, spall grinding | Rent or buy | $40–$80/day rent |
| HEPA shop vacuum | Dust from grinding | Rent or buy | $50–$100/day rent |
| Paint roller, frame, and extension pole | Applying sealers and coatings | Buy | $20–$40 |
| Painter's tape and plastic sheeting | Masking edges and landscaping | Buy | $10–$20 |
| Safety gear (gloves, goggles, respirator) | All chemical tasks | Buy | $30–$60 full kit |
For a basic refresh on a 200-square-foot patio, budget $100–$200 in materials. For a full repair-plus-stain-plus-seal job, expect $300–$600 in materials plus any tool rentals. The big variable is whether you need a mudjacking or foam-lift service, which adds $500–$1,500 depending on how many slabs need lifting.
Quick cosmetic fixes: clean, brighten, and pressure wash
If your patio looks tired but is structurally sound, a thorough cleaning is the single highest-return thing you can do. For a step-by-step guide on how to beautify a concrete patio, see our detailed walkthrough. I've cleaned patios that the owners were ready to tear out, and after a two-hour pressure wash they looked 15 years newer. Here's the full workflow. For detailed, step-by-step tips on how to brighten up concrete patio, see the related guide linked below.
Step-by-step deep clean
- Clear the patio completely. Move every piece of furniture, every planter, every rug. You can't clean what's underneath all that stuff, and you'll be amazed how much grime hides at the edges.
- Sweep off all loose debris with a stiff push broom. Don't skip this — pressure washing loose grit just sprays it around.
- Pre-treat oil spots with a commercial concrete degreaser. Apply per the product label, let it dwell 10–15 minutes, and scrub with a stiff brush. You're attacking concentrated spots before the general wash.
- Mix oxygen bleach at about 1 cup per gallon of warm water and apply to the whole surface with a deck brush or garden sprayer. Let it dwell 15–30 minutes to break down algae, mildew, and organic staining. Don't let it dry on the surface.
- Pressure wash at 2,500–3,500 psi using a 25-degree tip for general concrete. Maintain 6–12 inches distance and use a consistent overlapping pattern. If you have a surface-cleaning attachment (highly recommended), use it — it gives even results and prevents the streaky tiger-stripe pattern that a bare wand creates. For stubborn areas, drop to a 15-degree tip but be careful not to etch or fur up the surface.
- Work from the house outward and let rinse water drain away from the foundation.
- Allow the slab to dry completely, at least 24–48 hours in warm weather, before applying any sealer, stain, or patch material. Moisture trapped under a coating is the number-one cause of coating failure.
What to expect: a properly cleaned slab will often look two to three shades lighter and more uniform. For concrete driveways and patios, consumer pressure-washer guidance recommends about 2,500–3,500 psi and using a 15° tip for stubborn stains, 25° for general concrete cleaning, or 40° for gentler surfaces, see Pressure Washer Buying Guide | Lowe’s for details. Biological staining (the greenish-black film on shaded sections) usually disappears entirely. Oil and rust stains may remain, those need targeted treatment, covered in the next section. Once the slab is clean, a single coat of penetrating concrete sealer or a gloss acrylic sealer will darken the color slightly and give the surface a refreshed, cared-for appearance.
Removing common stains: oil, rust, mildew, and paint
The key rule with concrete stains is to identify before you treat. The wrong cleaner either does nothing or makes the stain worse. Here's a quick diagnostic so you know what you're dealing with.
| Stain appearance | Likely type | Test | Correct remover |
|---|---|---|---|
| Dark, greasy, repels water droplets | Oil/grease | Sticky to touch, doesn't bleach | Commercial degreaser or poultice |
| Reddish-orange, doesn't bleach | Rust/iron | Won't respond to bleach at all | Oxalic acid or commercial rust remover |
| Green, black, or brown film | Algae/mildew | Responds to bleach | Oxygen bleach or dilute chlorine bleach |
| White powdery deposits near edges or joints | Efflorescence | Dissolves in dilute acid | Dry brush + dilute phosphoric or muriatic acid |
| Colored film that scrapes or flakes | Paint | Visible flaking edge | Chemical paint stripper or mechanical grinding |
| Rainbow sheen or iridescent film | Sealer or petroleum product residue | Doesn't absorb water | Solvent wipe or chemical stripper |
Oil and grease stains
- For fresh spills: immediately cover with an absorbent material (kitty litter, oil-dry, or cornstarch). Let it sit 30 minutes, then sweep up and dispose in the trash.
- Apply a commercial concrete oil stain remover (such as QUIKRETE Oil Stain Remover) directly to the stain according to the label. These products use surfactants and sometimes microbes to break down hydrocarbons.
- For older, set stains, make a poultice: mix an absorbent powder (diatomaceous earth or pool filter sand) with a solvent or degreaser into a peanut-butter-thick paste. Apply a half-inch layer over the stain, cover with plastic sheeting, and let sit 24 hours. The paste draws the oil up as it dries.
- Scrub, rinse, and repeat if needed. Old oil stains often require two or three treatments.
- Honest caveat: deeply penetrated oil in older, porous concrete may not fully come out. If the stain is still visible after three treatments, an overlay or coating is the practical solution.
Rust stains
- Remove the source first: a metal planter, a rusty chair leg, a fertilizer spill. If you don't remove the source, the stain comes back.
- Apply an oxalic-acid-based rust remover. Bar Keepers Friend (in powder form mixed with water to a paste) works well for smaller stains. For larger areas, use a dedicated masonry rust remover containing oxalic acid.
- Apply the paste, cover to prevent drying, and let it dwell 1–2 hours.
- Scrub with a stiff nylon brush and rinse thoroughly.
- Repeat for deep stains. Oxalic acid is effective but not instant — old, deep rust stains may need three or four applications.
Mildew and algae
- Mix oxygen bleach (sodium percarbonate) at 1 cup per gallon of warm water, or use a 1:10 dilution of household chlorine bleach in water for faster action.
- Apply generously and let dwell 15–30 minutes. Do not let it dry on the surface.
- Scrub with a stiff brush and pressure wash off at 2,500+ psi.
- To reduce recurrence, seal the slab after it dries — sealer limits moisture absorption and makes the surface inhospitable to biological growth.
Efflorescence (white salt deposits)
- Start by dry-brushing the deposits with a stiff brush. Fresh, light efflorescence sometimes brushes right off.
- For persistent deposits, apply a dilute phosphoric acid cleaner (preferred for safety) or a 1-part muriatic acid to 9–19 parts water solution. Always add acid to water, never water to acid.
- Scrub, let dwell 5 minutes, then rinse thoroughly and neutralize any remaining acid with a baking-soda-and-water rinse.
- Important: efflorescence is a symptom of moisture moving through the slab. If it keeps coming back, investigate drainage, grading, or sub-slab moisture before sealing over it.
Repairing cracks and spalling
Assess severity before you pick a product
Not all cracks are equal, and using the wrong repair method is worse than doing nothing because it gives you false confidence that the problem is solved. For surface spalls and non‑structural repairs, polymer‑modified cementitious patch products (feather‑finish, fast‑set patch) are recommended; see QUIKRETE Concrete & Asphalt Cleaner / Quikrete product lines (patch & cleaner examples) for product examples and technical guidance. Here's a simple three-tier assessment.
| Crack type | Description | Best repair | DIY? |
|---|---|---|---|
| Hairline (under 1/8 inch wide, no displacement) | Surface-level shrinkage or age cracks | Polyurethane caulk or concrete crack filler | Yes |
| Medium (1/8 to 1/2 inch wide, no or minimal displacement) | Settlement or frost heave, no structural concern | Polymer-modified concrete patch or epoxy injection | Yes |
| Wide or displaced (over 1/2 inch or with vertical step) | Possible sub-base failure or ongoing movement | Assess cause first; may need lifting before patching | Partial — get a pro opinion |
| Active (opens/closes seasonally or with temperature) | Living crack — still moving | Polyurethane foam injection or flexible caulk only | Yes for foam injection kits |
| Spalling (surface flaking, shallow) | Freeze-thaw damage or deicing salt damage | Polymer-modified feather-finish patch | Yes |
| Deep spalling (past 1/2 inch, exposes aggregate) | Surface layer failure | Full overlay or resurfacer system | Yes with proper prep |
Repairing hairline to medium cracks
- Clean the crack thoroughly. Use a wire brush, angle grinder with a crack-chasing blade, or a cold chisel to open and clean the crack. Remove all loose material, dust, and debris. A shop vac is essential here.
- For cracks under 1/4 inch: apply a self-leveling polyurethane concrete crack filler. Pour it in, let it self-level, and let it cure per the manufacturer's time (usually 4–8 hours before foot traffic).
- For cracks 1/4 to 1/2 inch: use a polymer-modified cementitious patch product (Quikrete Vinyl Concrete Patcher, Ardex Feather Finish, or similar). Mix per the bag, pack firmly into the crack, and feather the edges smooth with a margin trowel.
- For dormant (non-moving) structural cracks where you need to restore tensile strength: epoxy injection is the standard method. Simpson Strong-Tie and similar systems use low-viscosity epoxy injected under pressure through ports spaced along the crack. This is only appropriate for cracks that are completely dormant — if the crack is still moving seasonally, epoxy will re-crack.
- Allow patch material to cure fully before applying any sealer or coating over it. Most polymer patches need 24–72 hours.
Repairing spalling
- Grind or chip out all delaminated and loose concrete in the spalled area. You want solid, clean concrete below your patch — any loose material will cause the patch to pop off.
- Undercut the edges slightly (at about 90 degrees or with a slight undercut angle) so the patch has mechanical retention and can't just peel off laterally.
- Apply a bonding agent to the repair area per the manufacturer's instructions. This is a step many DIYers skip, and it's why their patches fail within a season.
- Mix and apply a polymer-modified feather-finish or fast-set patch product. Work it in firmly, smooth with a trowel, and feather edges to zero thickness at the margins.
- Mist lightly with water during cure in hot/dry conditions to prevent rapid drying, which causes shrinkage cracks in the patch itself.
- Seal over the repaired areas once fully cured.
Fixing uneven slabs and settled concrete
A settled or uneven slab is both a cosmetic problem and a safety hazard. A vertical lip of 1/2 inch or more at a joint is considered a trip hazard in most building codes. You have a few options depending on how far the slab has dropped and what caused it.
Understanding why slabs settle
Concrete slabs settle when the soil underneath erodes, compresses, or washes away. Common causes are poor compaction at the original pour, tree root displacement, erosion from water running under the slab, or just decades of soil consolidation. The slab itself is often still perfectly good, it just has nothing under part of it.
DIY fix: grinding down high edges
If one slab has settled and created a lip at the joint, sometimes the practical DIY fix is grinding the high edge down rather than lifting the low one. An angle grinder with a diamond cup wheel can bevel a 1/2-inch to 3/4-inch lip into a ramp that removes the trip hazard and looks much cleaner. This is a cosmetic fix, not a structural one, and it works well for isolated, stable settlement where further movement is unlikely.
Mudjacking vs. polyurethane foam lift
For slabs that have genuinely dropped and need lifting, you have two professional service options: mudjacking (also called slabjacking) and polyurethane foam lifting. Both work by drilling small holes in the slab, injecting material underneath to fill voids and lift the concrete, then patching the holes.
| Method | Material injected | Hole size | Typical cost | Cure time | Best for |
|---|---|---|---|---|---|
| Mudjacking | Cement-sand-soil slurry | 1.5–2 inch holes | $500–$1,200 for a patio | 24–48 hours | Large slabs, budget-conscious, rural areas |
| Polyurethane foam lift | Expanding polymer foam | 5/8 inch holes | $800–$2,000 for a patio | 15–30 minutes | Smaller holes, faster cure, near utilities |
Both methods require professional equipment, this is not a DIY rental situation. The good news is they're both significantly cheaper than removing and replacing a settled slab, which typically costs $6–$12 per square foot or more depending on your area.
When to call a pro or replace instead of lift
Lifting makes sense when the slab itself is in reasonable shape and the settlement is localized. Call a structural contractor or get a replacement quote instead if: the slab has settled more than 4 inches, the concrete is severely cracked or crumbling (not just displaced), there is evidence of a major drainage or tree root problem that hasn't been corrected, or multiple slabs across the whole patio have settled unevenly. Lifting a slab over an unresolved drainage problem just means it settles again in two years.
DIY timing thresholds at a glance
- Lip under 1/2 inch and stable: grind the edge down yourself
- Lip 1/2 to 2 inches, slab otherwise solid: get mudjacking or foam lift quotes
- Settlement over 2 inches or slab crumbling: replacement or overlay evaluation needed
- Any active drainage or root problem: fix the cause before lifting or replacing
FAQ
What are the fastest cosmetic fixes to instantly improve a concrete patio's look?
Checklist: remove clutter and furniture, sweep debris, spot-treat stains, power-wash, arrange furniture and accent pieces. Steps: 1) Clear area and sweep. 2) For biological grime (mildew/algae) mix oxygen bleach (~1 cup sodium percarbonate per gallon warm water), apply, let 10–30 minutes, scrub and rinse. 3) For grease, absorb fresh oil with kitty litter, sweep, then apply commercial degreaser per label and rinse. 4) Pressure-wash the whole slab using ~2,500–3,500 psi; use 25° tip for general cleaning and keep 6–12 in distance or use a surface cleaner for even results. 5) Allow 24–48 hours to dry before replacing furniture. Expected result: noticeably cleaner surface within a half day to 2 days. Typical cost: $0–$50 (cleaners) or $40–$100/day to rent a pressure washer; time: 2–6 hours active work plus drying.
How do I identify different types of stains and choose the right cleaner?
Diagnostic checklist: oil/grease — dark, repels water, often sticky; use absorbent then concrete degreaser. Rust — reddish/orange that resists bleach; use oxalic acid or commercial rust remover. Algae/mildew — green/black removed by oxygen or chlorine bleach. Paint — film or flaking that scrapes; use paint stripper or mechanical removal. Efflorescence — white powdery salts; dry-brush then dilute acid wash if persistent. Always test a small inconspicuous area first and follow PPE and product instructions. Expected results: most surface stains removed or reduced to acceptable levels; deep-penetrated oil or old embedded rust may require resurfacing or overlay.
What are safe, step-by-step procedures for pressure-washing a patio?
Steps: 1) Inspect for cracks, loose concrete, or exposed rebar — avoid high pressure on damaged areas. 2) Protect nearby plants/windows with plastic and wet down vegetation. 3) Start with low pressure/25° tip and hold 6–12 inches from surface; increase intensity only if needed. 4) Work in overlapping passes, keep nozzle moving to avoid gouging. 5) Use degreaser on oil spots first and rinse thoroughly. 6) Allow 24–48 hours to fully dry before repairs or coatings. Safety: wear eye/ear protection, long sleeves, non-slip boots. Typical cost/time: rental $40–$100/day; 1–4 hours of work depending on patio size.
How should I repair cracks, spalls, and uneven slabs before refinishing?
Checklist: assess crack type (dormant vs active), clean cracks, select repair method. Steps: 1) For hairline/dormant cracks: clean debris, use polyurethane caulk for non-structural sealing or epoxy injection for structural, following product instructions. 2) For spalls: chip out loose concrete to sound edges, clean, apply polymer-modified cementitious patch or fast-set repair mortar in layers, finish to match. 3) For moving or leaking cracks: consider hydrophilic polyurethane injection to seal water; for significant movement or settlement consult a pro. 4) For uneven slabs greater than 1/2
What about addressing uneven slabs or large settlement areas?
If trip hazards or vertical displacement are >1/2
When and how do I use acid etching vs mechanical grinding for surface prep?
Use mechanical grinding or shot-blasting to achieve a consistent surface profile (ICRI CSP specified by overlay/coating manufacturers). Acid etching (dilute muriatic acid) can open dense concrete but is more hazardous and inconsistent; if used, follow conservative dilutions, neutralize and rinse thoroughly, and follow strict PPE (chemical-resistant gloves, eye/face protection, respirator if vapors present). For coatings and overlays, aim for the manufacturer’s recommended CSP (e.g., microtoppings CSP 2–3). Test patches and consider professional prep for large areas. Time/cost: rental grinders $50–$150/day; acid etch materials cheaper but higher safety risk; expect 1–2 days prep for average patio.