
A broken concrete patio is fixable in most cases, and you often have more options than you think. The real question isn't whether to fix it, it's figuring out what kind of damage you're dealing with, because hairline cracks, sinking slabs, and deep spalling all need different approaches. Get the assessment right first, and the rest of the process falls into place pretty cleanly.
Broken Concrete Patio Repair Guide: Fix, Rebuild, and Finish

Silas Morrison
29 May 2026
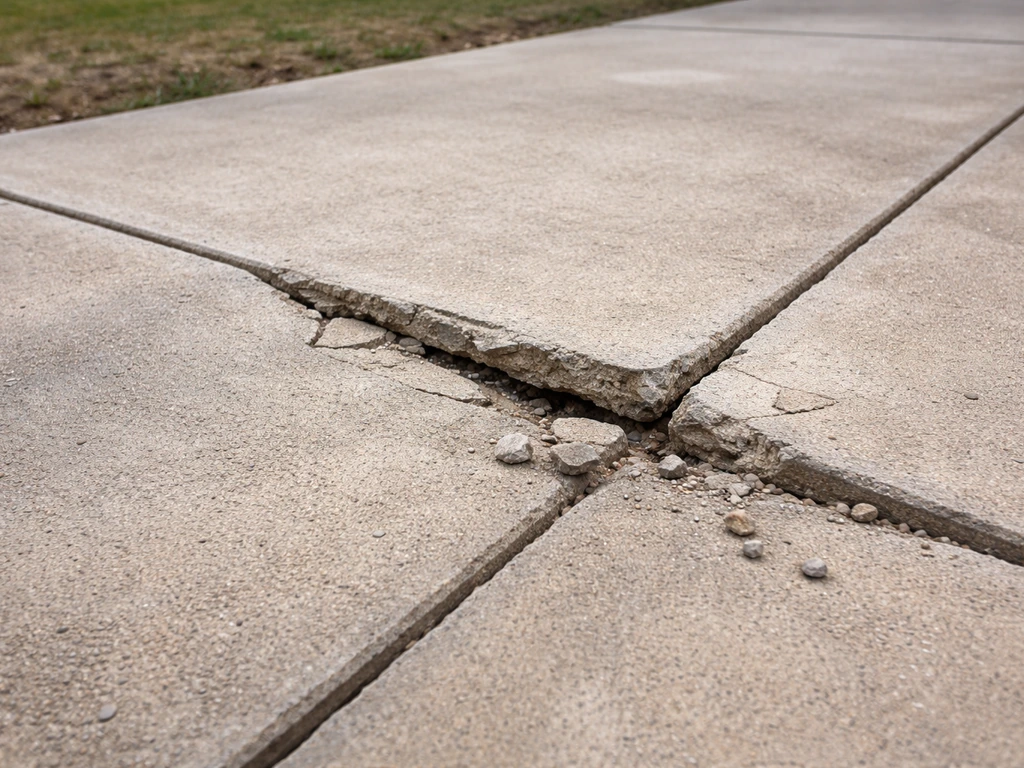
How to assess the damage on your broken concrete patio
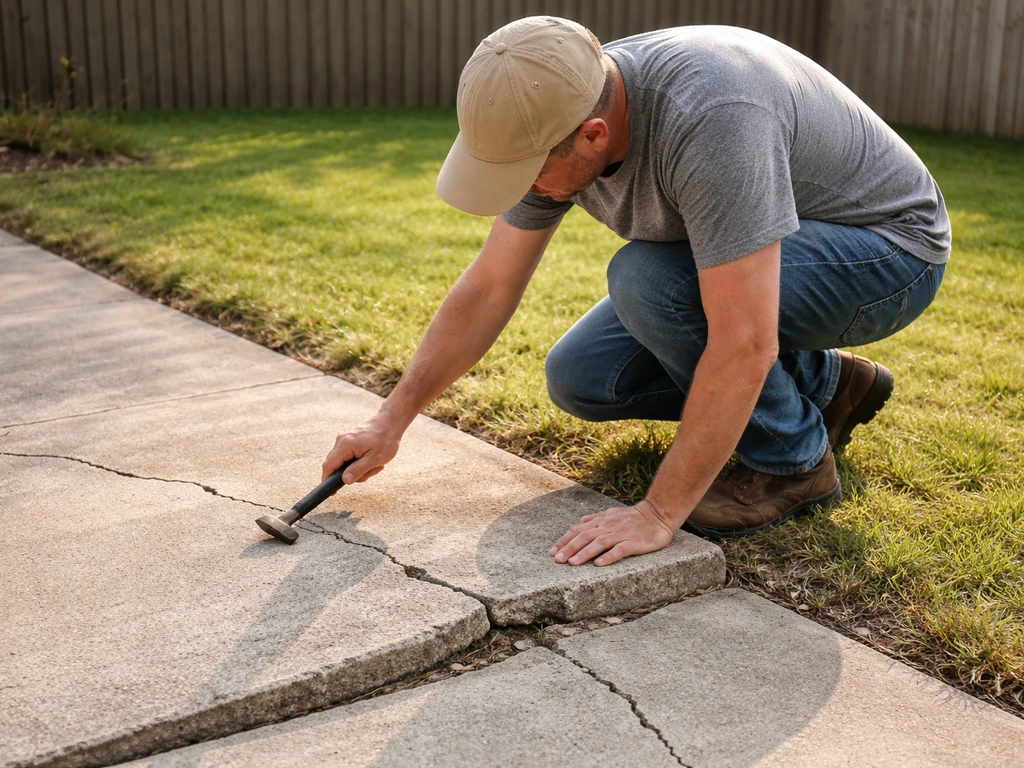
Before you buy a single bag of concrete mix, spend 20 minutes really looking at your patio. Walk every inch of it. Bring a screwdriver or a hammer and tap the surface, solid concrete sounds dense, while hollow or delaminating sections produce a dull thud. That simple test tells you immediately where you're dealing with unsound material that needs to come out before any patching happens.
You're checking for six main damage types, and each one points you toward a different fix:
- Hairline cracks (under 1/8 inch wide): Usually cosmetic, often from normal shrinkage or minor settlement. Low urgency, easy DIY fix.
- Medium to wide cracks (1/8 inch or wider): More serious, especially if the edges are at different heights. Could indicate underlying movement or base failure.
- Spalling: Surface scaling, flaking, or pitting — often caused by freeze-thaw cycles or deicing salt damage. Can be shallow (surface-only) or go deeper into the slab.
- Sinking or uneven slabs: One section is lower than another, creating a trip hazard or pooling water. Usually a base or subgrade problem.
- Lifting or heaving: A section has pushed upward, typically from tree roots or frost heave. The slab itself may still be structurally sound.
- Trip hazards: Any height differential of 1/2 inch or more between adjacent sections counts as a tripping hazard — a safety and liability issue you need to address promptly.
Also check the edges and control joints. If cracks are running through the slab itself rather than along the joints, that tells you the joints weren't placed correctly or the slab has moved significantly. Look underneath where you can, if there's a void beneath a slab section, no surface patch will hold long-term without addressing that void first.
Recognizing damage types visually: cracks, sinking, spalling, and trip hazards
If you're looking at broken concrete patio pictures online to compare with your own situation, here's how to read what you're seeing so you can match it to your patio accurately.
What cracks actually look like
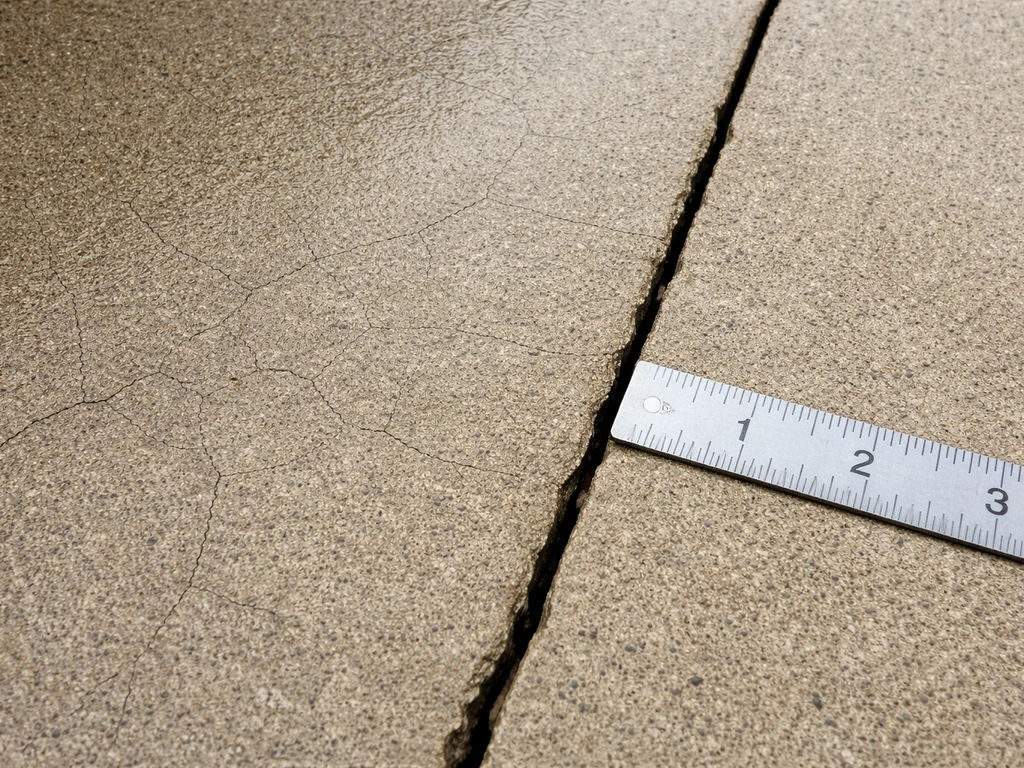
Hairline cracks are barely visible, you often only see them when the surface is wet and drying unevenly. They're usually less than 1/16 inch wide and run in fairly straight lines or follow the concrete's shrinkage pattern. Wider cracks are obvious to the eye, sometimes jagged or branching, and you can often fit a pencil tip or more into them. If crack edges are at noticeably different heights, that's a step crack, one of the more serious types because it confirms differential movement.
What spalling looks like
Spalling looks like the surface is flaking off in chunks or layers. It's common in cold climates where deicing salts and repeated freeze-thaw cycles break down the top layer of the concrete. In early stages, you'll see pitting and a rough, almost sandy texture. In advanced cases, you'll see chunks missing, exposed aggregate, and sometimes the rebar below. The depth of spalling matters a lot for repair: surface spalling (under 1/4 inch) can be addressed with a concrete overlay or resurfacer, but deeper damage that reaches or approaches the reinforcement requires more aggressive intervention.
What sinking and trip hazards look like
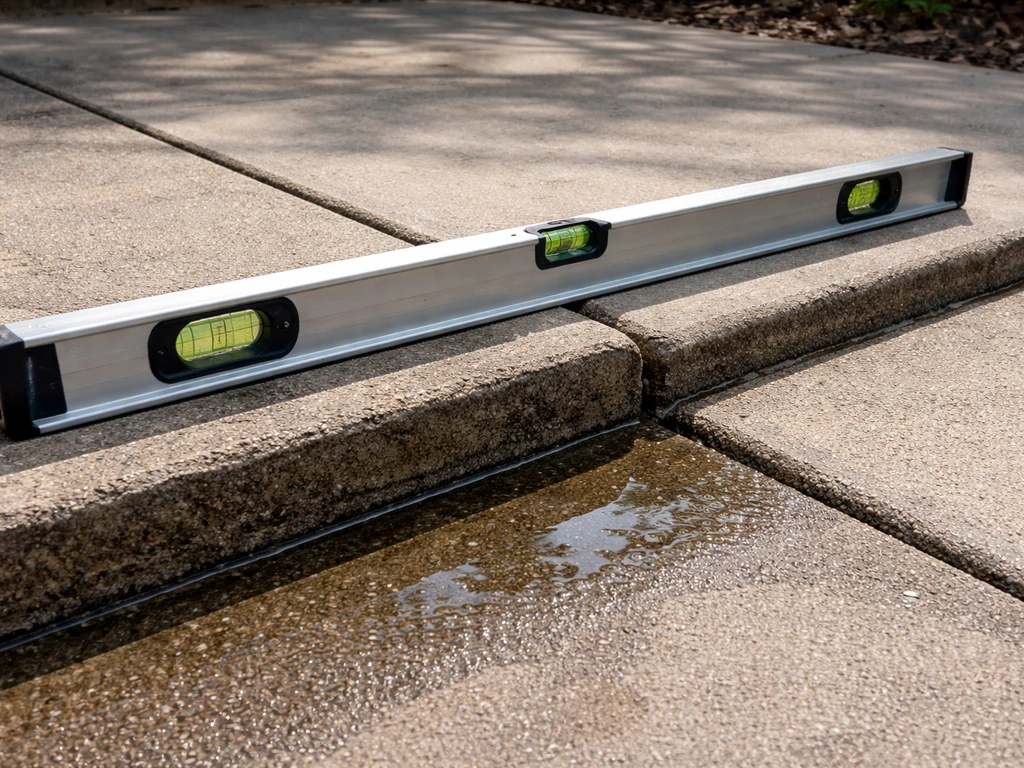
A sunken section is easy to spot, water pools on it, or you can see a visible drop from one slab panel to the next. Put a long level across two sections to measure the height differential. Anything over 1/2 inch is a trip hazard by most building standards. Lifting looks like the opposite: one panel is higher than its neighbors, with a visible lip. Both are usually base problems, not surface problems, which changes your repair path significantly.
DIY repair vs. replacement: making the call
Here's the honest version of this decision. Most homeowners can handle hairline cracks, shallow spalling, and small isolated patches on their own over a weekend. Where it gets dicey is when the damage is widespread, the base has clearly failed, or multiple slab sections have moved. If you decide to repair instead of replace, focus on removing unsound concrete, then patch and cure correctly so your broken concrete patio holds up how to tear up concrete patio. In those cases, a DIY patch job often fails within a year or two because you're putting new material on top of an unstable foundation.
| Damage Type | DIY Viable? | Typical Time | Approximate Cost (DIY) | When to Replace |
|---|---|---|---|---|
| Hairline cracks | Yes | 2-4 hours | $20-$60 in filler | Almost never needed |
| Wide/step cracks | Often yes | Half day | $50-$150 | If base has failed or movement is ongoing |
| Shallow spalling | Yes | 1-2 days | $100-$300 for resurfacer | If more than 1/3 of surface is affected |
| Deep spalling (near rebar) | Borderline | 2-3 days | $200-$500+ | If rebar is corroded or slab is structurally compromised |
| Sinking slabs | Sometimes (mudjacking/foam) | Half day (pro) | $500-$1,500 (pro) | If subgrade is severely eroded or base is gone |
| Widespread cracking + heaving | No | N/A | N/A | Almost always — replace the slab |
A full patio replacement typically runs $6 to $12 per square foot installed, so a 400 sq ft patio could cost $2,400 to $4,800 or more. That context makes DIY repair look very attractive for moderate damage. But I'd caution against patching just to delay the inevitable, if half your patio is compromised, spending $400 on patches you'll redo in two years is a waste. Be honest with yourself about the condition.
One more thing worth mentioning: if you're planning to fully tear up the old patio and start fresh, you'll want to think through how to break up the existing concrete and what to do with it, both of those are their own processes worth understanding before you commit to a full replacement.
Step-by-step broken concrete patio repair
This workflow covers the most common DIY repair scenario: patching cracks, fixing spalled areas, and leveling minor surface issues. Adjust based on what your assessment showed.
What you'll need
- Cold chisel and 3-lb hammer (or angle grinder with diamond blade for larger areas)
- Wire brush and stiff broom
- Pressure washer or garden hose with strong spray nozzle
- Concrete crack filler (polyurethane or epoxy for cracks under 1/2 inch wide)
- Hydraulic cement or fast-setting concrete mix for larger voids
- Concrete resurfacer (for spalled or uneven surfaces)
- Bonding adhesive (liquid concrete bonding agent)
- Trowel, float, and margin trowel
- Squeegee and long-handled roller (for resurfacer application)
- Plastic sheeting for curing
- Safety glasses and heavy gloves
Step 1: Remove all unsound concrete
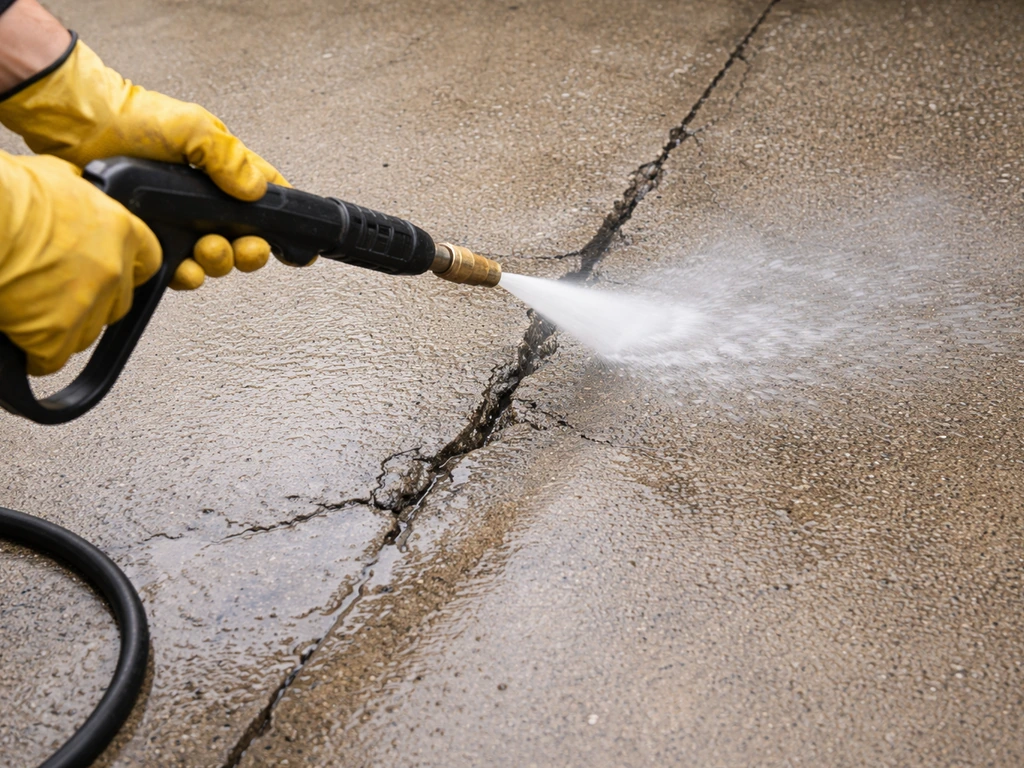
This is the step most people rush, and it's why patches fail. Any concrete that sounds hollow when tapped, crumbles under pressure, or is delaminating from the layer below has to come out. Use your cold chisel and hammer to chip it away, or an angle grinder to cut clean edges around damaged areas. The goal is to create a firm, solid perimeter, don't leave feathered edges because thin patches will pop off. Your cleaned-out repair area should have edges that are as close to vertical as possible, ideally at least 1/4 inch deep.
Step 2: Clean the repair area thoroughly
Brush out all dust, debris, and loose particles. Then use a pressure washer or strong hose to flush the area. You want the concrete surface damp but not soaking wet, this helps the patch material bond into the substrate's capillary network rather than sitting on top of it. Bonding or overlay and patch materials need to “fuse into the substrate’s capillary network,” which is why removing loose or unsound concrete and properly preparing exposed faces is critical “fuse into the substrate’s capillary network”. If the surface is bone dry, the existing concrete will pull moisture out of your patch too fast and weaken it. Damp is the target.
Step 3: Apply bonding adhesive
Brush a liquid concrete bonding agent over the entire repair area, including the vertical edges. Let it get tacky, usually 20 to 30 minutes depending on temperature. This step dramatically improves adhesion between old and new concrete and is worth the extra 10 minutes every time. Don't skip it for patches deeper than 1/4 inch.
Step 4: Fill cracks and voids
For cracks, use a polyurethane or epoxy crack filler and follow the product's instructions, most require you to slightly overfill and then shave flush once cured. For larger voids or missing sections, mix your patching concrete to a stiff (not soupy) consistency and pack it in firmly, working out any air pockets with your trowel. For very deep repairs (over 2 inches), build up in layers, allowing partial curing between passes.
Step 5: Surface with resurfacer if needed
If your patio has widespread shallow spalling or you want a uniform surface after patching, apply a concrete resurfacer over the entire area or affected zone. Mix it to a pourable but thick consistency, pour it on, and spread it with a squeegee to 1/8 to 1/4 inch thickness. Work in sections of about 144 square feet at a time so it doesn't set before you spread it. Drag a broom lightly across the surface for texture (more on that in the finishing section).
Step 6: Cure properly
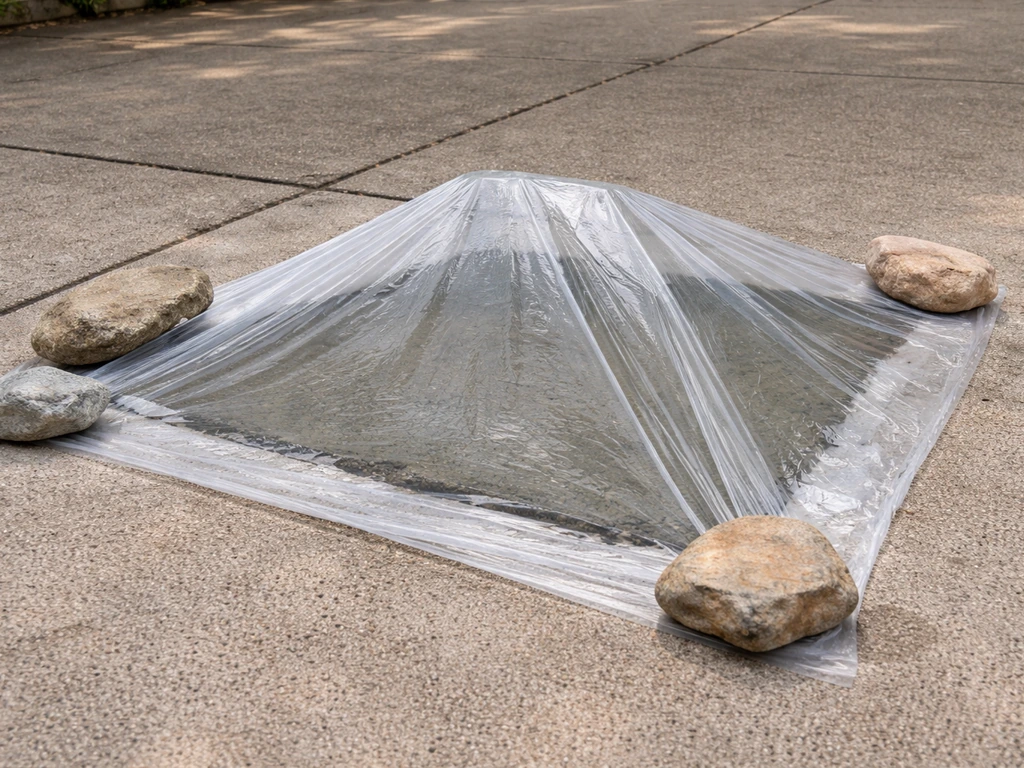
Cover the repaired area with plastic sheeting for at least 24 hours, ideally 48 to 72 hours. Keep it out of direct sun and wind during curing. Concrete patches that dry too fast become weak and brittle, moisture loss is the enemy during curing. Don't walk on patches for at least 24 hours, and don't put furniture or heavy loads on resurfaced areas for at least 72 hours. Full cure strength takes about 28 days, but it'll be durable enough for normal foot traffic within a week.
Using recycled concrete responsibly in your patio project
If you're tearing out broken sections or doing a full replacement, you'll end up with a pile of old concrete chunks. Recycled Concrete Aggregate (RCA), which is what crushed old concrete becomes, is legitimately useful in several contexts, and it's worth knowing where it helps and where it doesn't.
Good uses for recycled concrete in a patio project
- Sub-base material: Crushed or broken concrete works well as a compacted base layer under a new patio slab, replacing gravel. It drains reasonably well and compacts firmly. Aim for pieces under 4 inches, well-compacted in layers.
- Fill for low spots or grade corrections: Before laying a new patio, old concrete chunks can fill depressions in the yard to establish rough grade before you bring in gravel and compact properly.
- Drainage aggregate: Larger broken chunks can line drainage swales or French drain trenches alongside a patio area.
- Decorative 'urbanite' paving: Flat, broken concrete slabs can be laid like flagstone with ground cover or gravel between them — sometimes called an urbanite patio. It's a legitimate design option with a rustic, reclaimed look.
Where recycled concrete doesn't belong
Don't use RCA as a replacement for structural concrete in a new poured slab without proper engineering. Crushed concrete as aggregate in a new mix can work in controlled conditions, but it absorbs more water than virgin aggregate, which changes your water-cement ratio and can weaken the final product. For a homeowner pouring a new patio slab, just use the right mix, it's not worth the risk. Also avoid using large chunks of RCA directly under a new slab without crushing them down and compacting in layers, uneven base materials lead to the same cracking and sinking problems you're trying to escape.
If you're interested in the 'urbanite' or broken-concrete-as-paving approach, that's a genuinely creative option that many homeowners use to reuse old material with a unique aesthetic result. Laying broken concrete in a mosaic or flagstone pattern is worth exploring as an alternative to hauling everything to a recycling facility. If you plan on laying broken concrete in this way, start by fixing any underlying sinking or spalling so the surface stays stable after installation laying broken concrete in a mosaic or flagstone pattern.
Sealing and finishing for long-term durability
Once your repair has cured for at least 28 days, sealing is the single best thing you can do to protect it from future damage. A good concrete sealer locks out water (the main cause of freeze-thaw spalling), repels oil and stains, and extends the life of any patching or resurfacing work you just did.
Choosing the right sealer
| Sealer Type | Appearance | Durability | Best For | Reapplication |
|---|---|---|---|---|
| Penetrating/silane-siloxane | No sheen, natural look | 10-20 years | Older patios, cold climates, matte preference | Every 5-10 years |
| Acrylic film-forming | Slight to high sheen | 2-5 years | Resurfaced patios, moderate climates | Every 1-3 years |
| Epoxy coating | High gloss | 5-10 years | Garage-style coverage, heavy use areas | Every 3-5 years |
| Polyurethane | Satin to gloss | 5-10 years | High-traffic patios, UV-resistant finish needed | Every 3-5 years |
Apply sealer when the surface is clean, dry, and between 50 and 90 degrees Fahrenheit. Roll or spray it on in thin, even coats, two thin coats beat one thick coat every time. Thick coats bubble, peel, and look terrible within a season. Let the first coat dry completely (usually 2 to 4 hours) before applying the second.
Ongoing maintenance to prevent future damage
- Avoid deicing salts in cold climates — use sand for traction instead. Calcium chloride and sodium chloride accelerate spalling.
- Reapply sealer on the manufacturer's schedule. If water no longer beads on the surface, it's time to reseal.
- Clean the surface annually with a mild concrete cleaner to remove oil, algae, and buildup that can degrade the sealer.
- Fill any new cracks while they're small — hairline cracks cost $20 to fix; ignored cracks that grow cost $500+.
- Make sure water drains away from the patio edge, not toward the house or under the slab.
Design ideas to improve your patio's look after repair
Here's the part most repair guides skip: after you've fixed the structural issues, you don't have to live with a patio that looks patched. There are several ways to give a repaired patio a completely fresh, intentional appearance, and some of them cost less than you'd expect.
Concrete staining
Acid stain or water-based concrete stain can transform a dull or patched surface into something that looks genuinely designed. Acid stains react chemically with the concrete to create variegated, translucent color, earthy tones like terra cotta, walnut, and slate blue are popular for patios. Water-based stains give more predictable, solid color and work well over resurfaced areas where the concrete composition is more uniform. Either way, stain after sealing work is done, stain first, then seal over it to protect the color.
Texture options
If you applied a resurfacer, you have a window to add texture before it sets. A broom drag gives a classic non-slip finish. A concrete stamp mat pressed into fresh resurfacer can create stone, slate, or tile patterns, this works surprisingly well even for a homeowner doing it solo on a small to mid-sized patio. Exposed aggregate overlay is another option where you seed decorative stone into the surface and wash off the top layer to expose it. These textures also help disguise any remaining variation in the repaired surface.
Overlay systems for a full refresh
If the surface damage was widespread and you want a truly uniform result, a micro-topping or thin overlay system applied over the entire patio gives you essentially a new surface to work with. Micro-toppings go on at 1/16 to 1/8 inch thickness and accept stain and sealer beautifully. This approach costs more than spot-patching (typically $2 to $5 per square foot in materials), but the result looks intentional rather than repaired, and it protects everything underneath.
Layout ideas to add visual interest
- Saw cut a geometric pattern (grid, herringbone, or diagonal lines) into the resurfaced patio to mimic tile or stone layout.
- Use two contrasting stain colors to create field-and-border effects — stain the perimeter one shade and the interior another.
- Add a pebble or glass bead border along the edges using a colored mortar to define the space without replacing the slab.
- For a natural, informal look, use the urbanite approach with old broken concrete chunks set in decomposed granite or ground cover — a great option if you're replacing part of the slab and want to incorporate the old material creatively.
The repair process and the design process don't have to be separate. Once you've done the hard work of stabilizing and resurfacing the slab, you're actually in a great position to take the patio further than it was before, with a look that's intentional, sealed, and built to last well past the next decade.
FAQ
How can I tell if my broken concrete patio is moving because of drainage or soil issues, not just surface cracking?
Look for movement patterns, for example cracks that widen and shrink seasonally, doors or steps that no longer sit square, and water that runs toward the slab after rain. If water pools or you see a repeated wet band around the patio edges, address grading and downspouts first, otherwise even a well-bonded patch can loosen and re-crack.
Can I repair a broken concrete patio while it’s wet or recently rained on?
It’s usually a bad idea. The repair area needs clean, damp concrete for bonding, not actively wet. Let the slab dry so you can tap and chip unsound material properly, then dampen to the “damp, not soaking” target before bonding agent and patch placement.
What happens if I don’t remove all the hollow or delaminated concrete?
Your patch can look good initially and fail early because the new concrete bonds to unstable material. Hollow sound areas need to be cut out to solid substrate, and edges should be as close to vertical as practical, avoiding feathered thin borders that pop off.
Should I use a crack filler or should I open and repair the crack like a structural crack?
If the crack is just hairline and the slab surface is level with no height offset, filler can work. If you notice step edges (different elevations), branching that keeps changing, or any lift or drop around the crack, treat it as movement, and plan for substrate stabilization before any cosmetic filling.
How wide or deep does a spalled area need to be before it requires more than resurfacer?
Shallow surface spalling under about 1/4 inch is typically compatible with resurfacer or overlay. If spalling is deeper, exposes aggregate, or approaches reinforcement, you should plan a cutout and patch process with proper bonding and, in severe cases, professional evaluation.
Can I just patch over existing spalling and old repairs to speed up the job?
Avoid it. Old failed patches and loose concrete are often the weak layer, so bond strength is limited. Remove anything that is crumbling, peeling, or sounds hollow, then rebuild to clean, firm edges before patching and curing.
What’s the most common mistake with bonding agents on a broken concrete patio?
Using the wrong timing. You want the bonding agent to go on after cleaning, then apply patching when it becomes tacky, typically within the product’s stated window. If it fully dries to a film too early, your adhesion can drop significantly.
Do I need to seal the patio right away after resurfacing?
Usually no. Wait until the patch or resurfacing has cured fully enough for sealing, and ensure the surface is clean and dry. Sealing too early can trap moisture and contribute to future failure, especially with freeze-thaw conditions.
How do I choose between stain, stamp, or micro-topping after repairing broken concrete?
Choose based on how uniform your surface is. Spot repairs and minor variation often do well with stain and some texture. If the damage was widespread or you want a consistently even look across the whole patio, a thin overlay or micro-topping provides a more uniform base for stain and sealer.
Is there a safe way to test whether my patio base is failing before I spend money on resurfacer?
Tap test and edge inspection are your best DIY indicators. If large areas sound hollow or the slab edge undermines or dips, resurfacer alone will mask the problem temporarily and then fail. If you find widespread hollow areas, plan cutout and stabilization or consider replacement.
Can I use RCA, recycled concrete aggregate, under my broken patio or for leveling?
Do not treat it as a drop-in replacement for structural concrete. RCA can be appropriate as backfill in some contexts, but it needs proper compaction and crushing to avoid uneven settlement. For anything involving a new slab or load-bearing base, follow engineering guidance instead of assuming “recycled” equals “equivalent.”