
Concrete patios get brutally hot in summer, often reaching 140–160°F on a sunny afternoon, which is hot enough to burn bare feet in seconds. The good news is you have real options at every budget level: from a $20 portable misting fan you can set up today, to a coat of reflective sealer this weekend, to a pergola or shade tree that changes the space permanently. This guide walks you through all of it in order, starting with how to measure what you're actually dealing with, then moving through quick fixes, surface treatments, and structural upgrades so you can pick what fits your situation and get started.
How to Cool Concrete Patio: DIY Cooling, Shade & Resurfacing

Silas Morrison
9 Aug 2026
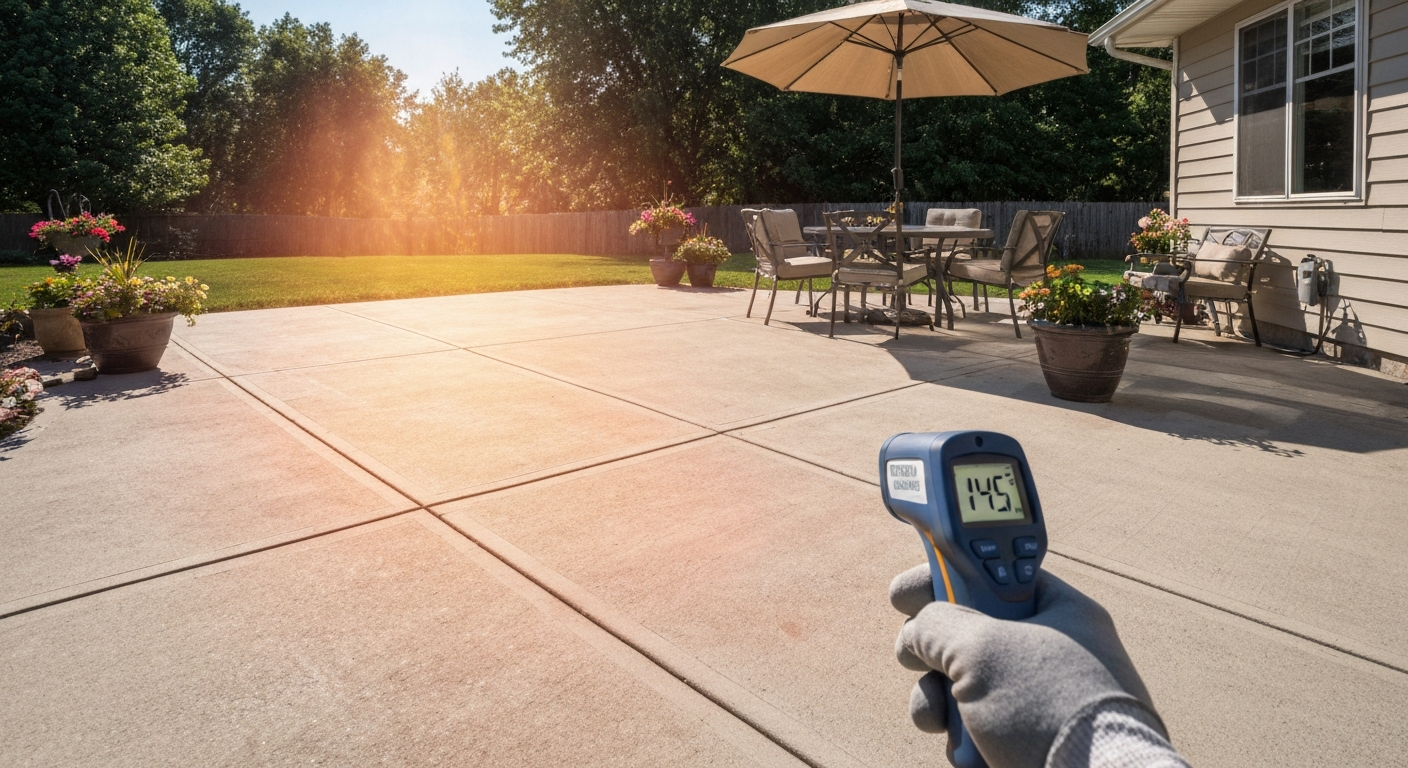
Why concrete patios turn into frying pans
Concrete is dense and dark enough to absorb a significant portion of the solar energy hitting it. A standard gray concrete slab has a solar reflectance (SR) of roughly 0.25–0.35, meaning it absorbs 65–75% of incoming solar radiation and converts it to heat. That heat drives surface temperatures far above air temperature, especially in the afternoon when the slab has been soaking up sun for hours. If your patio also sits in a south- or west-facing exposure with walls or fences that bounce radiant heat back onto it, you're dealing with a compounding effect that shade alone sometimes can't fully solve. That's why this guide covers surface treatments alongside shade: the two approaches attack the problem from different angles and work best together.
Measure surface heat before you do anything else
Before you spend money on solutions, spend 15 minutes taking actual temperature readings. Guessing that your patio 'feels really hot' doesn't tell you whether you need a reflective sealer, a shade structure, or both. Good data helps you pick the right fix and lets you measure whether it worked.
The right tools for the job
An infrared (IR) thermometer is the most practical tool for this. The Fluke 62 MAX is a solid choice: it has a 10:1 optical resolution, adjustable emissivity from 0.10 to 1.00, and accuracy of ±1.5°C or ±1.5% of reading. The critical step most people skip is setting the emissivity correctly. Concrete sits at about 0.92–0.95, so dial your IR gun to 0.95 before you point it at the slab. Using the default setting (usually 0.95 or 1.00) without checking means your readings could be off by several degrees. A reliable calibration trick: stick a small patch of matte black electrical tape to the slab, let it reach equilibrium for 5–10 minutes, set your gun to 0.95, and compare the IR reading on the tape to a contact thermometer placed right next to it. If they agree within a degree or two, your readings are trustworthy. If there's a larger offset, use that difference to correct your readings across the slab.
A contact thermometer (thermocouple or RTD probe) is slower but more accurate for a single spot. Thermocouples typically achieve ±0.75% accuracy and are great for cross-checking your IR gun and logging temperature over time. Use the IR gun to map the whole surface quickly, then verify hotspots with the contact probe. That combination gives you both spatial coverage and reliable accuracy.
Where to measure and what time of day
Take readings at solar noon and again at 3–4 PM, which is typically when concrete surfaces peak. Measure in at least four spots: the center, the sun-exposed edge, a shaded area (if any), and near any reflective walls. Keep your IR gun at a distance where the measurement spot is smaller than the feature you're measuring, which for a standard 10:1 gun means staying within about 10 feet for a 1-foot spot. Record air temperature at the same time so you know the delta between surface and air.
Comfort targets to aim for
ASHRAE thermal comfort research puts the comfortable barefoot floor-surface range at roughly 66–84°F (19–29°C), with the sweet spot for bare concrete around 79–83°F (26–28°C). That's your target. If your slab is reading 140°F in the afternoon, you need to bring it down by 50–60°F to hit the comfortable zone, which is a significant ask for any single solution. Realistically, a good reflective coating can cut peak surface temps by 10–16°F, shade structures can cut another 14–23°F, and combining them gets you into livable territory on most summer days.
Immediate cooling fixes you can do today
These are same-day solutions that cost little and require no surface prep. They don't change the slab itself, but they make the patio usable right now while you work on longer-term fixes. For more tips on making a hard, hot surface feel more comfortable underfoot, see our guide on how to soften concrete patios.
- Large patio umbrellas (9–11 ft diameter): set up before noon to block direct sun and prevent the slab from absorbing heat in the first place. Studies have measured average surface cooling of around 6.9°C (about 12°F) from cloth shade structures, so this isn't trivial. Overlap two umbrellas if you have a large slab.
- Portable shade canopies or pop-up tents: faster to deploy than umbrellas for parties or afternoon use. The 10×10 ft pop-up canopy with UV-blocking fabric is a cheap and effective temporary fix.
- Misting fans: a combination of a box fan and a simple misting ring can drop the perceived air temperature by several degrees. In low-humidity climates, the effect can be dramatic. In humid climates (above 65–70% relative humidity), misting raises the humidity further and the net comfort gain is smaller — in that case, rely more on airflow and shade than on misting.
- Wet the slab with a hose: thoroughly wetting the surface 20–30 minutes before you plan to use it forces evaporative cooling and can drop surface temps noticeably. It's temporary but immediate and free.
- Portable outdoor fans: fans don't lower air temperature, but they dramatically increase convective and evaporative cooling from skin. In dry conditions a 5–6 mph breeze at skin level can feel equivalent to dropping air temperature by several degrees.
One honest note on misting: in my own experience using a fan-plus-mister setup in a mid-Atlantic summer (high humidity), the misting helped on breezy days and barely made a difference on still, muggy ones. If you're in Phoenix or a similarly dry climate, a good misting system is one of the most effective same-day investments you can make. Experimental Verification of Mist Cooling Effect in outdoor spaces (peer-reviewed case studies) reports that field experiments of misting systems and fan+mister combinations show near-instantaneous skin- and air-temperature benefits for pedestrians, but also find that in humid climates misting can raise humidity and reduce evaporative cooling of people, so net comfort gain depends on local humidity, wind, and operational parameters Field experiments of misting systems and fan+mister combinations report near-instantaneous skin- and air-temperature benefits for pedestrians, while noting that in humid climates misting can raise local humidity and reduce evaporative cooling so net comfort gains depend on humidity, wind, and operational settings..
Short-term cooling upgrades (days to weeks out)
These options take a little planning or setup time but still don't require permanent construction. They're the right move if you want more coverage than umbrellas give you but aren't ready to commit to a pergola or coating project yet.
- Shade sails: triangular or square HDPE shade sails can cover 100–400 square feet, cost $50–$200 depending on size and UV rating, and install in an afternoon with concrete anchors or attachment points on your home and a fence. Look for 90%+ UV blocking and stainless hardware; cheap sail kits use aluminum hardware that corrodes and lets the sail sag within a season.
- Temporary awnings and retractable pergola covers: fabric awnings that attach to the house wall and extend over the patio can be rolled up when not in use. They block direct sun effectively and are removable if you rent. Expect $150–$600 for decent quality.
- Outdoor rugs: a light-colored or natural-fiber outdoor rug over high-traffic areas prevents direct foot contact with the hot slab. Rugs don't cool the concrete, but they make the patio much more comfortable to walk on barefoot. Use light tan, white, or gray colors to avoid creating a dark heat-absorbing surface on top of the concrete.
- Potted trees and large planters: a row of large potted arborvitae, bamboo, or small ornamental trees on the west or south edge of your patio can block low-angle afternoon sun. The evapotranspiration from the plants also adds a small cooling effect. This requires daily watering unless you set up a drip system.
Long-term structural and landscape solutions
If you want to fix the heat problem permanently, you need either a structure that shades the slab consistently or a landscape change that alters the microclimate. These involve more time and money but deliver the biggest temperature reductions: peer-reviewed measurements show tree shade can reduce midday surface temperatures by 14–23°F on average, compared to the 12°F from a cloth umbrella.
Pergolas and permanent shade structures
A DIY pergola attached to the house is one of the most popular patio upgrades for a reason: it blocks overhead sun, gives you a place to hang outdoor curtains or a shade cloth for the afternoon angles, and adds real value to the property. For maximum cooling, build it with a 70–80% shade cloth or polycarbonate roof rather than open lattice, which lets most direct sun through. Freestanding pergolas give more flexibility in placement. Most homeowners can build a 12×16 ft attached pergola in a weekend for $800–$2,500 in materials depending on wood species and hardware. If you're adding footings or doing any electrical (ceiling fans, lights), check local permit requirements first.
Permanent awnings
Retractable motorized awnings from name-brand manufacturers (Sunsetter, Maxxar, etc.) extend 10–14 feet over a patio and retract in wind or when not in use. Professionally installed units cost $1,500–$4,000. A simpler fixed aluminum awning is cheaper ($600–$1,500 installed) but doesn't retract. Both options completely block overhead sun in the covered area but leave afternoon side-angle sun to hit the slab edges and walls.
Tree placement and timing
Planting deciduous shade trees is one of the most cost-effective long-term investments, but you need to plan placement carefully. Trees planted on the west and southwest side of the patio will block the afternoon sun that does most of the heating. The problem is timing: a bare-root or 3-gallon tree takes 5–10 years to provide meaningful shade. If you want faster results, plant 15–25 gallon container specimens ($150–$400 each for maples, oaks, or honeylocusts) or fast-growing species like red maple, river birch, or thornless honeylocust. Keep trees at least 10–15 feet from the slab edge to avoid root encroachment under the concrete. Evapotranspiration from established trees also cools the surrounding air, adding a microclimate benefit beyond just shade.
Planting, groundcover, and irrigation
Replacing paved or bare-soil areas around (not on) the patio with groundcover, lawn, or planting beds reduces the amount of radiant heat bouncing back onto the slab from surrounding surfaces. Dark mulch, gravel, and asphalt all contribute to the heat island effect around a patio. A drip irrigation system in planting beds keeps soil and plants moist, which promotes evaporative cooling across the whole outdoor area. This is a low-cost, high-impact improvement that most homeowners overlook.
Surface treatments that reduce heat absorption
These approaches change the concrete itself (or its top surface) so it absorbs less solar energy in the first place. They're permanent or semi-permanent changes to the slab and range from a simple sealer coat to a full overlay. Here's an honest comparison of the main options.
| Treatment | Solar Reflectance (SR) | Expected Temp Reduction | Longevity | DIY Difficulty | Rough Cost (materials) |
|---|---|---|---|---|---|
| Light-colored acrylic sealer | 0.40–0.60 | 5–10°F | 2–4 years | Easy | $0.10–$0.25/sq ft |
| White/light reflective elastomeric coating | 0.70–0.90 | 10–16°F | 5–10 years | Moderate | $0.25–$0.60/sq ft |
| Concrete whitewash or limewash | 0.60–0.75 (estimated) | 8–13°F | 1–3 years | Easy | $0.05–$0.15/sq ft |
| Light-colored concrete overlay/microtop | 0.40–0.65 | 5–12°F | 5–15 years | Moderate-Hard | $0.75–$2.00/sq ft |
| Light-colored pavers (replacement) | 0.35–0.55 | 5–10°F | 20–30+ years | Hard/Pro | $8–$20/sq ft installed |
A useful rule of thumb from California DOT cool-pavement research: every 0.10 increase in albedo (reflectance) lowers peak daytime surface temperature by roughly 3–4°C (5–7°F). So going from a standard gray slab at SR 0.30 to a white reflective coating at SR 0.85 is a 0.55 improvement in albedo, which translates to a theoretical 16–21°F peak reduction. Real-world results from EPA cool-pavement field studies land in the 10–16°F range for reflective treatments, which is consistent with that math once you account for thermal mass, local wind, and humidity.
One important trade-off: reflective white coatings can be slippery when wet, which is a real safety concern on a patio. Look for products with anti-slip aggregate added (silica sand or aluminum oxide broadcast into the wet coating) and verify the coefficient of friction meets local code for exterior surfaces. Also be aware that bright white surfaces increase glare, which can be uncomfortable in a space where you're reading or eating. A light gray or off-white finish often strikes a better balance between reflectance and livability.
Applying light-colored sealers and reflective coatings
This is the most practical DIY surface treatment for most homeowners. Done right, a reflective acrylic or elastomeric coating is a weekend project that delivers measurable results and lasts several years before it needs reapplication. Here's exactly how to do it. If the surface needs smoothing or old coatings removed before you apply a sealer, see our guide on how to sand a concrete patio. For step-by-step instructions on smoothing a rough concrete patio before applying coatings, see our guide on how to smooth rough concrete patio.
Materials list
- Light-colored or white water-based acrylic sealer or elastomeric coating (look for products with published SR ≥ 0.70 and SRI ≥ 90 on the technical data sheet; examples include Karnak 529 Renu-White at SR ~0.85/SRI ~107 or Huntsman RCS 5000FS at SR ~0.86/SRI ~109)
- Concrete degreaser or TSP substitute (1–2 gallons for a 200–400 sq ft patio)
- Pressure washer or stiff-bristle scrub brush and garden hose
- Concrete etching solution (muriatic acid diluted 1: 10 or phosphoric acid etcher for smooth troweled surfaces)
- Acid-resistant gloves, safety glasses, and rubber boots
- 9-inch paint roller with 3/8-inch nap roller cover (2–3 covers)
- Extension pole for roller
- Paint tray and liners
- 2-inch brush for edges and tight spots
- Anti-slip aggregate (fine silica sand or aluminum oxide, 30-grit) — 1 lb per 100 sq ft
- Painter's tape for edges
- Plastic sheeting to protect adjacent surfaces
Step-by-step application
- Confirm the slab is ready: concrete must be fully cured (at least 28–30 days old) and must pass the water-droplet test — sprinkle water on the surface and if it beads up, the slab has an existing sealer that needs to be stripped or mechanically abraded before you proceed.
- Clean thoroughly: degrease the entire surface with a concrete degreaser according to label directions, scrubbing with a stiff brush or running a pressure washer at 2,500–3,000 PSI. Rinse well and let dry completely (24–48 hours in warm weather).
- Etch smooth surfaces: if your concrete has a smooth troweled finish, open the pores with a dilute acid etch (phosphoric acid etcher is safer than muriatic for DIY use). Apply, scrub, rinse thoroughly, and neutralize per label directions. The surface should feel like fine sandpaper when dry. If your slab already has an open, broom-finished texture, skip this step. (Smoothing or grinding the surface first is covered in related guides on smoothing rough concrete and grinding concrete.)
- Let the surface dry completely: this is non-negotiable. Apply your hand to the surface — if it feels cool or you see any moisture sheen, wait. Most coating failures I've seen come from applying to a damp slab.
- Apply the first coat: pour product into a tray, roll onto the slab in 3–4 ft sections using a 3/8-inch nap roller. Work from the far edge back toward the exit. Apply thin and even — don't try to get full coverage in one coat. Cut in edges with a brush first.
- Broadcast anti-slip aggregate (optional but recommended): while the first coat is still wet and tacky, lightly broadcast silica sand at about 1 lb per 100 sq ft, then roll it gently into the surface with a dry roller. This step dramatically improves slip resistance.
- Allow to dry per manufacturer's spec: most water-based acrylics are dry to touch in 1–2 hours and ready for a second coat in 4–6 hours at 70°F. Elastomeric products may need 8–24 hours between coats. Don't rush this.
- Apply the second coat: this provides full coverage, opacity, and the rated solar reflectance. Apply it perpendicular to the first coat (if you rolled east-west first, roll north-south second) for even coverage.
- Cure and stay off: keep foot traffic off for at least 24–48 hours, and keep furniture off for 72 hours minimum. Full cure before heavy use is typically 5–7 days. Do not apply if rain is forecast within 24 hours or if temperatures are below 50°F or above 90°F.
Maintenance and longevity
Light-colored acrylic sealers need reapplication every 2–4 years, and elastomeric coatings every 5–10 years depending on UV exposure, traffic, and freeze-thaw cycles. In climates with hard winters, check the product's freeze-thaw compatibility, some coatings become brittle and crack when moisture gets beneath them and freezes. Every spring, check for peeling, chalking, or discoloration. If the coating has turned gray from embedded dirt, a thorough pressure wash often restores a significant amount of reflectance. Manufacturers publish aged solar reflectance values on their technical data sheets (usually 3-year values), which give you realistic expectations for performance after the first few seasons.
Concrete whitewash and limewash
Whitewashing or limewashing a concrete patio is one of the cheapest ways to lighten its surface and improve reflectance. It's not as durable as a sealer or elastomeric coating, but it's extremely low-cost, easy to apply, and looks surprisingly good on older slabs with texture and character. I've used limewash on a back patio and been genuinely happy with the result for the first two summers before it needed a refresh.
Supplies
- Hydrated lime (Type S masonry lime) — 1 lb makes about 1 quart of working wash; plan on 1–2 lbs per 100 sq ft for a single coat
- Water
- 5-gallon bucket for mixing
- Drill with paddle mixer attachment
- Wide masonry brush or thick-nap roller (1/2 inch nap) for applying limewash
- Stiff-bristle brush for scrubbing prep
- Garden hose or pressure washer for prep
- Rubber gloves and eye protection (lime is caustic)
- Concrete primer or bonding agent (optional, improves adhesion on very smooth surfaces)
- Masonry sealer (optional, applied over the dried limewash to extend life)
Preparation
The surface prep for limewash is the same core sequence as for sealers: clean off all dirt, oil, and loose material with a pressure washer and degreaser, and let dry completely. The difference is that limewash bonds through a chemical reaction with concrete and doesn't require etching on most surfaces. If the slab has a slick or sealed surface, a light acid etch will help. Limewash will NOT adhere properly over an existing sealer or paint, if there's a previous coating on the slab, remove it mechanically or chemically first. Check for existing coatings with the water-droplet test mentioned above.
Mixing and application
- Mix the limewash: combine 1 lb of hydrated lime with 1 quart of water and mix thoroughly with a paddle mixer until it has the consistency of whole milk. No lumps. For a thicker, more opaque coat, reduce water slightly. Pigments (iron oxides) can be added at this stage for a tinted wash.
- Wet the concrete lightly before applying: a damp (not wet) surface slows absorption and gives you more working time. Mist the slab with a hose and let surface water evaporate until it's just damp.
- Apply the first coat with a wide brush using scrubbing strokes to work the wash into surface texture. A roller works for open areas but a brush gives better penetration. Work in 4–6 ft sections to maintain a wet edge.
- Let the first coat dry until it turns from translucent to white and chalky — typically 1–2 hours in warm, dry weather.
- Apply second coat: a second coat is almost always needed for consistent coverage and opacity. Apply the same way. A third coat can be added on textured slabs that show streaks.
- Optional sealer top coat: once the final limewash coat has cured for 24–48 hours, applying a penetrating masonry sealer or a diluted acrylic sealer over the top dramatically extends life and makes the surface easier to clean. Without a sealer, limewash is more vulnerable to water erosion and foot-traffic wear.
Expected lifespan and appearance
Unsealed limewash on a patio typically lasts 1–2 years in heavy-use areas before wearing noticeably, and 2–3 years in lighter-traffic spots. Sealed limewash can push to 3–4 years. It weathers gracefully rather than peeling, it fades and develops a patchy, weathered look that many people find attractive. The initial application will look very white and almost stark; it mellows to a softer, chalky off-white within a few weeks of UV exposure. If you want a consistent, controlled finish that holds its appearance longer, a reflective acrylic sealer is a better choice. But if you like the look of a European-style washed stone and want a fast, cheap refresh, limewash is hard to beat.
Safety, durability, and when things go wrong
A few important warnings before you go ahead with any surface treatment. First, slip resistance: any coating that adds a smooth film to concrete can become dangerously slippery when wet. Always add anti-slip aggregate to coatings and test the cured surface with a wet foot before declaring the project done. Second, freeze-thaw compatibility: in cold climates, water can get beneath coatings if they're applied over a damp surface or if the concrete has existing cracks. That trapped water freezes, expands, and pops the coating off in sheets come spring. Fix cracks before coating and ensure the slab is bone dry on application day. Third, coating compatibility: don't apply an oil-based product over a water-based one or vice versa without testing adhesion first. Use the same product line or confirm compatibility with the manufacturer. Applying a new coating over an incompatible existing one is one of the most common DIY mistakes I've seen, it looks fine for a few months, then delaminates. For guidance on safe de-icing methods and products that won't harm the slab, see our guide on how to melt ice without damaging a concrete patio.
For resurfacing options like concrete overlays, microtoppings, or a full paver replacement, the complexity and cost increase significantly. A proper overlay requires grinding or shot-blasting the existing surface (related to the grinding guide mentioned elsewhere on this site), applying bonding agents, and working within tight time windows for the overlay product. These are projects where calling a pro is reasonable unless you have prior experience with polymer-modified overlays. The same goes for any structural shade work that involves digging footings or attaching to a load-bearing wall, get permits and consider a contractor for those pieces even if you handle the rest yourself.
Cost and time summary
| Solution | Typical Cost (200 sq ft patio) | Time to Implement | Expected Temp Reduction | Lifespan |
|---|---|---|---|---|
| Umbrella + misting fan | $50–$150 | Same day | 10–15°F perceived | Seasonal |
| Shade sail | $80–$250 | 1 day | 10–15°F surface | 3–5 years |
| Limewash (DIY) | $20–$60 | 1 day | 8–13°F | 1–3 years |
| Reflective acrylic sealer (DIY) | $50–$120 | 1–2 days | 5–10°F | 2–4 years |
| Reflective elastomeric coating (DIY) | $100–$250 | 2 days | 10–16°F | 5–10 years |
| Pergola with shade cloth (DIY) | $800–$2,500 | 1–2 weekends | 14–23°F | 15–25 years |
| Shade trees (3 planted) | $450–$1,200 | 1 day + 5–10 yrs growth | 14–23°F (at maturity) | Permanent |
| Concrete overlay (pro) | $1,500–$4,000 | 3–5 days | 5–12°F | 5–15 years |
When to hire a professional
Most of the solutions in this guide are genuinely DIY-able for a handy homeowner. But there are specific situations where I'd recommend calling a pro. Hire out the work if: you need footings poured for a pergola or shade structure and you're not confident in your layout and depth; the slab has significant structural cracks, heaving, or drainage issues that need to be addressed before any surface treatment (applying a coating over a failing slab is money wasted); you want a professional-grade concrete overlay or microtop that requires shot-blasting equipment and tight application timing; or your patio is attached to the home's structure and any shade structure attachment points will interact with flashing, roofing, or load-bearing walls. For surface treatments alone, a pro rarely adds enough value over DIY to justify the markup, but for structural work and resurfacing, the expertise is worth it.
FAQ
How do I measure my patio’s surface temperature accurately before choosing cooling methods?
Use an infrared (IR) thermometer with emissivity set for concrete (~0.92–0.95) for spot checks and a contact probe (thermocouple/RTD) to verify readings. Make sure the IR spot is smaller than the area measured or move closer. For a quick calibration, place matte black electrical tape on the surface, let it equilibrate, compare IR reading to a contact probe on the tape, and apply any offset to other IR readings.
What surface temperature should I target for comfortable barefoot use?
Aim for a surface temperature between about 19–29 °C (66–84 °F). Most people find 26–28 °C (79–82 °F) especially comfortable for bare concrete. For safety, avoid prolonged contact above thresholds in ISO 13732 (hot-surface burn guidance). Use shading or treatments to keep peaks within this band.
What temporary/instant fixes work best while I plan permanent changes?
Effective short-term options: umbrellas/market parasols placed to block midday sun, portable fans (increase evaporation from skin), misting systems or handheld misters (works better in dry climates), and reflective shade cloths. Combine fan + mister for best perceived cooling. These require minimal skill and can reduce surface/near-air temps by several °C, but are weather- and humidity-dependent.
Which temporary methods can damage concrete or create hazards?
Avoid prolonged ponding from poorly drained misters, which can encourage efflorescence or freeze-thaw damage in cold climates. Don’t use pressure washers too hot or too close on newly cured concrete. Avoid dark, heat-absorbing rugs or tarps that trap heat and moisture against the slab.
What surface treatments lower heat absorption and how much cooling can I expect?
High-reflectance/‘cool’ coatings (white acrylic/elastomeric), light-colored sealers, limewash/whitewash, and reflective stains increase albedo and can reduce peak surface temps by several °C. EPA and field studies report typical reductions ~5–9 °F (≈3–5 °C) for high-reflectance treatments, but results depend on coating SR, thermal mass, and weathering.
How do I choose between paint/coating, stain, overlay, or whitewash?
Choose by tradeoffs: reflective acrylic/ elastomeric coatings give highest initial reflectance and long coverage but require good prep and periodic recoat; pigmented concrete stains are breathable and less likely to peel but lower reflectance; cementitious overlays let you change texture/color and may add thermal mass; whitewash is low-cost and breathable but short-lived. Consider slip resistance, durability, UV resistance, and local climate when deciding.