
Yes, you can absolutely extend an existing concrete patio with a new concrete slab. The key is treating it as a new independent slab that sits right next to the old one, properly separated by an expansion joint, rather than trying to bond the two slabs into one. Do it right and you get a seamless-looking, durable extension. Skip the prep work or ignore the joint, and you'll be looking at cracked concrete within a season or two.
How to Extend a Concrete Patio: DIY Step-by-Step

Silas Morrison
20 May 2026
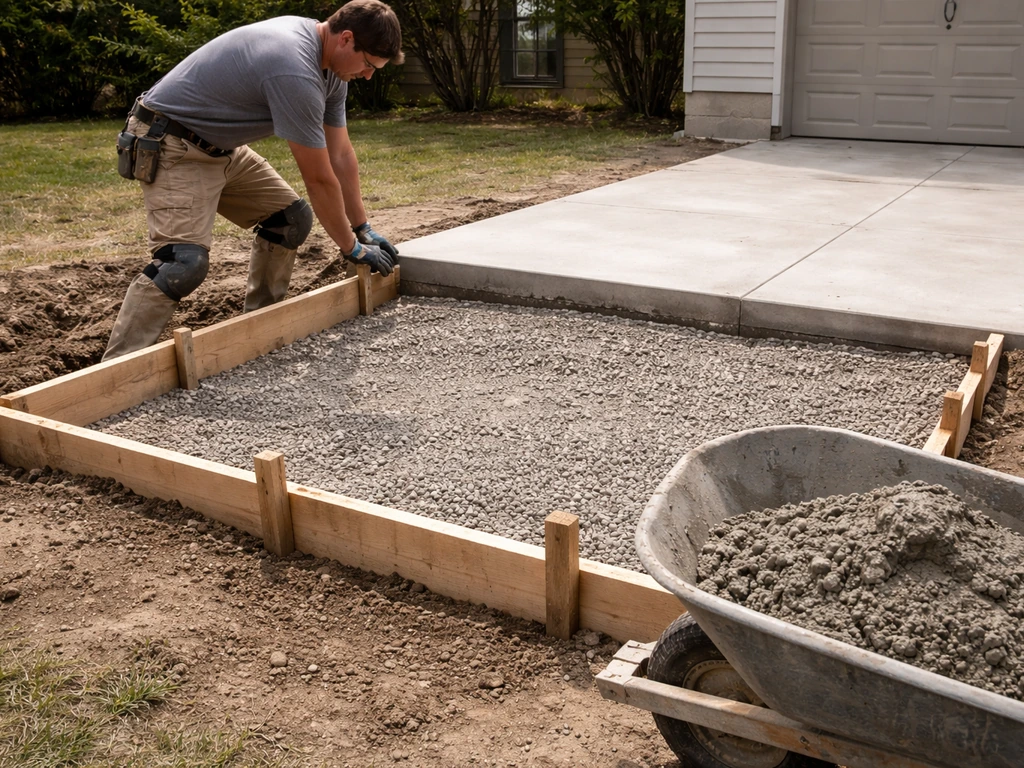
When you can (and can't) extend an existing concrete patio
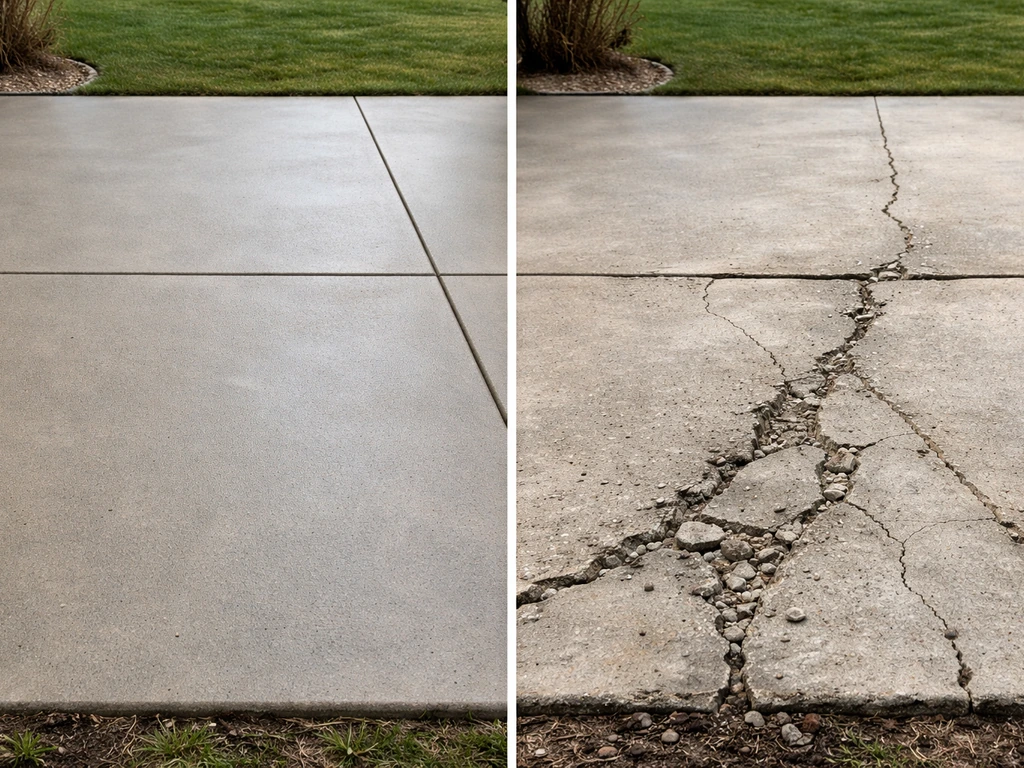
Most concrete patios can be extended, but before you rent a mixer, take a hard look at what you're working with. A structurally sound existing slab in decent condition is the ideal starting point. If your current patio has a few cosmetic cracks, that's fine. If it's heaving, crumbling at the edges, sinking, or showing signs of significant base failure, extending it will just give your new concrete a bad neighbor. Fix or replace the existing slab first.
There are a few other situations where a straight concrete extension isn't the right move. If your yard has poor drainage and the area you want to extend into stays wet or soft, you'll need to fix the drainage before pouring anything. If you're working right up against a structure, a fence post, or a buried utility line, you may need to rethink the layout.
And if you're extending close to your home's foundation, keep in mind that any slab within 10 feet of the house needs to slope away from it at a minimum of 1/4 inch per foot to protect the foundation. That slope requirement can sometimes complicate how a new extension connects to an existing patio, especially if the old slab doesn't already have adequate pitch.
If you're open to non-concrete options, there are other ways to make a patio bigger without pouring a new slab. If you want a patio without concrete, start with pavers, gravel, or composite decking to get the look and function without a slab. If you need ideas beyond a straight slab pour, you can also look at how to make a concrete patio bigger for alternate layouts and adjacent options.
Pavers, gravel, or composite decking can all extend a patio and are sometimes easier for a DIYer to manage. If you want to extend a patio without concrete, consider pavers, gravel, or composite decking for a simpler, non-pouring approach. But if you want a concrete extension that matches your existing patio, this guide covers exactly how to do it. If you want the step-by-step for this exact approach, see how to add onto a concrete patio for the full process.
Planning the extension: size, layout, elevation, and drainage
Good planning here prevents almost every major problem. Start by deciding the dimensions of your extension. Sketch it out on paper or stake it out in the yard with marking paint or stakes and string. Think about how you'll use the space: furniture placement, traffic flow, grill clearance. It's easier to pour more concrete now than to add another section later.
Elevation is where people get into trouble. Your new slab needs to sit at the same height as the existing one, or very close to it. Even a half-inch difference creates a trip hazard and looks sloppy. To match elevations, measure the top surface of your existing slab at the edge where the new slab will meet it. That's your target finished height for the new pour. Work backward from there to figure out how deep you need to dig, accounting for your concrete thickness (typically 4 inches for a residential patio), plus base material, plus any subbase you'll add.
Drainage is non-negotiable. The standard slope for a concrete patio is 1/8 inch per foot, sloping away from any structures. In wetter climates, you may want to go up to 3/8 inch per foot. Your extension should match the slope direction of the existing slab wherever possible. If you're extending sideways (parallel to the house), the slope should continue to run away from the house across the new slab as well. Set your forms to the correct slope before you pour a drop of concrete.
Prep work for an existing slab: removing edges, cleaning, and bonding surfaces
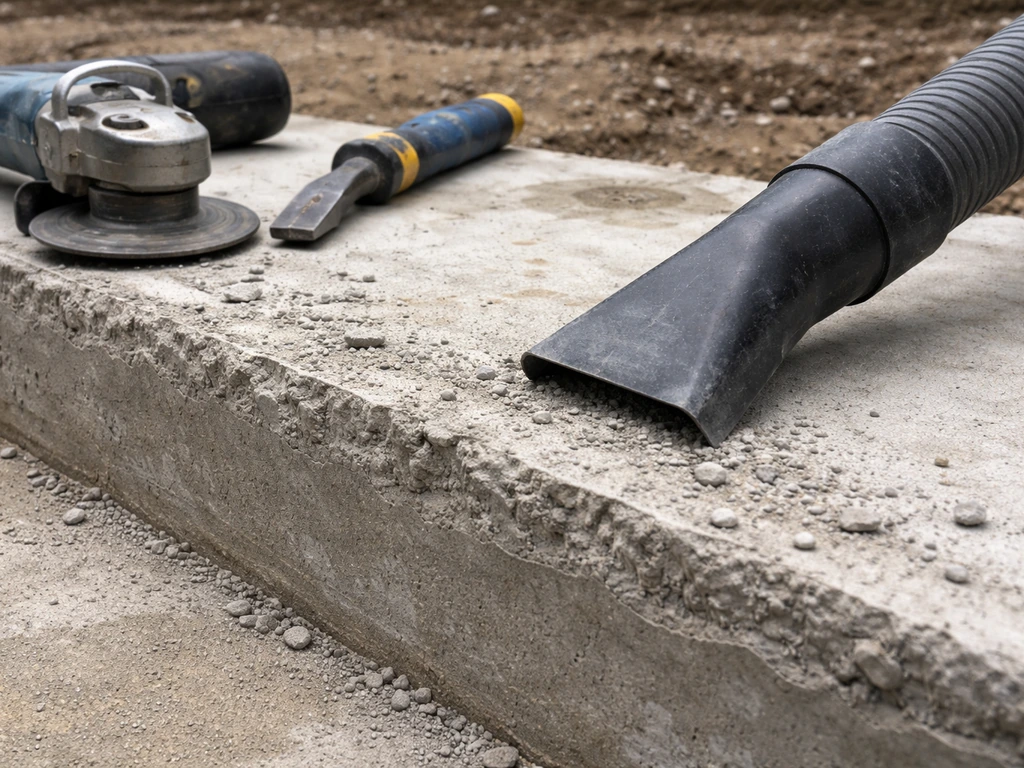
This is the section most DIYers skim past and then regret. Prep is everything. The edge of your existing slab where the new concrete will meet it needs to be clean, sound, and properly exposed. If the original slab has a rounded or troweled edge, you need to cut it back to a clean vertical face. Rent a concrete saw and cut straight down at the edge location. This gives you a true vertical surface for your expansion joint material to sit against.
Clean the entire edge and the surrounding ground area thoroughly. Remove any loose concrete, dirt, grass, roots, or debris. A wire brush and a pressure washer will handle most of it. The ground in the extension area needs to be excavated down to your target subbase depth, with all organic material removed. Concrete poured over soft soil or dead grass will settle and crack.
Here's a critical point about bonding: do not use a bonding agent to try to glue the new slab to the old one. This is counterintuitive but important. Two adjacent slabs bonded together without a joint will crack as they expand and contract at slightly different rates. Instead, the correct approach is to place a 1/2-inch expansion joint material (a compressible foam backer rod or pre-formed expansion joint strip) against the face of the existing slab before you pour. The new concrete butts right up against that material. This allows independent movement and prevents the new slab from cracking the old one, or vice versa.
Building the extension correctly: forms, reinforcement, base/subbase, and concrete mix
Subbase and base
Dig down far enough to allow for 4 inches of concrete plus at least 4 inches of compacted gravel base (more in cold climates with freeze-thaw cycles, where 6 inches of base is better). Use crushed gravel or road base, not pea gravel. Compact it in layers with a plate compactor. A well-compacted base is what keeps your slab from settling unevenly over time. Don't skip the compaction step.
Forms
Build your forms from 2x4 lumber (for a 4-inch slab) or 2x6 lumber if you're pouring a thicker section. Set the forms to the exact finished height you calculated during planning, with the correct slope built in. Brace the forms well with stakes every 2 to 3 feet so they don't blow out when you're screeding wet concrete. The expansion joint material against the existing slab acts as one side of your form on that edge.
Reinforcement
For a standard patio extension, #3 or #4 rebar on a 12 to 18 inch grid is a solid choice. Use rebar chairs or small stones to hold the rebar at mid-depth in the slab (about 2 inches from the bottom for a 4-inch slab). Alternatively, 6x6 welded wire mesh works for smaller slabs, though rebar provides better crack control on larger pours.
At the joint between the old and new slab, consider using smooth steel dowels to provide load transfer. These are horizontal steel bars that extend from the existing slab into the new one, allowing the slabs to share vertical loads so one doesn't sink below the other. If your existing slab doesn't already have dowels at that edge (most residential patios don't), you can drill into the existing slab with a hammer drill, insert smooth dowels with epoxy anchoring adhesive, and let them cure before pouring. Epoxy-coated smooth dowels are the best choice because they allow horizontal movement (expansion and contraction) while still preventing one slab from lifting or dropping relative to the other.
Concrete mix
For an exterior patio, you want a minimum of 3000 psi concrete. For most regions, blank" rel="noopener noreferrer">3500 to 4000 psi is the better choice for exterior flatwork exposed to weather. If you live somewhere with cold winters and freeze-thaw cycles, specify air-entrained concrete (6% entrained air per ASTM C260 is the industry standard for exterior flatwork subject to freeze-thaw). Air entrainment creates microscopic bubbles that give the concrete room to expand when water inside freezes, dramatically reducing surface scaling and spalling over time. If you're ordering ready-mix, tell the plant you want air-entrained exterior flatwork at 4000 psi. If you're mixing bags yourself, use a bagged mix specifically rated for exterior flatwork in your climate.
Pouring, curing, and finishing: matching texture and color and handling joints
The pour
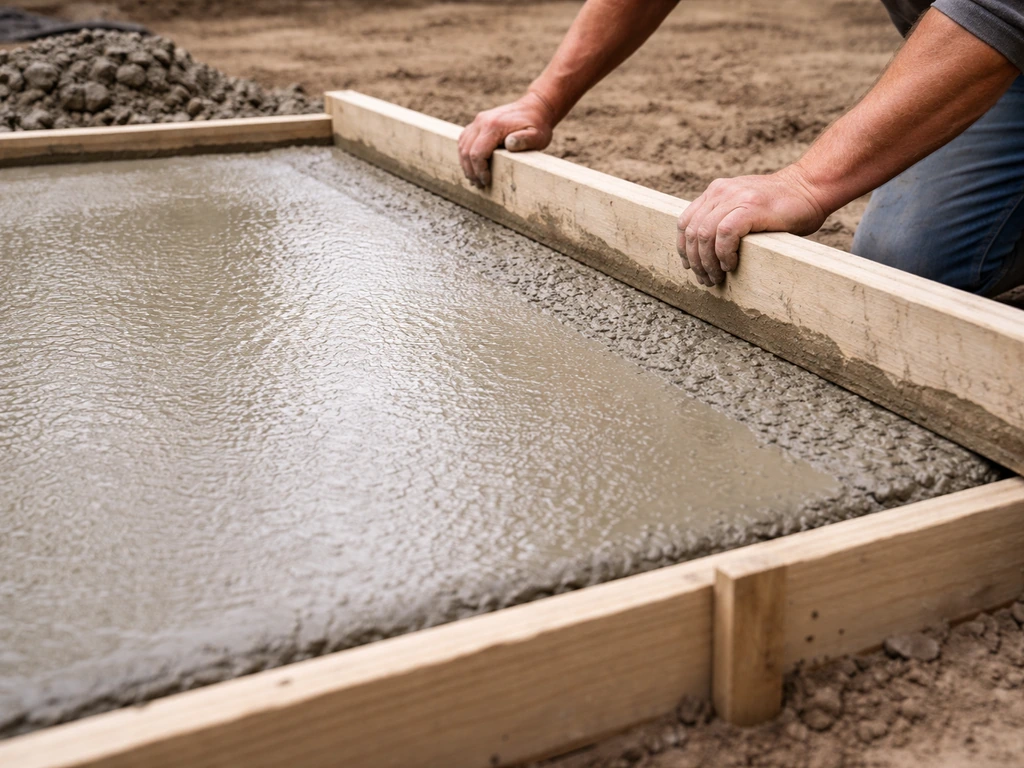
Pour the concrete into the forms starting at the far end and working back toward the expansion joint at the existing slab. Use a screed board (a straight 2x4) to level the concrete to the top of the forms, moving it in a back-and-forth sawing motion. Follow with a bull float to smooth the surface and push aggregate down. Work quickly and have helpers if the pour is large, because concrete doesn't wait for you.
Matching texture and color
Matching an existing slab's appearance is one of the trickier parts of a patio extension. If your existing patio is a standard broom finish, use the same technique on the new slab: wait until the bleed water has evaporated and the surface has lost its sheen, then drag a concrete broom across it in one direction. Use the same broom type and pressure as the original if you know it.
For color matching, concrete naturally varies from pour to pour depending on mix, water content, curing conditions, and age. Fresh concrete will almost always look lighter than aged concrete. You have a few options: add integral color pigment to the mix to get closer to the aged look of the original, wait and let the new slab weather naturally over a season, or apply a color stain to both slabs after curing to create a unified appearance.
Curing
Curing is not optional. Concrete that dries too fast loses strength and develops surface cracks. After finishing, apply a curing compound (ASTM C309) by sprayer, or cover the slab with plastic sheeting or wet burlap and keep it moist. Maintain curing for a minimum of 7 days at temperatures above 50°F. Don't walk on the slab for at least 24 to 48 hours, and don't put furniture on it for at least a week. Full design strength takes about 28 days.
Control joints in the new slab
Your new slab needs its own internal control (contraction) joints to manage shrinkage cracking. These are the lines you see cut across concrete patios. Space them so that no panel is larger than about 10 to 15 feet in either direction, following the rule of no more than 24 to 36 times the slab thickness in inches. For a 4-inch slab, that's a maximum panel dimension of roughly 8 to 12 feet.
Saw-cut the joints with a concrete saw within 4 to 12 hours after final finishing, while the concrete is firm enough to walk on but before random shrinkage cracking begins. Cut them to a depth of at least 1 inch (one-quarter the slab thickness) to properly guide any cracks to the joint location.
Joints, sealing, and long-term durability
Filling the joints
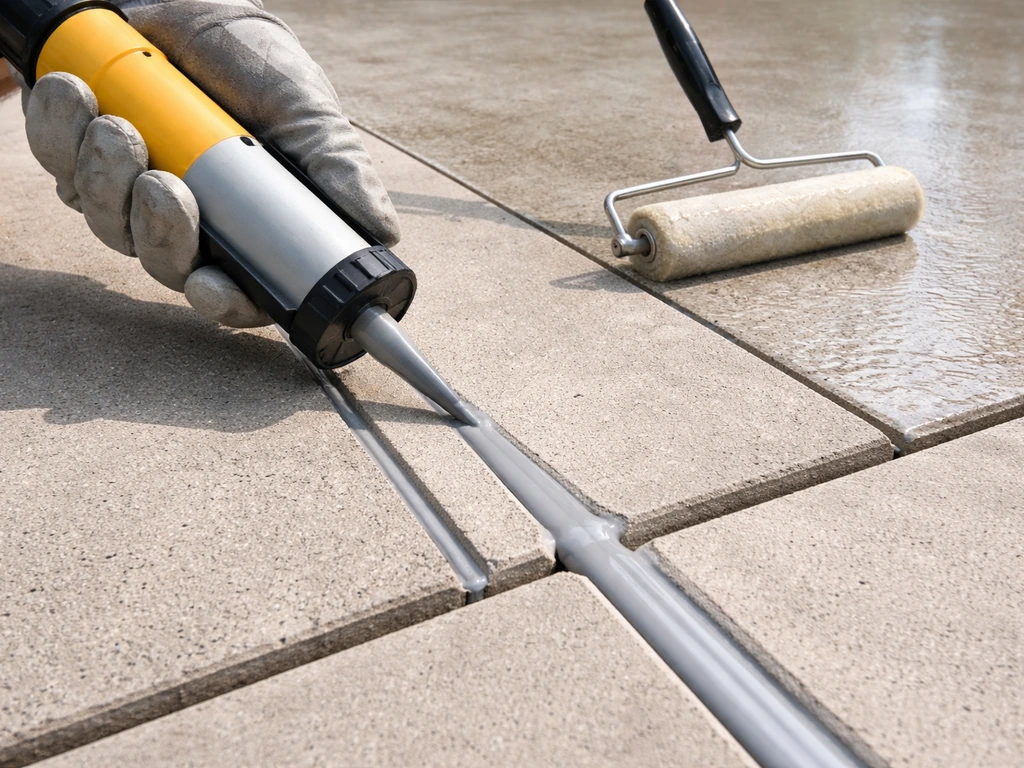
Once the new slab has cured, fill the saw-cut control joints and the expansion joint between the old and new slab with a flexible polyurethane or silicone concrete joint sealant. This keeps water from infiltrating the joints, which is especially important in freeze-thaw climates where water in a joint can expand and pry the slabs apart. Don't fill joints with rigid caulk or concrete grout, both of which will crack out quickly.
Sealing the slab
Seal both the new and the existing slab at the same time, about 28 days after the pour (once the new concrete has fully cured). For exterior patios exposed to freeze-thaw cycles and de-icing salts, a penetrating sealer is the better long-term choice over a film-forming sealer. Penetrating sealers soak into the concrete matrix and protect from within without leaving a surface film that can wear, peel, or become slippery when wet. Film-forming sealers look great initially but break down faster under UV exposure and foot traffic. If you want a decorative sheen, a low-gloss penetrating sealer gives you some of that look with better durability.
Before you seal, make sure the new concrete surface is clean and free of laitance (the weak, chalky surface layer that forms during curing). Light mechanical grinding or a concrete etching solution removes laitance and opens the pores so the sealer can penetrate properly. Wait until the slab is at least 28 days old before etching or sealing.
Keeping it in good shape long-term
Reseal the patio every 2 to 3 years depending on traffic and climate. Keep the expansion joint between the old and new slab filled with flexible sealant and reapply it when it starts to crack or pull away. Make sure the slope is doing its job: after heavy rain, look for pooling water on or near the slab. If water collects against your house foundation, that's a problem worth addressing with regrading or additional drainage before it causes real damage. Catch any new cracks early and fill them with a flexible concrete crack filler before water gets in and makes them worse.
| Step | What to do | Common mistake to avoid |
|---|---|---|
| Edge prep | Saw-cut a clean vertical face on the existing slab edge | Leaving a rounded troweled edge with no clean joint face |
| Expansion joint | Install 1/2-inch compressible expansion joint material against the old slab | Bonding or gluing new slab directly to old slab |
| Load transfer | Install smooth epoxy-coated dowels with epoxy anchoring adhesive | Skipping dowels, leaving slabs unconnected vertically |
| Base | Compact 4 to 6 inches of crushed gravel base in layers | Pouring over uncompacted or organic soil |
| Concrete mix | 3500 to 4000 psi, air-entrained for freeze-thaw climates | Using a basic 2500 psi mix for exterior applications |
| Control joints | Saw-cut within 4 to 12 hours at 1/4 slab depth, max 10 to 15 ft panel spacing | Cutting too late or skipping joints entirely |
| Curing | Cure for minimum 7 days above 50°F with compound or wet cover | Letting the slab dry out in the sun within the first few days |
| Sealing | Apply penetrating sealer at 28 days, reseal every 2 to 3 years | Using a film-forming sealer in freeze-thaw climates |
A concrete patio extension is a very doable DIY project if you go in with a plan and don't rush the prep or the curing. The steps that matter most are the ones that feel the least exciting: getting the elevation and slope right, compacting the base, installing that expansion joint correctly, and curing properly. Nail those and the rest follows. Do this right and your extended patio can last 20 to 30 years with minimal maintenance.
FAQ
What if my existing concrete has hairline cracks, can I still extend it?
If the old patio is rocking, sinking, or the base has failed, an extension will usually crack or settle unevenly because the new slab cannot fix the underlying soil movement. The practical check is to probe the edges and corners for hollow sound, visible subbase voids, or recurring dips after rain. If you find any of those signs, plan on repairing or replacing the existing slab section first, then extend from a stable footprint.
Can I extend a patio right next to an existing slab that was already extended before?
Yes, but treat them as separate slabs by keeping the expansion joint between them. Do not rely on dowels alone to “lock” the slabs together, because dowels provide load transfer, while the joint still needs a compressible gap (about 1/2 inch) to allow movement. Also match the new slab’s finished height and slope to the existing surface to avoid a lip that will collect water and debris.
Can I just grind the edge of the old patio instead of cutting it back?
In most cases, a concrete extension should start with a clean vertical cut at the existing slab edge, not a shallow grind-out. Grinding may help remove weak surface material, but it does not create the proper face for the expansion joint to seal against. Rent a concrete saw to cut straight down at the joint location so the compressible joint material seats correctly.
What should I use to fill the gap between the old and new slabs?
No, rigid fillers are a common failure point. The expansion joint between the slabs should be filled with a flexible polyurethane or silicone joint sealant, not rigid caulk or grout, because the joint flexes with temperature changes. If you use a rigid material, it often cracks out quickly and lets water infiltrate.
Is it okay to pour if the extension area is slightly damp from recent rain?
You generally should not pour if the base is wet, muddy, or still contains organic pockets. Concrete needs stable, compactable soil, so wait until the area drains and dries enough to excavate cleanly and compact without pumping mud. If drainage is the problem (standing water), correct drainage first, then rebuild the base, otherwise the new slab will settle.
What if the existing patio doesn’t have the right slope away from the house?
If the old patio slopes differently, match the slope direction you want for the new area, and adjust the thickness of the excavation/base so the new slab sits at the correct finished elevation at the joint. Avoid creating a local high spot at the transition, because even small depressions can collect water and accelerate joint and surface deterioration.
Do I need dowels if I’m already using an expansion joint?
For the joint zone at the existing slab, smooth dowels help reduce differential sinking by sharing vertical loads, but they do not eliminate the need for an expansion joint. If your old slab edge already has dowels that line up well, you may not need to add more, but you still need the new slab placed with the correct 1/2 inch compressible joint material.
Can I rely on wire mesh instead of rebar for an extension?
Using mesh is not the same as using correct jointing and base preparation. For larger extensions or thicker pours, rebar usually provides better crack control, but the decisive factors are expansion joints, control joint layout, and compaction. If you use mesh, ensure it is supported at mid-depth using chairs, otherwise it can sit too low and become nearly ineffective.
When do I need to cut control joints, and what happens if I wait too long?
Plan control joints before you pour, then keep them aligned and evenly spaced across the whole new slab area. If you delay cutting, random shrinkage cracks can form and you lose the ability to direct cracking into the joint lines. A good rule is to saw within about 4 to 12 hours after finishing, when the concrete is firm enough to walk on without disturbing the surface.
Can I seal sooner if the patio looks dry and cured?
Don’t seal early, and don’t assume a “dry to the touch” slab is ready. Sealing is typically done after the concrete has fully cured (around 28 days for most projects), and you must remove laitance so sealer can penetrate. If you seal over chalky surface, the sealer often fails to bond and can wear off quickly.
What’s different about extending a patio in freeze-thaw regions with de-icing salts?
If you plan to use de-icing salts in cold climates, prioritize air-entrained concrete and a penetrating sealer, and keep the joints maintained with flexible sealant. Salt exposure increases surface scaling risk, so skip film-forming sealers that can wear and become slippery. Also avoid aggressive pressure washing that can erode the surface layer before resealing is due.
How do I extend a patio close to my home without messing up foundation drainage?
Yes, but doing it “all at once” can backfire if the foundation requires that drainage slope rule near the house. Within about 10 feet of the home, any slab should slope away at minimum 1/4 inch per foot, so you may need thicker base removal on one side or a slightly different layout to keep the new extension within that pitch. Re-check elevations before forming to prevent a new section from violating the foundation drainage requirement.