You can level a concrete patio by grinding down high spots, patching and feathering low spots with a polymer-modified overlay, or lifting a sunken slab using mudjacking or polyurethane foam injection. The right method depends on whether you're working with a fresh pour or an existing slab, how bad the unevenness is, and whether the problem is a true trip hazard or just water pooling in the wrong spot. Most DIY-friendly fixes fall into the grind-and-patch category and can be done in a weekend with rented equipment.
How to Level a Concrete Patio Step by Step Guide

Silas Morrison
24 May 2026
First: understand what 'level' actually means for a patio
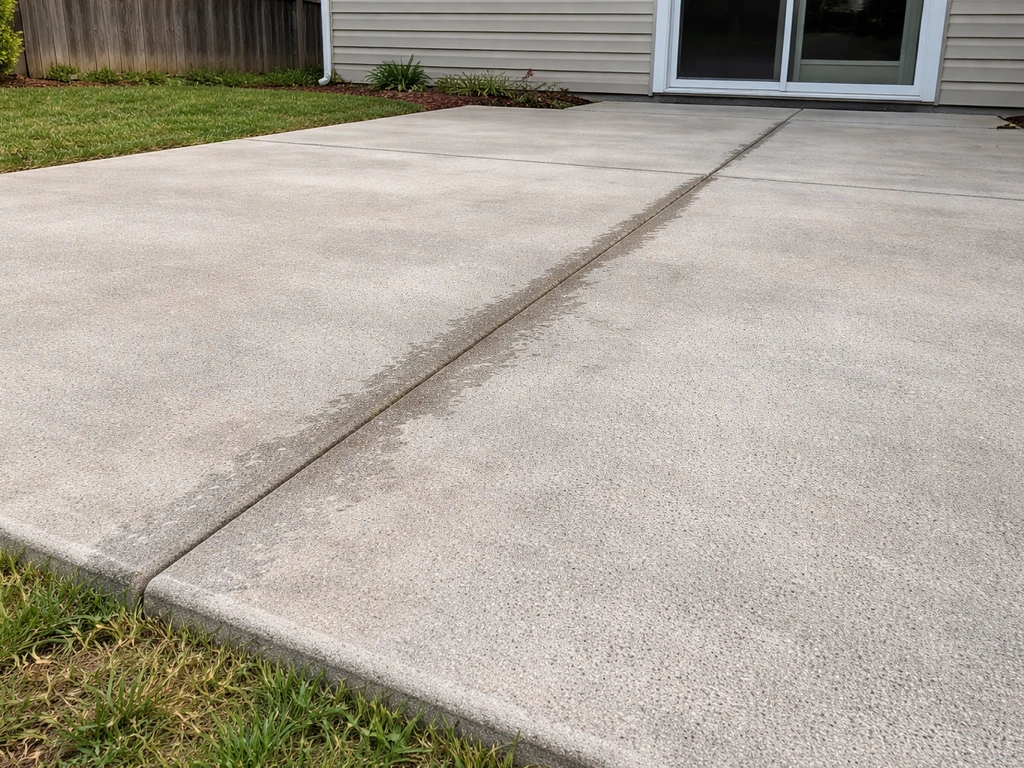
Here's a nuance that trips up a lot of homeowners: a perfectly flat, zero-slope patio is actually wrong for exterior use. If your goal is to fix a my concrete patio is not level situation, start by confirming what level should mean for exterior drainage level patio. Water has nowhere to go, so it ponds, stains, and eventually works its way into cracks. What you want is a controlled slope of about 1/8 to 1/4 inch per foot (roughly 1 to 2%) away from your house or toward a drain. That keeps the surface dry without being steep enough to feel sloped underfoot or create a slip hazard.
So before you start fixing anything, decide which problem you actually have. Is the patio tilting toward the house and funneling water against your foundation? Is there a low spot in the middle that holds a puddle after every rain? Is there a raised edge or sunken panel creating a trip hazard? Each of those is a different fix. Uneven doesn't always mean the whole slab needs to come up. A lot of the time you're correcting one bad section.
Common causes of an uneven patio
- Soil settlement or erosion under the slab: the most common cause of a slab that's sunk or tilted over time
- Poor compaction of the base before the original pour: leads to gradual settlement in specific spots
- Tree root intrusion: pushes sections up unevenly and can crack the slab
- Frost heave: repeated freeze-thaw cycles lift and shift slabs in cold climates
- Bad original forming: the slab was poured slightly off-grade from day one
- Concrete shrinkage and curling: edges lift slightly as the slab dries, creating a bowl effect in large pours
Knowing the cause matters because it tells you whether the fix will hold. If your slab sank because of a void under it, patching the surface without filling that void just means you'll be back in two years doing it again.
Tools, materials, and how to measure the slope
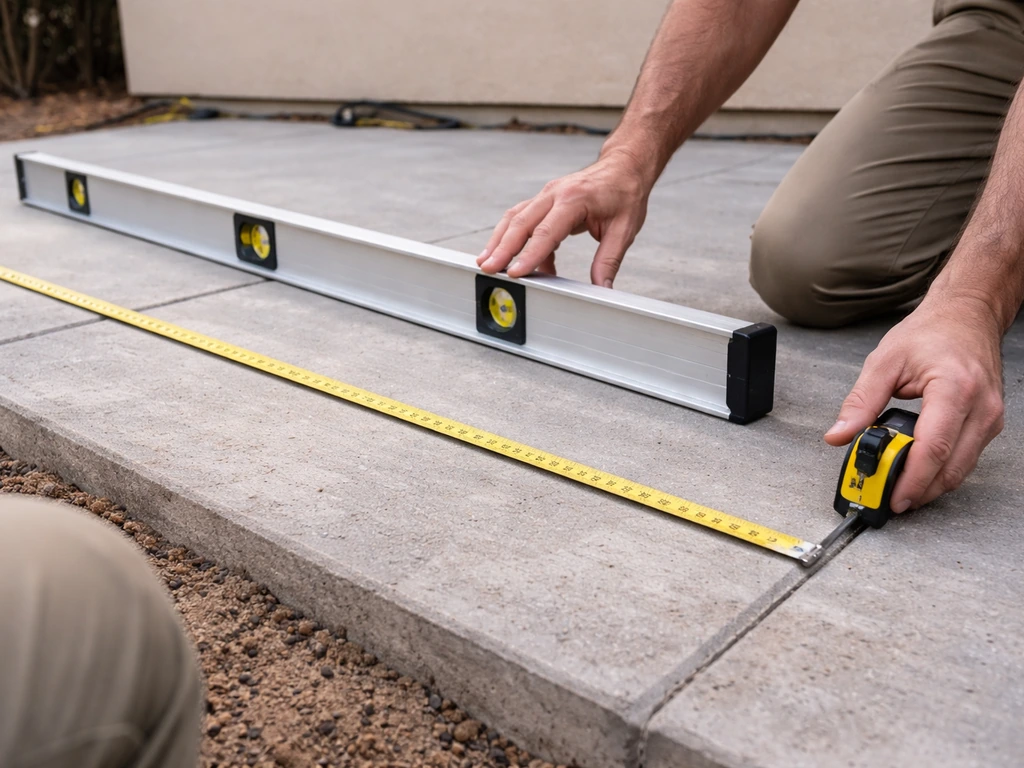
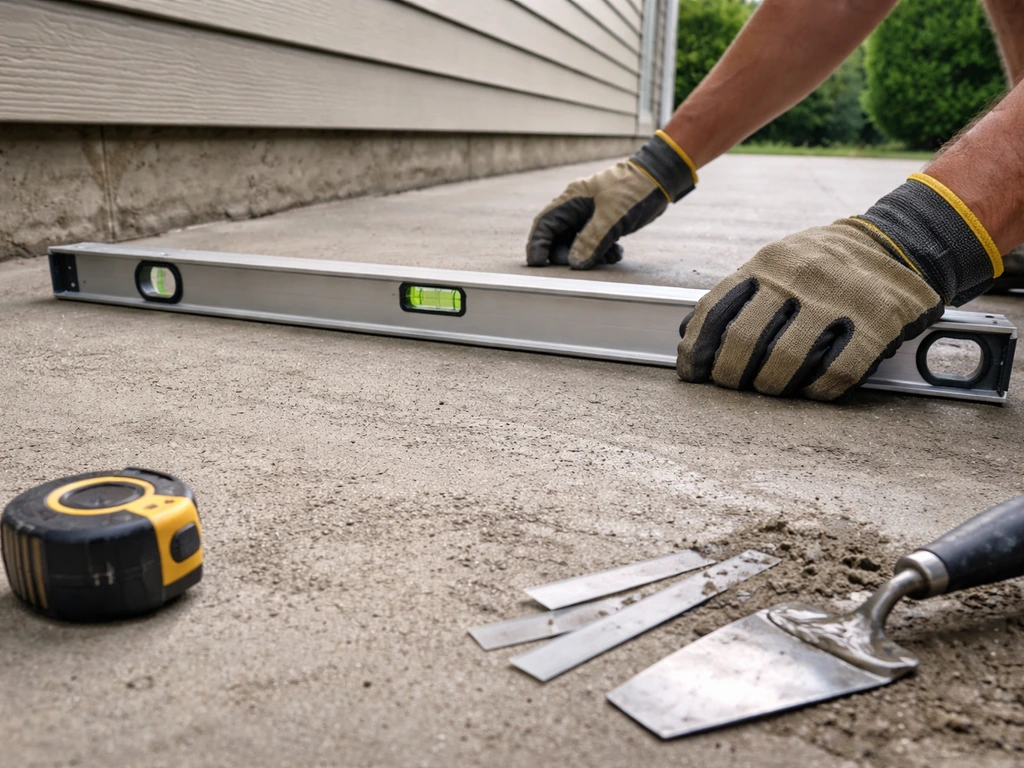
Get your measurements sorted before you buy anything. A long level (4-foot is ideal, 2-foot works) and a tape measure will handle most diagnosis jobs. Lay the level across different parts of the slab and note where it reads high and low. For a more accurate slope reading across the whole patio, use a string line pulled tight from one end to the other with a line level attached, then measure the gap between the string and the surface at multiple points. Mark high and low spots with chalk.
For grinding and patching work, you'll also want a diamond cup grinder or angle grinder with a concrete grinding disc (available at most tool rental shops), a stiff-bristle brush, a shop vac, and a margin trowel or steel finishing trowel. For larger overlay pours, a squeegee, a gauge rake, and spiked roller shoes round out the kit. Connect your grinder to an industrial vacuum whenever possible to keep concrete dust under control.
Materials matched to the job
| Situation | Best material | Max repair depth |
|---|---|---|
| Small low spots, feather edges | Polymer-modified patch mix (e.g., Sakrete Top 'N Bond) | Up to 1/2 inch |
| Thin skim coat or surface relevel | Self-leveling underlayment (e.g., USG Durock ProFlow) | Featheredge to 3/4 inch (19 mm) |
| Larger low areas or full overlay | Polymer-modified concrete topping mix | 1/4 inch to 2 inches depending on product |
| High spots only | Diamond cup grinder, no fill needed | Remove material rather than add |
| Sunken slab with void underneath | Mudjacking grout or polyurethane foam (pro tools required) | Lifts entire panel back to grade |
Leveling a new pour vs fixing an existing slab
These are two very different jobs even though the goal sounds the same. If you're leveling a new concrete patio during or right after the pour, you have a short window to get it right before the concrete sets. If you're dealing with an existing slab that's shifted, settled, or was poured badly, you're working around hardened concrete and have more options but also more constraints.
During a new pour
The best time to get a level patio is before you pour. Set your forms carefully using stakes and a level, establishing your target slope (1/8 inch per foot away from the house) as you go. Compact your base material thoroughly because voids will cause settlement later. Once the concrete is poured, use a screed board pulled across the top of the forms to strike off excess concrete and establish a flat plane. Follow up with a bull float to close the surface. Work quickly because you only have your working window before the concrete stiffens. If you miss a low spot and the concrete is still workable, add a small amount of concrete and re-screed. If it's already set but not fully cured, you can sometimes feather in a thin repair mix within the first day or two, but it's much harder to get a seamless finish.
On an existing slab
Here the question is whether the slab itself is structurally sound. Push on the corners and edges. If a section rocks or feels hollow underfoot (a dull thud when you tap it rather than a solid sound), there's a void underneath and surface patching alone won't solve it. A slab that's simply poured at the wrong grade, has one elevated corner, or has a low spot from settlement is a good candidate for grinding, patching, or a skim overlay. A slab that's sunk several inches because the soil beneath has eroded needs lifting before any surface work makes sense.
Step-by-step methods: grinding, mudjacking, patching, and overlays
Method 1: Grinding down high spots
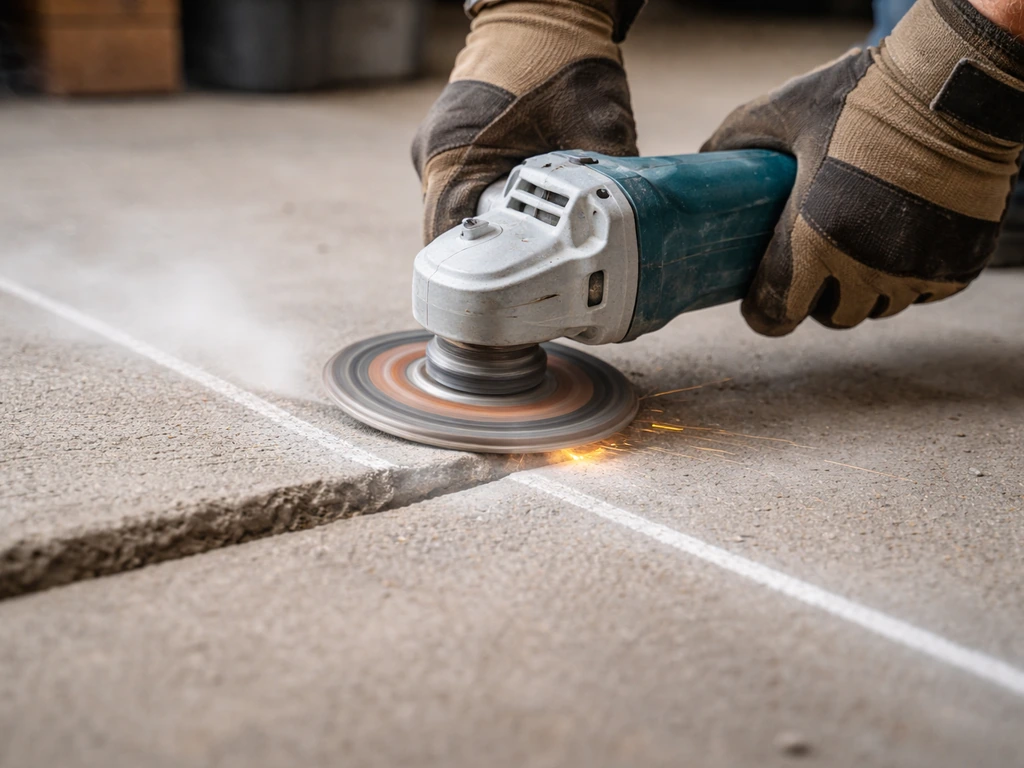
Grinding is the right call when one area of the slab is higher than the surrounding surface, creating a trip edge or a ridge where two slabs meet. It's also useful when the whole slab is close to level but has a bump or crown in one area. Rent a walk-behind concrete grinder or use an angle grinder with a diamond cup wheel for smaller spots. Before you start, sweep the slab clean and mark the high area with chalk.
- Identify the peak of the high spot with your level and mark it clearly.
- Start grinding at the highest point and work outward in a feathering motion, blending the ground surface into the surrounding concrete gradually. The goal is a smooth transition, not a crater.
- Stop frequently to check with the level. It's easy to overgrind.
- Keep the grinder moving constantly to avoid gouging a single spot.
- Connect the grinder to a shop vac or industrial vacuum to capture dust.
- Once you've reached the right height, finish with finer grit or a lighter pass to smooth the surface texture.
- Clean up all dust before any further work.
The biggest mistake people make grinding concrete is stopping too abruptly at the edge of the ground area. That leaves a shelf or ridge that becomes its own trip hazard. Taper the ground area out at least 12 inches past where the high spot ends so the transition is gradual.
Method 2: Patching and feathering low spots
For low spots up to about 1/2 inch deep, a polymer-modified patch mix is the most practical DIY solution. Products like Sakrete Top 'N Bond are designed specifically for thin feather-edge repairs and bond well to existing concrete when the surface is properly prepared. For spots that are technically level but need a thin skim to create a consistent slope, a self-leveling underlayment can be poured in and will find its own flat plane, though you'll need to dam the edges to keep it from running off. For example, USG’s Durock Proflow self-leveling underlayment is rated for an application range from featheredge up to 19 mm (3/4").
- Clean the area thoroughly. Remove any dirt, oil, paint, or loose concrete with a wire brush and shop vac. Contaminated surfaces cause delamination.
- If using self-leveling underlayment, apply a bonding primer to the concrete and let it reach the tack stage the manufacturer specifies.
- If using a patch mix, dampen the concrete surface slightly so it doesn't suck moisture out of the repair too fast.
- Mix according to package directions. Don't add extra water; it weakens the patch.
- Trowel or pour the material into the low spot and work it out to feather the edges smoothly into the surrounding surface.
- For self-leveling products, pour at the low end and let it flow; use a gauge rake to spread it evenly and pop air bubbles with a spike roller.
- Keep the repair damp for at least 24 hours and protect from direct sun and wind while it cures.
One honest heads-up on thin overlays: very thin polymer-modified toppings can be tricky because they're prone to shrinkage cracking if you rush the cure or apply them in hot, dry conditions. Work in mild weather, keep the surface damp during prep, and don't try to go thinner than the product's stated minimum. Surface prep is the single biggest predictor of whether a patch bonds or peels.
Method 3: Mudjacking or polyurethane foam lifting
If a whole section of your slab has sunk and there's a void underneath, surface patching is just putting lipstick on the problem. If you’re trying to raise a sunken section of patio, you’ll typically need to lift the slab with mudjacking or polyurethane foam injection rather than relying only on surface patches raise level of concrete patio. You need to lift the slab back up first. The two main ways to do this are mudjacking (also called slabjacking) and polyurethane foam injection. Both involve drilling holes through the slab and pumping material underneath to fill the void and raise the concrete.
Mudjacking uses a slurry of cement, soil, and water pumped through holes drilled at roughly 1- to 2-inch diameter, spaced every 3 feet or so across the sunken panel. The material fills the void and hydraulic pressure lifts the slab. The key to doing this without cracking the slab or overlifting one corner is to work incrementally: lift no more than 1/4 inch at each hole at a time, starting at the lowest point and working your way out. Polyurethane foam injection uses smaller holes (typically drilled closer together, 3 to 8 feet apart, and staying at least a foot from the slab edge) and expands to fill voids quickly. Foam is faster, lighter, and cures in minutes rather than days, but the equipment is specialized and this one is usually left to professionals.
Be honest with yourself about whether mudjacking is a realistic DIY project. The equipment is heavy and expensive to rent, the technique requires judgment to avoid cracking a slab by over-pressurizing it, and improper hole placement can make things worse. For most homeowners, this is worth calling a pro for, especially since a sunken patio often points to an ongoing drainage or soil problem that needs diagnosis too.
Dealing with old concrete: feather edges, releveling, and stopping new problems
Old concrete presents a few specific challenges. The surface is often contaminated with years of oil, algae, sealers, or paint, all of which will cause a repair to peel if you don't deal with them first. Mechanically scarify the area with a grinder or concrete scarifier before applying any repair product. If the old sealer is thick, you may need to grind it off entirely before a new overlay will bond.
Feather edges are another trouble spot. Any patch or overlay that thins out to a very thin edge at the perimeter is vulnerable to chipping, especially with foot traffic or furniture being dragged across it. Try to end your repair at a natural joint or edge rather than stopping in the middle of the slab. If that's not possible, tool a small V-groove into the old concrete at the repair boundary so the patch has a defined, supported edge rather than tapering to a paper-thin lip.
To stop new high and low spots from forming after you're done, address the root cause. If water is draining toward the slab and saturating the soil underneath, redirect it with a simple French drain or extend your downspouts. If tree roots were the problem, the tree will keep working against you. If the original base wasn't compacted well, a full slab repair may eventually be needed rather than repeated surface patches.
Finishing up: curing, sealing, drainage, and keeping it safe underfoot
After any leveling work, give the repair material adequate time to cure before you seal or walk on it heavily. Most patch mixes are strong enough for foot traffic within 24 hours but benefit from a longer cure (3 to 7 days) before sealing. Self-leveling underlayments vary, so follow the product data sheet. Keep the repaired area damp (mist it, don't flood it) and shaded from direct sun for the first 24 hours to prevent surface cracking from rapid moisture loss.
Seal the entire patio surface after repairs are cured, not just the patched area. A penetrating concrete sealer protects against water infiltration, staining, and freeze-thaw damage. If you applied a repair that's a slightly different texture or color than the original slab, a semi-transparent or tinted sealer applied over the whole surface will help blend the appearance. Reapply sealer every 2 to 3 years on an exterior patio.
Before you call it done, do a water test: run a hose on the surface and watch where the water flows. It should sheet off toward the yard or a drain at a gentle slope, not pool in the center or run toward your house. If you still see ponding after repairs, you may have created a new low spot with your patch, or the surrounding area needs to be addressed as well. Getting the drainage right is what separates a patio that stays fixed from one you'll be patching again in two years.
Post-leveling checklist
- Verify slope with a level: target 1/8 to 1/4 inch per foot away from the house
- Run a water test and confirm no pooling or back-drainage toward the foundation
- Check all repair edges and feathered transitions for any ridges or lips that could catch a foot
- Allow full cure time before sealing (check your repair product's data sheet)
- Apply a penetrating concrete sealer to the entire patio surface
- Inspect expansion joints and fill any that have opened with a flexible backer rod and polyurethane caulk
- Address any drainage, root, or soil issues that caused the original problem
- Plan to reseal every 2 to 3 years to maintain protection
If after going through all of this you're still looking at a patio that's dramatically out of level, multiple cracked panels, or significant sinking across a large area, it may be worth considering whether a full replacement or a raised concrete patio build makes more sense than repeated repairs. If you keep running into sinking, settling, or drainage issues, you may want to plan for a raised concrete patio instead. Sometimes the honest answer is that the original slab is beyond patching, and starting fresh with a properly compacted base and formed grade will cost less in the long run than chasing the same problems every few years.
FAQ
How much slope is enough for drainage without making the patio feel uneven?
Aim for about 1/8 to 1/4 inch per foot (roughly 1 to 2%) away from the house or toward a drain. After leveling, do a hose test, then stand where you normally place furniture, if the floor feels “steppy” or noticeably downhill in traffic paths, adjust the plan so the slope change is spread out over a longer distance.
What’s the easiest way to tell if my “low spot” is just surface grade or a void under the slab?
Look for a dull thud when tapping the area and for signs of settling like hairline cracks that radiate around the low section. Also check for a change in sound and firmness when you step on it, if it feels hollow or unstable, surface patching will not cure the cause.
Can I level a patio by adding more concrete on top instead of grinding?
Sometimes, but it depends on thickness and bonding. Thin feather-edge patches can work for minor lows, while thicker corrections may require scarifying and potentially an underlayment approach. If you add concrete without addressing voids or drainage, the new layer can crack or detach later even if the surface looks level at first.
How do I avoid creating a new trip edge after grinding or patching?
When grinding, taper the transition out at least 12 inches past where the high spot ends, so you don’t leave a shelf. When patching, consider ending repairs at an existing joint or edge, or tool a V-groove boundary so the thin perimeter edge is supported, not just feathered thin.
What temperature and weather conditions are safest for patching or overlays?
Work in mild conditions and avoid hot, dry, windy weather that speeds cure and increases shrinkage cracking risk. Keep the surface properly prepped, then follow the product’s minimum thickness guidance, do not assume a thinner application will “save material,” it can fail sooner.
How long should I wait before sealing a repaired area?
Plan for at least the manufacturer’s recommended cure time. Many patch products handle foot traffic in about 24 hours, but sealing benefits from longer cure (often 3 to 7 days). Do not seal early just to protect it, trapped moisture can cause discoloration or adhesion problems.
Can I walk on it sooner if I cover it with plastic?
Plastic coverings can help with curing conditions, but they do not replace proper cure time and they can trap excess moisture or promote uneven drying. Follow cure timing from the repair mix or underlayment product label, and mist lightly rather than flooding when directed.
Do I need to seal the whole patio or only the repaired section?
Seal the entire surface after repairs are fully cured, not just the patch. Repair areas may have a slightly different texture and moisture behavior, sealing only part can lead to uneven water infiltration, staining differences, and visible sheen mismatches.
My patio was originally poured at the wrong slope, can I fix it without lifting a slab?
If there is no void and the slab is structurally sound, you can usually correct minor grade errors by grinding high areas and patching low areas, or by using a thin, properly bonded skim/overlay to establish the drainage slope. If the slab is sinking or rocking from under-voids, lifting is typically required first.
What should I do if water still pools after repairs?
Treat it as a measurement problem or a drainage problem. Re-run the hose test and recheck your slope with a level, it’s possible your patch created a new low. If the slope is correct but water still collects, redirect runoff with downspout extensions or add drainage like a French drain so the surrounding soil is not staying saturated.
How do I handle stained or contaminated old concrete before patching?
Remove anything that prevents bonding, oil spots, algae growth, sealers, and thick paint residues. Mechanically scarify the repair zone and, when sealers are thick, grind them off so the patch can bond to clean concrete rather than floating over a slick layer.
Is self-leveling underlayment a good choice for all low spots?
It can help when you want a consistent plane over a broader area, but you must dam edges so it does not run off. It is not a cure for voids under the slab, and it still depends on clean, correctly prepared concrete for adhesion. If you see hollow spots or rocking, address the void first.
When does it make sense to call a pro instead of DIY leveling?
Call a pro if the patio is dramatically out of level across large areas, if sections rock or sound hollow (voids), or if you’re considering mudjacking where improper hole placement and over-pressurizing can crack or lift unevenly. Also call if drainage issues suggest ongoing soil movement, because repeated surface fixes will likely fail.