You can absolutely build a stamped concrete patio yourself, but it takes planning, the right materials, and good timing. The basic workflow goes like this: plan your layout and design, prep the site with proper grading and a compacted gravel base, build your forms, pour and finish the concrete to the right consistency, stamp it while there's still a window to work, then cure and seal it so the surface actually lasts. Each step has a tight margin for error, especially the stamping window, so reading through the full process before you mix a single bag of concrete is not optional. This guide walks you through everything, including what to do if something goes sideways.
Stamped Concrete Patio Do It Yourself: Step by Step Guide

Silas Morrison
5 May 2026
Choosing the Right Location, Size, and Design
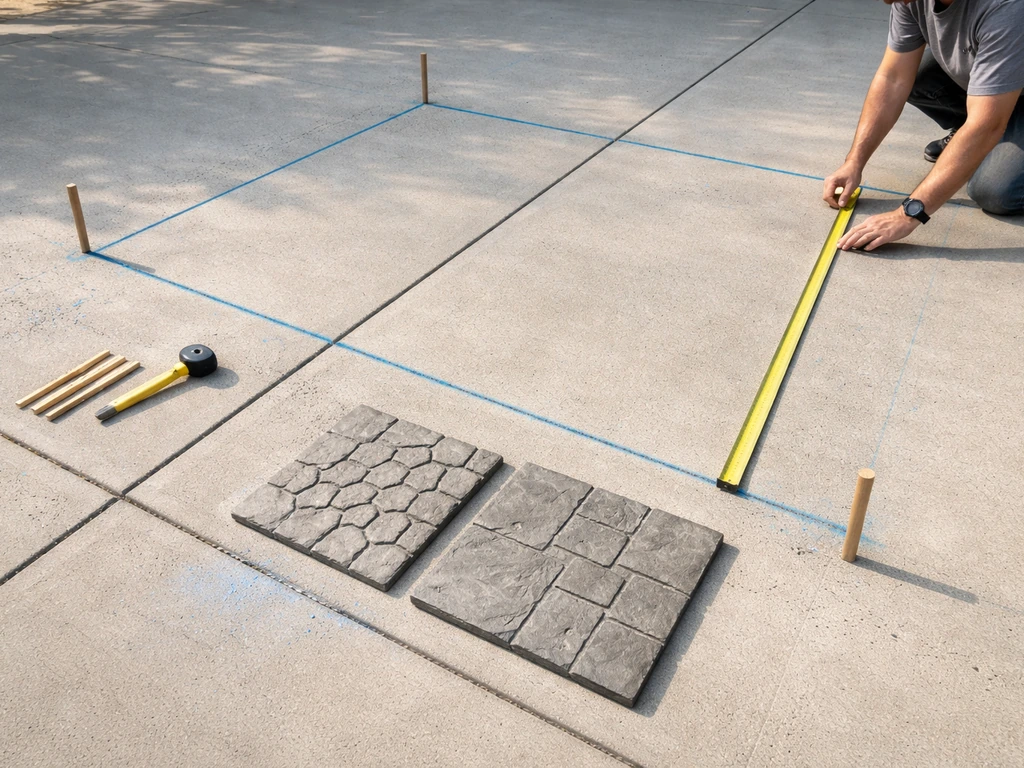
Start by deciding where the patio goes and how big it needs to be. Think about traffic flow from the house, shade at the times you actually use the space, and how the patio connects to the yard. A 12x16 foot patio is a manageable DIY first project. Anything larger than about 400 square feet starts to push the limits of what you can stamp before the concrete sets, so be realistic about your crew size and experience.
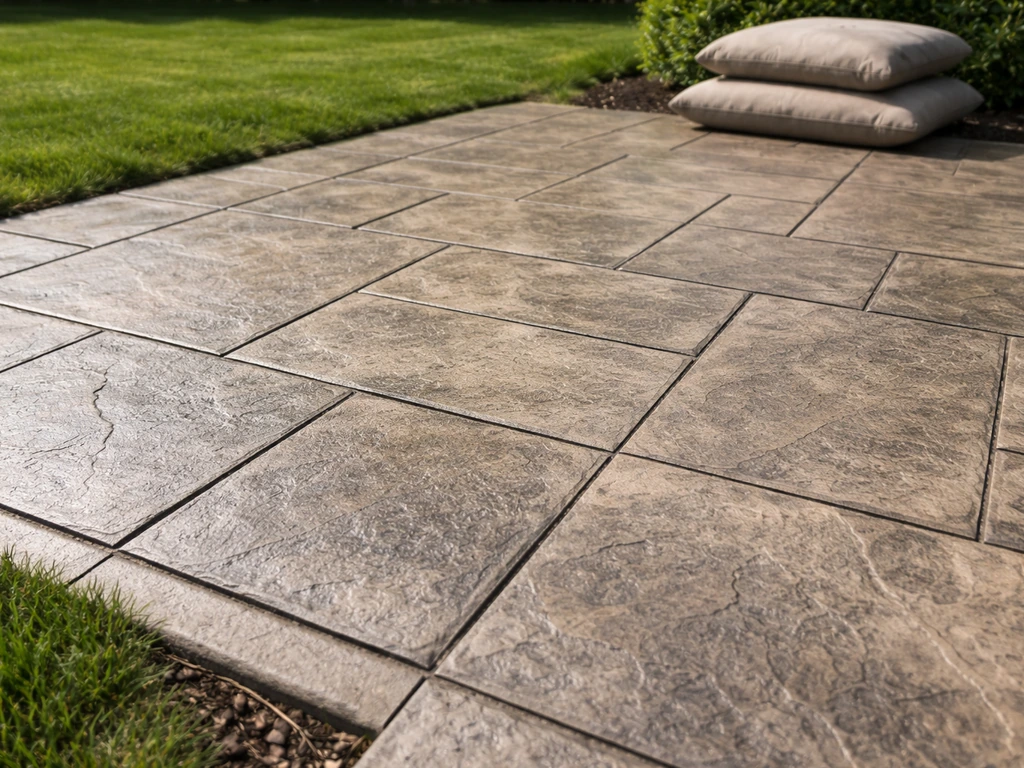
For the design, pick a stamp pattern that matches your home's architectural style. A flagstone or ashlar slate pattern works with most homes and is forgiving because the irregular shapes hide minor inconsistencies in the stamp impression. More complex multi-color layouts with intricate borders are beautiful, but they require precise execution and cost more in materials. If this is your first stamped patio, start simpler. That said, adding a contrasting border pattern around the perimeter, using one texture for the main field and a second complementary one for the edge band, visually frames the space and makes even a simple design look intentional and finished.
Sketch the layout on paper before you start. Decide where control joints will fall and try to line them up with the stamp pattern so they don't cut awkwardly through the middle of a slate or stone motif. That coordination matters more than most DIYers realize, and skipping it leads to joints that look like mistakes rather than design features.
Materials and Tools You'll Actually Need
Getting everything on site before the truck shows up is critical. There is no pausing a concrete pour to run to the hardware store. Here is a complete list of what you need for a standard stamped patio pour.
Materials
- Ready-mix concrete: order 4,000 psi mix, air-entrained if you're in a freeze-thaw climate, with a slump around 4–5 inches. Do not exceed about 4% air content if you're using color hardener, since you need some bleed water to wet out the powder.
- Color hardener: a pigmented cementitious powder broadcast onto fresh concrete. Plan on roughly 60–80 lbs per 100 square feet for a full-coverage application.
- Release agent: either liquid or powder form. Powder release agents serve double duty as a bond breaker and add a secondary accent color to the highs of the pattern. Liquid release is cleaner but adds no color.
- Concrete stamps: rent full stamp mat sets locally or from a concrete supply house. You'll need enough mats to create a continuous leapfrog pattern across the slab. For a 200 sq ft patio, budget for 8–12 mats plus border stamps.
- Expansion joint material: closed-cell foam backer rod or pre-formed asphalt-impregnated fiberboard for where the slab meets the house or any fixed structure.
- Rebar (3/8 in or 1/2 in) or welded wire mesh: for crack control reinforcement.
- Gravel base: 4 inches of compacted crushed stone (3/4 in clean crushed stone or road base).
- Vapor retarder (optional but recommended): 10-mil polyethylene sheeting placed under the slab, especially over clay or poorly draining soil.
- Form lumber: 2x4 or 2x6 depending on slab thickness, typically 4 inches.
- Concrete sealer: a film-forming acrylic sealer, either solvent-based or water-based. Solvent-based acrylics give a deeper wet-look finish and are the industry standard for stamped concrete. Plan on covering the square footage at the manufacturer's recommended spread rate, typically one coat around 200–300 sq ft per gallon.
Tools
- Plate compactor (rent one)
- Transit level or laser level for grading
- Screed board or strike-off board
- Bull float and hand floats
- Fresno or finishing trowel
- Concrete edger
- Groover for control joints
- Pump garden sprayer for applying liquid release agent
- Rubber mallet for seating stamps
- Knee boards (for working on fresh concrete without sinking in)
- Pressure washer for post-cure cleanup
- Paint roller and extension pole for applying sealer
- Safety gear: gloves, rubber boots, eye protection, kneepads
Site Prep and Base Construction
Most DIY concrete failures start underground, not on top. If you're trying to figure out concrete patio how to do it yourself, start by getting the base and drainage correct before you pour or stamp stamped concrete. If the base isn't right, nothing you do at the surface will matter long-term. This is the part that tempts people to cut corners, and it's exactly the part where you shouldn't.
Excavation and Grading
Excavate to a total depth equal to your slab thickness plus your gravel base. For a standard 4-inch slab with a 4-inch gravel base, you're digging down 8 inches. Remove all organic material, topsoil, and soft spots. If you hit clay, dig a little deeper and add more gravel. Grade the subgrade so water drains away from the house at a minimum slope of 1/8 inch per foot, ideally 1/4 inch per foot. That slope carries through to the finished slab surface.
Gravel Base and Compaction
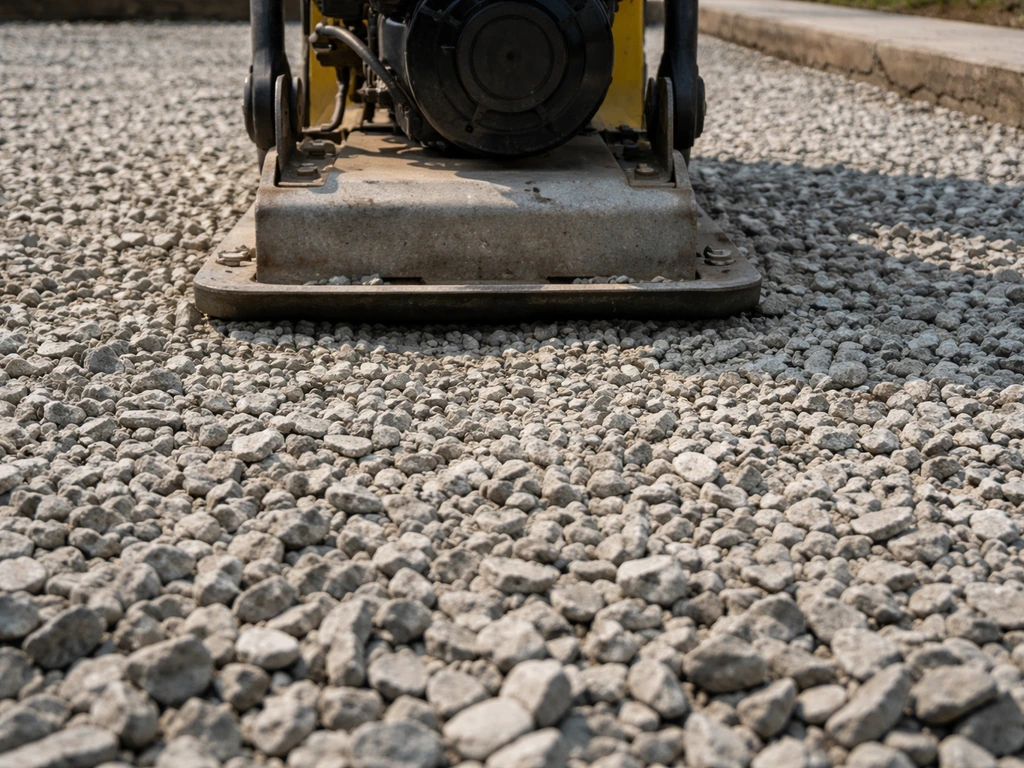
Spread 3/4-inch crushed stone in 2-inch lifts and compact each layer with a plate compactor. Do not skip compaction. Uncompacted base material settles unevenly over time and causes cracking. After compaction, the gravel surface should feel solid underfoot with no give.
Vapor Retarder
Whether to use a vapor retarder under a patio slab is an honest debate. ACI 302.1R-15 provides a flowchart to help determine placement based on site conditions. For a decorative stamped slab, there's a practical tradeoff: placing plastic sheeting directly under the concrete reduces moisture wicking from below, which can affect how the slab bleeds and dries. On clay soils or areas with high moisture, the retarder is worth using. On well-draining sandy soils, it's less critical. If you use it, place 10-mil poly sheeting with 12-inch overlaps, taped at seams, and lap it up the sides of the forms.
Forms and Reinforcement
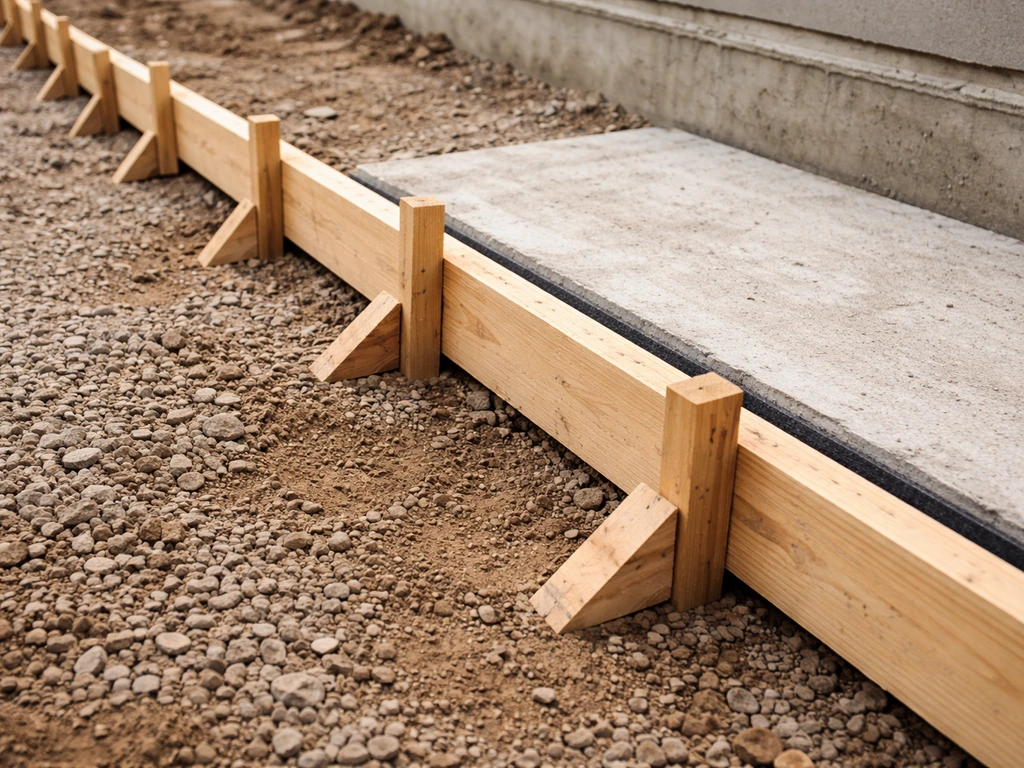
Set your form boards level and at the correct grade. Stake them every 2 feet and double-stake at corners. For curves, use 1/4-inch plywood bent to shape and staked tightly. Place rebar on chairs at mid-slab depth, keeping it 3 inches from edges. Use 3/8-inch rebar on a 24-inch grid for most residential patios. Welded wire mesh is an acceptable alternative, but keep it elevated with chairs so it actually sits in the middle of the slab rather than lying flat on the ground.
Install expansion joint material anywhere the slab will butt up against the house foundation, existing concrete, or any fixed structure. This is not optional. Without it, differential movement between the slab and fixed structures causes cracking at those edges. Use closed-cell backer rod or pre-formed fiberboard, run it the full slab depth, and position it before the pour.
Pouring Concrete and Getting the Mix Right for Stamping
Order your concrete from a ready-mix supplier and discuss your project with them ahead of time. Tell them it's a decorative stamped slab. The target is a 4,000 psi mix at 4–5 inches of slump. For freeze-thaw climates, specify air entrainment, but ask for no more than 4% air content. Higher air content reduces bleed water, and you need some bleed water to properly wet out and absorb the color hardener powder. If you're in a mild climate and not worried about freeze-thaw, you can skip air entrainment entirely.
If the truck arrives and the concrete is too stiff, you can request a small jobsite water addition to bring the slump up, but this must stay within the mix design's water-cement ratio limits. Adding too much water weakens the concrete, so stay conservative. A little slump adjustment at delivery is fine. Significant changes are not.
Pour the concrete, screed it level with the top of the forms, and bull float it to close the surface and embed aggregate. After bull floating, wait. Watch the surface. You're waiting for the sheen of bleed water to disappear. That's your cue to proceed with the next finishing steps. The timing will vary with temperature, humidity, and wind. On a hot, windy day, you might have 30 minutes. On a cool, overcast day, it could be two hours or more. Do not rush this.
Once bleed water is gone, broadcast color hardener across the surface. Apply it in two passes: the first pass covers the surface, let it absorb moisture and darken, then float it in with a hand float or fresno. Apply a second, lighter broadcast, float it in again. This two-pass approach gives even, consistent color penetration. After color hardener is embedded and the surface has accepted it evenly, you're ready to apply release agent and begin stamping.
Stamping, Texturing, Coloring, and Edge Detailing
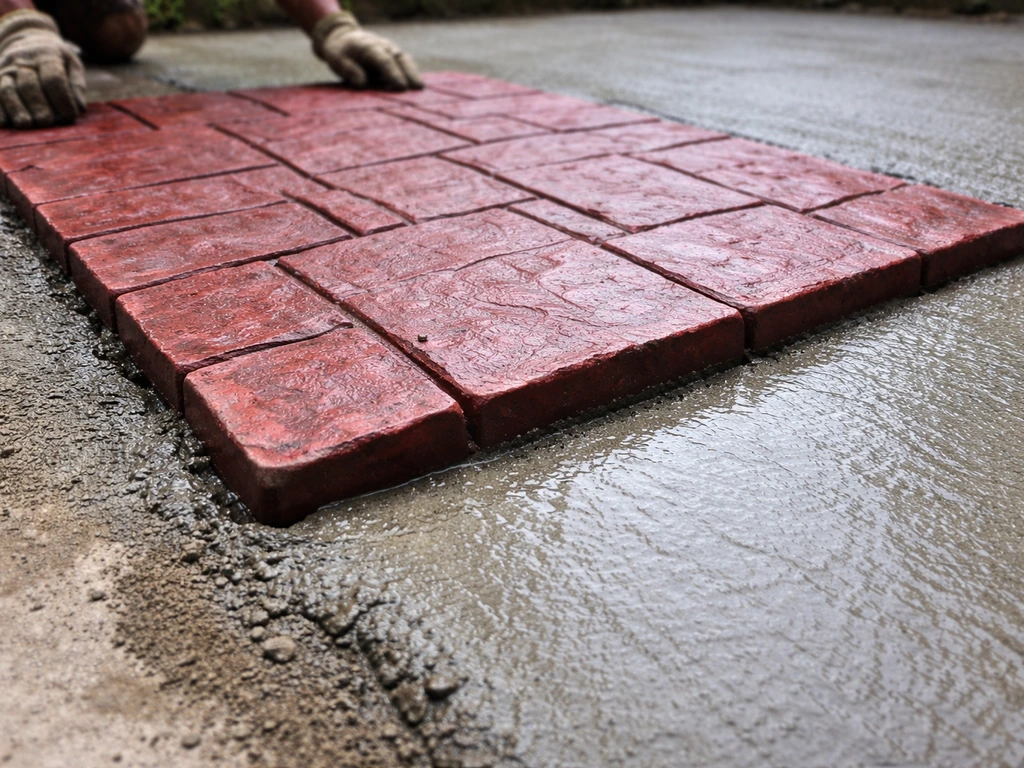
Timing the stamp is the most stressful part of this whole project, and it's where DIYers most often get into trouble. The concrete needs to be firm enough that your stamp mats leave a clean impression without sinking in, but soft enough that the texture transfers fully. The test: step onto a mat and it should not sink more than about 1/4 inch. The impression left should show virtually all of the texture detail from the stamp tool. If it's showing a mushy, blurred impression, wait longer. If the mat is leaving almost no impression, you've waited too long.
Apply release agent before you start stamping. For powder release, broadcast it across the surface with a dry brush or gloved hands. For liquid release, spray it onto the stamp mats using a pump sprayer just before each placement. The release agent is a bond breaker: without it, your mats will stick and tear the surface. Do not skip this even if you're using texture rollers instead of mats.
Work in a consistent pattern, typically from the house outward or from a center line. Place the first mat, step on it firmly and evenly, use a rubber mallet to tap areas that aren't making full contact, then leapfrog the next mat using the alignment tabs on the edges of the mats to maintain the pattern. Move quickly and steadily. Have at least one other person helping. Stamping alone on anything larger than 100 square feet is very difficult.
Use your border stamps along the perimeter edges to create a defined frame. Edge detailing with a hand chisel tool or flex mat can address tight corners and areas where full mats don't fit. Once all stamping is done, run your concrete edger along the form edges to create a clean, rounded edge on the slab perimeter.
Control joints need to be addressed as well. In a stamped slab, you want to place control joints at a maximum spacing of about 2 to 3 times the slab thickness in feet. For a 4-inch slab, that means joints roughly every 8 to 12 feet. Plan these so they fall along grout lines in the stamp pattern whenever possible. You can use a groover tool during finishing, or have them saw-cut within 12 to 24 hours after the pour. Saw cutting is often cleaner and easier to coordinate with the pattern if you plan ahead.
Curing, Releasing, and Sealing for Long-Term Durability
After stamping, leave the slab alone for at least 24 hours. Cover it with plastic sheeting if rain is possible, but don't let the plastic contact the fresh surface directly. Use a plastic cover sheet during curing to help reduce evaporation, which is especially helpful in hot weather blank" rel="noopener noreferrer">plastic cover sheet to help reduce evaporation. For most DIY projects, curing happens passively as the slab sets over the first several days. The PCA manual curing guidance indicates concrete should be cured for a minimum of 7 days. If conditions are very hot and dry, misting the surface after the surface has firmed up (not before, or you'll wash out color) helps prevent rapid moisture loss.
After 24 hours, remove the forms carefully. Wait at least 24 to 48 hours before doing the cleanup wash. When you're ready, use a pressure washer to rinse off the release agent residue. This step is important: any release agent left on the surface will interfere with sealer adhesion and cause blotchy or peeling results. Rinse thoroughly and let the surface dry completely. This can take another 24 hours or more depending on temperature and humidity.
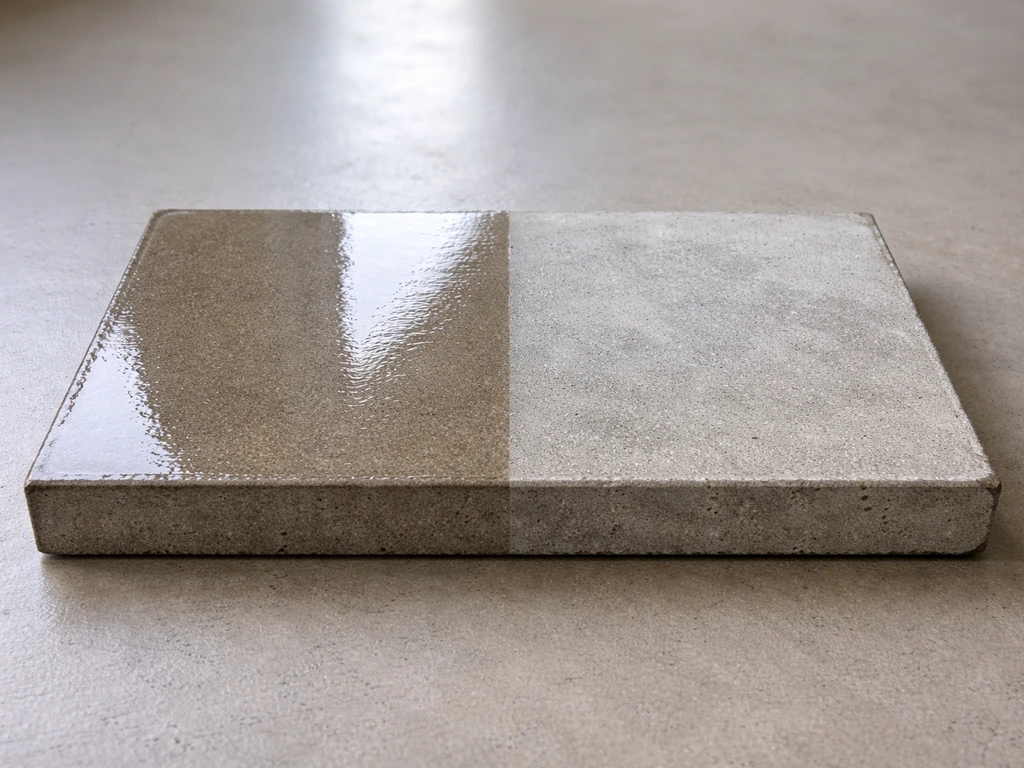
Apply sealer only after the release agent is fully rinsed away and the slab is dry. For stamped concrete, a film-forming acrylic sealer is the right choice. Film-forming sealers enhance color depth, add the wet-look sheen that makes stamped concrete pop, and protect the surface from staining and abrasion. Penetrating sealers are great for plain concrete but they don't deliver the visual enhancement that makes stamped work look its best. Solvent-based acrylic sealers generally give a richer appearance than water-based versions, though water-based options have improved significantly and are lower in VOCs.
Apply sealer in two thin coats using a roller and extension pole, letting the first coat dry before applying the second. Thin, even coats prevent the milky, trapped-moisture look you get from heavy applications. Plan on resealing every 2 to 3 years for exterior patios, or sooner if you notice water no longer beading on the surface.
Troubleshooting Common DIY Mistakes and What to Do Next
Even experienced people run into problems on stamped concrete. Here's how to handle the most common ones without tearing out the slab.
Poor Stamp Texture or Shallow Impressions
If the concrete got too stiff before you finished stamping, some areas may show flat or poorly defined texture. You can't re-stamp cured concrete. The recovery option is a stampable overlay system. These thin overlays (typically 3/8 inch or less) are troweled or sprayed over the existing slab, and then stamped while fresh, essentially giving you a second chance with the right timing. Proper prep is critical: the existing slab must be clean, free of sealer, and mechanically profiled (acid-etched, ground, or scarified) so the overlay bonds. Bond coats are often required as a primer step depending on the overlay system.
Blotchy or Uneven Color
Uneven color hardener application, inconsistent floating, or excess release agent residue left on the surface are the usual culprits. If the color looks blotchy or faded after sealing, strip the sealer first using a chemical stripper appropriate for the sealer type. Once stripped, assess the color. If it's a release agent residue issue, a thorough wash and re-seal may fix it.
If the color hardener itself is patchy, options include applying a concrete stain or dye to even out the appearance, or using a tinted sealer to shift the overall tone. Recoloring a stamped patio is a real and practical path, not a defeat. Recoloring a stamped concrete patio often involves stripping old sealer, then using a stain, dye, or tinted sealer to shift the tone evenly recoloring a stamped patio.
Sealer Problems: Cloudiness, Peeling, or Loss of Gloss
Milky or cloudy sealer almost always means moisture was trapped under the film, either because the slab wasn't dry enough before sealing or the coats were applied too thick. Strip the sealer, let the slab dry for at least 48 to 72 hours in warm conditions, and reapply in thin coats. Peeling sealer typically points back to contamination: release agent residue, efflorescence, or oil on the surface before sealing. Strip, clean, let dry, and reseal. If the sealer has simply worn down over a few years, clean the surface, check for any areas that need touching up, and apply a fresh thin coat.
Cracks
Hairline shrinkage cracks are common in any slab and not necessarily a structural problem, but they're more visible in stamped concrete because of the sealer sheen. For narrow cracks (less than 1/8 inch), a flexible polyurethane or epoxy crack filler injected into the crack, then color-matched and sealed over, can make them nearly invisible. Larger cracks or cracks that are moving need professional assessment before you spend money on cosmetic fixes.
Surface That Feels Rough or Looks Dull Over Time
A surface that's lost its sheen but is otherwise sound just needs a cleaning and a fresh coat of sealer. Scrub the surface with a concrete cleaner, rinse thoroughly, let it dry completely, and roll on a fresh coat of the same sealer type. Don't layer incompatible sealer types without stripping first. If the existing sealer is solvent-based, stay with solvent-based on the recoat unless you strip completely.
If you're starting from an existing patio that was never stamped and wondering whether you can add texture now, that's a separate but related question worth exploring. Stamped overlays make it possible to transform a plain slab without a full demolition and repour, though the prep and timing requirements are just as demanding as a fresh pour.
| Problem | Likely Cause | Best Fix |
|---|---|---|
| Shallow or missing stamp texture | Concrete too stiff when stamped | Stampable overlay over prepped slab |
| Blotchy, uneven color | Uneven color hardener or release agent residue | Strip sealer, apply concrete stain or tinted sealer |
| Milky or cloudy sealer | Moisture trapped under film or coats too thick | Strip sealer, dry fully, reseal in thin coats |
| Peeling sealer | Surface contamination before sealing | Strip, deep clean, let dry, reseal |
| Hairline cracks | Normal shrinkage or poor joint spacing | Flexible crack filler, color match, reseal |
| Dull, worn surface | Sealer worn down from weather and traffic | Clean, let dry, apply fresh sealer coat |
A stamped concrete patio is genuinely one of the more ambitious DIY concrete projects you can take on, but it's not out of reach if you prepare well, have help on pour day, and don't rush the timing. The biggest wins come from getting the base right, nailing the stamping window, and being patient with the cleanup and sealing steps. If you’re wondering how to refinish a stamped concrete patio, the same mindset applies: fix prep issues first, then restore color and seal with the right products for the surface condition. Get those three things right and you'll end up with a patio that looks like it cost twice what you spent.
FAQ
Can I still get a clean, natural look if I need control joints in a stamped concrete patio?
Yes, but choose the joint type deliberately. For decorative control joints, you usually have two options: saw-cut grooves after the pour (within the 12 to 24 hour window) or install pre-formed joint material before finishing. If your goal is a stone-like look, align the saw-cut line with existing “grout” lines in your stamp pattern so the groove reads as part of the design rather than an interruption.
What should I do if the stamping comes out shallow or blurred?
If a stamp mat leaves a weak impression because the surface was too stiff, stop and wait rather than trying to force a deeper stamp. If the concrete has already started setting, you cannot re-stamp successfully, and the practical fix is a stampable overlay. That overlay requires removing all old sealer and mechanically profiling the slab so the overlay can bond.
Do I need plastic sheeting (vapor retarder) under my stamped concrete patio?
Not always. The article notes a vapor retarder is situation-dependent, and the key decision is moisture movement under the slab. On well-draining sandy sites, you may skip it, but on clay or high-moisture areas it helps reduce moisture wicking that can disrupt how bleed water works. If you do use poly, tape seams and lap up the forms, and do not let the poly wrinkle or bridge across low areas.
The concrete feels stiff on pour day, can I just add water to make stamping easier?
Order a ready-mix with the right target, then manage consistency, not by guessing water amounts. A small jobsite water addition is sometimes allowed, but it must stay within the mix design’s water-cement limits. If you routinely need to add water to make it workable, that is a sign the mix, slump target, or delivery timing is off, and it can lead to weaker concrete and poor color development.
What’s the best way to apply release agent so I don’t get blotchy color or peeling sealer?
Plan for a release agent workflow that matches your materials and schedule. Powder release can be tricky if it’s uneven, liquid release is more controlled when applied with a sprayer to the mats right before placement. In both cases, avoid overspraying the slab. Too much release tends to leave residue that can cause blotchy sealer adhesion and peeling.
Why does my stamped patio look unevenly colored after sealing?
Yes, and it’s one of the common DIY mistakes. Color hardener needs two passes with proper absorption time before floating it in. If you apply it unevenly, float inconsistently, or let it overdry, you can get patchiness that sealer will highlight. If the appearance is already blotchy after sealing, the realistic path is stripping and then either re-sealing or adjusting with stain or dye depending on the cause.
Can I re-seal my stamped patio with a different sealer type than what was used before?
You generally should not. Using a different sealer chemistry over an unknown or mismatched existing sealer can trap moisture, create hazy “milky” areas, or peel. If you want to switch types, strip the current sealer first, then apply in thin coats of the new system. The “film-forming acrylic, two thin coats” approach applies to most stamped patios, but compatibility is the real rule.
My sealer turned cloudy or started peeling, what’s the most likely cause and fix?
The best answer depends on what you see. Milky or cloudy sealer is usually moisture trapped under the film, often from sealing too soon or applying coats too thick, so strip, let the slab dry longer (often 48 to 72 hours in warm conditions), then reapply thin coats. Peeling usually indicates contamination like residue, efflorescence, or oils, so strip, clean, fully dry, then reseal after fixing the root cause.
How often should I reseal, and how do I know it’s time?
For routine maintenance, reseal before water stops beading, and keep timing consistent. If you wait until the surface looks dry and worn, you may have to clean more aggressively before the next coat bonds. Also use the same sealer type as the last successful coating, applying it in two thin coats with adequate drying between coats.
Can I change the color of a stamped concrete patio after it has already been sealed?
If you need a different look later, recoloring is possible, but the prep and method matter. A typical approach is stripping old sealer first, then using a stain, dye, or tinted sealer to shift the overall tone evenly. Spot-treating without stripping usually leads to uneven color depth.