
Yes, you can absolutely paint cement patio blocks. The right masonry paint or acrylic concrete coating bonds well to cured concrete, holds up underfoot, and can completely transform a dull, stained, or weathered patio. The catch is that the prep work matters far more than the paint itself. Skip the cleaning, etching, or priming steps and you will be peeling flakes off your patio within a season. Muriatic (hydrochloric) acid is widely used to etch concrete and remove minerals; recommended dilutions commonly range from about 1:10 to 1:3 acid:water, always add acid to water, limit dwell time, then neutralize with baking soda or an alkaline rinse and rinse thoroughly Muriatic (hydrochloric) acid is widely used to etch concrete and remove minerals; recommended dilutions commonly range from about 1:10 to 1:3 acid:water—always add acid to water, limit dwell time, then neutralize with baking soda or an alkaline rinse and rinse thoroughly.. Do the prep properly and a painted concrete patio can look great and last three to five years before needing a refresh.
Can You Paint Cement Patio Blocks? Guide + Steps & Tips

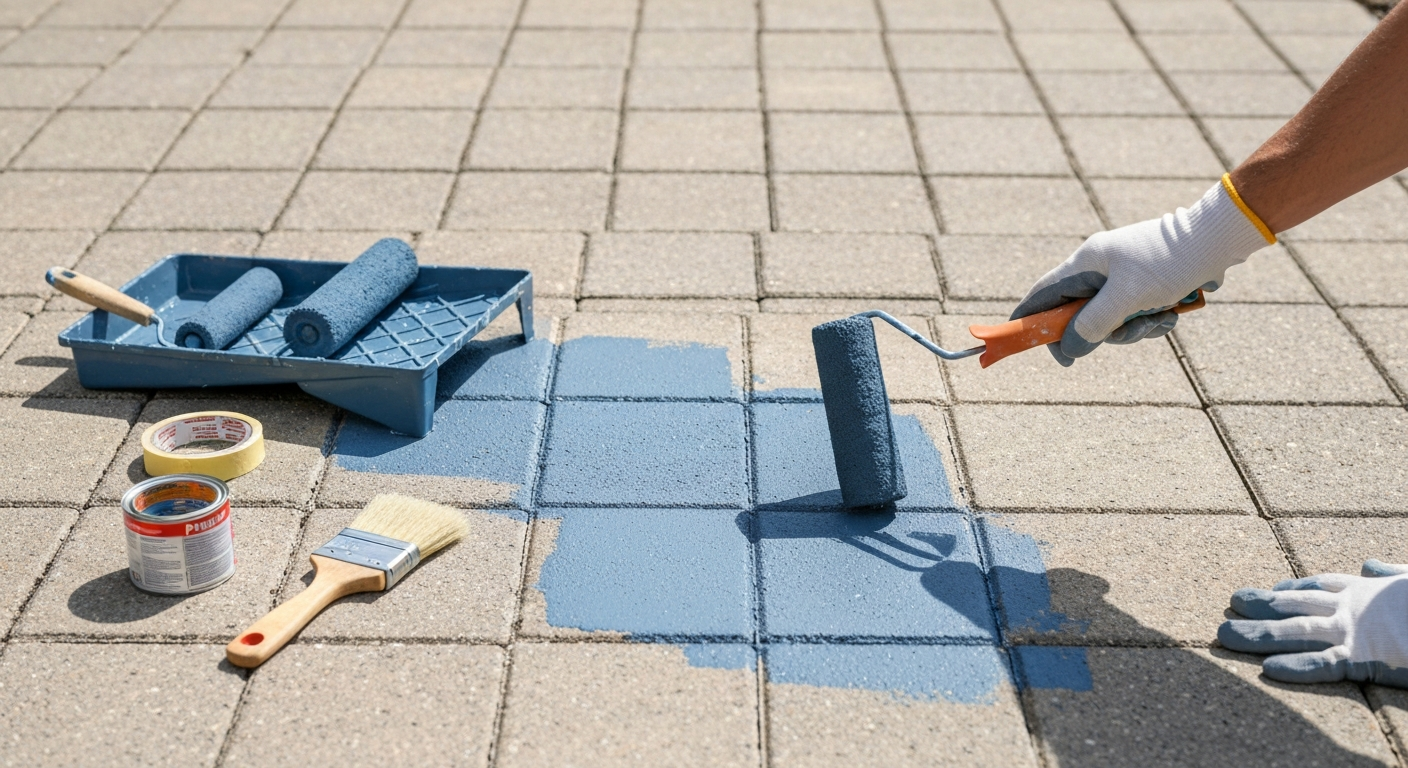
Should you paint your concrete patio blocks? Pros and cons
Painting is one of the fastest and most budget-friendly ways to give concrete patio blocks a new look. A gallon of quality masonry paint runs $30 to $60, and a weekend is enough time to transform most small to medium patios. But painting is not always the right call. Here is an honest look at both sides.
Reasons to paint
- Low upfront cost compared to replacing pavers or applying a full overlay system.
- Wide color selection, including options to create faux stone or tile effects using stencils and sponging techniques.
- Hides surface stains, minor discoloration, and old oil spots that cleaning alone cannot fix.
- Relatively beginner-friendly when done correctly, needing only basic tools.
- Can be recoated or color-changed in the future without major surface removal.
Reasons to think twice
- Paint sits on top of the surface and will eventually peel, chip, or scuff, especially in high-traffic areas or climates with hard freeze-thaw cycles.
- Once you paint concrete, the surface needs ongoing maintenance, recoating every two to five years depending on traffic and climate.
- Moisture problems underneath the blocks will cause blistering and adhesion failure no matter how good the paint is.
- Efflorescence (white salt deposits) will push right through paint if the underlying water infiltration is not corrected first.
- Painted surfaces can become slippery when wet unless you add a non-slip additive to the topcoat.
Site assessment: when to paint and when to walk away
Before you buy a drop of paint, spend fifteen minutes honestly evaluating your patio. I have walked away from painting projects because the surface simply was not ready, and it saved me a lot of wasted time and money.
Painting is a good option when: the concrete is structurally sound with no deep cracks or crumbling edges, the blocks are at least 28 days old (new concrete needs to cure fully before any coating will stick), surface staining or fading is the main issue, and drainage around and under the patio is working properly with no standing water or damp spots after rain.
Painting is not a good option when: blocks are heaving, cracked through their full depth, or have active moisture pushing up from below. If you tape a piece of plastic sheet to the block overnight and find condensation on the underside in the morning, you have a moisture vapor problem that will destroy any coating. Also avoid painting if more than a third of the surface has heavy efflorescence, loose spalling, or deteriorated mortar joints. In those cases, fix the underlying problems first or consider resurfacing instead.
Climate and surface suitability
Climate plays a big role in how long painted concrete blocks will hold up. In climates with repeated freeze-thaw cycles, water can work its way under a paint film and cause it to lift when it freezes and expands. For these areas, epoxy-based coatings or elastomeric masonry paints handle temperature swings better than basic acrylic flat paint. If you are in a hot, sunny region, look for a coating rated for UV resistance, since untreated acrylic can chalk and fade within a year or two in direct southern sun.
Shaded patios present a different challenge: they stay damp longer, which encourages mildew growth on the paint film. In these situations, choose a paint with a built-in mildewcide, make sure drainage is excellent, and consider a semi-gloss or satin finish that sheds water more easily than a flat finish. Patios with poor drainage or that sit lower than the surrounding grade should be addressed structurally before any paint goes down.
Materials and tools: everything you need
Having the right materials lined up before you start saves you mid-project hardware store runs. For heavy-duty cleaning, rent a 2,500–3,500 PSI pressure washer (many contractors use about 3,000 PSI) and a surface‑cleaner attachment to prep driveways and patios safely, How to Pressure Wash Concrete Driveways & Patios, Concrete Network How to Pressure Wash Concrete Driveways & Patios — Concrete Network. Here is the complete list organized by category.
Paint and coating options
- Acrylic masonry/concrete paint: The most common consumer choice. Products like Rust-Oleum Concrete & Garage Floor Paint are self-priming, cover 300 to 400 sq ft per gallon on smooth concrete and 180 to 220 sq ft per gallon on porous or textured surfaces. Good durability for light to moderate foot traffic.
- Epoxy concrete coating: Two-part systems (Part A resin + Part B hardener) offer harder, more chemical-resistant finishes. Best for high-traffic areas. Typically harder to apply and less forgiving of surface moisture than acrylics.
- Elastomeric masonry paint: Contains rubber-like polymers that flex with the surface. Better for climates with freeze-thaw cycles and for bridging hairline cracks.
- Concrete stain: Not a paint, but a coloring option worth knowing about. Penetrating stains soak into the surface rather than sitting on top, which means no peeling — though color choices are more limited.
Primers and sealers
- Concrete and masonry bonding primer: Products like BEHR PRO Concrete & Masonry Primer or Sherwin-Williams LOXON Concrete & Masonry Primer are specifically formulated to seal porous concrete and tolerate the high pH of masonry. Required when using standard exterior paint that is not labeled self-priming for concrete.
- Concrete sealer (topcoat): Applied after paint dries completely. Adds UV protection and abrasion resistance, and extends the life of the painted surface significantly. Acrylic sealers are the most DIY-friendly; polyurethane sealers are harder-wearing.
Prep chemicals
- Concrete degreaser or TSP substitute: For removing oil, grime, and organic buildup before etching. TSP substitute is commonly used at roughly half a cup to one cup per gallon of water for heavy-duty cleaning.
- Muriatic (hydrochloric) acid or phosphoric acid: For etching smooth or dense concrete to open the surface pores. Typical dilutions start at 1 part acid to 10 parts water; always add acid to water, never the reverse. Phosphoric acid is safer and gentler for lighter-duty etching.
- Baking soda (sodium bicarbonate) or commercial alkaline neutralizer: To neutralize acid residue after etching before rinsing.
- Efflorescence cleaner or dilute acid solution: For white salt deposits. A 1:9 to 1:19 muriatic acid-to-water dilution is commonly recommended, but fix the water source first or the deposits will return.
Tools and equipment
- Pressure washer: Rated 2,500 to 3,500 PSI for concrete cleaning. Use a 25-degree or 40-degree nozzle and keep the tip 12 to 24 inches from the surface to avoid surface damage. A surface-cleaner attachment gives more even results than a single wand nozzle.
- Stiff-bristle scrub brush or deck brush: For scrubbing with degreaser and working acid into the surface.
- Wire brush and chisel or oscillating tool: For removing loose mortar, spalling edges, or existing flaking paint.
- Angle grinder with diamond cup wheel (optional): For mechanical surface prep where etching alone is not enough, especially under epoxy systems.
- 4-inch angle brush or masonry brush: For cutting in edges, joints between blocks, and corners.
- 9-inch or 12-inch roller frame with 3/8-inch to 1/2-inch nap cover: For main field area. Thicker nap handles the texture of concrete blocks better.
- Paint tray and liners.
- Airless paint sprayer (optional): Speeds up large jobs but requires practice and masking. Not essential for most DIYers.
- Painter's tape and plastic sheeting: For protecting adjacent surfaces and landscaping during acid washing and painting.
- Garden hose with spray nozzle: For rinsing.
Safety gear
- Chemical-resistant rubber gloves (nitrile or neoprene) for acid and solvent handling.
- Safety goggles or splash-proof glasses.
- N95 respirator or half-face respirator with organic vapor/P100 cartridges for painting and acid work.
- Old clothes and boots you do not mind ruining.
- Ventilation: work in well-ventilated conditions or in open air. Acid fumes are serious.
Sample materials list and estimated cost ranges
The table below gives a realistic starter kit for a typical patio of 150 to 200 square feet. Prices are retail estimates as of mid-2026 and will vary by region and brand.
| Item | Quantity | Estimated Cost |
|---|---|---|
| Acrylic concrete/masonry paint (1 gal) | 2 gallons | $60 – $110 |
| Concrete & masonry bonding primer (1 gal) | 1 gallon | $25 – $45 |
| Concrete sealer, acrylic (1 gal) | 1 gallon | $25 – $50 |
| Muriatic acid (1 qt) | 1 quart | $8 – $15 |
| Concrete degreaser / TSP substitute | 1 container | $10 – $18 |
| Baking soda (neutralizer) | 1 lb box | $2 – $4 |
| 9-inch roller frame + 3/8" nap covers (2-pack) | 1 set | $12 – $20 |
| 4-inch masonry brush | 1 brush | $6 – $12 |
| Painter's tape (1.5-inch) | 2 rolls | $10 – $16 |
| Safety goggles | 1 pair | $5 – $12 |
| Chemical-resistant gloves | 1 pair | $6 – $14 |
| N95 respirator (box of 10) | 1 box | $12 – $20 |
| Pressure washer rental (if not owned) | Half-day rental | $40 – $80 |
| Total estimated range | $221 – $416 |
If you already own a pressure washer and some basic tools, you can get the materials-only cost down to roughly $140 to $260 for a small patio. Epoxy systems cost more upfront, typically $80 to $150 for a two-part kit covering around 200 to 250 square feet, but they last significantly longer under heavy traffic.
DIY project checklist
Run through this checklist before you buy anything and again on project day. I print mine out and literally check boxes. It prevents the kind of "oh I forgot to do that" moments that cost you a redo.
Before you buy materials
- Confirm concrete is at least 28 days old (new concrete) or has no active moisture issues.
- Perform the plastic sheet moisture test: tape a 12x12-inch sheet flat to the block for 24 hours. Moisture on the underside means a vapor barrier or drainage fix is needed first.
- Assess cracks: hairline cracks are fine to paint over; cracks wider than 1/8 inch need to be filled with a concrete crack filler or flexible caulk first.
- Check for efflorescence: white deposits must be cleaned and, more importantly, the moisture source must be identified and corrected.
- Measure your patio area in square feet to calculate paint and sealer quantities.
- Check the weather forecast: you need at least 48 to 72 hours of dry weather with temperatures between 50°F and 90°F for painting.
Prep day tasks
- Clear all furniture, planters, and debris from the patio.
- Mask off adjacent walls, house foundation, and protect landscaping with plastic sheeting.
- Degrease the surface with TSP substitute solution and a stiff brush, then rinse.
- Pressure wash at 2,500 to 3,500 PSI using a 25-degree or 40-degree nozzle, keeping wand 12 to 24 inches from the surface.
- Remove efflorescence with diluted acid cleaner if present; neutralize and rinse thoroughly.
- Etch the surface with diluted muriatic or phosphoric acid (for smooth or dense concrete); dwell 5 to 10 minutes, scrub, neutralize with baking soda solution, and rinse.
- Let the surface dry fully: at least 24 hours in warm, sunny weather; 48 hours in cool or humid conditions.
- Fill any cracks or damaged joints with appropriate concrete repair product and allow to cure.
Painting day tasks
- Confirm surface is clean, dry, and free of dust.
- Apply bonding primer if required by your paint manufacturer; allow to dry per product instructions.
- Cut in edges and joints with a masonry brush before rolling the main field.
- Apply first coat with roller; work paint into the surface texture with firm pressure.
- Allow first coat to dry fully per manufacturer's dry time (typically 4 to 8 hours for acrylics).
- Apply second coat in the same manner.
- Add non-slip grit additive to the final coat if traction is a concern.
- Allow full cure before foot traffic: typically 24 hours minimum, 72 hours before replacing furniture.
Finishing and safety reminders
- Apply acrylic or polyurethane sealer after paint is fully cured (usually 7 days) for maximum durability.
- Dispose of acid rinse water and solvent-based materials according to local regulations.
- Store leftover paint sealed and upright in a climate-controlled space.
- Label containers with the color name and purchase date for touch-up reference.
Estimated timeline
| Phase | Time Required |
|---|---|
| Surface assessment and material purchase | 1 to 2 hours |
| Prep (cleaning, etching, crack repair) | Half day to full day |
| Drying time before painting | 24 to 48 hours |
| Primer coat + dry time | 1 to 2 hours work, 4 to 8 hours dry |
| First paint coat + dry time | 1 to 2 hours work, 4 to 8 hours dry |
| Second paint coat + dry time | 1 to 2 hours work, 24 hours dry |
| Sealer coat + cure | 1 hour work, 7 days before heavy use |
| Total elapsed time | 3 to 4 days minimum (mostly drying) |
Step-by-step painting process
Once prep is done, the painting itself is straightforward. For a step-by-step guide on how to paint concrete patio blocks, see our detailed tutorial. For step-by-step instructions and product recommendations, see our guide on how to paint cement patio. Start at the farthest corner from your exit point so you do not paint yourself into a corner (yes, I have done this). Cut in all the edges, seams between blocks, and any areas the roller cannot reach using a 4-inch masonry brush. Then load your roller generously and work in 3-foot sections, applying the paint in overlapping strokes with firm pressure to work the paint into the concrete texture. For a visual step-by-step walkthrough, see a YouTube tutorial on how to paint a concrete patio.
For porous or rough-textured concrete blocks, you may find the first coat gets absorbed quickly and looks patchy. This is normal. Let it dry fully and the second coat will level out and cover evenly. Do not try to fix thin spots by over-applying wet paint on the first coat. Two proper coats will always outperform one thick coat that sags and takes forever to cure.
If you want to create a faux stone or tile effect, the basic painted field coat is your base. For a faux tile look, let the base dry, then use painter's tape to mask off grout lines and apply a contrasting color in the tile areas. For a stone effect, a sea sponge dipped in two or three complementary shades and dabbed over the base coat creates natural-looking variation. Stencils work well too, and there is a lot more detail on these decorative techniques in guides specifically covering faux stone and faux tile concrete patio finishes. For step-by-step instructions on how to paint a concrete patio to look like stone, see our dedicated guide.
Sealing and long-term maintenance
Sealing is the step most DIYers skip, and it is one of the biggest reasons painted patios start looking rough after year two. After your paint is fully cured (wait a full seven days), apply a clear acrylic concrete sealer using a roller or pump sprayer. This adds UV resistance, makes the surface easier to clean, and significantly extends how long the paint color holds. Reapply sealer every one to two years in high-traffic or sun-exposed situations.
For regular maintenance, sweep and rinse the patio periodically. Avoid harsh chemical cleaners like bleach at full strength, which can break down the paint film over time. For mildew or staining, a diluted dish soap solution and a scrub brush will handle most issues. Touch up chips and scuffs promptly before they grow; keeping the original paint color on hand makes spot repairs seamless.
Troubleshooting: peeling, blistering, and adhesion failure
If your paint peels in sheets within the first season, the culprit is almost always surface prep. The most common causes are residual sealer that was not removed before painting, moisture under the blocks, or applying paint over concrete that was not fully etched. Blistering (bubbles under the paint film) points specifically to moisture vapor pushing up from below. If you see blistering within weeks of painting, you have a drainage or vapor problem that no paint system will solve without addressing it at the source.
Efflorescence pushing through paint appears as white powdery spots or bumps under the film. This happens because the water source was not corrected before painting. The fix is to scrape off the affected paint, clean the efflorescence, identify where water is entering the substrate (usually from soil contact, poor grading, or an unsealed edge), correct the source, and then repaint after the surface has dried thoroughly.
If adhesion is generally poor across the whole surface, the most likely issue is that the concrete surface was too smooth and glossy (not etched) or that an existing sealer was left in place. Re-etching or mechanical grinding to create a rougher surface profile (called an anchor profile) and then repainting with a quality bonding primer will usually solve this. For high-performance coatings like two-part epoxies, manufacturers often recommend mechanical abrasion such as diamond grinding or shot-blasting to achieve a consistent surface profile.
Alternatives to painting: what else can you do with concrete patio blocks
Painting is one tool, not the only one. Depending on your goals, budget, and the condition of your existing blocks, one of these alternatives might actually be a better fit.
| Option | How it works | Pros | Cons | Rough cost (150–200 sq ft) |
|---|---|---|---|---|
| Concrete stain | Penetrating acid or water-based stain soaks into the surface for a permanent color change | No peeling, natural look, low maintenance | Limited color range, cannot fully cover stains, subtle effect | $50 – $150 DIY |
| Concrete overlay / microtopping | Thin cementitious layer troweled over existing surface | Can dramatically change texture and appearance, very durable | Requires skill to apply evenly, not for badly damaged surfaces | $150 – $400 DIY; $800 – $2,000 pro |
| Resurfacing compound | Thicker product for damaged or worn concrete | Repairs surface imperfections, can be stamped or textured | Still requires painting or sealing for color, some skill needed | $100 – $250 DIY |
| Replacing pavers | Remove and replace individual or all blocks | Fresh start, can upgrade to better material | Most expensive, labor-intensive, requires some demolition | $400 – $2,000+ depending on scope |
| Painting | Acrylic or epoxy coating applied to the surface | Fast, affordable, wide color range | Peels over time, needs maintenance and periodic recoating | $140 – $416 DIY |
My honest recommendation: if your concrete blocks are structurally sound and you just want a color change or a cleaner look on a budget, painting is the right first move. If the blocks have moderate surface wear or are just dull and slightly pitted, a penetrating stain is worth considering because it will never peel. If you want something more dramatic or your surface is significantly damaged, look at an overlay or resurfacing option before committing to a paint job that will not hold.
FAQ
Can you paint cement patio blocks?
Short answer: Yes — you can paint cement patio blocks and concrete pavers, but success depends on proper surface prep, correct products, and site conditions. New concrete should cure ~28 days and active moisture, efflorescence, or loose substrate must be addressed first.
What are the main pros and cons of painting concrete patio blocks?
Pros: Fresh look, lower cost than replacement, can hide stains and unify mixed pavers, wide color options, allows decorative finishes (faux tile/stone). Cons: Paint can peel or chip if prep is poor or moisture/efflorescence recurs, requires periodic maintenance/recoating, limited lifespan vs. replacement (often 3–10 years depending on product/use), not a structural repair.
What materials and tools will I need for this project?
Materials: exterior masonry/concrete primer (bonding/alkali‑tolerant), acrylic or epoxy concrete paint or concrete stain, masonry sealer (penetrating or film‑forming as recommended), efflorescence remover or muriatic/phosphoric cleaner, TSP or degreaser, patching mortar or polymeric sand for joints. Tools: pressure washer (2,500–3,500 PSI) or surface cleaner, stiff push broom, scrub brushes, acid‑resistant bucket and mixing tool, masonry grinder/diamond cup or sanding equipment (optional), rollers (3/8"–1/2" nap), brushes, airless sprayer (optional), masking tape/plastic, respirator, acid gloves, eye protection, knee pads.
What are the detailed preparation steps before painting?
1) Wait for new concrete to cure ~28 days. 2) Remove furniture, plants, and loose debris. 3) Clean: degrease with TSP or commercial cleaner, then pressure‑wash (25°–40° nozzle, 12–24" distance). 4) Identify efflorescence; remove deposits with commercial efflorescence cleaner or dilute muriatic/phosphoric acid per label, always add acid to water, neutralize and rinse thoroughly. 5) Repair cracks, spalls, and loose mortar with appropriate patching compound; let cures. 6) Etch or mechanically abrade to open pores: acid etch per product directions or use diamond sanding/grinder for a stronger profile. 7) Remove dust and allow substrate to dry fully (follow primer/paint moisture limits). 8) Prime with a concrete/masonry primer if product requires (always follow TDS).
Step‑by‑step painting procedure and estimated time/cost?
Procedure: 1) Prep and clean (1 day to 2 days depending on drying). 2) Remove efflorescence/repair (same day or additional day for repairs to cure). 3) Etch/sand and rinse, then dry (1–2 days). 4) Apply primer per label (1 coat; allow recommended dry time, typically 2–24 hours). 5) Apply first coat of paint (roller or sprayer) and allow full dry time. 6) Apply second coat if needed. 7) Apply sealer if recommended and allow cure before use. Estimated timeline: small patio (100–300 sq ft): 2–5 days total (including dry times); larger jobs 3–7+ days. Estimated cost (DIY): materials only roughly $150–$700 depending on product quality and area — primer & paint $50–$300, sealer $30–$150, cleaners/patch/consumables $30–$200; tools/rentals (pressure washer, grinder) extra if needed.
How much paint will I need and what coverage can I expect?
Typical acrylic concrete paints list coverage ~300–400 sq ft/gal on smooth, non‑porous surfaces and ~180–220 sq ft/gal on porous or profiled concrete. Always use manufacturer coverage numbers and account for porosity, number of coats, and losses from rollers/sprayers.