
The concrete patio process runs from staking out your layout and pulling a permit all the way through pouring, finishing, curing, and sealing a slab that will last decades. If you're starting from scratch, you'll work through site prep, formwork, reinforcement, the pour itself, control joints, and a cure period before you're done. If you're repairing or refinishing an existing slab, the process is shorter but the prep work is just as critical. Either way, this guide covers the full sequence so you know exactly what's coming, what it costs, and where the real risks are.
Concrete Patio Process: DIY Planning, Building & Repair

Silas Morrison
4 Aug 2026
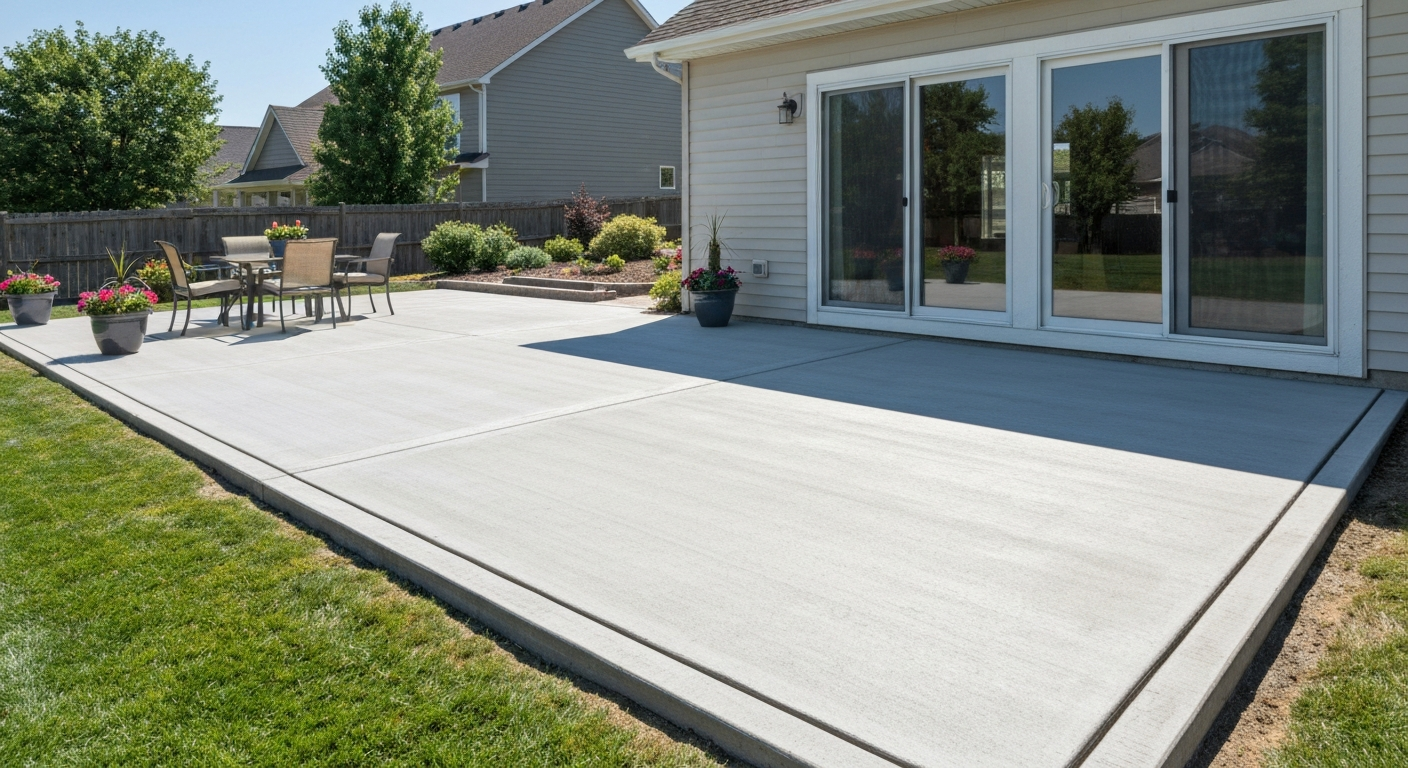
What this guide covers and who it's for
This article is written for DIY homeowners who want to build, repair, or improve a concrete patio without hiring a full crew. The scope includes new slab construction (planning through curing), common repairs like crack filling and resurfacing, finishing options like staining and stamping, and specific situations like integrating steps with a patio door threshold. If you're comfortable with basic carpentry, renting equipment, and spending a full weekend outdoors, most of what's here is within reach. That said, I'll be straight with you about where professional help makes sense, because getting the pour wrong can cost you more to fix than it would have cost to hire out.
Safety note before anything else: concrete is caustic. Fresh concrete can cause severe chemical burns on skin, especially with prolonged contact through wet clothing or boots. Wear nitrile or rubber gloves, waterproof boots, eye protection, and long sleeves any time you're handling wet mix. Keep a source of clean water nearby to rinse skin immediately if contact happens.
DIY or hire a pro? Here's how to decide
I've poured patios both ways, and the honest answer is that project size and soil conditions are the two biggest deciding factors. A straightforward rectangular patio under roughly 200 square feet on stable, well-drained soil is a reasonable DIY project for someone with a helper and a free weekend. Once you're pushing past that, or dealing with slopes, bad soil, or a complex design, the margin for error shrinks fast and the cost of a redo climbs.
Project-size rules of thumb
- Under 200 sq ft, simple rectangular shape, flat or gently sloped site: strong DIY candidate with one helper
- 200–400 sq ft: manageable for experienced DIYers, but you'll want a crew of three and possibly a concrete pump or wheelbarrow relay
- Over 400 sq ft or irregular shape: seriously consider hiring a finisher for at least the pour and finish stages — wet concrete moves fast and you can't pause it
- Any slab attached to a foundation, supporting a structure, or over 6 inches thick: consult a structural engineer or licensed contractor
Risk factors that push toward hiring out
- Poor or expansive soils (clay, fill, poorly drained ground)
- High seasonal water table — look for evidence of standing water or saturated soil after rain
- Tight access for a ready-mix truck or equipment
- Patio adjacent to or attached to a foundation wall
- Steps connecting to an exterior door where threshold height and ADA clearances matter
- First time pouring concrete with no experienced helper
Cost tradeoff reality check
DIY concrete work saves on labor but not on materials. Ready-mix concrete, aggregate base, reinforcement, form lumber, and tool rentals typically run $6–$12 per square foot for a basic 4-inch slab, depending on your region and current material prices. A professional crew for the same basic slab runs $10–$20 per square foot installed, with stamped or decorative finishes pushing that to $18–$30 or more. The DIY savings are real, but factor in your time, two to three helpers, and the cost of renting a plate compactor, screed board, bull float, and possibly a concrete saw.
DIY decision checklist
- I have at least one experienced helper available for the full pour day
- The patio is 400 sq ft or smaller with a simple layout
- The site has stable, well-drained soil with no known drainage problems
- I can get a ready-mix truck within 100 feet of the pour area, or I'm comfortable with a mix/pump rental for smaller pours
- I've confirmed permit requirements and have time to handle the permit process
- I've read through the full process and understand the timeline commitment
- I have access to all required tools or can rent them locally
- I'm comfortable working with wet concrete in a timed environment
Planning your project and pulling permits
Before you touch a shovel, spend time on planning. I've skipped this step on small projects and regretted it. Site assessment, drainage, and permit requirements all feed into your design decisions, and changing course mid-project is always more expensive than planning it right the first time.
Site assessment
Walk the area after a rain and watch where water goes. Exterior slabs need to slope away from your house for drainage, the standard target is 1/4 inch per foot, though 1/8 inch per foot is acceptable for very smooth finishes. Anything that holds water against the foundation is a problem. Dig a test pit 18–24 inches deep in the middle of your planned slab area and check what you're working with: rock, sandy loam, clay, or fill material all change your base requirements. If you hit saturated soil within 18 inches of the surface during a wet season, factor in drainage mitigation before you build.
Call 811 before you dig
This is not optional. Call 811 (the national dig-safe number in the U.S.) or submit a locate request online at least 3 business days before any excavation. Utilities including gas, electric, water, fiber, and cable will be marked at no cost. Hitting a buried line during excavation is a serious safety and legal liability.
Permits: what to check and when you need one
Permit requirements for concrete patios vary significantly by jurisdiction. Many U.S. cities exempt small uncovered flatwork from permit requirements, for example, some municipalities set a 200 square foot maximum for permit-exempt concrete flatwork. But covered patios, patios attached to the foundation, or work in areas with impervious-cover restrictions almost always require a permit. Most jurisdictions have adopted versions of the International Codes (the IRC for residential), sometimes with local amendments, so the local building department is your authoritative source. Check International Code Council, news & code adoption notices for current I‑Code adoption and local amendments, and verify requirements with your local building department International Code Council — news & code adoption notices. Call them or check their website before assuming you're exempt.
- Contact your city or county building department to confirm permit thresholds for concrete flatwork
- Ask specifically about impervious-cover limits (these apply in many water-quality sensitive areas and can cap total hard surface on your lot)
- Check whether a survey or site plan is required with the permit application
- Ask about required inspections — base compaction and reinforcement inspections are common before the pour
- Confirm setback requirements from property lines, easements, and utilities
- If the patio connects to the house or has a roof, expect a more involved permit review
Design choices and dimensions
Slab thickness and load
For a standard residential patio with foot traffic, outdoor furniture, and a grill, 4 inches is the correct slab thickness. That's the widely accepted standard based on ACI 302.1R guidance for slabs on grade. If you're planning to park a vehicle on it, drive a skid-steer over it, or support a heavy pergola post, step up to 5 or 6 inches and add rebar rather than just wire mesh. The subbase under the slab should be 4–6 inches of compacted crushed stone (also called graded aggregate base or crusher-run) for typical residential soil. Soft, poorly drained, or expansive soils may need a deeper base.
Steps, thresholds, and patio doors
If your patio connects to the house through an exterior door, the relationship between the finished slab elevation and the door threshold matters a lot, both functionally and for code compliance. For detailed guidance on forming, riser and tread dimensions, and threshold transitions, see patio door concrete steps. For a focused how-to on concrete steps and patio integrations, see concrete steps and patio. For patios on an accessible route, blank" rel="noopener noreferrer">the ADA Standards for Accessible Design set a maximum threshold height of 1/2 inch (about 13 mm) at doorways. In practice, most homeowners target a finished patio surface 1 to 2 inches below the door threshold to allow for weather stripping clearance and a small drainage gap, while keeping the step transition safe and manageable. If you're building concrete steps between the patio and door, plan riser heights carefully. A single riser of 4–7 inches is typical. Consistent riser height matters more than hitting a specific number. For more on integrating steps with door thresholds specifically, that topic is worth its own deep dive alongside guidance on using composite materials like Trex over concrete step surfaces.
Finished elevation and transitions
Think through your finished elevations before you set any forms. Where does the patio meet the lawn? An edge that drops more than 1.5 inches into grass creates a trip hazard and makes mowing harder. A buried or tapered edge, or a defined edge with a small bevel, handles this better. Where you transition to a concrete or masonry walkway, try to match the finished surface elevations within 1/4 inch or use a beveled transition strip.
Tools, materials, and safety checklists
Print this section or pull it up on your phone before you head to the supply yard. Missing one critical item on pour day means a scramble you don't want. For additional concrete patio tips, see our detailed how-to guide for troubleshooting common problems and improving finishes.
Tools checklist
- Tape measure, string line, line level, and stakes for layout
- Square (framing or speed square) for form corners
- Circular saw or reciprocating saw for cutting form boards
- Hammer and nails or cordless drill and screws for form assembly
- Plate compactor (rental) for subbase compaction
- Wheelbarrow and concrete rake (come-along) for moving and spreading mix
- Screed board (a straight 2x4 works for spans up to 10–12 ft)
- Bull float for initial surface smoothing
- Hand float or magnesium float for edge and detail work
- Steel trowel for finishing smooth surfaces (skip if you want a broom finish)
- Grooving tool or concrete saw for control joints
- Broom for broom finish texture
- Edger for perimeter edges
- Level (4-foot) for checking forms and surface flatness
- Garden hose or misting nozzle for curing
- Plastic sheeting or curing compound for keeping moisture in the slab
Materials checklist
- Ready-mix concrete (order by the cubic yard) or bagged mix for small pours — specify 3,000–4,000 psi, 4-inch slump, air-entrained if in a freeze-thaw climate
- Crushed stone or graded aggregate base (crusher-run) for subbase
- 2x6 or 2x8 lumber for forms (match to your slab thickness)
- Stakes (wood or metal) for holding forms
- Double-headed nails or screws for form assembly (easy removal)
- Welded wire mesh (6x6-W1.4 is common) or rebar (#3 or #4 at 18-inch spacing) for reinforcement
- Fiber reinforcement (optional, added at the plant or mixed in for bag mixes)
- Wire chairs or dobies to support mesh or rebar at correct height
- Form release agent or old motor oil to prevent concrete sticking to forms
- Isolation joint material (asphalt-impregnated foam strip) where the slab meets the house or existing concrete
- Concrete sealer for post-cure application
PPE and safety plan
- Nitrile or rubber gloves — not fabric or leather, which absorb water and hold concrete against skin
- Waterproof rubber boots — concrete inside a boot causes serious burns
- Safety glasses or goggles
- Long-sleeved shirt and long pants
- Dust mask or N95 respirator when cutting, grinding, or mixing dry concrete
- Hearing protection when operating a plate compactor or concrete saw
- First aid kit and clean water source on site
- Know the location of the nearest urgent care facility for chemical burn treatment
- Designate one person to handle safety checks and watch for fatigue during the pour
Timeline and realistic cost ranges
The timeline for a concrete patio project is longer than most people expect, mostly because of cure time at the end. Here's a realistic breakdown for a typical 200–300 square foot DIY slab.
| Phase | Typical Time | Notes |
|---|---|---|
| Planning, permits, material ordering | 1–3 weeks | Permit processing time varies widely by jurisdiction |
| Site layout and excavation | 1 day (4–8 hrs) | Longer for large or obstructed sites |
| Subbase installation and compaction | Half day to 1 day | Compaction requires rental plate compactor |
| Formwork and reinforcement | Half day to 1 day | Includes setting isolation joints and mesh/rebar |
| Pour, screed, and finish | 4–8 hours | This is your hard deadline — concrete doesn't wait |
| Initial cure (light foot traffic) | 24–48 hours | Keep off slab, keep it moist |
| Full cure before sealing or heavy use | 28 days | Concrete reaches design strength at 28 days |
| Crack repair or patching (existing slab) | Half day | Plus 24–48 hr cure before traffic |
| Resurfacing/overlay (existing slab) | 1–2 days | Includes surface prep — the most important step |
Ballpark cost ranges (DIY, materials only)
| Item | Typical Cost Range | Cost Driver |
|---|---|---|
| Ready-mix concrete (per cubic yard) | $150–$220/cy | Region, supplier, mix specs, delivery distance |
| Crushed stone subbase (per ton) | $30–$60/ton | Material type, delivery distance |
| Welded wire mesh (per 50 sq ft roll) | $15–$30 | Wire gauge and mesh spacing |
| 2x6 form lumber (per 8 ft board) | $5–$12 | Lumber market prices (fluctuate significantly) |
| Tool rental for a weekend | $150–$300 | Plate compactor, float, screed, concrete saw |
| Permit fee | $50–$400+ | Jurisdiction, project size |
| Concrete sealer (per 5-gallon pail) | $40–$100 | Product type (penetrating vs. film-forming) |
| Total DIY cost estimate (200 sq ft slab) | $1,200–$2,400 | All in, materials + rental + permit |
| Professional installed (200 sq ft basic) | $2,000–$4,000 | Labor + materials, region-dependent |
Site preparation and excavation
Good site prep is where long-lasting slabs are made or lost. I've seen perfectly poured concrete fail in a few years because someone skipped compaction or didn't get the grade right. Don't rush this phase.
Layout and marking
Use batter boards and string lines set just outside your planned slab perimeter to establish your corners and elevation. Batter boards let you pull down the strings for digging and reset them precisely afterward. Spray paint the ground under the strings to mark your cut lines before you take the strings down. Double-check your corners are square by measuring diagonals, they should be equal within 1/4 inch.
Excavation depth
For a 4-inch slab on a 4-inch compacted aggregate base, you need to excavate about 8 inches below your finished slab elevation, plus a little extra to account for any high spots. Add an inch of tolerance. If your soil is soft, poorly drained, or you hit fill material, use a 6-inch base instead and excavate accordingly. Remove all sod, roots, and organic material, organic matter compresses and decomposes over time, which is how slabs crack and sink.
Grading and drainage
Grade the excavated surface so that it follows the planned slope of the slab (1/8 to 1/4 inch per foot, sloping away from the house). A laser level or water level makes this much easier to verify. Correcting slope problems in the base layer is easy; correcting them after the pour means grinding or demolition.
Subbase installation and compaction
Spread your crushed stone base in lifts no more than 4 inches thick and compact each lift with a plate compactor. For a 4-inch base, that's one compact pass. For a 6-inch base, do it in two lifts. Engineering specs typically call for compaction to 95% Standard Proctor density, which means a plate compactor making multiple overlapping passes, not just a quick single run. Make sure the compactor reaches the edges and corners. After compaction, the base surface should be stable: walking across it should leave no visible impressions.
Drainage and erosion control
- If water consistently pools in the excavation, install a perforated drain pipe (French drain) along the upslope edge before placing base material
- Use a geotextile fabric between native soil and aggregate base in areas with fine-grained or silty soils to prevent migration
- Control erosion at excavation edges with silt fence or straw wattles if the site will be open during rain
- Plan where roof and patio runoff will go after the slab is in place — avoid directing it toward neighbors or toward your own foundation
Building your forms and edge details
Forms are the molds that give your slab its shape and hold it to the right elevation while the concrete sets. Getting forms level, straight, and sturdy is critical, a wobbly form that shifts during the pour means a slab that isn't flat and edges that aren't straight. This step takes more time than you think, but it's worth every minute.
Form boards and stakes
Use 2x6 lumber for a 4-inch slab and 2x8 for a 5-inch slab. The extra inch of board height gives you something to screed against and helps contain any minor pour height variation. Drive wood or metal stakes into the ground on the outside face of the form boards every 24 to 36 inches, closer spacing (24 inches) on curves or anywhere the form needs extra support. Stakes should extend below the bottom of the form board so they're anchored in firm soil, not just in loose backfill. Use double-headed nails or screws driven through the stake into the form board so you can pull the nails cleanly when stripping forms later.
Set your form boards to the final finished elevation of the slab surface, accounting for your planned slope. Use a long level (4 feet minimum) and a tape measure to check the cross-slope and lengthwise slope every few feet. Coat the inside face of the forms with form release agent, cheap vegetable oil, or old motor oil before the pour, this makes form removal much cleaner and protects the lumber if you want to reuse it.
Corner and curve details
For square corners, cut form boards so one board butts against the other, and drive a stake at the intersection point inside the corner. Check the corner with a framing square and verify diagonals again after staking. For curved edges, use 1/4-inch plywood or flexible hardboard bent around stakes placed every 12 inches. Curved forms take more time to set but make a significant difference in the finished look.
Removable vs. permanent forms
Most forms are stripped 24–48 hours after the pour, once the concrete is strong enough to hold its edge without the form's support. Permanent forms are sometimes used when a decorative redwood or cedar edge is desired, the lumber stays in place and becomes part of the finished look. If you use permanent forms, choose rot-resistant wood, pre-drill to avoid splitting, and understand that wood will eventually deteriorate and may need replacement over the slab's lifetime.
Isolation joints at the house
Wherever the new slab will meet the house foundation, existing concrete, or another structure, install an isolation joint, a strip of asphalt-impregnated foam expansion joint material (1/2 inch thick is standard) set against the existing surface before the pour. This allows the new slab to move independently without cracking against the fixed structure. Stake or tape it in place so it stays vertical and at the right elevation during the pour.
Forming for steps and patio door thresholds
Concrete steps attached to a patio require their own step forms, typically built from 2x lumber with risers cut to the planned height. A standard comfortable riser is 7 inches maximum, with a tread depth of at least 11 inches. If the steps connect to an exterior door, work back from the door threshold height and plan your finished step and patio elevations so the threshold transition is at most 1/2 inch (for accessible routes) or a manageable single step with a clearly defined nosing. Mark the threshold height on the house wall with a pencil line and use it as your elevation reference when setting step forms. A diagram or photograph of your planned step section before you build forms will save you trouble, it's easy to think through the geometry wrong in your head but see the error on paper.
A key practical tip: set your step form's top riser board so the finished concrete surface of the top step lands at your target threshold clearance. If the door swings outward, you need enough clearance below the threshold for the door to open without dragging on the concrete, typically 1 to 2 inches. If the door swings inward, you have more flexibility, but you still want to avoid water draining toward the door threshold. These details matter more than most people realize before the concrete is set.
Placing reinforcement in forms
Once forms are set, place your reinforcement before calling for the concrete truck. For welded wire mesh, ACI 302.1R guidance calls for placement approximately 2 inches below the slab surface, or in the upper one-third of the slab thickness. In a 4-inch slab, that means roughly 1.5 to 2 inches from the top, not lying on the ground at the bottom of the excavation, which is where most of it ends up if you don't use wire chairs or dobie blocks. Use chairs or small concrete blocks to hold the mesh at the right height. Lap mesh sheets by at least 6 inches and tie them at laps with wire ties. For rebar, typical spacing for a residential patio is #3 or #4 bars at 18 inches on center in both directions, supported at 1.5–2 inches from the bottom for maximum structural efficiency, though placement guidance varies by design.
Wire mesh and rebar both help control crack widths after cracking starts, but they don't prevent cracking, that's the job of properly spaced control joints. Fibers mixed into the concrete (synthetic or steel) can further reduce crack width and are worth discussing with your ready-mix supplier if you're concerned about a slab that's prone to shrinkage cracking. For most standard residential patios, 6x6-W1.4 welded wire mesh properly positioned is adequate. For anything supporting vehicles or heavy point loads, consult an engineer or upgrade to rebar on a designed layout.
FAQ
What primary codes and local permits must I check before starting a concrete patio project?
Check your local city/county building department for permit thresholds, zoning and impervious‑cover rules, and any adopted amendments to model codes. Reference the International Codes (IRC/IBC/ISPSC) via the International Code Council for typical requirements, and verify local adoption/variances. Example: some jurisdictions publish square‑foot exemptions for uncovered flatwork — always confirm with your local permitting office.
Which authoritative technical guides should be referenced for slab design, jointing, and finishing best practices?
Use ACI 302.1R (Guide for Concrete Floor and Slab Construction) for site prep, reinforcement placement, joint layout and finishing; ACI 224R/224.3R for crack control and joint timing/depth; and ACI 546R for concrete repair selection and procedures. These ACI guides provide industry‑accepted practices for residential slabs and repairs.
What material and testing standards are essential to cite for concrete quality and field tests?
Cite ASTM standards commonly used in the field: ASTM C94 (ready‑mixed concrete specification), ASTM C143 (slump test), ASTM C31 (making and curing field specimens), and ASTM C33 (aggregate gradation). These establish mix, consistency and sampling/testing protocols.
What authoritative guidance covers accessibility and door/threshold requirements when integrating steps with patio doors?
Use the 2010 ADA Standards for Accessible Design for threshold and accessible route limits (e.g., maximum 1/2" thresholds) and check local code amendments. For retrofit/altered conditions consult local building code officials about thresholds, transitions and required profiles to meet egress and accessibility rules.
What soil, drainage and base preparation references are needed to ensure slab performance?
Reference EPA/NRCS/USGS guidance for test pits and seasonal high water table checks, local DOT or municipal specs for aggregate base selection and compaction requirements (many require 90–95% Standard Proctor), and model/agency guidance recommending a well‑compacted granular base (commonly 4–6") under a 4" residential slab. Also cite ICC/ISPSC guidance for recommended exterior slab drainage slopes (typical 1/8–1/4" per foot).
What authoritative rules govern joint spacing, depth and timing to control cracking?
Use ACI 302.1R and ACI 224R guidance: common spacing rule of thumb is 24–36× slab thickness in inches (e.g., 4" slab → ~8–12 ft spacing), saw or tool joints should be 1/4–1/3 of slab depth, and timing of early‑entry saws or tooling is critical to produce effective contraction joints. These documents detail joint layouts and crack‑control strategies.