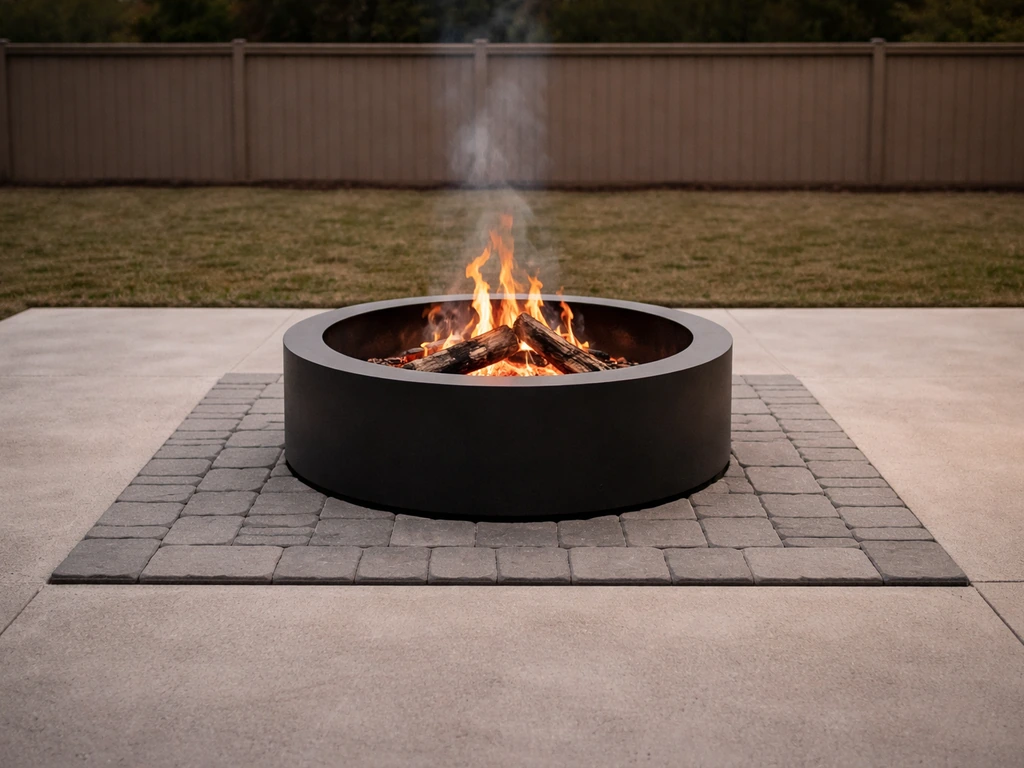
Yes, you can absolutely build or install a fire pit on a concrete patio, and it's one of the more satisfying backyard upgrades you can tackle yourself. The key is protecting the slab from heat damage, keeping safe clearances from your home and any combustible structures, and choosing the right fire pit type for your space. Skip those steps and you risk cracking your concrete, scorching the surface, or running into issues with your local fire code. Do them right and you'll have a fire pit setup that's safe, durable, and looks great for years.
How to Build a Fire Pit on a Concrete Patio DIY Guide

Silas Morrison
17 Jun 2026
Can you really put a fire pit on a concrete patio?
Concrete seems tough, but it does have a vulnerability: heat. Prolonged direct heat from a wood-burning fire can cause concrete to spall, crack, or discolor over time, especially if there's any trapped moisture in the slab. That said, the solution isn't to avoid putting a fire pit on concrete. It's to manage the heat transfer correctly. With the right fire pit pad or base underneath your pit, you can protect the slab completely and enjoy your fire pit without worrying about damage.
The same goes for cement patios. Cement and concrete are used interchangeably in everyday conversation, and whether your slab is a standard poured concrete patio or a cement-based surface, the same heat protection approach applies. The concrete doesn't care what you call it; it just needs to be shielded from sustained radiant heat.
There are two situations you might be in: you already have a poured concrete patio and want to add a fire pit to it, or you're planning a new concrete patio from scratch and want to build the fire pit as part of that project. This guide covers both. The safety rules and positioning logic are the same either way; the main difference is when in the project timeline you're doing the work.
Safety basics and building code you need to know first
Before you touch a single block or buy a fire pit insert, spend 15 minutes on this. It'll save you a headache later. Fire pits fall under local fire codes in most jurisdictions, and the rules vary more than people expect.
The baseline most jurisdictions use comes from the International Fire Code (IFC), which sets a minimum 25-foot setback from any structure or combustible material for a recreational fire, defined as a fire no larger than 3 feet in diameter and 2 feet in height.
Arvada Fire Protection District notes that recreational fires meeting the International Fire Code limits (fuel area under 3 feet in width and flame under 2 feet in height) are allowed without permits, but they cannot be conducted within 25 feet of combustible materials or structures recreational fire must stay within 3 feet in diameter and 2 feet in height and typically uses a 25-foot setback. That 25-foot rule is a starting point, not a universal guarantee.
Some jurisdictions tighten it, and many add permit requirements on top.
Portable fire pits and chimeneas often get a pass on permits as long as the fire stays within those size limits, but permanent installations almost always require a permit. If you're running a gas line to a built-in gas fire pit, expect to need a plumbing or gas permit and possibly a building inspection. Natural gas fire pits, for example, are typically recommended to be 10 to 25 feet from the home depending on local rules, and some municipalities require a licensed contractor for the gas connection. Wood-burning pits on patios fall under recreational fire rules in most areas, while propane and natural gas versions may have their own set of requirements.
A few things to check before you start: call your local fire marshal's office or look up your municipality's code online. Ask specifically about portable vs. permanent fire pit permits, setback requirements from the house and from fences or pergolas, and any HOA rules if you have them. Places like Orchard Lake Village, MI require a building permit for any natural gas or propane outdoor fire pit before installation. Your town may be similar. Five minutes on hold with the city is worth it.
- Maintain at least 25 feet from the house, fences, overhangs, and combustibles (check local code; it may be stricter)
- Keep the fire no larger than 3 feet wide and 2 feet high for recreational fire classifications
- Portable fire pits generally don't require a permit; permanent and gas-connected pits usually do
- Gas fire pit installations need a licensed professional for the gas line in most jurisdictions
- Check HOA rules separately; they often have stricter setback or fuel-type restrictions than local fire codes
Which type of fire pit actually works on a concrete patio
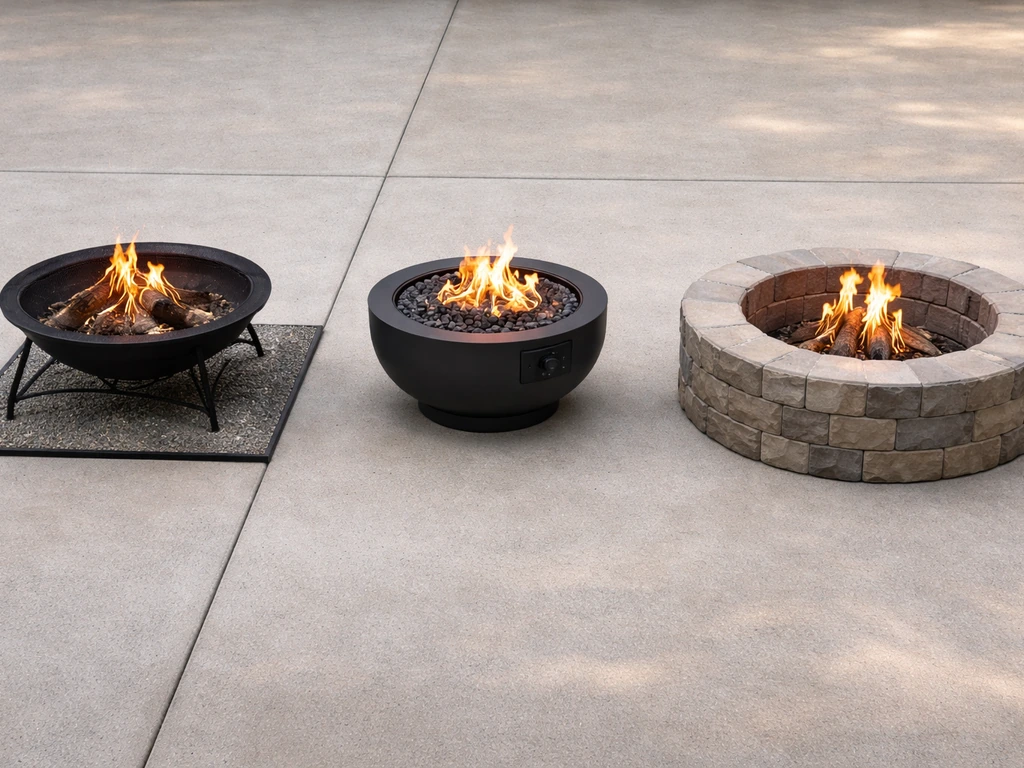
Not every fire pit type is equally suited for a concrete patio. Here's a quick rundown of your main options and how they each interact with a concrete surface.
| Fire Pit Type | Works on Concrete? | Heat Risk to Slab | Permit Likely? | Best For |
|---|---|---|---|---|
| Freestanding wood-burning bowl/ring | Yes, with heat pad | Moderate to high | Usually no | Casual use, easy setup |
| Propane tabletop or freestanding gas pit | Yes, with pad | Low to moderate | Sometimes | Small patios, renters |
| Drop-in fire pit insert (gas) | Yes, built into patio feature | Low | Yes (gas line) | Permanent patio design |
| Masonry/block constructed pit | Yes, with proper base prep | Moderate | Often yes | Built-in, permanent look |
| Chimenea | Yes, with pad | Low | Usually no | Small spaces, windy yards |
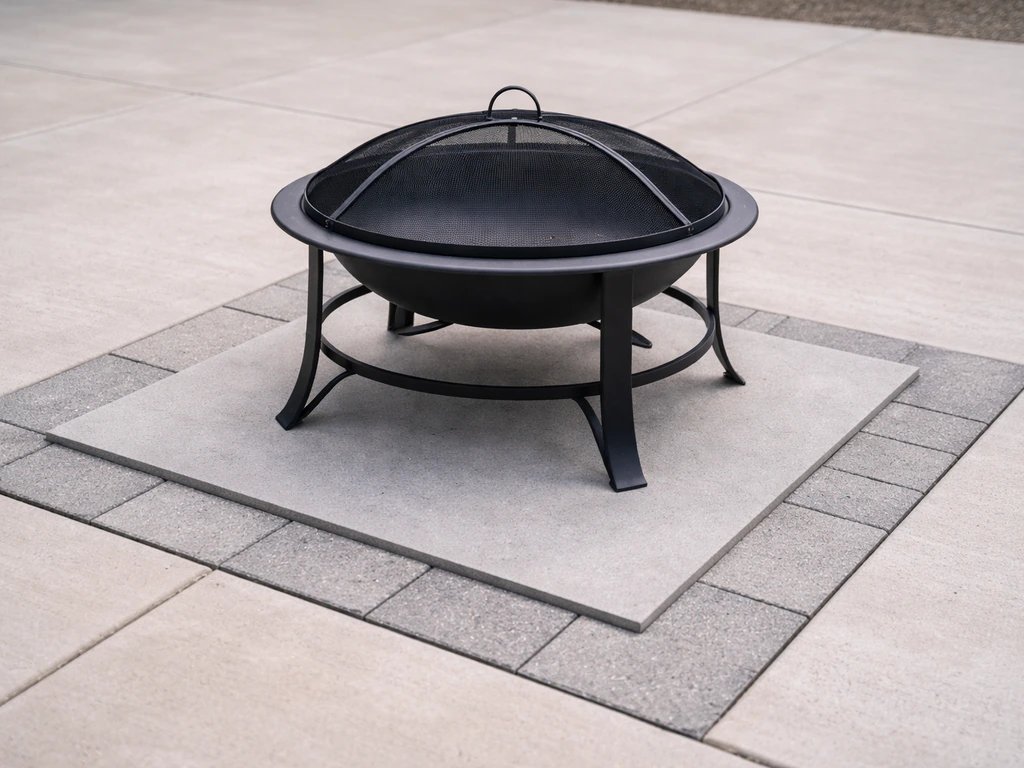
For most homeowners adding a fire pit to an existing poured concrete patio, a freestanding wood-burning or propane fire pit is the practical choice. It's fast to install, budget-friendly, and doesn't require you to cut into your slab. If you're building a new concrete patio with fire pit integration in mind, a block-built or drop-in gas insert design gives you a cleaner, more permanent result and is worth planning from the patio construction stage.
Manufacturer clearance specs matter as much as local code, sometimes more. Tropitone specifies a minimum of 48 inches of clearance from any surrounding structures. Belgard recommends placing fire pit kits at least 10 to 20 feet from the home, fences, and pergolas. Always pull the manual for whatever product you buy and treat those numbers as your hard floor.
What you'll need: materials and tools list
The exact list depends on which route you take, but here's a comprehensive shopping list that covers the most common scenario: installing a freestanding or block-kit fire pit onto an existing concrete patio, including all the heat protection and finishing materials.
For a freestanding fire pit on existing concrete
- Fire pit (bowl, ring, or freestanding unit — wood-burning or propane)
- UL 1618-listed fire pit pad or noncombustible hearth pad (sized at least 4 inches larger than the pit on all sides)
- Concrete/patio sealer rated for heat zones (silane-siloxane or penetrating sealer for the surrounding slab)
- Fire-resistant pavers or porcelain tile (optional: to create a defined fire pit zone on the slab surface)
- Level (4-foot)
- Tape measure
- Chalk line or spray paint (for layout marking)
- Wire brush and concrete cleaner (TSP or degreaser for surface prep)
- Garden hose or pressure washer
- Work gloves and eye protection
For a built masonry block fire pit on or into a concrete patio
- Fire pit block kit (e.g., Belgard, Cambridge Pavers, or similar) or individual retaining wall blocks
- Steel fire ring/metal liner insert sized for the kit
- 4 to 6 inches of compacted crushed gravel aggregate (if building a base inside the fire pit area)
- Masonry adhesive or construction adhesive rated for outdoor/heat use
- Landscaping fabric (optional: inside pit base to limit weed/debris intrusion)
- Concrete drill bit (if anchoring or drilling into existing slab for drainage)
- Plate compactor or hand tamper
- Rubber mallet
- Shovel and wheelbarrow
- 4-foot level and torpedo level
- Tape measure and chalk line
- Angle grinder with masonry blade (for cutting blocks to fit)
- Safety glasses, dust mask, and gloves
- Concrete/masonry sealer for the finished pit exterior
Step-by-step: installing your fire pit on a concrete patio
Here's the full process from start to finish. If you want a visual walkthrough, search YouTube for how to build a concrete patio fire pit and follow the steps closely how to build a concrete patio youtube. I've broken it into two paths: the faster route for a freestanding pit, and the longer build for a constructed masonry pit. Read through both before you commit to your approach.
Step 1: Pick the right location
Mark out your fire pit location on the patio before buying anything. Grab a tape measure and check your clearances in all directions: at least 25 feet from the house, 10 to 20 feet from fences and pergolas, and at least 4 feet (48 inches) of open clearance around the pit itself for safety and seating. If your patio doesn't give you these clearances from the house or combustible structures, a gas tabletop unit or a smaller chimenea closer to the patio edge is a safer call than cramming a full fire pit into a tight corner.
Think about wind direction relative to your house and your neighbors too. You want smoke moving away from seating areas, not drifting back through sliding doors. Mark your chosen center point with spray paint or chalk so you can visualize it before committing.
Step 2: Prep the concrete surface
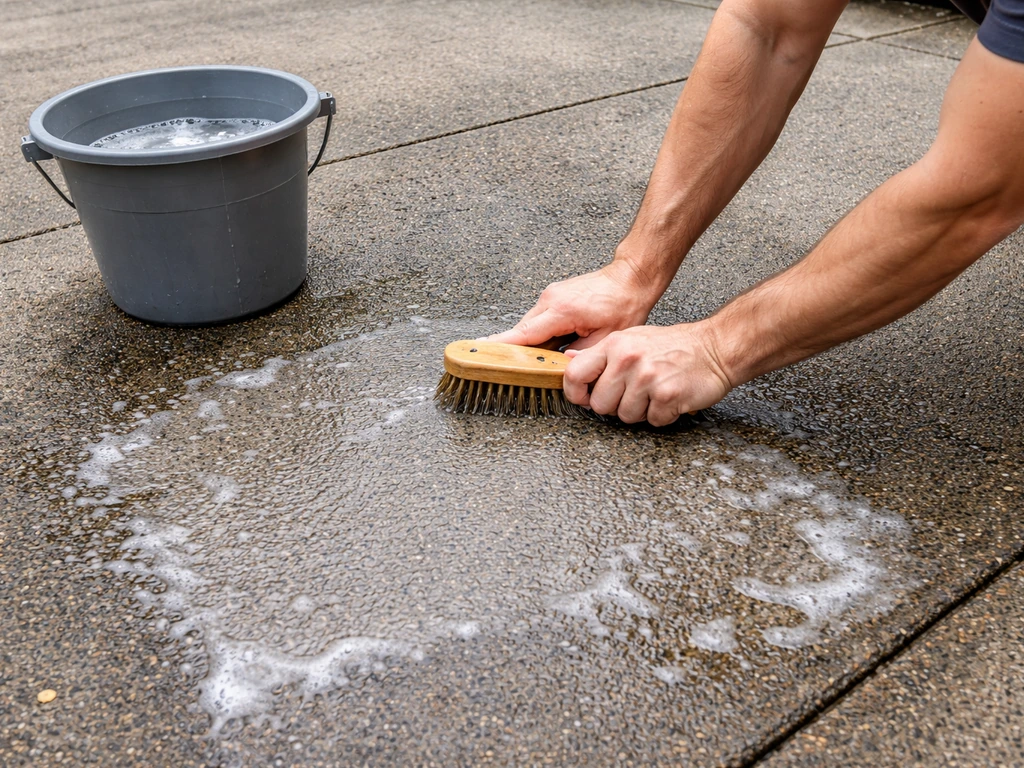
Clean the area where the fire pit and any pad or base will sit. Use a stiff wire brush to knock off any debris, and scrub with a concrete degreaser or TSP solution. Rinse thoroughly and let it dry completely, at least 24 hours. If there are any existing cracks in the slab in that area, now is the time to fill and seal them with a flexible concrete crack filler. You don't want moisture sitting under a heat source; that's exactly how spalling starts.
Step 3: Set down the heat protection pad (freestanding pit)
This is the step most DIYers skip and later regret. Place a UL 1618-listed fire pit pad or a noncombustible hearth pad on the clean concrete before setting your fire pit. The pad should extend at least 4 inches beyond the fire pit perimeter on all sides. Materials like mineral wool, cement board, or listed composite hearth pads all work. The goal is to break the direct heat transfer from the fire pit to your slab. Some people use a single layer of fire-rated pavers or thick porcelain tiles here, which also works and looks more finished. If you're going with a pad, center it precisely on your marked location, then set the fire pit centered on top.
Step 4: Build a masonry block fire pit on the slab (constructed pit route)
If you're building a block-based fire pit rather than placing a freestanding unit, the process has more steps but is very achievable for a weekend DIYer. Here's the sequence:
- Mark the fire pit circle on your slab with chalk or spray paint. The typical kit size is 36 to 48 inches in outer diameter, but check your kit specs.
- If your kit or design calls for a gravel base inside the pit (for drainage and heat buffering), you have two options: build the blocks directly on the slab and fill the interior with 4 to 6 inches of compacted crushed gravel, or drill drainage holes through the slab inside the pit perimeter and then add your gravel layer. Drilling gives better drainage but isn't always necessary if your patio has existing slope.
- Dry-lay your first course of blocks around the marked circle to check fit and spacing before using any adhesive. Adjust the layout until the circle is even and the gaps between blocks are consistent.
- Apply masonry adhesive to the bottom of the first course blocks and set them on the slab. Check for level with a 4-foot level as you go. Use a rubber mallet to tap blocks into place. This first course is the most important one: if it's not level, every course above it will be off.
- Continue laying courses, staggering the block joints like brickwork for strength. Apply adhesive between every course. Most kits are 3 to 4 courses high, ending at roughly 12 to 14 inches from the slab.
- Set the steel fire ring/metal liner inside the completed block ring. This liner protects the block from direct flame and makes cleanup much easier.
- Fill the base of the pit interior with 4 to 6 inches of compacted crushed gravel for drainage and to buffer heat from reaching the slab through the pit floor.
Step 5: Final positioning checks
Before you light anything, step back and re-measure clearances with a tape measure one more time. It's easy to drift a few feet during a build. Verify 48 inches of clear space around the pit in all directions, and confirm nothing combustible (furniture, patio umbrella, pergola post, fence) is within the manufacturer-specified distance. Move patio furniture back, and make sure any overhead structure like a pergola or patio cover is not directly above the fire pit. If you're also planning a pergola or covered structure over your patio, keep the fire pit positioned well outside that footprint, since open-flame fire pits and enclosed overhead structures don't mix safely.
Protecting and preparing the concrete (pads, heat shields, and sealing)
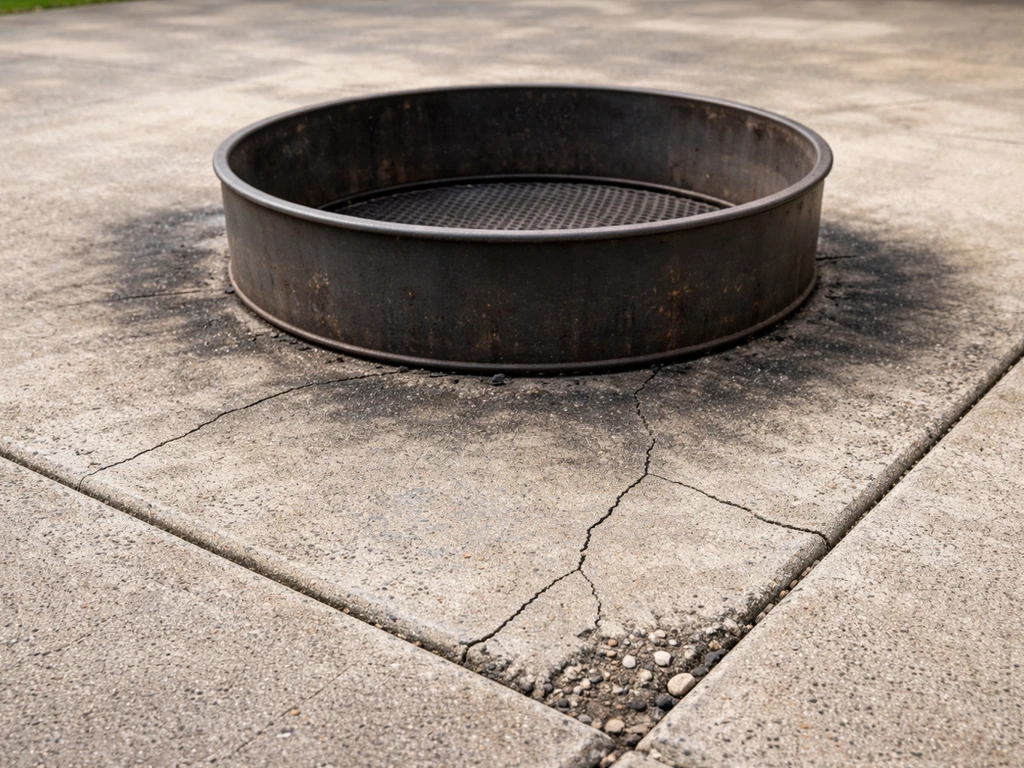
Heat protection for your concrete deserves its own section because it's where most DIY fire pit installations go wrong. Concrete doesn't melt, but sustained radiant and conducted heat does real damage over time: surface spalling, hairline cracks, and discoloration are the most common results.
The key principle is breaking the thermal path between the fire and the slab. A UL 1618-listed fire pit pad or hearth pad is the cleanest solution: these are specifically tested for heat protection under appliances, and using a listed pad means you're working with a product that's been validated to do the job. Hearthstone Tech's Homestead 8570 floor protection requirements define a listed hearth pad concept and include an assembly chart that lists materials such as cement mortar, mineral wool, and tested noncombustible hearth pad approaches to guide heat protection design. Look for pads made from materials like mineral wool board, cement board composites, or ceramic fiber. Avoid anything marketed as decorative but not rated for heat.
If you want a more built-in look, use fire-rated pavers (concrete or porcelain rated for high heat) as a defined pad zone on the slab surface, laid directly on the concrete with a thin mortar or adhesive setting bed. This creates a visual fire pit area that also protects the surrounding slab. Size this zone generously: at least 6 to 8 inches beyond the fire pit edge in every direction.
Air gaps help too. If your fire pit has legs that raise the bowl off the surface, you already have some natural air circulation helping to dissipate heat. If it sits closer to the ground, that's even more reason to use a thicker listed pad beneath it.
After installation, seal the concrete around the fire pit zone with a penetrating silane-siloxane sealer. If you want to extend this approach beyond a fire pit, the same idea of heat protection and code-aware placement applies when learning how to build a gazebo on a concrete patio how to build a gazebo on concrete patio. This protects the slab from water, ash, and any greasy residue that drips or splashes from the pit. Reapply sealer every 2 to 3 years or whenever water stops beading on the surface. Keep the area around the pit swept and clean; ash and debris trap moisture, which accelerates surface wear.
Building a new concrete patio with a fire pit from the start
If you're pouring a new patio and planning to incorporate a fire pit from day one, you have some options that make the final result cleaner and more structurally sound. The most common approach is to pour the patio slab with a recessed or framed-out area for the fire pit, or to run a gas line conduit under the slab before pouring so you're not cutting into it later.
For a constructed masonry pit integrated into a new patio: pour the slab first, cure it fully (at least 28 days for full cure strength), then build the fire pit on top following the same block-laying process described above. Trying to integrate the fire pit base into the wet pour adds complexity without much benefit for most residential projects.
For a gas drop-in fire pit insert built into a patio feature wall or table: plan the rough-in for the gas supply line before pouring, and frame out the insert location in the patio design. This is the approach that produces a seamless, high-end result, but it requires more upfront planning and likely a licensed gas contractor. If you're considering adding other overhead structures to the patio later, like a pergola or patio cover, plan both the fire pit placement and the overhead structure together so you're not boxing yourself into a clearance conflict. If you plan to add a patio cover over the same area, use the same careful spacing and attachment approach described in how to build a patio cover on concrete.
Common mistakes, troubleshooting, and finishing touches
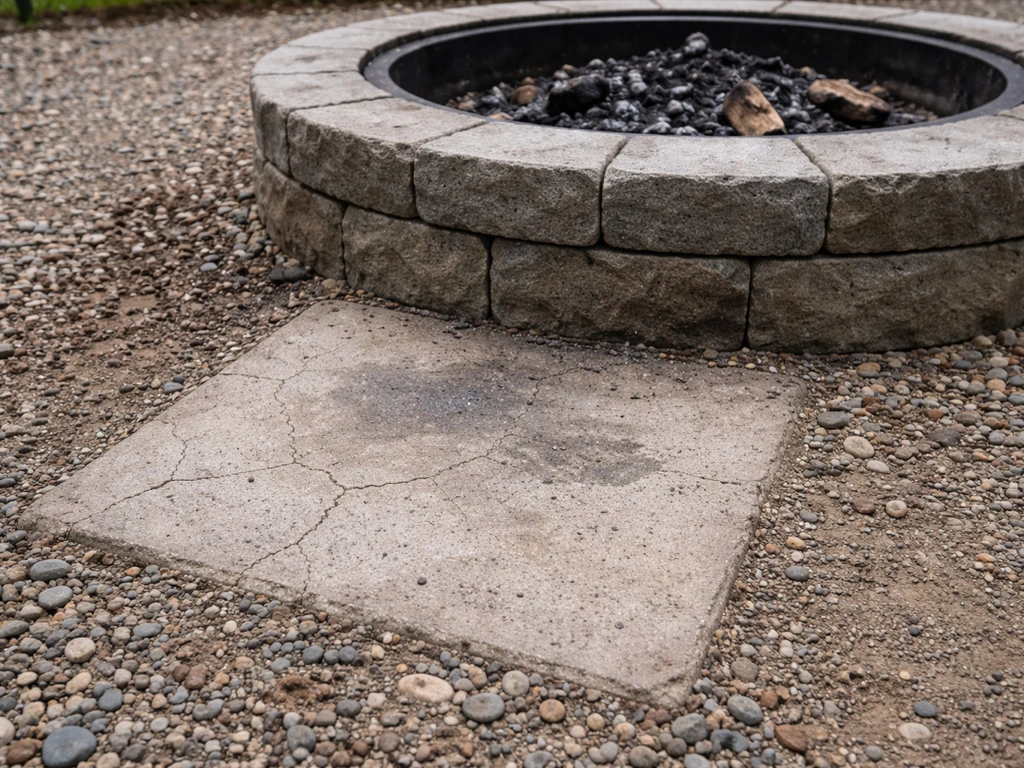
Concrete cracking or spalling under the fire pit
If you notice hairline cracks developing in the slab around or under your fire pit after use, heat transfer is the likely cause. Remove the fire pit, let the area cool completely, and inspect the damage. Minor surface cracks can be filled with a flexible concrete crack filler, then sealed. More significant spalling usually means the heat pad wasn't adequate: upgrade to a thicker, UL 1618-listed pad or add a layer of fire-rated pavers under the existing pad. Never re-install a fire pit directly on damaged concrete without repairing and protecting the surface first.
Staining and discoloration
Ash, soot, and grease from fire pits stain concrete quickly, especially unsealed concrete. Clean ash stains with a stiff brush and a diluted TSP or concrete cleaner solution while they're fresh. For older, set-in stains, a poultice cleaner or a pressure wash at low-to-medium pressure (under 2,000 PSI to avoid surface damage) usually lifts most of it. Prevention is easier than cure: seal the concrete before first use and keep the area swept after every fire.
Block fire pit not level or feels wobbly
A wobbly block fire pit almost always comes from the first course not being set level. If the pit is newly built and the adhesive hasn't fully cured, you can carefully tap blocks with a rubber mallet to adjust. If it's cured and still noticeably unlevel, consider whether it's a cosmetic issue or a structural one. A slight lean is mostly aesthetic on a block pit, but anything that makes the metal liner sit unevenly should be corrected before use. For a serious lean, the right fix is to disassemble, clean the adhesive off the slab, and relay from scratch.
Drainage and water pooling inside the pit
If rainwater collects inside a built block fire pit on your concrete patio, you have two fixes: drill two or three 1/2-inch drainage holes through the slab inside the pit perimeter using a hammer drill and masonry bit, or build up the interior gravel layer higher so water drains around it rather than sitting on the concrete. A few inches of crushed stone inside the base of the pit helps with both drainage and heat distribution.
Finishing touches that make the setup feel complete
Once everything is in place, take 30 minutes to finish it properly. Seal all exposed concrete in and around the fire pit zone. Apply masonry sealer to the exterior of any block or stone fire pit walls to protect them from freeze-thaw cycles and water intrusion. Install a fire pit cover or lid when the pit is not in use; this keeps water and debris out and dramatically extends the life of the metal liner and the concrete below it. Arrange seating at a safe but comfortable distance, keeping combustible materials like cushions, rugs, and umbrellas outside the clearance zone when the fire is burning.
A fire pit on a concrete patio is a completely achievable DIY project for a weekend. The work isn't complicated; it's mostly about respecting the clearances, protecting the slab with the right materials, and following the manufacturer's specs for whatever fire pit you choose. Get those three things right and you'll have a patio feature you actually use.
FAQ
Do I really need a fire pit pad if my fire pit has legs and air space under it?
If the fire pit sits directly on the concrete, the pad is what keeps heat from cooking the slab. Make sure the pad is rated for under-appliance or under-fire-pit use (for example, a UL 1618-listed hearth pad) and extends beyond the fire pit footprint on all sides, then add at least a few inches of additional edge coverage with pavers if you are using a decorative “zone.” Decorative stone or tile that is not heat-rated can fail even if it looks similar.
Is it safe to put a propane or natural gas fire pit on a concrete patio?
Yes, you can usually use a propane fire pit on concrete, but treat it like a permanent heat source. Confirm the manual clearance requirements for nearby combustibles and also follow any permitting or gas-supply rules in your area. For propane systems that sit close to the patio surface, you still want a heat barrier (listed pad or rated pavers) because radiant heat can still warm the slab and nearby materials.
How can I tell if my concrete patio is getting too much heat from the fire pit?
Don’t rely on “patio surface” temperature as your only check. When you test, run the fire for 30 to 60 minutes and use a non-contact thermometer or touch-safety method through a distance you can control, then re-check under the pad edge area. If you notice discoloration, a strong lingering odor from the slab, or rapid cracking after repeated use, upgrade to a thicker listed pad or add the recommended paver underlayer.
Can I install a fire pit on a concrete patio with existing cracks?
If your patio has existing hairline cracks, don’t just seal over them and continue. Clean the area, remove any loose material, and use a flexible crack filler rated for exterior concrete before installing the pad. If the cracks are actively widening or there is spalling or settling, fix the slab first, because heat protection cannot compensate for movement.
Should I cover the fire pit when it rains or during storage, and what kind of cover is best?
Covering helps a lot, but it must not trap heat against the bowl or impede ventilation. Use a manufacturer-approved lid or cover for the fire pit model, and keep the cover for storage only when the unit is fully cooled. Avoid custom covers that sit tightly over openings or hold moisture against the liner.
What’s the best way to clean ash and prevent concrete staining around the fire pit?
Yes, but do it carefully because you can worsen concrete staining. First, remove unburned fuel and cool completely. For fresh ash, dry sweep first, then clean with a diluted TSP or concrete cleaner. If you use pressure washing, stay below about 2,000 PSI and keep the nozzle moving to avoid creating pitting that later holds moisture and stains.
My block fire pit wobbles slightly, what should I check first?
A wobbly pit can be a safety issue, not just an appearance problem. Re-check level before any use by placing a level across the bowl and the base, confirm the pad surface is flat, and adjust with shims only if the manufacturer allows it. If the adhesive or leveling bed has cured unevenly, the safest fix is to remove and relay so the liner sits evenly.
What should I do if rainwater collects inside a built block fire pit on my patio?
If water is pooling inside the pit, don’t just drain the liner later. The two common fixes are drilling drainage holes (through the slab if permitted and appropriate) and ensuring the internal base is built with proper slope and crushed stone so water moves away instead of sitting on concrete. After a draining fix, run a short test fire after drying to confirm the pad and surrounding slab stay dry.
Can I add insulation under the fire pit to protect the slab more?
Usually, no. If you want to add insulation, use only materials intended for hearth or fire-pit heat protection (listed pads, cement board composites, mineral wool board) and keep them under the pit zone only. Avoid adding blankets, foam, or generic insulation, because they are not designed for high surface temperatures or outdoor moisture exposure.
What should I do if the concrete around the fire pit develops new cracks or spalling?
If you see new cracking after a season or two, stop using it immediately and inspect the slab after it fully cools. Minor surface cracks can sometimes be addressed with flexible repair and improved sealing, but spalling or deeper deterioration usually means the pad or heat barrier was insufficient. Upgrade to a thicker listed pad and confirm the pad coverage and fire pit clearance match the manual before you reinstall.