To cement patio slabs in place, you set each slab on a full mortar bed about 50mm (2 inches) thick, tap them level with a rubber mallet, maintain consistent spacing with spacers, and let everything cure for at least 24–48 hours before grouting the joints and sealing. That's the core of it. The work that actually determines whether your patio lasts 5 years or 25 years, though, happens before a single slab touches mortar: the base prep, the slope for drainage, and the compaction underneath. Get those right and the rest falls into place.
How to Cement Patio Slabs Step-by-Step DIY Guide

Silas Morrison
12 May 2026
First, figure out what kind of project you're actually doing
"Cementing a patio" means different things depending on where you're starting. The two most common scenarios are: (1) setting pre-made concrete or stone patio slabs onto a prepared base using mortar, or (2) pouring a continuous slab of concrete to create a patio from scratch. This guide focuses primarily on setting patio slabs with mortar, since that's what most DIYers mean when they search this. If you're looking to pour a full concrete patio from scratch, that's a bigger project involving formwork, rebar, and a ready-mix truck.
Within the slab-setting world, you might also be repairing or re-cementing an existing patio where slabs have shifted, cracked, or come loose. That's a different scope from building new. For repairs specifically, there's more to dig into around patching and resetting individual problem slabs. Here, we're walking through a full new installation from ground up.
Materials and tools you'll need before you start
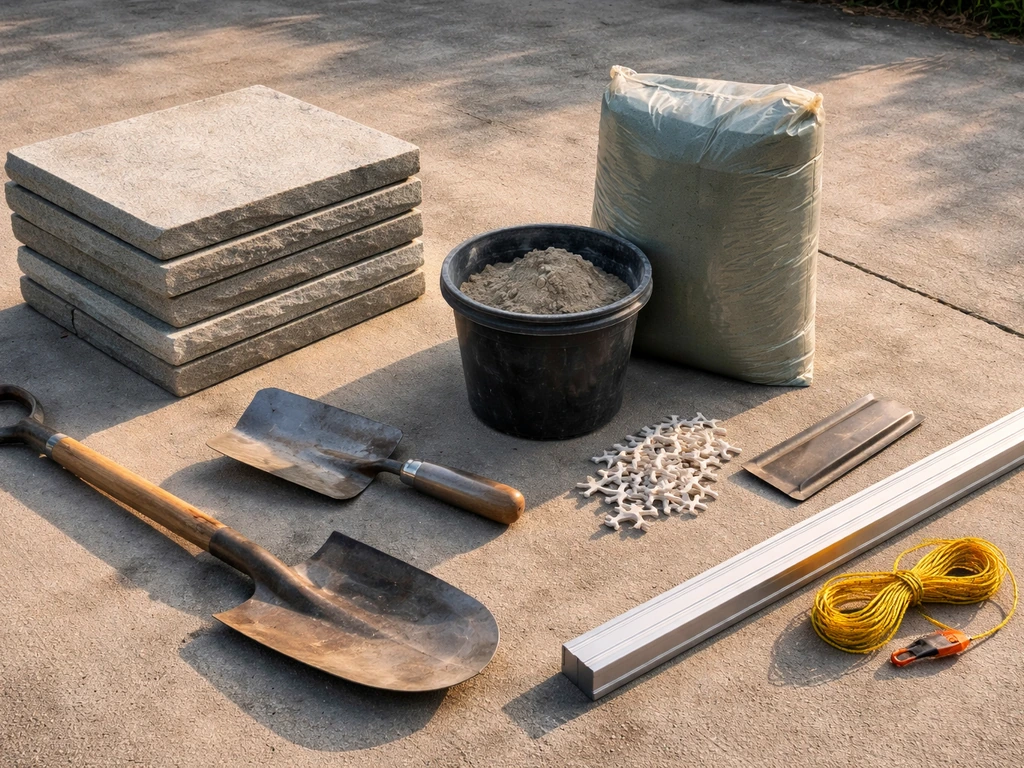
Get everything on-site before you begin. Running out of mortar halfway through a hot afternoon is a fast way to ruin your joints and your day.
Materials
- Patio slabs (concrete, natural stone, or porcelain — buy 10% extra for cuts and breakage)
- Dry-mix or ready-to-mix sand and cement mortar (5: 1 sand-to-cement ratio is standard for slab beds)
- Crushed aggregate or road base (typically 4–6 inches for a standard residential patio)
- Sharp builder's sand for the mortar mix
- Portland cement
- Jointing compound or polymeric jointing mortar for filling gaps between slabs
- Backer rod (for joints wider than half an inch before sealing)
- Concrete or patio sealer (penetrating silane/siloxane or film-forming acrylic)
- Weed-resistant membrane (optional but recommended under the base layer)
Tools
- Spade, shovel, and wheelbarrow
- Plate compactor (rent one — hand tamping is not enough for a real patio base)
- Spirit level (minimum 4 feet long) and a string line with stakes
- Rubber mallet
- Brick or slab bolster and club hammer for cutting
- Angle grinder with diamond blade (for cleaner cuts on porcelain or concrete)
- Pointing trowel and margin trowel
- Mixing paddle or drill attachment (or a cement mixer for larger jobs)
- Bucket or mortar tub
- Spacers (10mm or as specified for your slab pattern)
- Knee pads (trust me on this one)
- Tape measure, chalk line, and marker
- Safety glasses, gloves, and dust mask
Prep the base, this is where most DIY patios fail or succeed
A patio is only as solid as what's underneath it. I've seen beautifully laid slabs start rocking and cracking within a single winter because someone skipped the proper base work. Don't let that be your project.
Excavate to the right depth
Mark your patio area with stakes and string, then dig out the soil. For a standard patio with a mortar-set slab, you need to remove enough material to accommodate: 4–6 inches of compacted crushed aggregate base, plus 2 inches (50mm) of mortar bed, plus the slab thickness itself (typically 1.5–2.5 inches depending on the product). That usually means excavating 9–12 inches total from your finished surface level. In areas with hard freeze-thaw cycles, go deeper on the base, up to 8 inches of aggregate, to give frost somewhere to go without heaving your slabs.
Build the subgrade and compact it
Once excavated, compact the native soil with a plate compactor. Then add your crushed aggregate in 2-inch layers, compacting each layer before adding the next. Never dump the full depth in at once and compact it in one pass. That's how you get soft spots. The finished base should feel rock solid when you walk on it, no bounce, no give. If you're in a wet area or dealing with clay soil, a layer of geotextile fabric under the aggregate helps prevent the subgrade from migrating up into your base over time.
Set the right slope for drainage
This step is non-negotiable. Water sitting on a patio surface causes freeze-thaw damage, staining, and mortar joint failure. The standard minimum slope for a patio is 1/8 inch per foot away from your house or toward a drain. For a 12-foot-deep patio, that's a 1.5-inch drop in elevation from the house end to the outer edge. Set this slope on your base layer using string lines, and check it constantly as you work. If the base has the right slope, the slabs will follow.
Layout and alignment: measure twice, set once
Before any mortar goes down, do a dry run. Lay the slabs out in your planned pattern without mortar, using spacers to represent your joints. This lets you see where cuts fall, identify any awkward slivers at edges (which you want to avoid), and confirm the layout looks right from the house. It takes an hour, but it saves you from tearing up freshly mortared slabs to fix a layout mistake.
Snap chalk lines across your base in both directions to give yourself reference lines during installation. Start from a fixed straight edge, usually the house wall or a patio edge, and work outward. Keep a consistent joint width using plastic spacers as you go. Most patio slab installations look best with 10–15mm (about 3/8 to 5/8 inch) joints, but follow the slab manufacturer's recommendation if given.
Setting slabs: how to apply mortar and get a solid bond
Mix your mortar correctly
For a standard patio slab bed, mix sharp sand and Portland cement at a 5:1 ratio (5 parts sand to 1 part cement) with just enough water to reach a semi-dry, crumbly consistency. It should clump when you squeeze it in your hand, but not be wet or soupy. This is sometimes called a "dry mix" or "semi-dry" mortar, and it's what gives you the workability to tap slabs level without them sinking. A soupy mortar bed leads to slabs that sink unevenly and joints that don't hold.
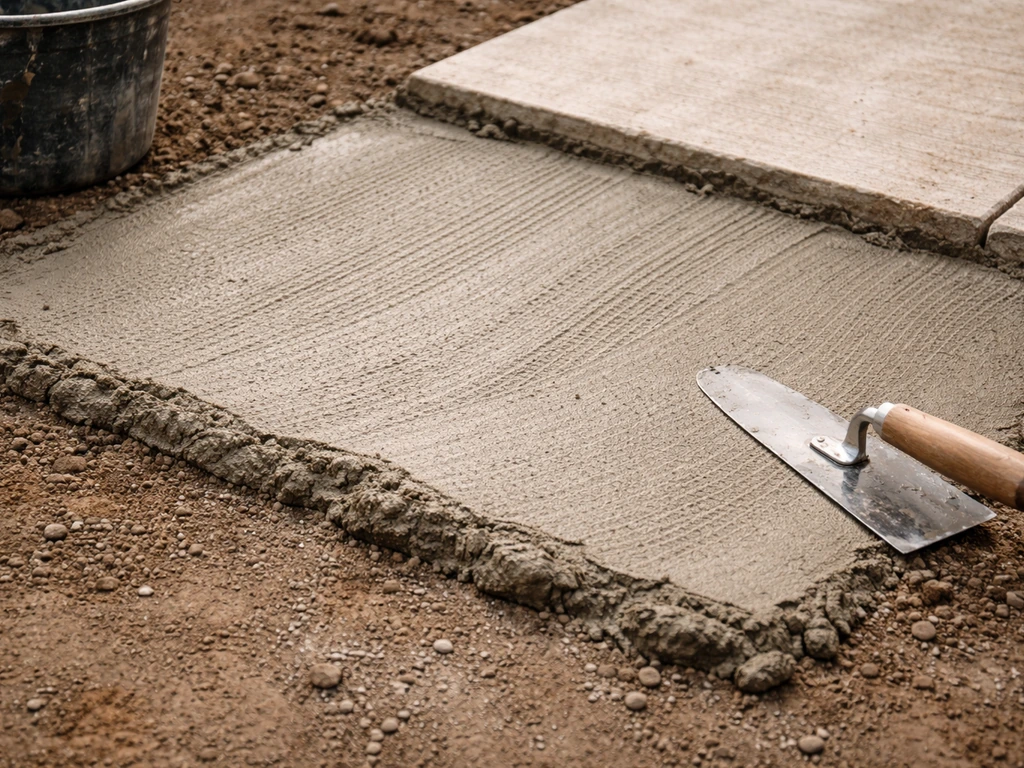
Apply the mortar bed
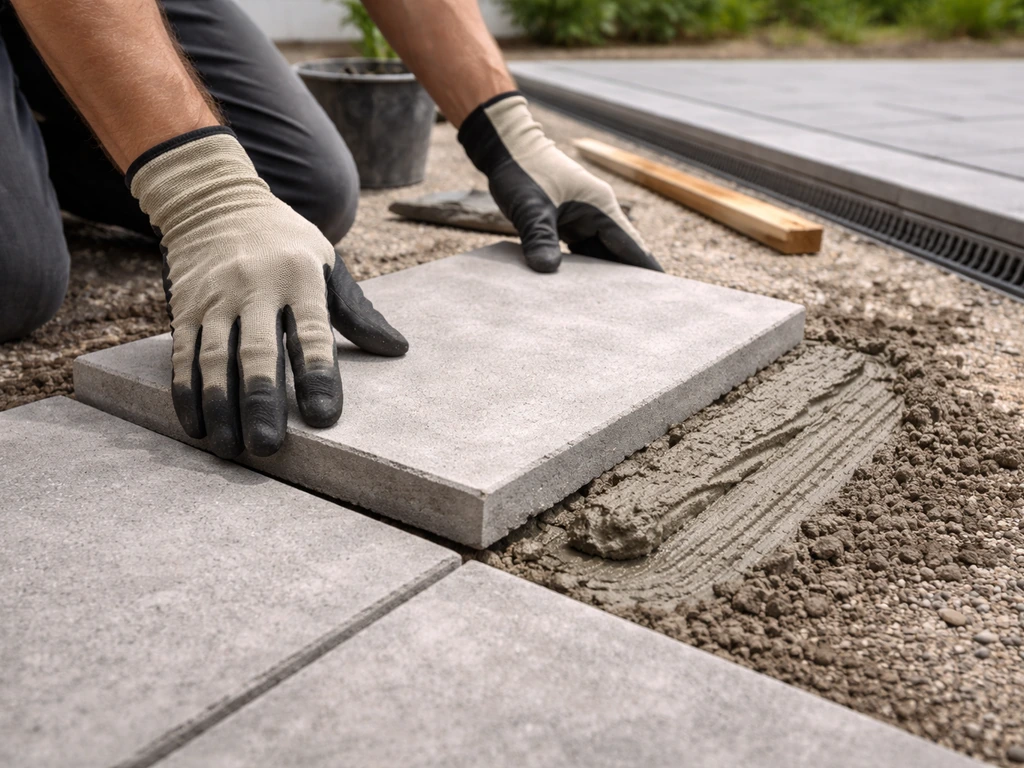
Lay your mortar bed at approximately 50mm (2 inches) thick across an area just larger than one slab. Rough it up slightly with a trowel to avoid air pockets. For better adhesion, especially on porcelain or dense concrete slabs, apply a neat cement slurry (a thin paste of cement and water, about the consistency of yogurt) to the back of the slab just before setting it. This acts as a bonding layer between the slab and the mortar bed, and significantly reduces the chance of a hollow, poorly bonded spot underneath.
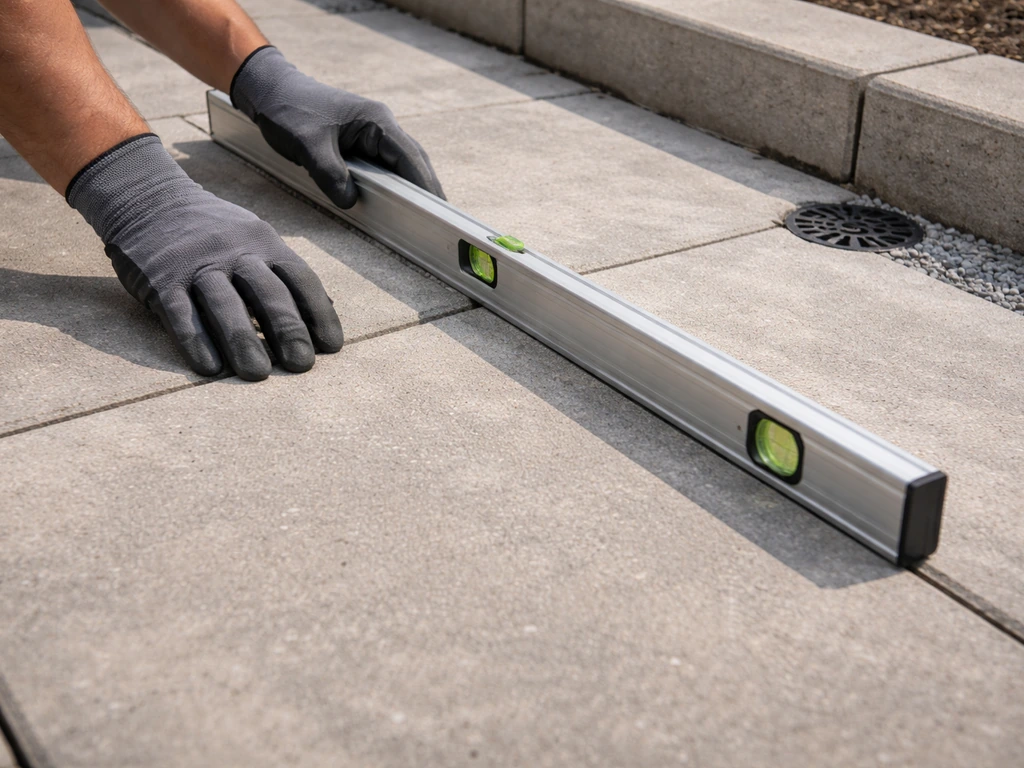
The goal is better than 95% contact between the slab and the mortar bed. Hollow spots underneath cause cracking and rocking later. Lower the slab carefully into place (don't drop it), then use your rubber mallet to tap it down and work out any high spots. Check level and slope with your spirit level after every slab.
Keep slabs aligned and spaced consistently
Use your string lines as a constant reference. Slabs drift over time as you work, especially if you're adjusting one and nudging its neighbor. Every 3–4 slabs, check back to your chalk lines and string guides to make sure you haven't crept out of alignment. Insert spacers at each corner as you go, and leave them in place until the mortar has set, usually at least 24 hours.
Finishing the details: edges, joints, curing, and sealing
Edge slabs and cuts
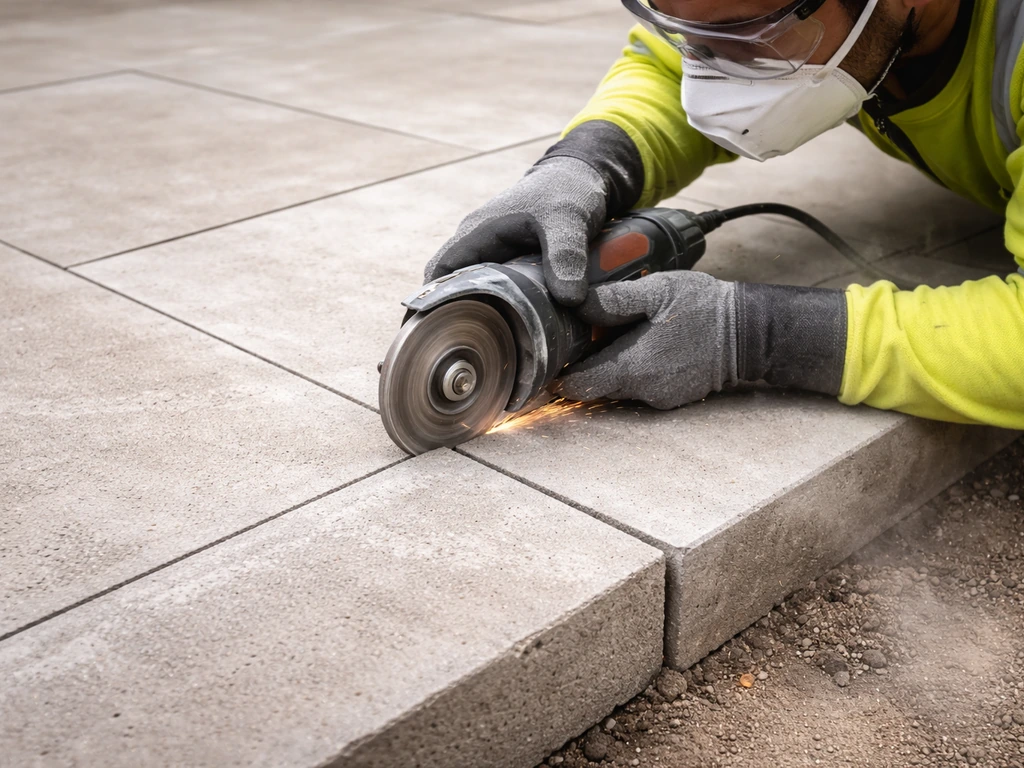
Cut slabs to fit edges using an angle grinder with a diamond blade or a slab splitter. For straight cuts on concrete slabs, a bolster and club hammer work, but you'll get a rougher edge. Porcelain slabs must be cut with a diamond blade, they'll shatter with a bolster. Edges along the perimeter of the patio should be bedded fully in mortar just like the field slabs. Don't scrimp on mortar at the edges; those are the first spots that fail if undersupported.
Grouting and pointing the joints
Once the mortar bed has cured for at least 24–48 hours and you've removed the spacers, fill the joints. For narrow joints (under 1/2 inch), brush-in polymeric jointing sand or a pointing mortar works well. For wider joints, use a proper pointing mortar (3:1 sand to cement, slightly wetter than the bedding mix) pressed firmly into the joint with a pointing trowel. Tool the joint slightly recessed or flush, not proud of the slab surface. For very wide joints (over 1/2 inch), push in a backer rod first to control the depth, then apply your sealant or pointing compound on top. The backer rod keeps the sealant from going too deep, which actually helps it perform better and last longer.
Curing: leave it alone longer than you think

Keep foot traffic off the patio for at least 48–72 hours after setting, and ideally a full week before any heavy furniture goes on it. In hot or windy weather, mist the slabs lightly and cover with plastic sheeting to slow the cure and prevent cracking. Don't let mortar dry out too fast. FHWA cautions that adequate curing is needed for cementitious paving mixtures to develop sufficient strength and that hydration can continue behind the surface even after surface curing is terminated blank" rel="noopener noreferrer">Don't let mortar dry out too fast. In cold weather (below 40°F), protect the fresh mortar from frost for at least 48 hours, since frozen mortar loses its strength permanently. ACI 306R-10 discusses curing practices that include protecting fresh concrete during unexpected freezing so it can maintain strength blank" rel="noopener noreferrer">protect the fresh mortar from frost for at least 48 hours.
Sealing the surface
Sealing is optional but strongly recommended for concrete and natural stone slabs. A penetrating silane/siloxane sealer soaks into the slab surface, repels water and oils, and protects against freeze-thaw damage without changing the appearance. A film-forming acrylic sealer sits on top, adds a slight sheen, and enhances color but needs reapplication every 2–3 years. Apply sealer after the mortar has fully cured, typically 28 days for the base mortar. Clean the surface thoroughly first, and apply on a dry day above 50°F.
When things go wrong: common problems and how to fix them
| Problem | Likely Cause | Fix |
|---|---|---|
| Lippage (slab edges don't line up) | Uneven mortar bed or slabs not checked level frequently enough | Reset affected slabs while mortar is still green; grind high edges if mortar has hardened |
| Slabs rocking or loose | Hollow spots in mortar bed, poor contact | Lift slab, clean off old mortar, re-bed with full coverage and bonding slurry |
| Gaps widening over time | Inadequate joint fill or mortar washed out | Re-point joints; use polymeric sand or firm pointing mortar |
| Slabs shifting or moving | Base not compacted properly, no edge restraint | Lift section, compact base, add edge restraints, re-set slabs |
| Uneven surface/pooling water | Slope not built into base, slabs set level instead of sloped | Lift slabs in affected area, re-grade base to proper 1/8-inch-per-foot slope, re-set |
| Mortar joints crumbling at edges | Edge slabs undersupported, no edge restraint installed | Remove loose mortar, re-bed edges fully, consider a concrete edge restraint or soldier course |
Most of these problems trace back to the same root causes: not enough base preparation, mortar beds with hollow spots, or skipping the slope. If your cement patio starts cracking or failing joints, you can often fix cement patio issues by addressing the base and re-setting the affected slabs. If you're troubleshooting an existing patio rather than building new, the fix usually starts with lifting the problem slabs and addressing what's underneath rather than trying to patch over the top.
A few things worth knowing before you dive in
A standard 200–300 square foot patio is a realistic weekend project for one or two people with the right tools, but plan for two full days minimum, not one. Day one for base prep and compaction, day two for setting slabs. Jointing and cleanup can happen on day three. Trying to rush it into a single day almost always means cutting corners on the base or not letting the mortar set long enough.
If your project involves a cement mixer for larger batches, or you're interested in going deeper on decorating or refinishing the surface once it's done, those are natural next steps from here. Once your patio is solid, you can focus on the finishing touches that make a cement patio look nice. The foundation work in this guide is what makes everything else, from staining to sealing to decorating, actually hold up long-term. Once your cement patio is installed and cured, you can focus on how to decorate a cement patio with colors, textures, and finishes that match your style. Get the base right, get the mortar contact right, and get the slope right. The rest is finishing work.
FAQ
What’s the quickest way to tell if my mortar mix is too wet or too dry for setting slabs?
Most DIY failures come from letting sand and cement get too wet or rushing the cure. Mix until it clumps when squeezed, then use it promptly, and keep slabs from moving while the mortar beds stiffen. If you notice the mortar turning soupy or sandy, stop and re-mix rather than trying to “save” it with extra dry powder.
If I can’t see voids under the slabs, how do I prevent hollow spots that cause cracking later?
It usually looks fine at first, but hollow spots create a pattern of rocking and cracking later. Use spacers, bed the slab carefully without dropping, and aim for high contact by roughing the mortar bed and applying a thin cement slurry to the slab face (especially for porcelain or dense slabs).
Can I reduce mortar at the patio perimeter edges to save time and still have a solid result?
For slab edges that carry the same loads as the field, you should bed them fully in mortar, not just spot-support them. Undersupported perimeter edges tend to lift first during freeze-thaw or after settling, so treat perimeter cuts like interior slabs.
What should I do if a slab looks out of level or the slope is off after I’ve already set it?
If you have to adjust after setting, lift the slab out, scrape off the old mortar, re-bed, and re-check slope. Don’t try to shim by pulling spacers after the mortar has started curing, because trapped partial contact will still create rocking.
How soon after setting slabs can I grout or fill the joints without risking displacement?
Yes, but only if the bond is still safe. Wait until the bedding mortar has cured for at least 24–48 hours, then fill joints. You can move on earlier for light checks, but don’t joint too soon because uncured bedding can shift under pressure from jointing tools.
Should I use polymeric jointing sand or pointing mortar for patio slab joints?
Polymeric jointing sand and pointing mortars behave differently. Polymeric sand is often best for stable, properly supported joints of typical patio width, while pointing mortar is better when joints are wider or you want a more rigid, controlled finish. Also confirm it’s compatible with your slab type and joint width.
How do I choose the right joint-filling method when my patio joints are wider than expected?
For narrow gaps under about 1/2 inch, you can usually brush in jointing sand or point mortar. For wider gaps, fill to the correct depth using a backer rod first, then top with sealant or pointing compound, so the filler doesn’t end up too deep and weaken or fail faster.
What are the best cure-time protections if it’s very hot, very windy, or freezing at night?
Aim to keep the patio from drying too fast, because rapid surface drying can reduce mortar strength. In hot or windy conditions, mist lightly and cover with plastic sheeting. In freezing conditions (below about 40°F), protect the fresh mortar from frost at least 48 hours, since it can lose strength permanently if frozen early.
How can I confirm the patio slope is right before I lock in the slabs with mortar?
A good slope isn’t only about water runoff, it also reduces freeze-thaw stress by preventing trapped water. Check slope using string or lines on the base layer before you start setting, then verify continuously as you place slabs, since individual slabs can drift while you work.
My patio slabs are rocking or loose, should I patch over the top or lift and re-set?
If your patio starts rocking, lift the affected slab(s) rather than patching the surface. You typically need to correct what’s underneath, then re-bed with fresh mortar. Patching over existing soft spots just delays the failure and can worsen neighboring joint cracking.
What cutting mistakes most often cause edge failure or ugly gaps at the perimeter?
Yes, but it’s much harder to do cleanly. For cutting, use a diamond blade for porcelain to avoid shattering, and plan cut lines during the dry run so you don’t end up with tiny slivers at edges that are hard to support properly in mortar.
Can I seal right after jointing, or do I need to wait a full cure before sealing a cement patio?
Grout-like jointing and sealing are not the same. Sealing is typically applied after full mortar cure (often around 28 days for the base mortar) and only when the surface is thoroughly clean and dry. If you seal too early, moisture trapped in the mortar can interfere with performance.
How long should I wait to walk on the patio and when is it safe for heavy furniture?
You generally want to keep foot traffic off while the bedding mortar is gaining strength, commonly 48–72 hours for light use. For moving heavy furniture or loads, wait longer, ideally about a week, so the slab contact and joints stabilize fully.