The best way to cover cracks in a concrete patio is to clean and prep the surface thoroughly, fill or undercut any cracks wider than a hairline, then apply a concrete resurfacer or overlay product that bonds to the existing slab and creates a fresh, uniform surface. For hairline cracks on a mostly solid patio, a good-quality resurfacer alone can hide them completely. For wider or more damaged slabs, you need to fill the cracks first, let them cure, then resurface over the top. The key is not skipping prep, the covering will only look as good as the surface underneath it.
How to Cover Cracks in a Concrete Patio Step by Step

Silas Morrison
25 Jun 2026
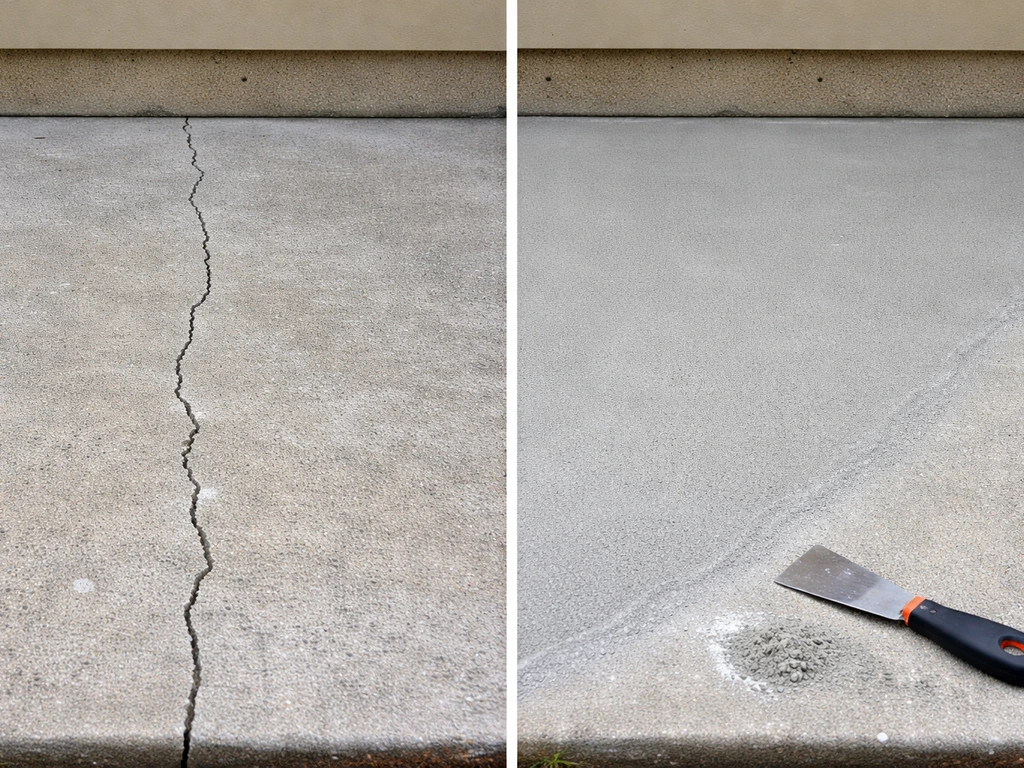
Figure out what kind of cracks you have (and whether they're moving)
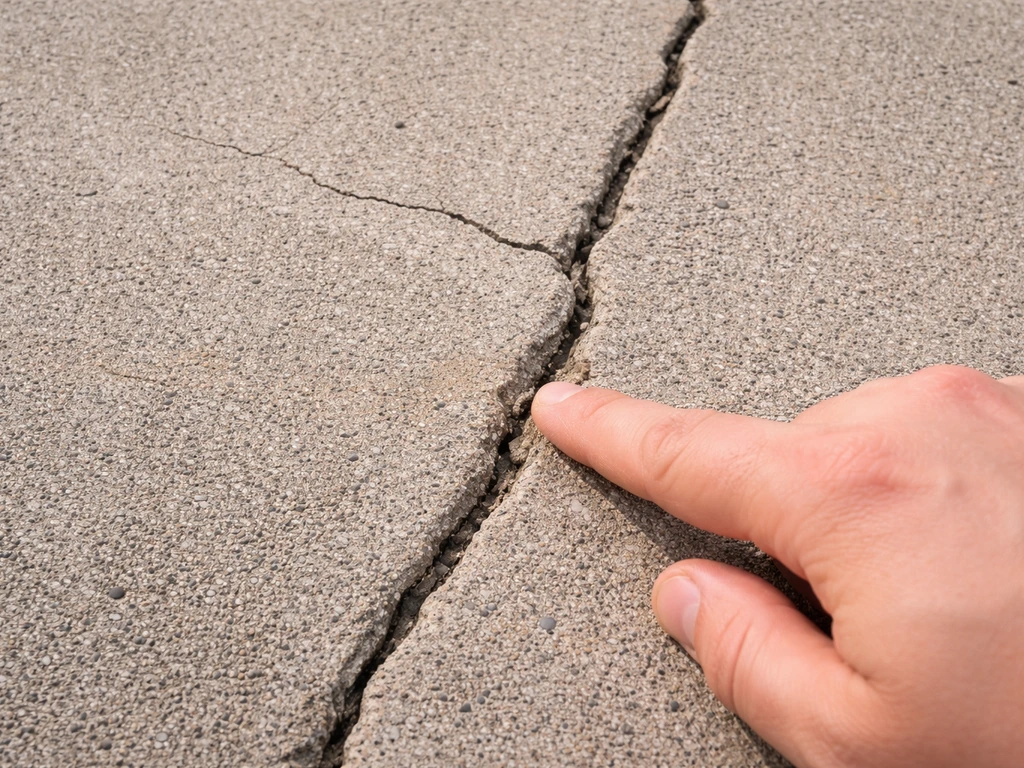
Before you buy a single bag of resurfacer, spend 10 minutes actually looking at your cracks. Run your finger along them. Are the edges sharp or rounded? Are they tight (hairline, under 1/16 inch) or wide enough to slip a coin into? Does the concrete on either side of the crack feel solid and flush, or is one side higher than the other? All of that changes how you approach the repair.
The bigger question is whether the crack is active, meaning it's still moving, or stable. Active cracks open and close with temperature swings or continue to grow over time. If you cover an active crack with a rigid resurfacer, the crack will reflect right through your new surface within a season or two. Stable cracks, on the other hand, are done moving and can be patched and covered for good.
Here's how to check for movement without any special tools: put a small strip of tape across the crack and draw a pencil line across both sides. Take a photo and note the date. Check it again in a few weeks, especially after a big temperature swing. If the two halves of the line have shifted apart or toward each other, the crack is still moving. A more precise method is a two-piece calibrated crack monitor, which has a grid and crosshairs printed on it, if the red crosshairs drift relative to the grid, the crack is opening or closing. These cost a few dollars and are worth it for wide cracks before you commit to a full resurfacing job.
| Crack Type | Width | Likely Cause | Best Coverage Approach |
|---|---|---|---|
| Hairline | Under 1/16 inch | Shrinkage, normal aging | Resurfacer or coating directly over prep'd surface |
| Medium | 1/16 to 1/2 inch | Settlement, freeze-thaw, tree roots | Fill with crack filler or polyurethane sealant first, then resurface |
| Wide/structural | Over 1/2 inch or with displacement | Heaving, major settlement, subbase failure | Consult a pro before covering; may need slab repair or replacement |
| Active/moving | Any width | Ongoing settlement, thermal cycling | Use flexible crack sealant, monitor before full resurface |
If your slab has multiple cracks running in a map or spiderweb pattern, that's crazing or surface spalling, usually a surface issue, not a structural one. Resurfacing handles that well. But if you see a crack with one side noticeably higher than the other (called a trip hazard for a reason), or if the concrete crumbles when you press on it, the problem goes deeper and cosmetic coverage alone won't hold.
Clean, prep, and test before you touch a trowel
I can't stress this enough: resurfacer and overlay products bond to concrete, not to dirt, oil, or old sealer. If you skip prep, your beautiful new surface will peel, flake, or crack within a year. I've seen it happen on jobs where people just hosed off the patio and started mixing. Don't do that.
Start by pressure washing the entire patio at a minimum of 3,000 PSI. You want to strip off loose concrete dust, algae, mildew, and any flaking material. If there's an old sealer on the surface, you'll need to either chemically strip it or mechanically grind it off, resurfacers won't bond through sealer. After washing, let the surface dry completely, then do a simple water bead test: sprinkle some water on the concrete. If it beads up, there's still sealer or contamination present. If it soaks in, you're good.
For moisture from below, which can cause overlays to bubble or delaminate, do the plastic sheet test (ASTM D4263): tape a 12-by-12-inch piece of plastic sheeting flat to the concrete, seal all four edges with tape, and leave it for 16 to 24 hours. If moisture condenses under the plastic when you lift it, there's significant vapor drive coming up through the slab. That's a bigger issue that can compromise any overlay system. In that case, you'd want to address drainage or use a moisture-tolerant product specifically rated for damp substrates.
Also use this prep stage to knock off any high spots, loose chunks of concrete around crack edges, and spalling areas with a cold chisel and hammer or an angle grinder. Any material that sounds hollow when you tap it needs to come off. What remains should be solid and sound.
Choose the right approach for hiding the cracks
There's no single best product for every patio. The right method depends on how bad your cracks are, what condition the surrounding concrete is in, and how you want the finished surface to look. Here's how I think about the three main paths:
Option 1: Patch and fill only (for minor isolated cracks)
If your patio is generally in good shape but has a few isolated cracks you want to hide, a targeted patch fill followed by a penetrating sealer or concrete paint can work fine. You fill the cracks with a concrete crack filler, polyurethane caulk, or a flexible sealant product, then apply a surface sealer or coating over the whole patio. The cracks won't be invisible, but they'll be sealed and much less visible under a pigmented coating. This is the fastest and cheapest route.
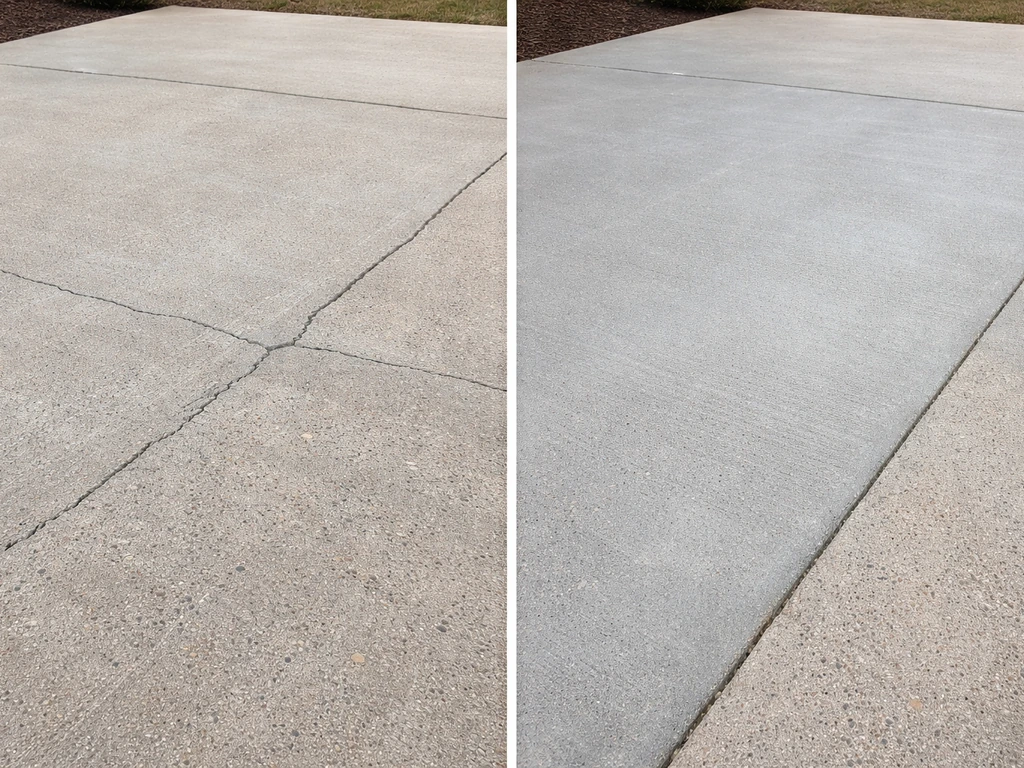
Option 2: Resurfacer or microtop overlay (for widespread cracking and worn surfaces)
This is the approach I'd recommend for most homeowners with an old, cracked patio. A concrete resurfacer (like Quikrete Concrete Resurfacer or Sakrete Flo-Coat) goes on at about 1/8 to 1/4 inch thick and creates a completely fresh surface. You'll still need to fill wider cracks first so they don't telegraph through, but hairline cracks under 1/16 inch can often be covered directly. Hairline cracks can often be repaired and then hidden with a properly bonded concrete resurfacer repair hairline cracks in concrete patio. The result looks like a brand-new slab. Labor-intensive but very satisfying and durable.
Option 3: Decorative coating or stamped overlay (for maximum visual transformation)
If you want to go further and give the patio a whole new look, stained, stamped, or textured, a thicker decorative overlay system is the way to go. These products typically go on at 1/4 inch or more and can be stamped or textured before they cure. They hide cracks completely, add grip, and genuinely transform the space. The tradeoff is cost, complexity, and the fact that you really need to pre-fill and level the surface well before applying. This is worth it for patios you plan to keep long-term.
Step-by-step: repair and prepare the cracks for a seamless finish

Once you've identified your crack types and chosen your approach, here's the actual repair process before you apply any covering system. Do this the day before you plan to resurface so everything has time to cure.
- Undercut hairline cracks with an angle grinder or crack chaser blade to widen them slightly to about 1/4 inch — this gives filler something to grip. It sounds counterintuitive but it works much better than trying to fill a feather-thin seam.
- Vacuum out all the dust and debris from the crack. A shop vac works great here. Any loose material left in the crack will prevent bonding.
- For cracks 1/16 to 1/2 inch wide: apply a concrete crack filler or polyurethane sealant (like Sikaflex). For active or slightly moving cracks, use a flexible polyurethane or polymer-modified product specifically rated for crack movement. Products like Sikaflex Crack Flex Sealant are designed to accommodate ongoing movement — importantly, you should install them when temperatures are at a midpoint between the seasonal extremes so the crack is at mid-range of its anticipated width, not fully open or fully closed.
- For cracks over 1/4 inch wide: pack them with a backer rod (foam rope) first to control depth, then apply sealant on top. This gives you better sealant performance and reduces product waste.
- After filling, tool the surface flush with a putty knife or margin trowel. The goal is a flat fill, not a proud bead.
- Let crack filler cure fully — at minimum 2 to 4 hours for polyurethane products, overnight if you can manage it.
- Sand or grind any high spots on the filled cracks so they're flush with the surrounding surface. High spots will show through a thin overlay.
- Do a final vacuum and light misting of the surface with water just before applying the overlay. Concrete should be damp but not puddled — this prevents the dry slab from sucking moisture out of the resurfacer too fast.
Apply the crack-covering system: mixes, tools, thickness, and coats
Applying a concrete resurfacer
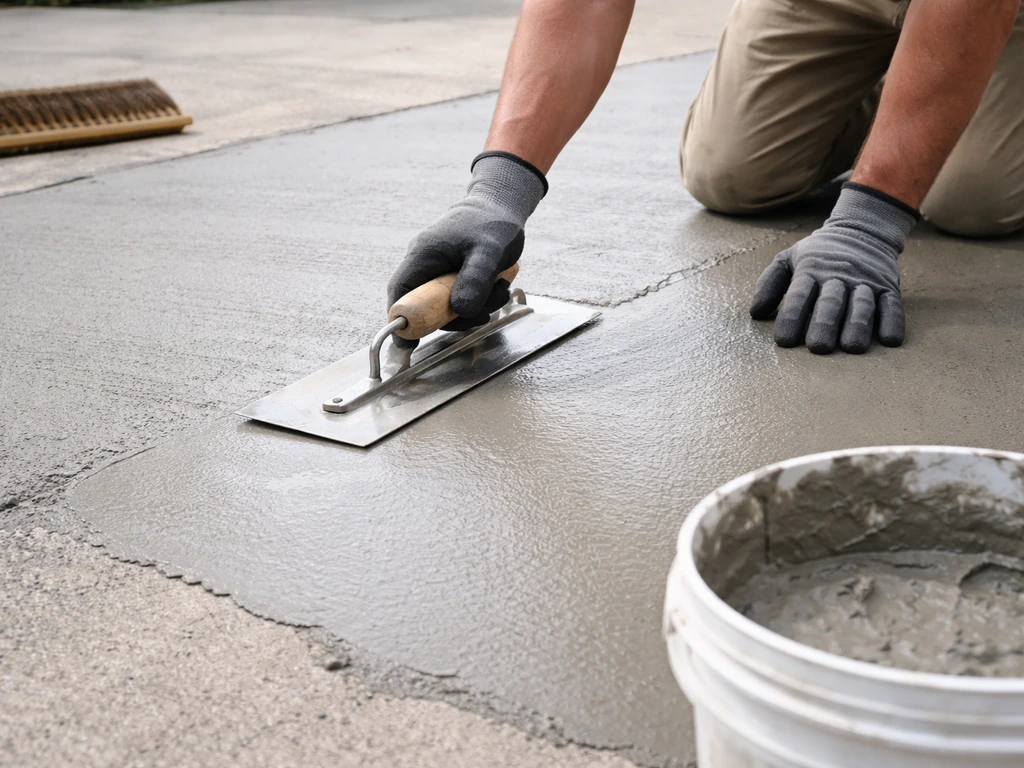
Mix your resurfacer per the bag instructions, typically about 3.5 quarts of water per 40-pound bag for a pourable consistency. Don't make it too thin or too thick; it should flow like thick pancake batter. Pour it onto the damp surface and spread it quickly with a long-handled squeegee or gauge rake. Work in sections of about 10 to 15 square feet at a time, especially on a warm day, because resurfacer starts to set fast. Aim for a consistent thickness of 1/8 to 1/4 inch.
For texture and grip, drag a broom across the surface before it sets fully, about 5 minutes after spreading. A light broom drag creates a non-slip finish that also helps disguise where sections were joined. For a smoother look, use a rubber float instead. One coat is usually sufficient on a well-prepped surface, but if you see any crack telegraphing after the first coat dries, apply a second thin coat (1/16 to 1/8 inch) after the first has cured for at least 24 hours.
Applying a decorative overlay
Decorative overlay systems vary by brand, but most involve a base coat at 1/4 inch, a color or texture broadcast layer, and a topcoat sealer. Always follow the manufacturer's open time windows, these products are formulated to be worked within a specific time frame before they begin to set. Use a gauge rake to control thickness. If you're stamping, have your stamps, texture mats, and release agent ready before you pour. Working with a second person makes stamped overlays much more manageable.
Applying a concrete coating or paint system
For a simpler covering, think epoxy patio paint or a masonry coating, apply a primer coat first, then two finish coats. Use a 3/8-inch nap roller for smooth surfaces and a 1/2-inch nap for textured ones. Allow full dry time between coats (usually 4 to 8 hours). These coatings sit on top of the concrete rather than bonding into it, so prep is extra critical here. Any moisture or contamination will cause peeling.
Cure, seal, and keep the cracks from coming back
After applying your resurfacer or overlay, protect it from drying too fast. In direct sun or warm, windy weather, mist the surface lightly with water every 20 to 30 minutes for the first 2 to 3 hours after application. This is called curing, and it keeps the surface from cracking as the material dries. You can also lay plastic sheeting loosely over it to retain moisture, just don't let the plastic touch the surface until it's firm.
Keep foot traffic off for at least 24 hours and vehicle traffic off for at least 72 hours. In cooler weather (below 60 degrees F), extend those times, curing slows down significantly in the cold. Don't apply resurfacer at all if temps are expected to drop below 50 degrees F within 24 hours of application.
Once fully cured (typically 5 to 7 days for full hardness), apply a concrete sealer. This is one of the most important long-term steps. A penetrating silane/siloxane sealer or an acrylic sealer fills the pores of the new surface and dramatically reduces water infiltration, which is one of the main drivers of new cracking. Water getting into concrete, freezing, and expanding is what breaks slabs apart over time. Seal the surface every 2 to 3 years to maintain protection. Related to this, preventing future cracks is also about keeping water away at the source, proper drainage, avoiding pooling water on the patio, and keeping heavy loads off weak areas.
Common mistakes, troubleshooting, and when to call a pro
Mistakes I see all the time
- Skipping the pressure wash or applying over old sealer. The overlay will delaminate in patches within months. There's no shortcut here.
- Applying resurfacer in direct afternoon sun on a hot day. The surface sets too fast, leaving drag marks and weak spots. Work in the morning or evening, or on a cloudy day.
- Not pre-wetting the concrete. A dry slab pulls moisture out of the resurfacer so fast it can't bond properly — always mist first.
- Filling active cracks with rigid patching compound. If the crack is still moving, a rigid fill will crack again immediately. Use a flexible polymer or polyurethane product for anything that might still move.
- Applying the resurfacer too thin over wide cracks. If you haven't filled and leveled those first, the resurfacer will bridge them and then telegraph the crack back through as it dries and shrinks.
- Rushing coats. Whether it's crack filler, primer, or overlay coats — not waiting for full cure between layers is one of the most common reasons DIY resurface jobs fail.
Troubleshooting after the job
If cracks reappear through your new surface within a season, there are two likely causes: either the original cracks were active and still moving (in which case a flexible overlay or crack sealant needs to be part of the system), or the substrate wasn't clean and prepped well enough for the product to bond. In either case, you'll need to grind back the failed area, re-prep, and redo it, there's no patching over a delaminated overlay. Hairline cracks specifically in resurfaced patios are often discussed separately because they require slightly different handling before and during resurfacing.
If your overlay bubbles or blisters after application, that's almost always a moisture issue, either vapor drive from below or water trapped under the surface. Go back and do the plastic sheet moisture test before redoing the work. If you have ongoing high moisture, you may need a moisture-mitigation primer before any overlay.
When to call a pro instead
Most cracked patios are good DIY candidates, and resurfacing is genuinely one of the more forgiving concrete projects out there. But there are a few situations where calling a concrete contractor makes more sense than covering up: if you have cracks with significant vertical displacement (one side is higher than the other), if large sections of the slab rock or feel hollow, if you have more than a few cracks wider than 1/2 inch, or if the concrete crumbles when you probe around the crack edges. Those are signs of subbase failure or structural deterioration that cosmetic coverage won't fix for long. A contractor can assess whether lifting, mudjacking, or partial slab replacement makes more sense before you spend money on overlay materials. Similarly, if your patio is part of a stamped concrete installation, crack repair involves some additional considerations specific to matching patterns and textures that are worth addressing carefully.
FAQ
Can I cover my concrete patio cracks if the slab still has old sealer on it?
Use the water bead test and the plastic sheet test results to decide. If water beads up, you likely still have sealer or contamination, which will prevent bonding. If the plastic sheet shows condensation, moisture vapor is coming through, and you should either use a moisture-mitigation primer that is rated for damp slabs or pause and correct drainage so the overlay is not trapped under excess moisture.
What happens if I skip deep cleaning and just scrub or power wash lightly?
In most cases, no. Resurfacer and most overlays bond to sound concrete, not to dirt films, oil, or curing compounds. If you cannot remove the contaminant completely, the new layer will look good initially and then peel, flake, or debond. Spot-treating individual stains can work only if you still meet bonding conditions across the entire resurfacing area.
If cracks reappear after resurfacing, does that mean my resurfacer was defective?
Yes, but it depends on the crack behavior and the type of covering. If the crack is active or you see vertical mismatch (one side higher, or spalling and hollow areas), a rigid resurfacer can crack again through the new surface. For cracks that move or keep reappearing, choose a flexible crack sealant or a system designed to bridge movement instead of relying on a hard overlay alone.
My crack has a slight height difference across it, can I still resurface over it?
Do a dry, flatness check before you fill and resurface. If the slab is high on one side of a crack, the patch and overlay can still end up telegraphing the step or creating a thin weak spot that fails. You may need to grind down high ridges, rework loose edges, and possibly use a leveling approach if the difference is more than a small featheredge.
How dry does my patio need to be before applying resurfacer?
Do not pour resurfacer over wet areas. After pressure washing, let the slab dry fully, then confirm it meets bonding conditions using the water bead test. For the plastic sheet test, moisture indicates that even if the surface looks dry, vapor drive may still ruin adhesion or cause blisters.
What temperature and weather conditions should I avoid?
Plan the timeline around cure and temperature. Avoid applying resurfacer if freezing temperatures are expected soon after installation, and do not apply if temps will drop below 50°F within 24 hours. In cooler weather, extend recoat and traffic-off times because slower curing increases the chance of surface weakness.
My overlay bubbled. Should I just sand and patch it?
If the overlay blisters after it starts to cure, stop and investigate moisture first. Re-doing the failed section is usually necessary, because once the bond is compromised you cannot rely on a patch. Retest with the plastic sheet moisture check and, if vapor drive is confirmed, use the correct moisture-mitigation primer before reapplying.
What’s the best way to make the finished surface non-slip?
Light broom texture is often the easiest way to make resurfacing less slippery, especially if you are not using an aggregate broadcast. For maximum grip on a patio that gets wet, consider a non-slip additive or a textured finish option that the product line recommends, because smooth coatings can become slick when damp.
How do I know if spiderweb cracking is just cosmetic or a bigger problem?
If you have multiple cracks that look like a spiderweb pattern, that often points to surface deterioration like crazing. Resurfacing can hide it, but only if the substrate is solid, and you must still grind out any hollow or crumbling areas first. If the concrete sounds hollow or crumbles when probed, stop and have a contractor evaluate subbase issues.
Can I cover cracks if the concrete crumbles when I press or tap?
If the concrete is crumbling at the crack edges or you find hollow-sounding areas, covering is not the fix. That indicates loss of bond or subbase failure, and the new layer can detach over time. A more durable approach may require lifting and re-leveling or partial slab replacement, depending on what’s under the failing concrete.
I have stamped or patterned concrete. Do I treat cracks differently?
Staining and decorative overlays can still work, but crack repair must be done carefully so the texture and color remain consistent. If your patio is patterned or stamped, rework of cracks may require matching the original texture map, and you may need extra prep steps to avoid visible lines where repairs were made.