
The single most effective way to prevent a concrete patio from cracking is to get the groundwork right before you pour a single drop: proper subgrade compaction, a correctly sized granular base, control joints cut at the right spacing, and a low water-to-cement ratio mix with air entrainment if you live somewhere it freezes. Do all of that, cure the slab slowly and completely, and you will eliminate the vast majority of cracks that plague DIY patios. Skipping any one of those steps is usually where things go wrong.
How to Prevent Concrete Patio from Cracking: Complete DIY Guide

Silas Morrison
28 Jul 2026
Why concrete patios crack in the first place
Concrete does not crack randomly. Every crack has a cause, and most of them are preventable if you understand what is happening at a material level. According to ACI 224R-01, the primary cracking mechanisms in slabs-on-grade are plastic shrinkage (cracks that open while the concrete is still wet), drying shrinkage as moisture leaves the hardened slab, thermal movement when the slab heats and cools, settlement caused by a weak or poorly compacted base, freeze-thaw distress in saturated concrete, alkali-silica reaction (ASR) causing slow internal expansion, corrosion of embedded steel, and overloading from concentrated or heavy loads.
For a typical backyard patio, the everyday villains are the first four: plastic shrinkage, drying shrinkage, settlement, and freeze-thaw. The rest are either climate-specific or materials-specific, but it is worth knowing they exist. Once you know what causes a crack, every prevention step below maps directly back to one of these mechanisms.
Hairline crack or structural problem? Know before you act
Before you build or repair anything, it helps to understand the difference between a crack that needs monitoring and one that demands immediate action. If you are looking at an existing patio and deciding whether to fix it yourself or call someone, crack width is the fastest diagnostic tool you have.
| Crack Width | Classification | Typical Risk | What to Do |
|---|---|---|---|
| Under 0.1 mm (hairline) | Cosmetic | Surface appearance only; low durability concern | Seal with penetrating sealer; monitor annually |
| 0.1 mm to 0.3 mm | Minor / monitor | Low to moderate; watch for widening | Clean, fill with flexible crack filler, seal, monitor |
| 0.3 mm to 0.5 mm (≈0.012–0.020 in) | Serviceability concern | Moisture and chloride ingress possible; reinforcement may corrode | Repair promptly; assess for movement or settlement |
| Over 0.5 mm | Structural concern | Possible base failure, settlement, or overload | Get a professional evaluation before DIY repair |
For a new build, this table is mostly context for what you are trying to avoid. For an existing patio where you are adding new concrete or a resurfacing layer, it tells you whether a patch-and-seal job is enough or whether the slab needs structural attention first. Hairline cracks that appear shortly after a new pour are almost always plastic shrinkage cracks, and they are worth understanding because they are almost entirely preventable with better early-pour practices.
DIY or hire a pro: a quick decision guide
- DIY is reasonable for: new patios under roughly 400 sq ft on stable, well-draining soil; sealing and filling hairline or minor cracks (under 0.3 mm); cutting or installing control joints; routine maintenance and resealing.
- Consider hiring a pro for: patios larger than 400–500 sq ft (managing a ready-mix truck pour alone is genuinely hard); any slab near tree roots, a slope, or an area with known drainage issues; cracks over 0.5 mm, any crack showing vertical displacement (one side higher than the other), or any pattern of map cracking across a large area; sites with expansive clay soils, high water tables, or poor fill that may need engineered solutions.
- Always hire a structural engineer or geotech if you see heaving, settlement of more than 1/2 inch, or cracks that keep reopening after repair.
Planning and site selection: set yourself up before you dig
I cannot count how many patios I have seen crack because of a bad site decision made before anything was even built. A few minutes with a grade stake and a level can save you years of headaches. Here is what to sort out at the planning stage.
Slope and drainage
Your patio needs to shed water away from the building. The IRC minimum is 1/8 inch per foot (about 1% slope), but 1/4 inch per foot (about 2%) is a more practical target and what most concrete contractors default to. Water that ponds on or under a slab is enemy number one, especially in freeze-thaw climates where it saturates the base and then expands. Check where the natural drainage flows on your site and design the slab to reinforce that path, not fight it.
Trees, roots, and frost line
Tree roots are one of the most common causes of patio heaving and cracking, and they grow much further than most homeowners realize. As a rule, keep concrete at least as far from a tree trunk as the tree is tall, or use root barriers if that is not possible. Check your local frost line depth (in cold climates this can be 36 to 48 inches or more) and make sure your base extends below the frost-susceptible zone, or at minimum that you are using free-draining material that does not hold water to freeze.
Load and size considerations
A standard 4-inch residential patio slab is fine for foot traffic, furniture, and a gas grill. The moment you add a hot tub (which can weigh 4,000 to 6,000 pounds fully loaded), an outdoor kitchen with a stone countertop, or any area that will see vehicle access, bump that slab thickness to 5 or 6 inches minimum and design your base and reinforcement to match. The bigger the panel, the more critical proper joint placement becomes, too. Panels over roughly 18 feet in any direction without reinforcement are asking for mid-panel cracking.
Tools, materials, and safety gear: what you actually need
Getting your materials and tools staged before the concrete truck arrives is not optional. Once the pour starts, you do not have time to run to the hardware store. Below is a practical checklist for a standard DIY patio pour of up to roughly 300 square feet (a 4-inch slab, about 4 cubic yards of concrete).
Tools
- Plate compactor (rental, roughly $75–$120/day) — non-negotiable for proper subgrade and base compaction
- Concrete screed (board or pipe screed) sized to span your form width
- Bull float (4-ft minimum) for initial surface leveling
- Magnesium hand float and steel trowel for finishing
- Groover or walking jointing tool for hand-tooled joints (or an early-entry saw for sawcut joints)
- Concrete saw (rental) for sawcut control joints — early-entry saw preferred if timing is tight
- Shovels (2–3), a come-along rake, and a wheelbarrow
- Stakes and string line for grade and form layout
- Laser level or water level for setting form height accurately
- Mixing hoe and bucket for small touchup mixes
- Wire cutters and bar benders if using mesh or rebar
Materials (for a 300 sq ft, 4-inch slab)
- Ready-mix concrete: approximately 3.7–4 cubic yards (order 4 to account for waste and uneven subgrade); specify 4,000 psi, max 0.45–0.50 w/cm, 4–7% air entrainment if in a freeze-thaw climate, and 3–4 inch slump
- Crushed aggregate base (3/4-inch minus): approximately 2 tons for a 4-inch base layer under 300 sq ft
- Geotextile fabric: 1 roll (typically 6 ft wide) to line the excavation where needed on marginal soils
- 2x4 or 2x6 lumber for forms (linear footage equals your patio perimeter plus waste)
- Duplex nails and stakes for form assembly
- Welded wire mesh (6x6 W1.4/W1.4) or 3/8-inch rebar at 18-inch spacing for reinforcement
- Rebar chairs or concrete spacers to hold reinforcement at mid-slab depth
- Premolded expansion joint filler (1/2 inch thick) for isolation joints against the house
- Curing compound (Type 1 or Type 2 dissipating, ASTM C309) or curing blankets: enough to cover the full slab area
- Concrete sealer (penetrating silane/siloxane) for application after full cure
Safety gear (PPE)
- Rubber waterproof boots: fresh concrete is highly alkaline (pH 12–13) and causes chemical burns on prolonged skin contact
- Nitrile or rubber gloves rated for alkaline materials
- Safety glasses or goggles (splatter is common during screed and float work)
- Knee pads for trowel and finishing work at slab level
- Dust mask (N95 minimum) when cutting dry concrete or mixing bagged materials
- High-visibility vest if working near a street or driveway pour
- First aid kit on site
Timeline reality check: plan for two full days minimum. Day one is excavation, base preparation, and form setting. Day two is the pour, finish, and initial joint work. Curing takes at least 7 days of moisture retention, and you should wait 28 days before placing heavy loads or furniture on the slab. Sealing should happen after that 28-day cure.
Permits, utility locates, and site prep
This is the step most DIYers skip and then regret. In most jurisdictions, a concrete patio over a certain size (often 200 square feet, but it varies widely) requires a building permit, especially if it is attached to the house or within a setback. Check with your local building department before you dig anything. Fines for unpermitted work are real, and unpermitted structures can cause headaches when you sell the property.
Before any excavation, call 811 (in the US) or your regional utility locate service. This is free, legally required in most states, and can save your life. Underground utilities including gas, electrical, and water lines are often shallower than homeowners expect. Locates are typically completed within 2 to 3 business days, so build that into your schedule.
Site prep includes removing all sod, organic material, and loose topsoil from the entire patio footprint plus about 6 inches beyond the form lines. Organic material under a slab decomposes and creates voids that lead directly to settlement cracking. Do not skip this step even if the topsoil layer is thin.
Subgrade and base prep: the most important work you will do
I have said it before and I will keep saying it: more patio cracks come from a bad base than from any other single factor. A perfectly mixed, perfectly poured slab will crack if the ground underneath moves. Here is how to do this right.
Excavation depth
For a standard 4-inch slab on a 4-inch compacted base, you need to excavate roughly 8 to 9 inches below your finished slab elevation (4 inches slab plus 4 inches base plus a little for geotextile fabric). Add more excavation depth for heavier-load applications or poor native soils. In freeze-thaw climates, confirm that your base material extends into free-draining aggregate that will not hold water against the frost line.
Geotextile and base steps
- After excavating, proof-roll the subgrade with your plate compactor to identify any soft spots. Soft areas will visibly deflect or pump under the compactor. Dig out any soft pockets and replace with engineered fill.
- On expansive clay, silty, or organic soils, line the bottom and sides of the excavation with a non-woven geotextile fabric before placing base material. This acts as a separator, preventing clay migration up into your gravel base over time.
- Place your 3/4-inch minus crushed aggregate base in maximum 3-inch lifts and compact each lift to at least 95% of standard Proctor density. For a DIY project without a nuclear density gauge, use this practical check: the compactor should no longer cause visible movement in the material, and you should not be able to push a 3/8-inch rebar more than a few inches by hand.
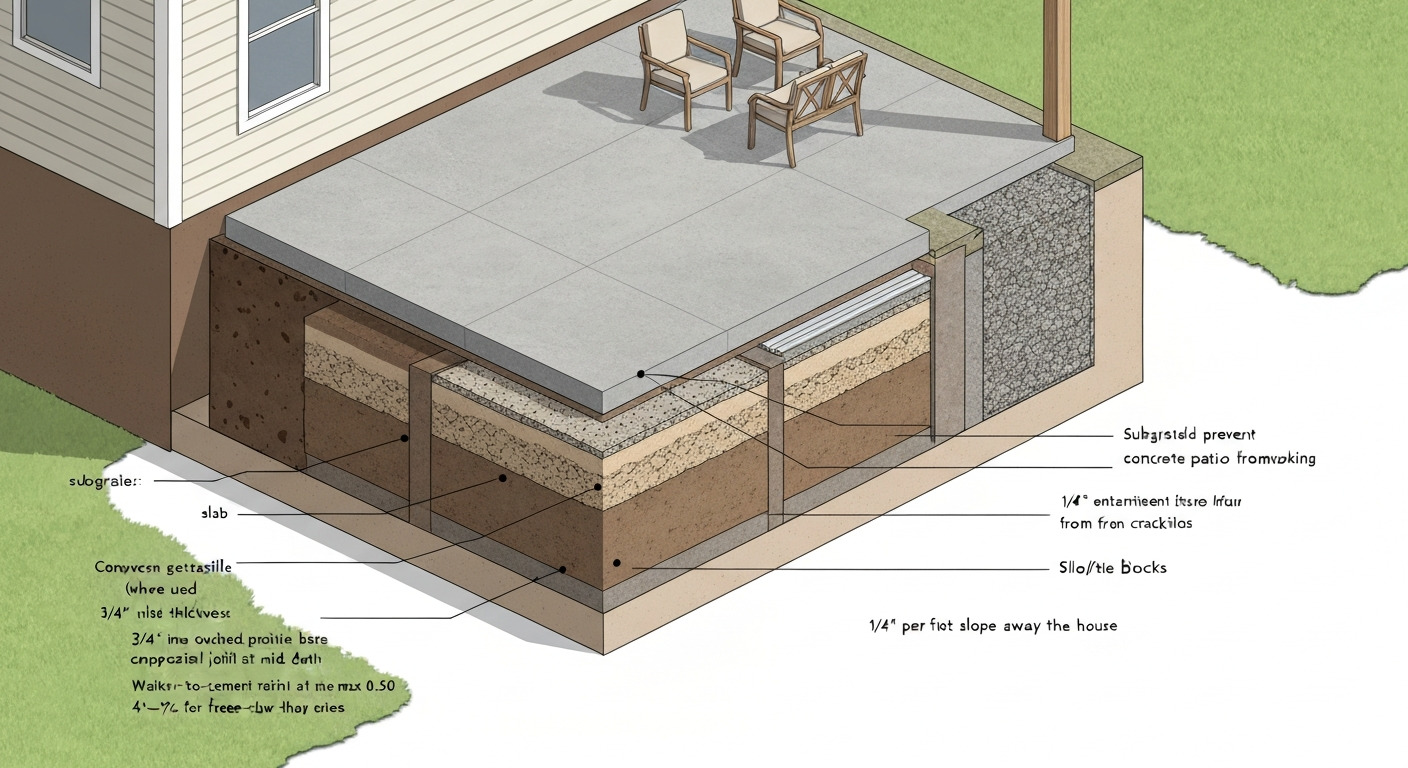
- Check your finished base surface with a level or straightedge. It should follow the same slope as your planned finished slab (1/4 inch per foot away from the house) and have no low spots where water can collect under the slab.
- If you have identified expansive clays, high plasticity soils, or poor fill, stop here and consult a geotechnical engineer. Undercutting and replacing with engineered fill, or installing perimeter drains, is far cheaper than tearing out a cracked slab later.
Choosing the right concrete mix and admixtures
When you call the ready-mix plant, do not just say 'I need some concrete.' Be specific. The mix you order has a direct impact on cracking risk, freeze-thaw durability, and long-term strength. Here is what to specify.
Strength and water-to-cement ratio
For a residential patio, specify a minimum 28-day compressive strength of 4,000 psi (3,500 psi is an absolute floor; 4,000 psi is the sweet spot for durability without a significant cost jump). More importantly, specify a maximum water-to-cementitious-materials ratio of 0.45 to 0.50. This single number controls permeability more than compressive strength does. A wetter mix is easier to finish but far more likely to shrink, crack, and allow water infiltration. Resist the temptation to add water at the site if the mix seems stiff.
Slump
Order a slump of 3 to 4 inches for a trowel-finished slab. If you need more workability, ask the plant to add a water-reducing admixture (plasticizer) rather than more water. This maintains your w/cm target while making the mix easier to work. Never have the truck driver add water at the site to increase slump, every inch of additional slump added with water significantly increases shrinkage cracking risk.
Air entrainment
If your patio will experience freeze-thaw cycles (basically anywhere that regularly drops below 32°F in winter), air entrainment is not optional. Specify 4 to 7% entrained air. Air-entraining admixtures create a microscopic system of tiny bubbles distributed throughout the paste that give water room to expand when it freezes, instead of that expansion going into the concrete itself. This is the single best protection against freeze-thaw scaling and surface deterioration.
Admixtures worth considering
- Shrinkage-reducing admixtures (SRAs): reduce capillary tension in the pore structure, directly cutting both early and drying shrinkage. Worth the cost on larger or more complex pours.
- Supplementary cementitious materials (SCMs) like fly ash or slag: replace a portion of Portland cement, lower heat of hydration, reduce permeability, and help mitigate alkali-silica reaction risk. Fly ash replacement at 20–25% of cementitious content is common for residential slabs.
- Synthetic fibers (polypropylene): added at the mix plant, these reduce plastic shrinkage cracking during the early plastic phase. They do not replace structural reinforcement but are a useful backstop against surface cracking.
- Water-reducing admixtures (plasticizers/superplasticizers): allow you to reduce w/cm while keeping workability. Always worth using if your ready-mix plant offers them.
Reinforcement options: what actually reduces cracking risk
There is a lot of confusion about reinforcement among DIYers. Here is the honest version: reinforcement does not prevent cracking. What it does is hold cracks together when they form, limiting crack width and preventing slab segments from shifting and heaving relative to each other. With proper joints, base prep, and mix design, you may never see a visible crack. But reinforcement is your insurance policy when movement does happen.
Welded wire mesh (WWM)
The most common choice for residential patios. Standard 6x6 W1.4/W1.4 (6-gauge) mesh is the baseline. It is inexpensive, easy to handle solo, and widely available. The critical installation detail that most DIYers get wrong: the mesh must be positioned at mid-slab depth, not sitting on the subgrade. Use 2-inch plastic rebar chairs or concrete brick spacers to hold the mesh at roughly 1.5 to 2 inches from the bottom of the slab in a 4-inch pour. Mesh sitting on the ground provides almost zero crack control because it is below the tensile stress zone.
Rebar
For heavier-load applications (hot tubs, outdoor kitchens, vehicle access), step up to 3/8-inch (No. 3) or 1/2-inch (No. 4) rebar at 18-inch centers in both directions. Rebar provides better crack control and load distribution than mesh alone. Same placement rule applies: chairs at mid-depth. Tie rebar intersections with wire ties to keep the grid from shifting during the pour.
Synthetic fibers
Polypropylene or nylon fibers added at the ready-mix plant (typically at 0.75 to 1.5 lb per cubic yard) are excellent at reducing plastic shrinkage cracks, the ones that form in the first few hours after placement. They work by bridging the microcracks that form as the surface dries faster than the interior bleeds. They are not a substitute for rebar or mesh in terms of structural crack control, but they are a genuinely useful addition to any mix, especially in hot or windy conditions.
Side-by-side comparison
| Reinforcement Type | Best For | Crack Control | DIY Difficulty | Relative Cost |
|---|---|---|---|---|
| Welded wire mesh (6x6 W1.4) | Standard residential patios, pedestrian load | Good if placed at mid-depth; holds cracks tight | Easy | Low |
| Rebar No. 3 at 18" grid | Heavy loads, hot tubs, vehicle areas, 5-6" slabs | Best structural crack control | Moderate | Moderate |
| Synthetic fibers (polypropylene) | Reducing plastic shrinkage cracks; any pour in hot/windy conditions | Good for early surface cracking; minimal structural contribution | Easy (added at plant) | Low |
| No reinforcement (plain slab) | Very small patios (under 50 sq ft) with excellent base and tight joint spacing | Poor; crack width uncontrolled | N/A | Lowest |
My recommendation for most DIY residential patios: use 6x6 W1.4 mesh on chairs plus synthetic fibers in the mix. It covers both the early plastic shrinkage window and the long-term structural crack-control need without making the job significantly harder. For anything with heavy point loads, add rebar instead of or in addition to mesh.
Control joints: the most underused crack prevention tool
Control joints are intentional weakened planes that tell the concrete where to crack, in a straight line you choose rather than a random map across your patio. They work by reducing the slab cross-section at planned intervals so that if shrinkage stress builds to the point of cracking, it cracks there, not somewhere else.
For a 4-inch unreinforced slab, space control joints at 8 to 12 feet in both directions, creating roughly square panels. The ACI 302.1R rule is 24 to 36 times the slab thickness in inches, which for a 4-inch slab gives 8 to 12 feet. Do not make panels longer than about 18 feet in any direction without reinforcement. Sawcut joints should be 1/4 to 1/3 of the slab depth: for a 4-inch slab, that is 1 to 1.5 inches deep. Shallower than that and the weakened plane is not deep enough to reliably control the crack.
Timing for sawcut joints is critical. With a conventional wet saw, cut within 4 to 12 hours of finishing. With an early-entry dry saw, you can cut as soon as 1 to 4 hours after finishing. The goal is to cut before random cracking starts, which in hot or windy weather can happen surprisingly fast. When in doubt, err on the early side. A slightly rougher cut edge beats a random crack by a wide margin.
Do not forget isolation joints where the patio meets the house. Use 1/2-inch premolded expansion joint filler extending the full depth of the slab, and do not tie the patio to the foundation with rebar or dowels. The patio needs to move independently from the house as temperature and moisture change. After curing, fill the top of that isolation joint with a flexible polyurethane or silicone sealant to keep water out.
Pouring, finishing, and curing: where most DIY patios go wrong
The pour
Start at the far end from the truck and work toward it. Discharge the concrete into the form and move it with a come-along rake, do not drag it long distances with a shovel, which segregates the aggregate. Screed the surface level with the form tops using a back-and-forth sawing motion. Follow immediately with the bull float to close the surface and knock down ridges left by the screed.
Finishing timing
Wait for bleed water to evaporate from the surface before starting hand floating or steel troweling. Working the surface while bleed water is still present drives water back into the top layer, weakening it and dramatically increasing surface scaling and cracking risk. This is one of the most common DIY mistakes I see. The surface is ready to finish when it no longer looks shiny wet and a footprint depresses it about 1/4 inch.
Preventing plastic shrinkage cracks during the pour
Plastic shrinkage cracks form when the surface loses moisture faster than the concrete can bleed. Hot weather, wind, and low humidity all accelerate this. If conditions are hot (above 90°F) or windy, use an evaporation retardant spray immediately after screeding, set up windbreaks with tarps, or schedule the pour for early morning. Synthetic fibers in the mix are your best line of defense, but managing evaporation during placement is equally important.
Curing
Curing is moisture retention, not just waiting for the concrete to harden. You need to keep the slab moist (or use a curing compound to seal in moisture) for at least 7 days, and ideally 14 days. Concrete gains most of its strength in the first 28 days, and that process requires water. If the slab dries out in the first week, you lose both strength and crack resistance. Options include spraying with curing compound immediately after finishing, covering with wet burlap and plastic sheeting, or using curing blankets. I prefer curing compound for DIY because it is simple, consistent, and does not require you to keep wetting burlap. Apply it as soon as the final finishing is done, before the surface sheen disappears.
Drainage, load, and environmental management after the pour
Prevention does not end when the concrete hardens. Long-term crack prevention is about managing the conditions the slab lives in. Keep gutters and downspouts directed away from the patio. Make sure the grading around the slab still slopes away from the house at 1/4 inch per foot. Check that no garden beds or raised planters are trapping moisture against the slab edge. In freeze-thaw climates, avoid de-icing salts on concrete, especially in the first two winters when the surface is still developing durability. Use sand for traction instead.
For loads, distribute heavy point loads wherever possible. Put furniture on rubber pads to spread the load and reduce wear on the surface. If you add a hot tub after the fact, confirm the slab and base design can handle the weight before placing it. A fully loaded hot tub can add 50 to 75 pounds per square foot over its footprint, which exceeds the design load of a standard 4-inch residential slab.
Sealing and routine maintenance
Apply a penetrating silane/siloxane sealer after the slab has fully cured (28 days minimum). This type of sealer chemically bonds with the concrete and fills capillary pores, significantly reducing water and chloride ingress without forming a surface film that can peel or trap moisture. For a standard gray patio, reapply every 2 to 5 years depending on traffic and climate. If you have stamped or colored concrete, a film-forming sealer (acrylic or epoxy) may be appropriate for appearance protection, but make sure it is breathable to prevent delamination.
Routine maintenance is straightforward: keep control joints clean of debris (compacted dirt and vegetation in joints reduces their ability to accommodate movement), reapply sealant to joint filler as it deteriorates, and address any new cracks promptly before they widen. A hairline crack sealed in year one is a 15-minute job. For step-by-step guidance and recommended materials, see how to repair hairline cracks in concrete patio. The same crack left for three freeze-thaw cycles becomes a repair project.
Stamped concrete: extra prevention steps you need to know
Stamped concrete has a higher inherent cracking risk than plain concrete for a few reasons: the stamping process compresses the surface during a narrow finishing window, the integral color and release agents affect finishing timing, and the surface texture can make small cracks more visible. Everything above applies equally to stamped concrete, but add these precautions.
- Never add water to the mix at the site on a stamped pour — workability management with a plasticizer is even more important here because the stamping window is tight.
- Stamp only during the right window: too early and the stamps sink; too late and the pattern is weak and the surface can tear. Practice timing on a small test batch if this is your first stamped pour.
- Control joints in stamped concrete are typically tooled into the pattern by hand during finishing rather than sawcut afterward, to preserve the appearance. Make sure they still reach 1/4 to 1/3 slab depth.
- Reseal stamped concrete more frequently than plain concrete because the film-forming sealers used for appearance protection wear faster than penetrating sealers. Check the surface annually and reapply as soon as the sheen starts to dull.
- If you already have cracks in a stamped patio, repair guides specific to stamped surfaces will help you match the pattern and color — a standard crack fill will be much more visible on a stamped surface than on plain gray concrete.
When prevention is not enough: dealing with existing cracks
Even a well-built patio can develop a crack over time. If you see a hairline crack (under 0.1 mm, roughly the width of a human hair), clean it with compressed air, fill it with a penetrating crack sealer or concrete filler, and seal the whole surface. That is typically the end of the story. For cracks in the 0.1 to 0.3 mm range, a flexible polyurethane crack filler applied after cleaning is the right approach, followed by a full reseal. Detailed guidance on filling and sealing those cracks, including the right products and step-by-step technique, is covered in dedicated guides on sealing and covering concrete patio cracks.
For cracks over 0. ACI 224R-01, Concrete Cracking Control (discussion of crack-width limits and 0.30 mm guidance) notes that a crack width around 0.3 mm is commonly used as a threshold for potential durability concerns and for considering repairs ACI 224R-01 — Concrete Cracking Control (discussion of crack-width limits and 0.30 mm guidance). 3 mm, or any crack where you can feel a vertical lip between the two sides, you need to assess the cause before you repair the surface. A surface-only repair on a crack caused by ongoing settlement or base failure will fail quickly. If the underlying cause is not fixed, the crack will return. In those cases, get a professional assessment and look at whether slab stabilization, mudjacking, or full removal and replacement is the right path.
If your patio is stamped concrete with visible cracks, the repair approach is different because color and texture matching matter. For detailed step-by-step guidance on fixing them, see how to repair cracks in stamped concrete patios. And for very fine hairline cracks that are mostly cosmetic, there are targeted repair techniques that minimize the appearance of the repair itself.
Prevention checklist: do these things and you are ahead of 90% of DIY patios
- Choose a site with natural drainage away from the house; plan for 1/4 inch per foot minimum slope
- Check for tree roots, frost line depth, and expansive or organic soils before excavating
- Pull permits and call 811 for utility locates before any digging
- Excavate all organic material; proof-roll and compact subgrade
- Install geotextile separator on marginal soils; place and compact 4 inches of 3/4-inch minus crushed aggregate in max 3-inch lifts
- Order 4,000 psi concrete with max 0.45–0.50 w/cm, 3–4 inch slump, 4–7% air entrainment in freeze-thaw climates, and request plasticizer for workability
- Add synthetic fibers (0.75–1.5 lb/yd3) to the mix for plastic shrinkage protection
- Place welded wire mesh or rebar on chairs at mid-slab depth — never on the ground
- Install 1/2-inch premolded isolation joint filler against the house, full slab depth
- Install control joints at 8 to 12 foot spacing for a 4-inch slab; cut to 1 to 1.5 inch depth within 4 to 12 hours of finishing
- Do not add water to the mix on site; do not finish over bleed water
- Apply curing compound immediately after final finishing; keep slab moist for 7 to 14 days
- Wait 28 days before heavy loading; apply penetrating silane/siloxane sealer
- Maintain drainage, keep joints clean, and reseal every 2 to 5 years
FAQ
What are the main causes of concrete patio cracking I should plan for?
Cracks are caused by several mechanisms: plastic (early) shrinkage (hours–days after pour), drying/autogenous shrinkage as concrete cures, thermal movement and restraint, settlement or loss of subgrade support, freeze–thaw distress when saturated, alkali–silica reaction (long‑term internal expansion), corrosion of embedded steel, and overload or concentrated loads. Planning and detailing address most of these causes.
How do I select and prepare the site to reduce cracking risk?
Choose a site with positive drainage away from the house (1/8–1/4 in/ft slope). Avoid saturated or organic soils; if present, undercut and replace with engineered fill. Proof‑roll the subgrade to find soft spots and compact to at least ~95% of Proctor max dry density. Provide a free‑draining compacted aggregate base (commonly 2–4 in compacted under a 4 in slab; increase for poor soils/heavier loads). Install perimeter drainage or swales if water collects near the slab.
What slab thickness and loading considerations should I use?
For typical pedestrian patio use, use 4 in (100 mm) concrete. Increase to 5–6 in or more for spa/hot tub, vehicle access, heavy grills or masonry features. Match base depth and compaction to loading. For heavy concentrated loads, add reinforcement or isolated footings.
How should I plan joints (control, isolation, and construction) to prevent cracks?
Use isolation (expansion) joints where the slab meets buildings, footings, columns, or fixed structures—these should extend full slab depth and remain unbonded to the structure. Space contraction (control) joints at roughly 24–36 times the slab thickness in inches (e.g., 4 in slab → 8–12 ft spacing); keep panels reasonably square and limit maximum panel length (~18 ft) unless engineered. Sawcut control joints to ~1/4–1/3 slab depth before random cracks form: conventional saws 4–12 hours after finishing, early‑entry saws 1–4 hours in favorable conditions.
What concrete mix and admixtures reduce cracking risk?
Target 28‑day strength 3,000–4,000 psi for residential patios. Limit water‑cementitious ratio to ~0.45–0.50; use water‑reducing admixtures (plasticizers/superplasticizers) to maintain workability at low w/cm. Use air entrainment (4–7%) where freeze‑thaw exposure exists. Consider shrinkage‑reducing admixtures (SRAs) or internal curing for high‑risk sites. Use SCMs (fly ash/slag) or low‑alkali cement where ASR is a concern.
When and how should reinforcement or fibers be used?
Use welded wire mesh or rebar when panels will experience moderate loads or to control crack widths (mesh helps distribute cracks but won’t prevent all cracking). For typical 4 in patios, welded wire is common; increase reinforcement for heavier loads. Synthetic macrofibers can reduce plastic shrinkage cracking and help control early cracks—use per producer dosages. For structural control of crack widths under flexural loads, design with steel reinforcement per ACI guidance.