
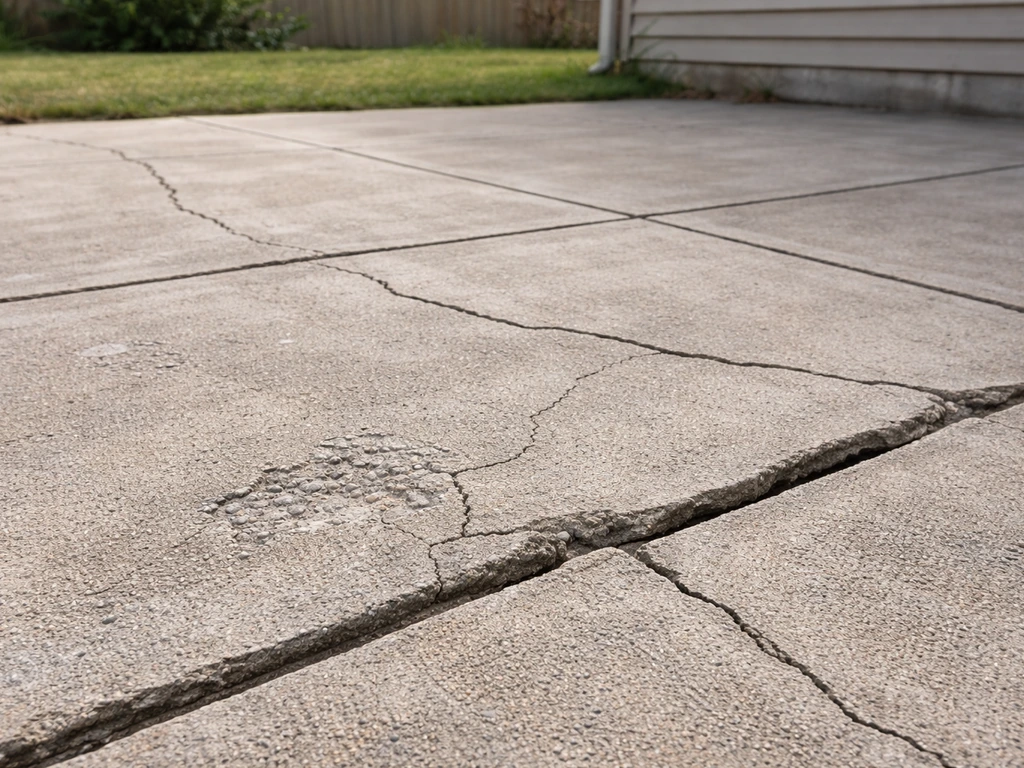
Most concrete patio problems fall into one of four categories: cracks, crumbling or spalling surface, uneven or sunken sections, and general ugliness from age and wear. Each one has a real DIY fix, and most of them you can start on a Saturday morning with materials from your local home improvement store. Each of these approaches is designed to get you a durable concrete patio fix that matches the damage instead of just covering it up. The key is matching the repair to the actual damage, because slapping a bag of concrete patch on the wrong problem just delays a bigger headache.
How to Fix a Concrete Patio: Step-by-Step Repairs

Silas Morrison
6 Jun 2026
Quick diagnosis: what's actually wrong with your patio
Before you buy anything, spend ten minutes walking the whole slab and taking notes. You want to identify which category your damage falls into, because the fix is completely different depending on what you're looking at.
| What you see | What it means | Repair type needed |
|---|---|---|
| Hairline cracks, less than 1/8 inch wide | Shrinkage or thermal movement, surface only | Crack filler or caulk |
| Wider cracks, 1/4 inch or more | Settling, heaving, or structural stress | Polyurethane or epoxy injection, then patch |
| Flaking, peeling, or pitting surface | Spalling from freeze/thaw cycles or deicers | Surface patch + resurfacer |
| Crumbling edges or chunks breaking off | Delamination, old failing concrete | Chisel out, patch with bonding agent |
| One section is noticeably lower or tilted | Soil erosion or settling underneath | Slabjacking or self-leveling overlay |
| Dull, stained, rough, or just ugly | Age, no sealer, surface wear | Resurfacing, staining, or sealing |
One thing to check before anything else: push down on any suspicious section. If it flexes, rocks, or feels hollow when you tap it with a hammer, the slab has separated from the base below. That's a bigger structural issue and may need a professional to evaluate whether the slab needs to be lifted, stabilized, or replaced. Everything else in this guide assumes you have a structurally sound slab that just needs surface or cosmetic work.
Safety and prep before you touch anything
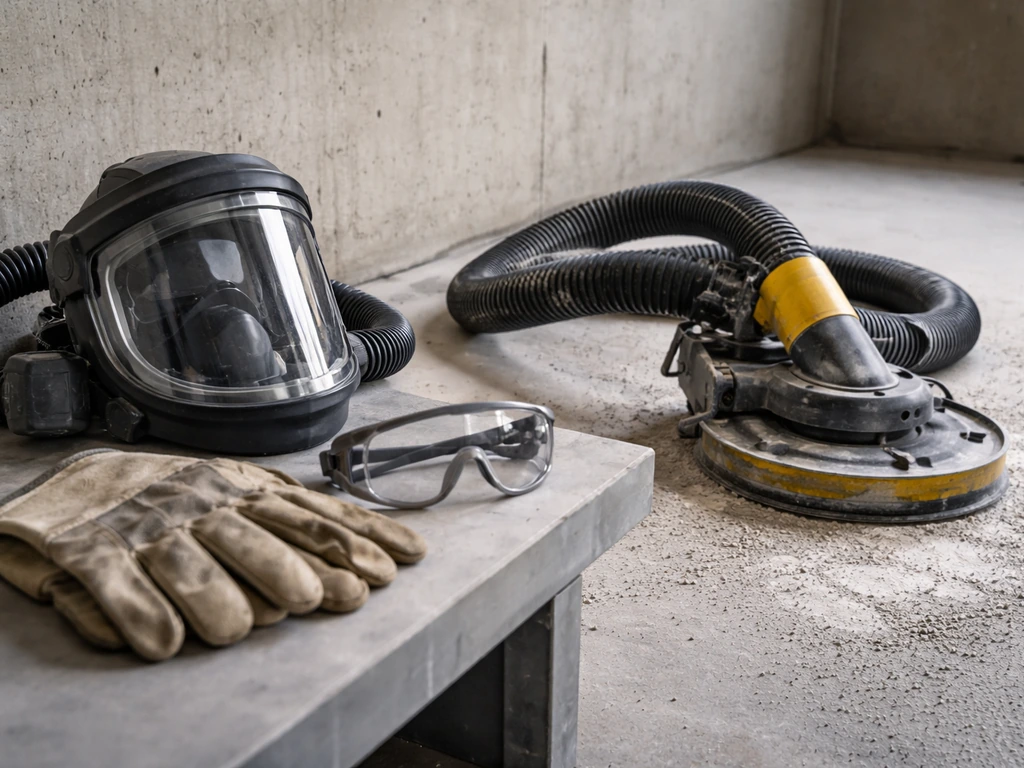
Concrete repair work generates a lot of dust, and that dust contains crystalline silica. Grinding, chiseling, or cutting concrete without protection exposes you to silica particles that cause serious lung damage over time. Wear an N95 or P100 respirator rated for silica dust, not just a paper dust mask. Safety glasses and gloves are non-negotiable too. Work upwind when you can, and wet the surface down before dry-grinding to keep dust levels down.
Now, prep. Good prep is honestly 70 percent of any successful concrete repair. If you skip it, your patch will pop off in a year. Here's the order to follow:
- Pressure wash the entire patio. Use at least 3,000 PSI to remove dirt, mold, algae, grease, and any old sealer that's flaking. Let it dry completely, at least 24 hours.
- Knock off all loose material. Use a cold chisel and hammer or an angle grinder with a diamond cup wheel to chip away any loose, crumbling, or delaminated concrete. If it sounds hollow when you tap it, it has to come out.
- Undercut the edges of any crack or hole. Chip the sides so they're vertical or slightly undercut inward, not feathered. Feathered edges fail; undercut edges grip.
- Vacuum or blow out the area thoroughly. Loose dust and debris will prevent bonding.
- Apply a concrete bonding adhesive or primer to the repair area. This step is skipped by beginners and regretted every time. Brush or roll it on and let it get tacky before applying your patch material.
Tools you'll want on hand: cold chisel, hammer, angle grinder, pressure washer, stiff wire brush, margin trowel, flat trowel, mixing paddle and bucket (or a drill with a paddle bit), safety glasses, respirator, and gloves.
How to repair cracks in a concrete patio
Cracks are the most common patio problem, and the right fix depends on the size and whether the crack is active (still moving) or stable.
Hairline and narrow cracks (under 1/4 inch)
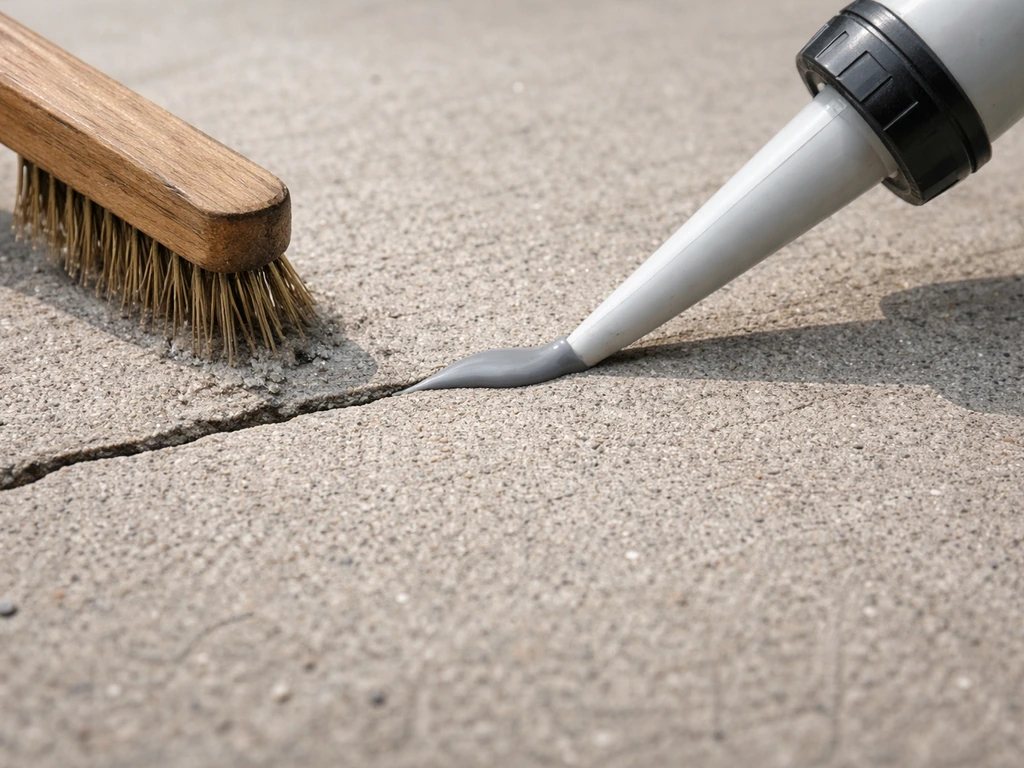
For hairline cracks, a polyurethane concrete caulk or a liquid crack filler is your best bet. Clean out the crack with a wire brush and compressed air, then work the filler in with a caulking gun or squeeze bottle. Smooth it flush with a putty knife and let it cure per the product instructions, usually 24 hours before foot traffic. These products stay slightly flexible, which matters because concrete keeps moving with temperature changes.
Wider cracks (1/4 inch and up)
Wider cracks need a more substantial repair. Use a vinyl concrete patch mix or a two-part epoxy paste for cracks that are deep or load-bearing. If the crack goes all the way through the slab and the two sides are at different heights, the underlying soil has shifted and you need to address that before patching, otherwise the new material will just crack in the same spot. For a crack you're confident is stable, clean it out, undercut the edges with a grinder or chisel, apply bonding adhesive, then pack in the patch mix and trowel it level. For deeper cracks, use backer rod (foam rope from any hardware store) to fill the depth before applying filler, so you're not wasting material and the filler cures properly.
For very deep structural cracks, pressure-injected epoxy is the professional-grade approach. Low-viscosity epoxy resin is injected through ports drilled into the crack at intervals, starting at one end and working toward the other so the resin fills completely without air pockets. In pressure-injected epoxy crack repairs, blank" rel="noopener noreferrer">injection typically starts at a designated location or sequence and resin is directed so it reaches the adjacent port before a nonadjacent port is unplugged. TxDOT’s bridge crack repair guidance describes using a blank" rel="noopener noreferrer">low-viscosity epoxy resin (TxDOT Type IX) that typically meets ASTM C 881 Type IV, Grade 1 for crack injection. This is beyond most DIY toolkits, but if you have a large, deep crack in a load-bearing section, it's worth knowing this option exists.
Fixing crumbling, spalling, and flaking concrete
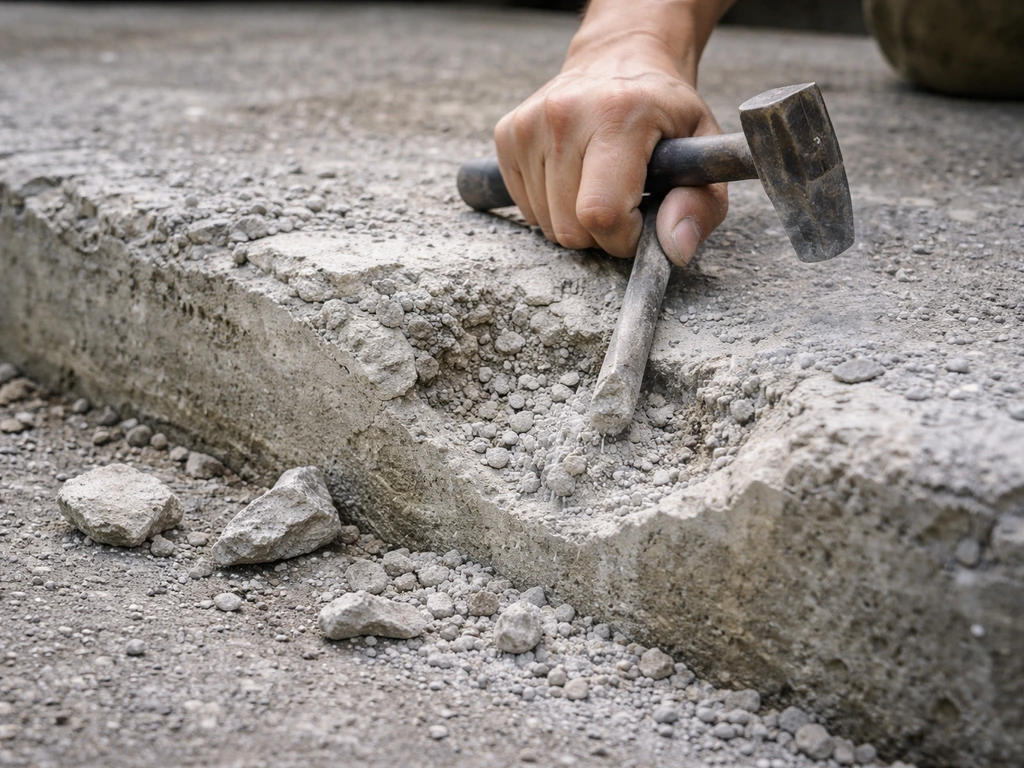
Spalling is that frustrating problem where the top layer of concrete starts peeling off in flakes or chunks, often after a few winters of freeze/thaw cycles or too many seasons of road salt tracked in from the driveway. The surface looks pitted, rough, and patchy. The good news is that spalling is almost always a surface repair, not a structural one. If you're seeing widespread crumbling around the edges of your patio specifically, that's worth a closer look as a separate issue.
- Remove all loose and delaminated material. Use a chisel and hammer or a grinder to chip down to sound concrete. Don't leave any soft or hollow areas, even small ones.
- Clean the surface thoroughly and let it dry.
- Apply a concrete bonding agent to the repaired area. Don't skip this.
- For small patches (up to a few square feet), use a pre-mixed vinyl concrete patch product. Mix to a thick peanut-butter consistency and press it firmly into the damaged area.
- Trowel the patch smooth and feather it slightly at the edges so it blends with the surrounding surface.
- For large spalled areas covering most of the patio, a concrete resurfacer product is the more practical approach (covered in the resurfacing section below).
- Mist the patch lightly with water after initial set and cover with plastic sheeting for 24 to 48 hours to slow curing and prevent shrinkage cracks.
One thing I've learned the hard way: don't apply concrete patch when it's below 50°F or above 90°F. Cold slows curing to the point where the patch never properly bonds. Heat makes it cure too fast, leading to shrinkage cracks. Early morning work in summer, midday in cooler months.
Leveling and smoothing rough or uneven concrete
An uneven patio is either a tripping hazard or a drainage problem, and sometimes both. If your main issue is slipping on smooth, worn, or slick concrete, you can tackle it by cleaning properly and using the right non-slip surface or coating how to fix slippery concrete patio. How you fix it depends on the cause and the severity.
Slight unevenness and rough surface texture
If your patio is just rough, has a gritty texture, or has minor high spots from old repairs, a self-leveling concrete overlay or a skim coat is the right move. These products are poured or troweled on thin (usually 1/8 to 1/4 inch) and flow to a smooth finish. Clean the surface, apply bonding primer, then pour and spread. They set fast, often walkable in 3 to 4 hours. This is also the solution if you want to go from a broom-finish texture to something smoother.
One section that's noticeably lower or has settled
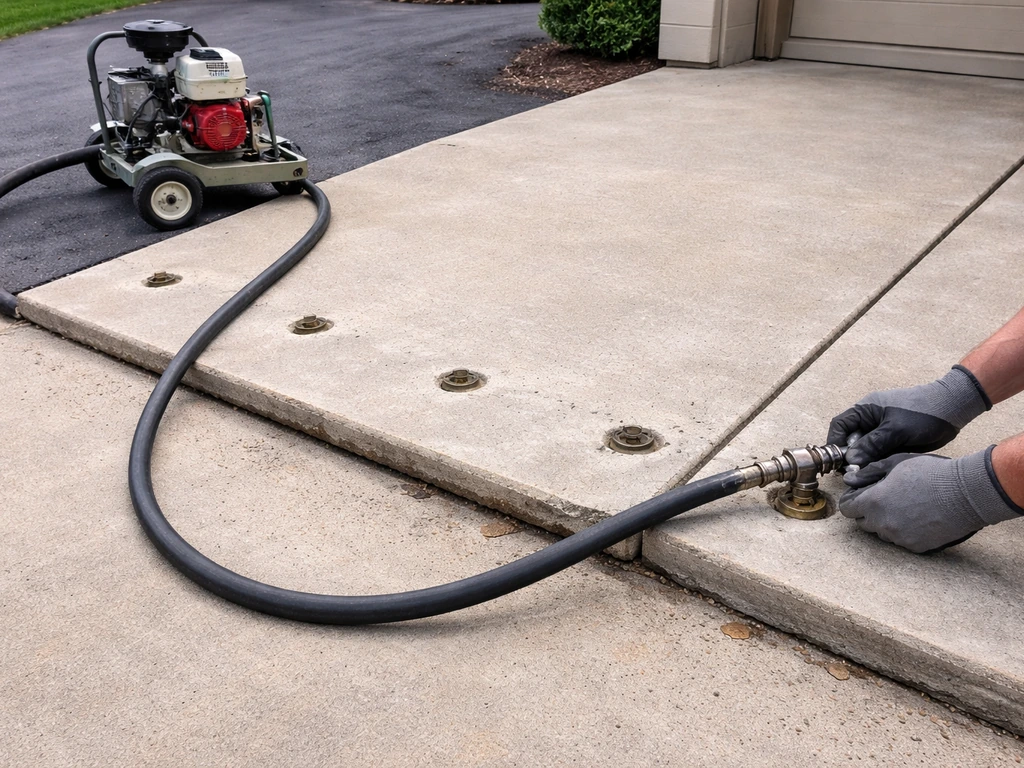
If one section of your patio has sunk an inch or more relative to the rest, you have two realistic options. The first is mudjacking or slabjacking, where a contractor pumps a slurry under the slab to lift it back to grade. The second, newer option is polyurethane foam lifting, where expanding foam is injected through small holes to lift the slab. Both are professional jobs. DIY slab lifting kits exist but are generally underpowered for anything more than minor settling. If the differential is less than half an inch, a self-leveling overlay can bridge the gap without lifting the slab.
Grinding down high spots
If one edge of a slab panel has heaved upward and created a lip, you can grind it down with an angle grinder or a concrete grinder. This creates a beveled transition rather than a trip hazard. Wear your respirator, wet the surface to control silica dust, and work slowly. A 4-inch angle grinder with a diamond cup wheel handles most DIY grinding jobs.
Restoring an old or ugly patio: resurfacing, staining, and finish options
If your patio is structurally fine but just looks terrible, worn, stained, and faded, resurfacing is one of the most satisfying weekend projects you can do. If you are trying to fix old concrete patio issues that look worn, stained, or faded, resurfacing is often the fastest way to refresh the surface without rebuilding it. The right approach depends on how bad the surface is and what finish you want.
Concrete resurfacer (best for widespread surface damage)
Products like Quikrete Concrete Resurfacer or Sakrete Flo-Coat are specifically designed to go over an existing slab in a thin layer, typically 1/8 to 1/4 inch, to create a fresh surface. You mix them to a pourable consistency, pour onto a wet (but not puddle-wet) slab, and spread with a squeegee or trowel. For texture, drag a broom across it before it sets. These products bond extremely well to existing concrete as long as the surface is clean and you use a bonding primer. This is the move for a patio with widespread spalling, pitting, or just general ugliness.
Skim coating for smoothness
A skim coat is an ultra-thin layer, often just 1/16 to 1/8 inch, of modified cement or overlay material used to smooth out texture and minor imperfections. It's the right call when the surface is sound but rough or has old paint or sealer you've stripped off. Apply with a steel finishing trowel in long, smooth strokes. It takes practice to get a perfectly flat finish, but even an imperfect skim coat looks dramatically better than a weathered bare slab.
Staining for color and character
Acid staining or water-based concrete stain can transform a plain gray slab into something that looks genuinely attractive. Acid stains react chemically with the concrete to create permanent, mottled color that doesn't peel. Water-based stains are easier to work with, less fume-intensive, and come in more colors. Either way, the concrete must be clean, free of sealer, and porous enough to absorb the stain. Always test a small area first. After staining, you must seal the surface or the color will wear off quickly.
Concrete paint and epoxy coatings
Masonry paint is the quickest refresh, but it will eventually peel and needs to be reapplied every few years. Epoxy floor coatings, the kind with a base coat and a topcoat with decorative chips, are more durable and popular for garage floors but work great on patios too. They need a very clean, lightly etched surface to bond properly. If your patio gets a lot of sun, use a UV-stable formula so it doesn't yellow.
| Finish option | Best for | DIY difficulty | Durability |
|---|---|---|---|
| Concrete resurfacer | Widespread spalling, pitting, old surfaces | Moderate | 7-15 years with sealer |
| Skim coat | Smoothing rough or stripped surfaces | Moderate-hard | 5-10 years with sealer |
| Acid stain | Color transformation, decorative look | Moderate | 10+ years (permanent color) |
| Water-based stain | Easy color change, lots of color options | Easy-moderate | 5-10 years with sealer |
| Epoxy coating | Durable, high-traffic, decorative | Moderate | 5-10 years |
| Masonry paint | Quick cosmetic fix, low budget | Easy | 2-5 years |
Curing, sealing, and making sure this doesn't happen again
The repair itself is only half the job. How you cure it and what you put on top determines whether it lasts five years or fifteen.
Curing your repair correctly
Concrete doesn't dry, it cures, and the curing process needs moisture. After any patch or resurfacing work, mist the surface lightly with water once or twice a day for at least three days, and cover it with plastic sheeting to retain moisture. Don't let it dry out too fast in hot weather and don't let it freeze in cold weather. Keep foot traffic off patches for at least 24 hours, and avoid heavy furniture or planters for 72 hours. Full strength takes 28 days, but you can use the patio normally after a week.
Sealing: the step most people skip
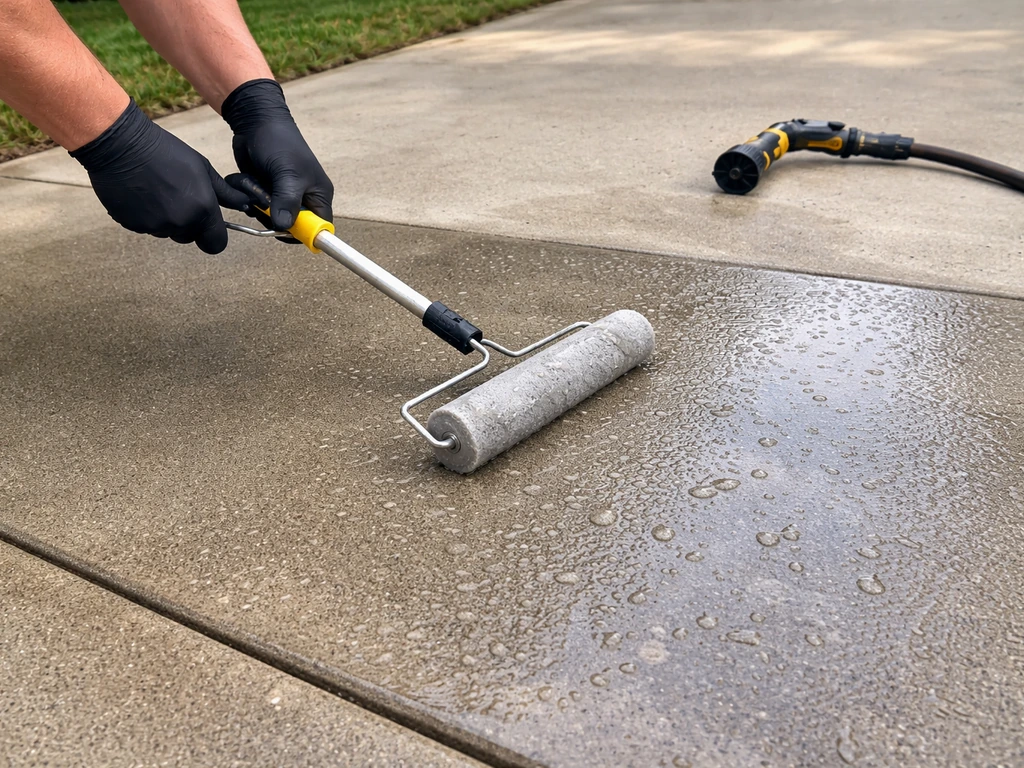
Sealing is the single most effective thing you can do to prevent future spalling, cracking, and staining. A good penetrating concrete sealer (silane-siloxane based) soaks into the concrete and repels water at the surface level, which is what prevents freeze/thaw damage. Film-forming sealers, like acrylic or polyurethane, sit on top and add sheen but need to be reapplied more often. For outdoor patios that see real weather, a penetrating sealer is the better long-term investment. Apply it to a clean, dry surface with a roller or pump sprayer. Two thin coats are better than one thick one.
Reapply sealer every two to three years, or whenever water stops beading on the surface. That bead test is your early warning system: when water soaks in instead of beading up, the sealer has worn off and your concrete is exposed.
Prevention tips that actually work
- Never use rock salt or sodium chloride ice melt on concrete. It destroys the surface. Use sand or a concrete-safe deicer if you need traction in winter.
- Make sure water drains away from the patio, not toward it or toward your house foundation. Poor drainage is the root cause of most settling and freeze/thaw damage.
- Rinse the patio in spring to remove any salt or chemical residue that tracked in over winter.
- Keep heavy potted plants on feet or stands so water doesn't sit trapped underneath, which stains and holds moisture.
- Inspect cracks each spring before they have a chance to grow through another freeze/thaw cycle and fill them while they're still small.
One more honest note: if your patio is very old, has widespread structural cracking, is heaving in multiple places, or has sections that feel soft or hollow over large areas, the right answer might be replacement rather than repair. A concrete patio that's 30 or 40 years old and failing broadly may cost more to repeatedly patch than to pour fresh. That's a judgment call, but don't let sunk-cost thinking keep you applying Band-Aids to a slab that's done. For most patios with specific, localized problems though, everything covered in this guide is well within reach of a motivated DIYer on a weekend.
FAQ
How can I tell if a crack is active or just a cosmetic hairline?
Look for seasonal change and movement, measure the width with a ruler, and do a simple pencil-mark test across the crack. If the line changes width or the edges keep shifting, treat it as active by using flexible products and planning for movement. If it stays the same for months and you see no offsets, it is more likely stable.
Should I clean a patio with bleach or acid before patching or sealing?
Usually no. Bleach and many acids can leave residues that interfere with bonding, especially with primers, bonding adhesives, and epoxy-based repairs. Use a pressure washer and mechanical cleaning (wire brush/grinding) instead, then rinse thoroughly and let the surface dry fully before priming or coating.
Can I use a normal cement patch for spalling or do I need something special?
For spalling, most of the time you need a repair material designed for bonding to prepared concrete, not a generic bag of “set and fill.” If the area will see freeze/thaw or water exposure, choose a patch or resurfacer intended for exterior use and follow the bonding primer requirement so the new surface does not debond.
What does it mean if my patch cracks again along the same line as the original problem?
That typically means the underlying issue was not addressed, such as a through crack with soil movement, slab separation, or a crack that remains active. If the crack goes all the way through or there is vertical displacement, you may need stabilization or a different repair approach rather than just repatching the surface.
How long should I wait before applying a sealer after repairing cracks or doing an overlay?
Do not seal immediately after patching. Let repairs cure long enough to reach near full strength, then ensure the surface is dry and clean. As a practical rule, wait at least several days after patch work, longer if temperatures were cool or humidity was high, and follow the specific product cure time before sealing.
Is it safe to patch concrete if the slab is damp or I see moisture coming up?
Only do surface patching when the slab is dry enough for the product to bond and cure. If moisture is actively coming through, it can prevent adhesion and accelerate failure. In those cases, identify the source (grading, drainage, standing water, or rising damp) before repairing so you do not trap water under the patch.
What should I do about weeds or plants growing from cracks and spalls?
Remove the vegetation and the root material completely, then mechanically clean the crack or damaged area to expose sound concrete. If you just apply patch over organic matter, adhesion drops and you can get hollow spots that later break away. After cleaning, rinse, dry, and proceed with the correct filler or patch.
Can I smooth an uneven patio by grinding instead of overlaying or lifting?
Grinding works best for small high spots or lips, not for a whole-panel sinking section. If one area is significantly lower (often about half an inch or more), grinding will not fix drainage and may still leave trip hazards or a bad slope. For large height differences, consider leveling solutions or professional slab lifting.
What’s the safest way to deal with silica dust when cutting or grinding concrete?
Use a respirator rated for silica dust (not just a basic paper mask), wear eye protection and gloves, and control dust direction by working upwind. Wet the surface before grinding and consider a dust shroud or vacuum attachment if you have one. If dust clouds are visible, stop and improve containment before continuing.
Do I need to seal hairline cracks before resurfacing, or will the overlay cover them?
It depends on the overlay system and crack behavior. If cracks are stable and the overlay is designed to bridge minor imperfections, you can sometimes go straight to an overlay after proper cleaning and priming. If cracks are active, use the flexible crack filler or caulk method first so the top layer does not telegraph movement and fracture.
How do I choose between an overlay, skim coat, and resurfacer for my patio?
Use a thin skim coat for smoothing roughness and tiny surface defects over a sound slab, use a resurfacer when you want a new worn look over pitted or patchy areas, and use a self-leveling product only when you need to correct shallow unevenness with flow. For anything involving movement or sinking, do not rely on a thin topping as the primary fix.
When should I consider replacing rather than repairing a concrete patio?
Replacement is more likely the right call if multiple areas are heaving, several panels feel hollow or loose, cracking is widespread and structural, or large sections are failing in coordination with frost or drainage problems. If you can press on sections and they flex or sound hollow over a broad area, that points beyond cosmetic fixes and may justify professional assessment or replacement.