
To fix erosion under a concrete patio, you need to stop the water source causing it, excavate or access the void, compact a new gravel base, fill any remaining voids with flowable fill or polyurethane foam, and then patch or re-pour the surface. Just patching the top without addressing what's underneath is the single biggest mistake homeowners make, the slab will keep settling, cracking, and sinking until you deal with the eroded base.
How to Fix Erosion Under a Concrete Patio Step by Step

Silas Morrison
11 Jul 2026
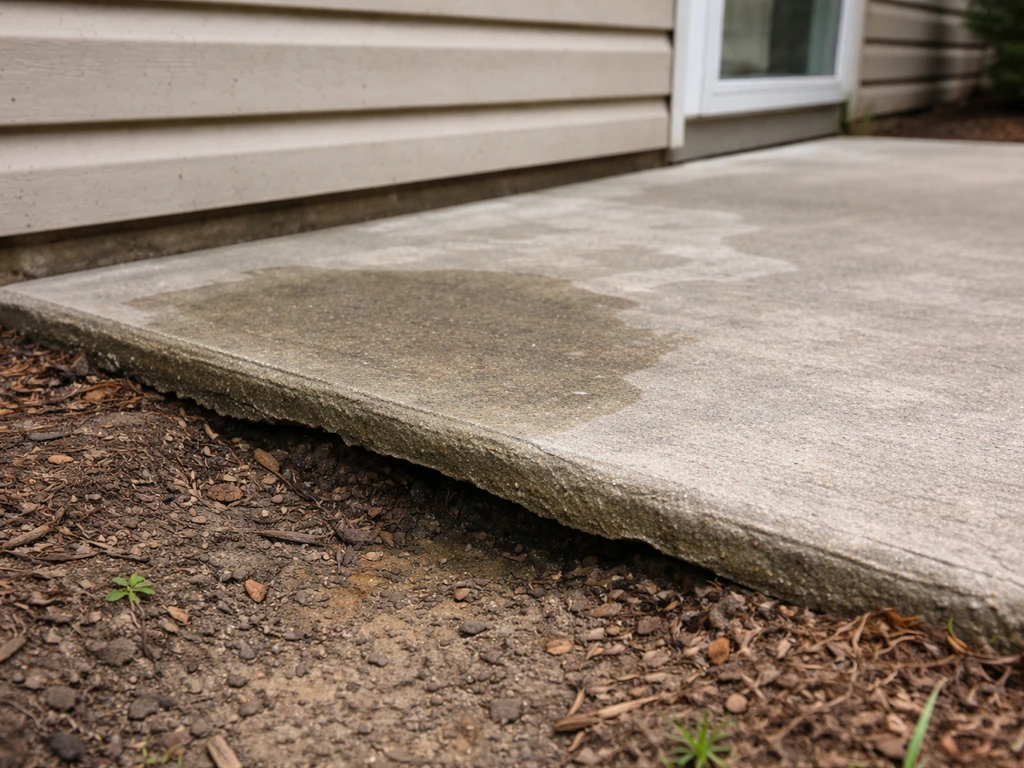
What erosion under a concrete patio looks like and why it happens
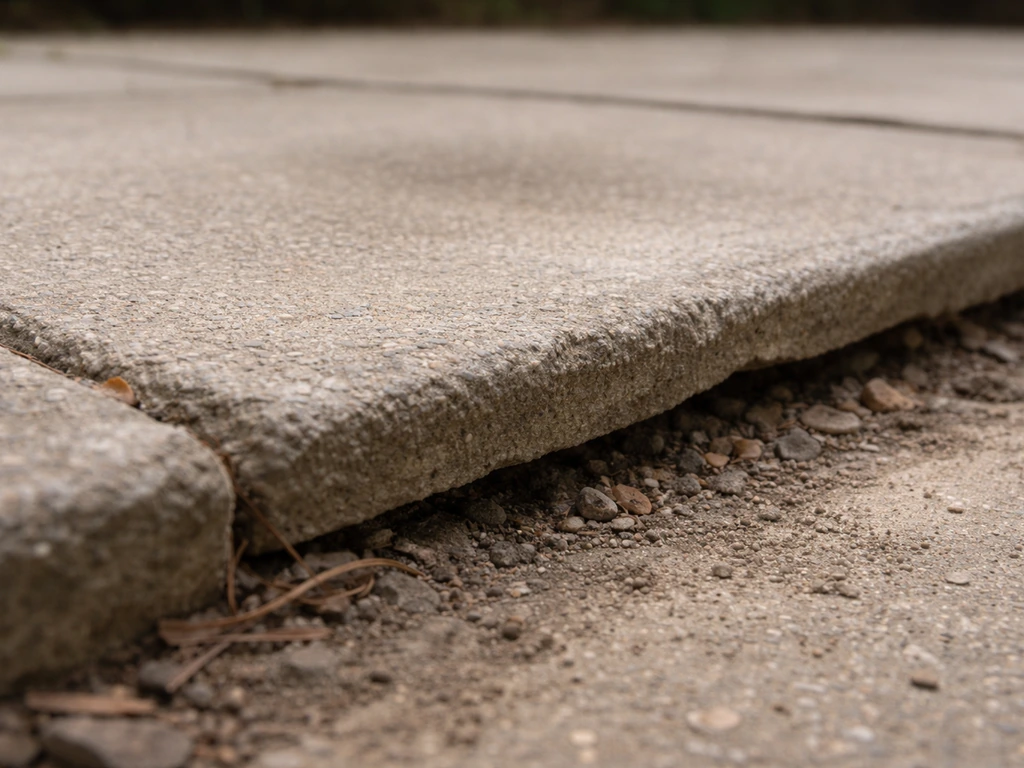
Erosion under a patio doesn't announce itself with a big dramatic crack right away. It usually starts quietly. Water finds a path under the slab, through a gap at the edge, a control joint, a crack, or right through porous soil at the perimeter, and slowly washes out the fine particles in your base material. Over time, that creates an empty space, or void, between the soil and the underside of your concrete. Once that support is gone, the slab either flexes under load or gradually sinks into the void.
The most common visual signs you're dealing with this: a dip or low spot on one section of the patio, a gap opening up between the slab edge and the house foundation, cracks that are wider than a typical hairline shrinkage crack, or a section that feels slightly springy when you walk on it. That last one is a tell. If your patio flexes or bounces under foot traffic, the slab is spanning an unsupported void, and it's only a matter of time before it cracks under load. Stabilization and void filling under an unsupported slab are intended to restore support and reduce further cracking over time stabilization/void filling is intended to restore support and reduce further cracking.
The root causes almost always come back to water. Roof runoff hitting one corner of the patio, a downspout discharging right at the slab edge, poor grading that sends stormwater toward the house instead of away from it, or a drain line that's been slowly leaking underground, these are the usual suspects. In some cases it's seasonal freeze-thaw cycles working on an already-compromised base, but water is almost always involved upstream of that.
Diagnose the cause before you touch the concrete
Don't start digging or mixing anything until you know what's causing the problem. If you fix the damage without fixing the cause, you'll be back in the same spot in a year or two.
Find the water source
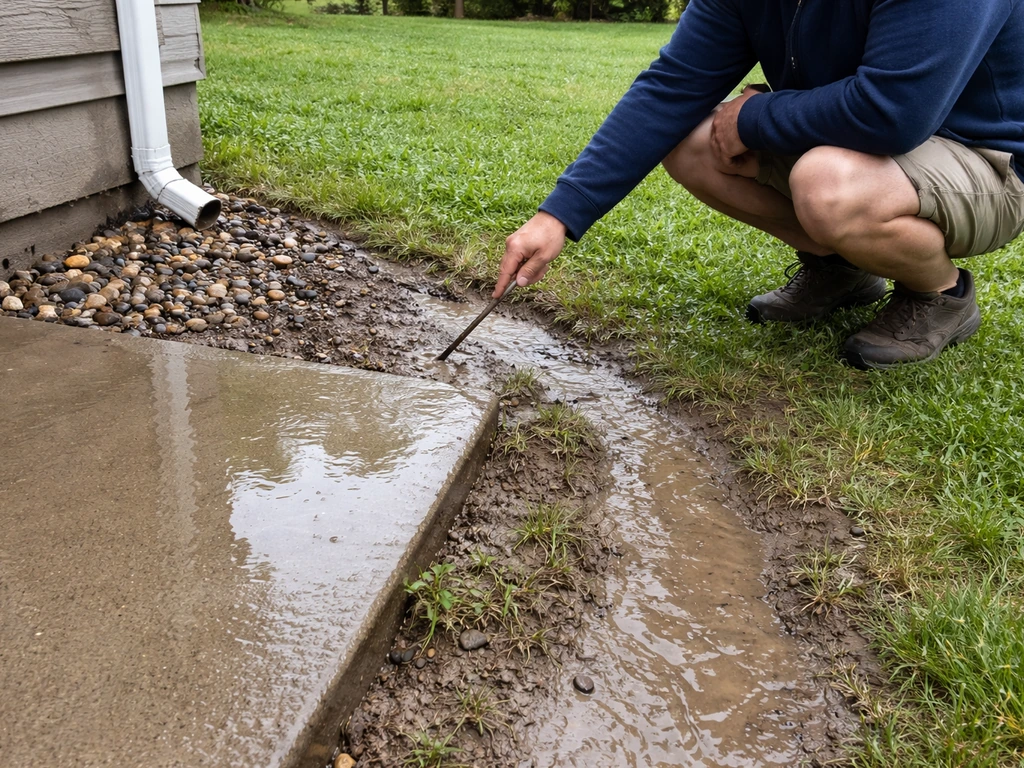
Walk the perimeter of the patio and look at where water flows during a rain event. Is there a downspout that empties right next to the slab? Does the yard slope toward the patio rather than away from it? Check the gap between the house and the slab, if soil has washed away there, that's a highway for water to get underneath. You can also run a garden hose slowly along the edges for several minutes and watch where water disappears into the ground or pools against the slab. That tells you exactly where the entry point is.
Locate the voids
Once you know where water is coming from, map out the damage. Grab a hammer and walk the slab, tapping the surface every foot or so in a grid pattern. A solid, ringing tap means the concrete has good support underneath. A dull, hollow thud tells you there's empty space below, that's your void.
If you want the practical steps to fill the hole under a concrete patio, focus on locating the void, stopping the water source, compacting a new base, and then filling and sealing properly. Mark every hollow spot with chalk or a marker so you have a clear picture of the affected zone. If a large portion of the slab sounds hollow, that's a more serious situation than a small localized patch.
Probe the depth of the void
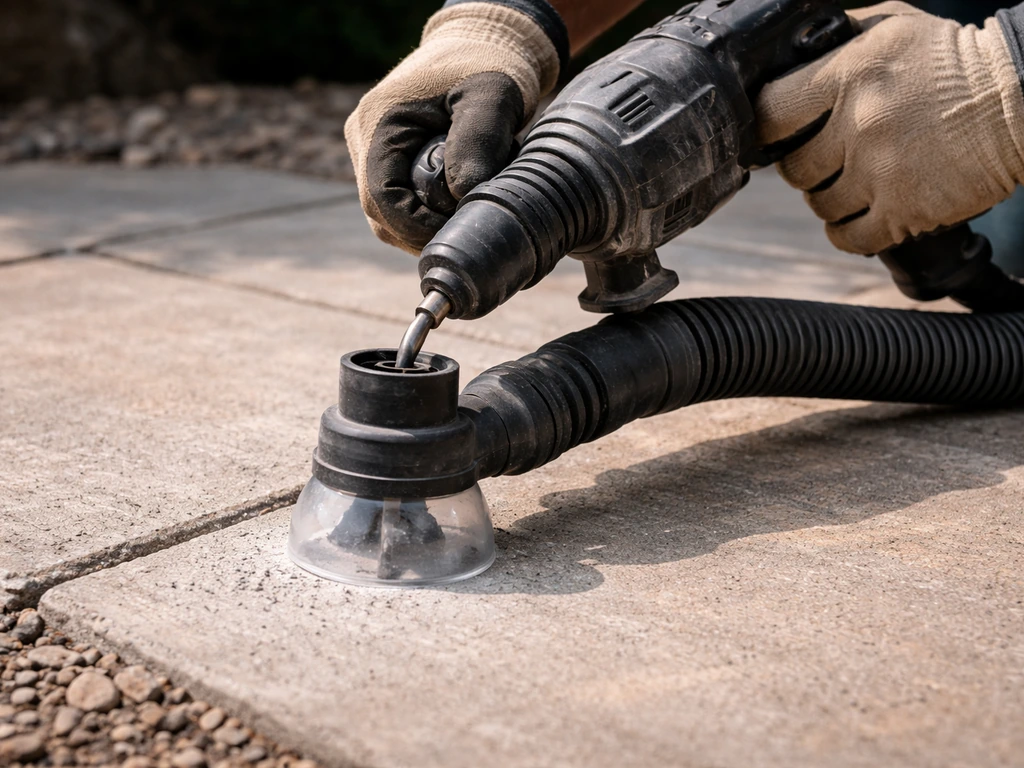
For areas you plan to fill without full excavation, you need to know how deep the void is. Drill a small hole through the slab (a 1/2-inch masonry bit works for this) and insert a thin rod, wire, or piece of rebar into the hole. How far it drops before hitting solid ground tells you the void depth. This matters because a 1-inch void is a quick foam injection job, while a 6-inch void with washed-out base material is a full excavation situation.
Check severity: small voids vs. a slab that's really undermined
Not all erosion problems are created equal. Here's how to categorize what you're dealing with so you pick the right repair path.
| Severity Level | What You See | What It Means | Repair Approach |
|---|---|---|---|
| Minor | Small hollow spot, no surface cracking, slab hasn't moved | Localized void, base mostly intact | Drill and inject polyurethane foam or flowable fill |
| Moderate | Visible dip or low spot, hairline to medium cracks, slight edge gap | Meaningful base washout, partial settlement | Inject voids plus compact and re-pour or re-level affected section |
| Severe | Slab visibly sunken, wide cracks, rocking when walked on, large gap at house | Widespread undermining, base essentially gone | Partial or full demo, rebuild base, re-pour slab section |
A rocking slab is a red flag. When a section moves or shifts under foot traffic, it means the slab is spanning a void and flexing with every step. That flexing causes cracking, and a cracked slab lets in more water, which causes more erosion. You can't foam-inject your way out of a severely undermined slab, it needs to come up and get rebuilt from the base.
If you're also dealing with low spots that collect water on the surface, that's a related but separate problem worth addressing at the same time. Fixing the base while the slab is already open or lifted gives you a good opportunity to correct surface drainage too.
Tools and materials you'll need
What you need depends on the repair path you've chosen, but here's a complete list covering all three severity levels. Buy or rent based on what your assessment showed.
For void injection (minor to moderate)
- Rotary hammer drill with 1/2-inch masonry bit
- Two-part polyurethane foam injection kit (DIY versions available at most home improvement stores) or bags of flowable non-shrink grout
- Caulking gun if using cartridge-style foam
- Thin wire or rod to probe void depth before injecting
- Hydraulic cement or concrete patching compound to plug injection holes afterward
- Safety glasses and gloves (polyurethane foam is sticky and stains skin)
For base replacement and re-pour (moderate to severe)
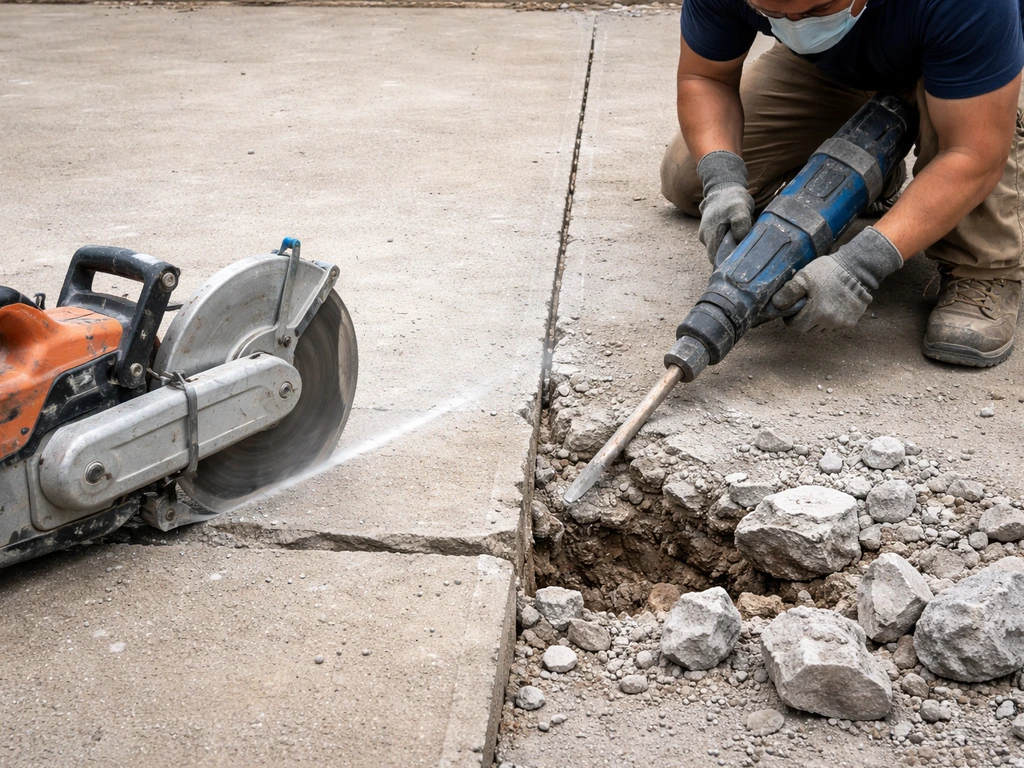
- Circular saw with a diamond or abrasive concrete blade for cutting control joints and breaking slab sections
- Rotary hammer or electric demolition hammer for breaking out slab sections
- Pry bar and heavy-duty work gloves
- Plate compactor (rent from any equipment rental store) or hand tamper for smaller areas
- Compactable gravel base: 3/4-inch crushed stone or road base (compacted to 4 inches minimum, 6 inches in poor-draining or clay soils)
- Geotextile landscape fabric to separate soil from base and prevent future migration
- Rebar or wire mesh for reinforcing re-poured sections
- Concrete mix: 4,000 PSI minimum for patios, or ready-mix truck for larger areas
- Concrete float, edger, and finishing tools
- Polyurethane caulk or self-leveling joint sealant for expansion and control joints
Step-by-step repair process
Step 1: Stop the water first
I can't stress this enough, do not start the structural repair until you've addressed the water source. Redirect any downspouts so they discharge at least 6 feet away from the patio. If you need to bury a drain line, slope it at least 1/2 inch per foot for 10 feet away from the house. If the yard grades toward the patio, you'll need to add soil and regrade before you button everything up. This step is what separates a permanent fix from a repeat job.
Step 2 (minor voids): Drill and inject
For small, localized voids with no significant slab movement, polyurethane foam injection is the fastest and cleanest repair. Drill 1/2-inch holes through the slab into the void space, spacing them about 12 to 18 inches apart across the hollow area. Insert the foam injection nozzle and fill slowly, working from the furthest point of the void back toward your starting point. The foam expands to fill the void and then hardens to a rigid support. Leave one hole open as a vent so expanding foam has somewhere to go. Once the foam has cured (usually 15 to 30 minutes), plug all holes with hydraulic cement or a quick-setting patching compound and finish flush with the surface.
Step 3 (moderate to severe): Excavate the damaged section
For sections that have noticeably settled or where the base is largely gone, you need to open the slab. Use a concrete saw to score your cut lines along existing control joints wherever possible, this keeps the surrounding slab intact and gives you a clean edge to work from. Break out the compromised section with a demolition hammer. Work carefully near adjacent slab sections you want to keep; demolition hammers transfer vibration, and you don't want to crack something you're not planning to fix.
Step 4: Remove washed-out base material and regrade subgrade
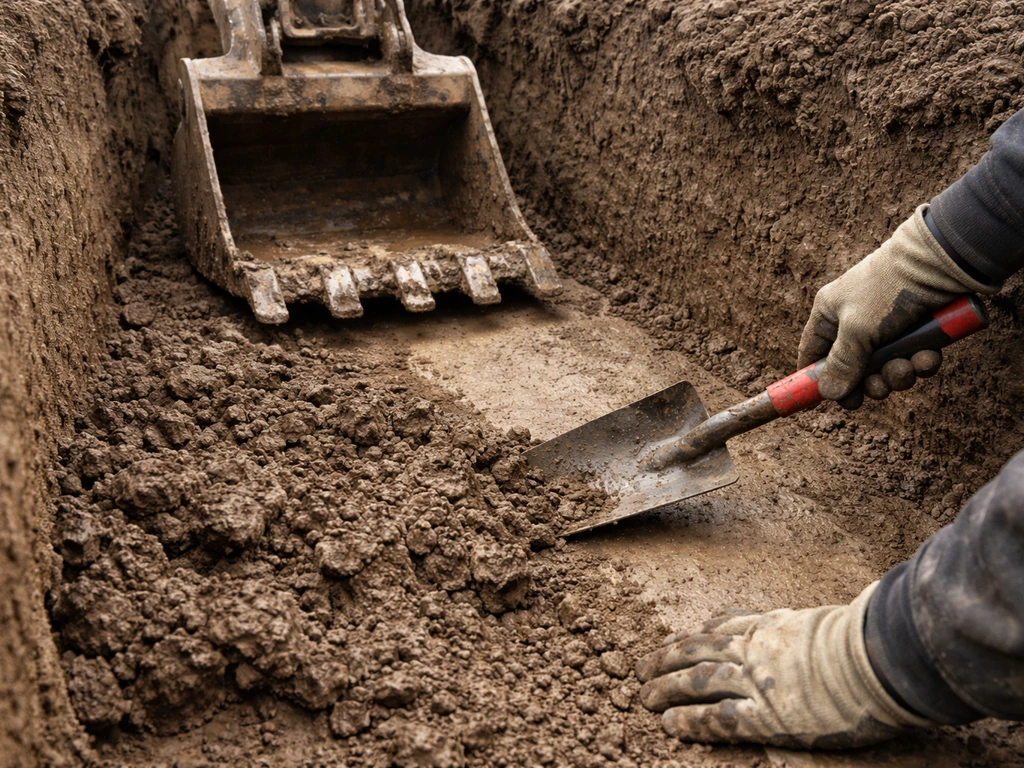
Once the concrete is out, dig down and remove all the washed-out, saturated, or muddy base material. Your subgrade (the native soil beneath the base) should be firm and dry. If it's soft or saturated, let it dry out, or bring in a few inches of fill and compact it. This is a good time to lay geotextile fabric over the native soil before adding new base material, the fabric acts as a separation layer that prevents fine soil particles from migrating up into the gravel over time, which is exactly what causes future erosion.
Step 5: Compact a new base
Add compactable gravel (3/4-inch crushed stone or road base) in 2-inch lifts, compacting each layer before adding the next. You want a finished base depth of at least 4 inches; go 6 inches if you're working over clay or soil that drains poorly. Compact until the surface doesn't deflect under foot traffic and the plate compactor is no longer sinking in. Skipping proper compaction is why voids form in the first place, don't rush this step.
Step 6: Re-pour and finish the concrete
Place rebar or wire mesh before pouring to reinforce the new section and help it tie in with the existing slab. Use a minimum 4,000 PSI concrete mix. Pour, screed, float, and finish to match the surrounding surface as closely as you can. Make sure the surface pitches slightly away from the house, the standard recommendation is at least 1/8 inch per foot, though I prefer closer to 1/4 inch on patios near the foundation. That slope is one of your best defenses against future water intrusion.
Prevent it from coming back
The repair is only half the job. Here's what you need to address to make sure you're not doing this again in a few years.
Get the grading right
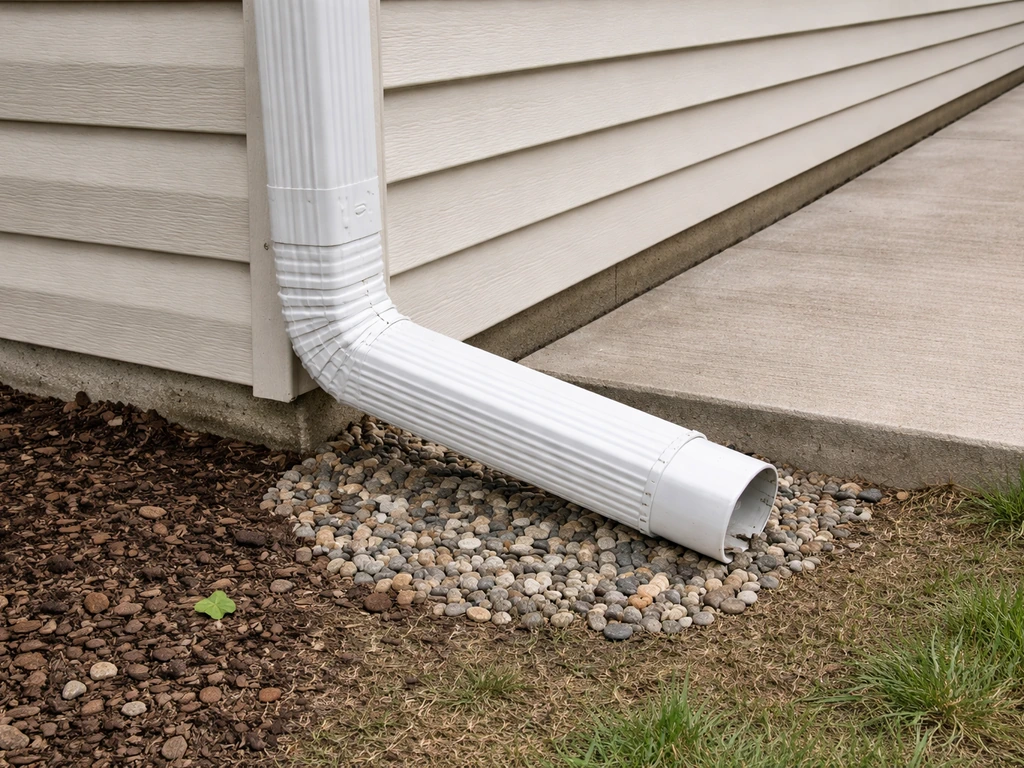
The ground surrounding your patio should slope away from the house at a minimum of 1/2 inch per foot for the first 10 feet. If it doesn't, add soil and regrade. It sounds like a lot of dirt, but it's one of the most cost-effective things you can do for the long-term health of your foundation and patio. While you're at it, check the patio surface slope. If water is ponding anywhere near the house, it's either finding its way under the slab or saturating the soil against the foundation, both of which lead back to the erosion problem you just fixed.
Fix your downspouts and roof runoff
A single downspout can dump hundreds of gallons of water in a moderate rainstorm. If that's discharging right at the corner of your patio, it's a constant erosion engine. Extend downspouts so they discharge well away from the slab, or bury a drain pipe sloped at 1/2 inch per foot leading water at least 10 feet from the house. If you're adding buried drain lines, use solid pipe in the buried section (not perforated, you don't want to release water near the foundation) and make sure the outlet daylights somewhere it can flow freely.
Seal the joints and edges
Open control joints and the gap between the slab and house are entry points for water. Fill them with a self-leveling polyurethane joint sealant, not standard caulk. Polyurethane stays flexible through temperature swings, which matters a lot for outdoor concrete that expands and contracts seasonally. Reseal every two to three years as part of regular patio maintenance. Also seal the surface of the slab with a quality penetrating concrete sealer, it won't waterproof the slab completely, but it significantly reduces how much water soaks in and finds its way to the base through micro-cracks.
Add drainage if the problem is structural
If your yard is genuinely flat or the patio sits in a natural low area, surface regrading alone won't be enough. You may need to add a trench drain or channel drain at the low end of the patio, a French drain running alongside the slab, or both. Addressing drainage at the system level is the permanent fix for properties where water has nowhere to go. This connects closely to broader patio drainage planning, getting water off the surface quickly is just as important as getting it away from the base.
Curing, finishing, and when to call a pro
Curing your repair
Concrete needs moisture to cure properly, don't let a fresh pour dry out too fast. Cover repaired sections with plastic sheeting or damp burlap for at least 3 to 7 days, especially in hot or windy weather. Keep foot traffic off the new concrete for at least 48 hours, and don't put furniture or heavy loads on it for 28 days if you can help it. That's when concrete reaches its full design strength. Rushing this step leads to surface scaling and weakened concrete that erodes faster the next time water hits it.
Sealing after the repair
Once the concrete has cured for at least 28 days, apply a penetrating silane-siloxane sealer to the entire patio surface, including the new section. Then seal all control joints and the house-to-slab gap with polyurethane joint sealant. This combination keeps surface water from working its way into the base through the concrete itself or through open joints.
When to stop and call a professional
DIY is the right call for most erosion repairs under a residential patio, but there are situations where you should bring in a concrete contractor or structural engineer. Call a pro if the slab is sinking against the foundation wall and you're worried about foundation movement, if more than about one-third of the patio surface sounds hollow, if you see cracking or movement in the foundation itself, or if the slab has dropped more than an inch or two unevenly. A contractor with slabjacking or polyurethane lifting equipment can also re-level a settled but structurally sound slab without full demo, that's worth getting a quote on before you commit to breaking everything out yourself. The injection process fills voids under the slab with pressurized slurry or expanding foam and can restore both elevation and support in a few hours, with no re-pour required.
For everything else, a hollow section here, a low spot there, base material that's washed out along one edge, this is absolutely a project a handy homeowner can handle over a weekend with rented equipment and the right materials. Fix the water, fix the base, and seal it up properly, and you won't be dealing with this again anytime soon.
FAQ
How can I tell if the erosion is just under one corner versus a larger area under the whole patio?
Do a full perimeter-to-center tap test in a grid pattern, then outline every “hollow thud” zone with chalk. If hollowing covers more than a third of the patio, plan on a contractor assessment, since widespread undermining often needs partial slab lifting or replacement rather than localized foam injection.
Can I foam-inject if the patio has a rocking or bouncing feel when I walk on it?
Usually no. Rocking indicates the slab is repeatedly flexing over a void, which commonly means the washed-out base is extensive. In that situation, the stable fix is to open up the slab section, rebuild the base, then re-pour or patch the slab level.
What if the void depth varies, for example deeper in one area and shallow in another?
Map void depth by drilling and checking with a thin rod at multiple points, not just one measurement. Different depths may require different approaches, shallow voids sometimes suit foam injection, while deeper or soil-turned-muddy areas typically mean full excavation and base rebuild.
Is drilling holes for foam injection safe for existing rebar or wire mesh?
It can be, but you should avoid repeated drilling at the same spots and plan your hole layout across the hollow area rather than randomly. If you suspect rebar or mesh is present, use careful spacing (about 12 to 18 inches) and drill straight down, a contractor can confirm reinforcement layout if the patio is older.
How do I confirm my “water entry point” before doing repairs?
After the rain (or during a controlled hose test), watch where water disappears or pools, then compare it to the hollow map from the tapping survey. If water keeps finding the same edge or control joint gap, treat that entry point first, otherwise repairs will reopen once runoff resumes.
Should I remove all the washed-out base material, or can I patch over remaining weak material?
For undermined sections, remove all saturated, muddy, or loose material down to firm, dry subgrade before adding new base. Leaving soft material under new gravel is a common cause of repeat settlement, compaction can only “stabilize” firm soil.
What is the best way to avoid contamination between native soil and the new gravel base?
Install geotextile as a separation layer over firm subgrade before placing gravel, especially when your surrounding soil is clayey or prone to pumping fines. This reduces upward migration of fine particles that gradually turns a stable base back into a water-driven channel.
How much slope should I aim for on the patio surface after re-pouring?
Aim for at least a slight pitch away from the house, a practical target is around 1/8 inch per foot for many patios, and closer to 1/4 inch per foot for areas very near foundations. Use a level and straightedge across the repair zone before final finishing so the slope matches the rest of the patio.
Do I need to extend drainage away from the patio even if the downspout is already diverted?
Yes, verify discharge distance and direction. A downspout can still be problematic if water lands within a few feet of the slab edge, use a long extension or properly sloped buried line so runoff exits well away from the patio perimeter.
How often should I reseal joints and the slab surface to prevent water intrusion?
Plan for joint resealing every two to three years for outdoor concrete. Separately, apply a penetrating silane-siloxane style sealer to the surface after the concrete has cured and reapply as the surface starts to wet differently, typically when water no longer beads or darkens uniformly.
What’s the correct way to protect the new concrete while it cures?
Keep the fresh repair covered and protected from drying wind or sun, and avoid early loading. Typical guidance is light traffic after about 48 hours, and avoid heavy furniture or loads for around 28 days when possible, since premature use can contribute to scaling and faster erosion.
When should I stop DIY and call a professional?
Call a pro if the patio is sinking unevenly (especially more than an inch or two), if you notice foundation cracking or movement, if hollow tapping affects a large portion of the slab (roughly more than one third), or if the slab is undermined right at the house foundation gap. Equipment-based slab lifting or injection can sometimes reduce demo compared with full removal.