The right fix for an uneven concrete patio depends on what caused the unevenness in the first place. If the slab has settled more than half an inch due to a failing base, you need mudjacking or a structural fix, not a resurfacer. If the surface is just worn, scaled, or has shallow low spots, a self-leveling overlay or grinder will handle it. And if freeze-thaw heave or poor drainage is the culprit, no repair will last until you deal with the source. Figure out the cause first, then pick the method, and you'll actually solve the problem instead of just buying yourself a year or two before it looks bad again.
How to Fix Uneven Concrete Patio Step by Step

Silas Morrison
7 Jun 2026
Diagnose why your patio is uneven before you buy anything
I've seen homeowners spend money on self-leveling compound only to watch it crack because the slab underneath was still moving. Diagnosis is the most important step, and it takes maybe 20 minutes. Get down and look at what you're actually dealing with.
Signs of base settlement or subgrade failure
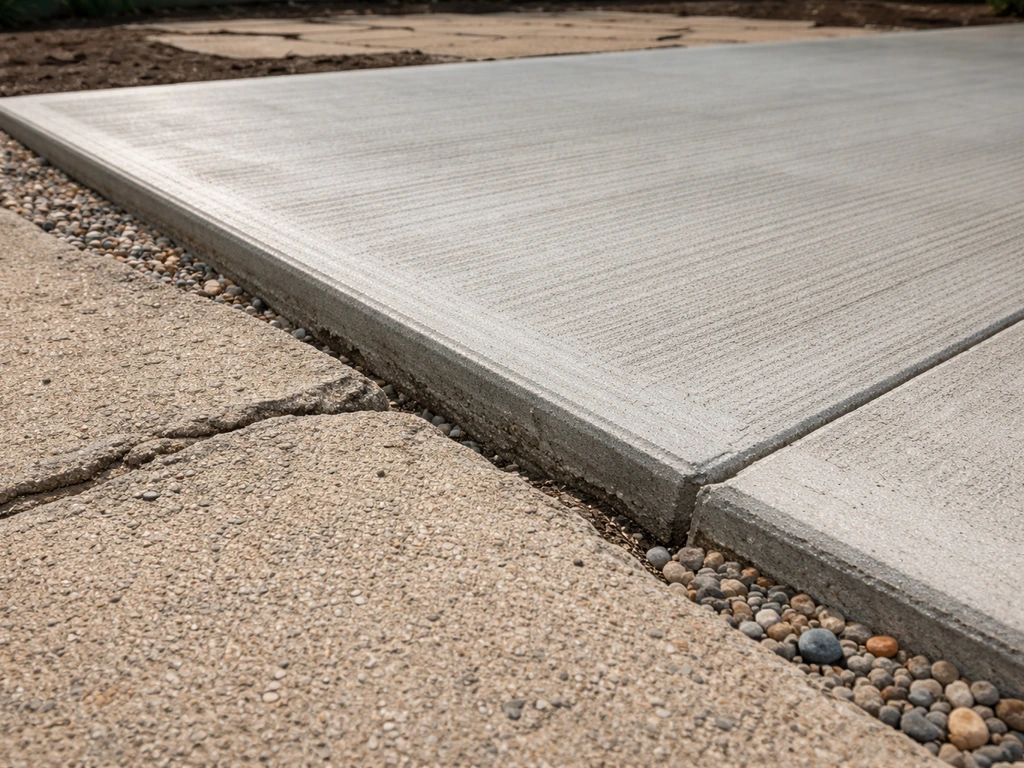
If one panel or section of your patio is noticeably lower than adjacent sections, and you can see or feel a step across a joint or crack, that's differential settlement. This means the soil or base material underneath has compressed, washed out, or eroded. Knock on the slab in that area. A hollow sound means there's a void underneath. Settlement is especially common near downspouts, garden beds, or areas that were filled and compacted quickly during original construction. Related problems like erosion under the slab are worth understanding before you proceed with any repair.
Signs of freeze-thaw heave
In cold climates, water gets under the slab, freezes, and pushes sections up. The telltale sign is a section that is higher than its neighbors, often along the edges or near areas where water pools and soaks in. Heaved slabs often look tilted rather than sunken. If the high spot returns to roughly the right height after a warm spring, you're dealing with heave. The fix here isn't just leveling, it's also fixing drainage so water stops getting under the slab in the first place.
Surface wear, scaling, and shallow low spots
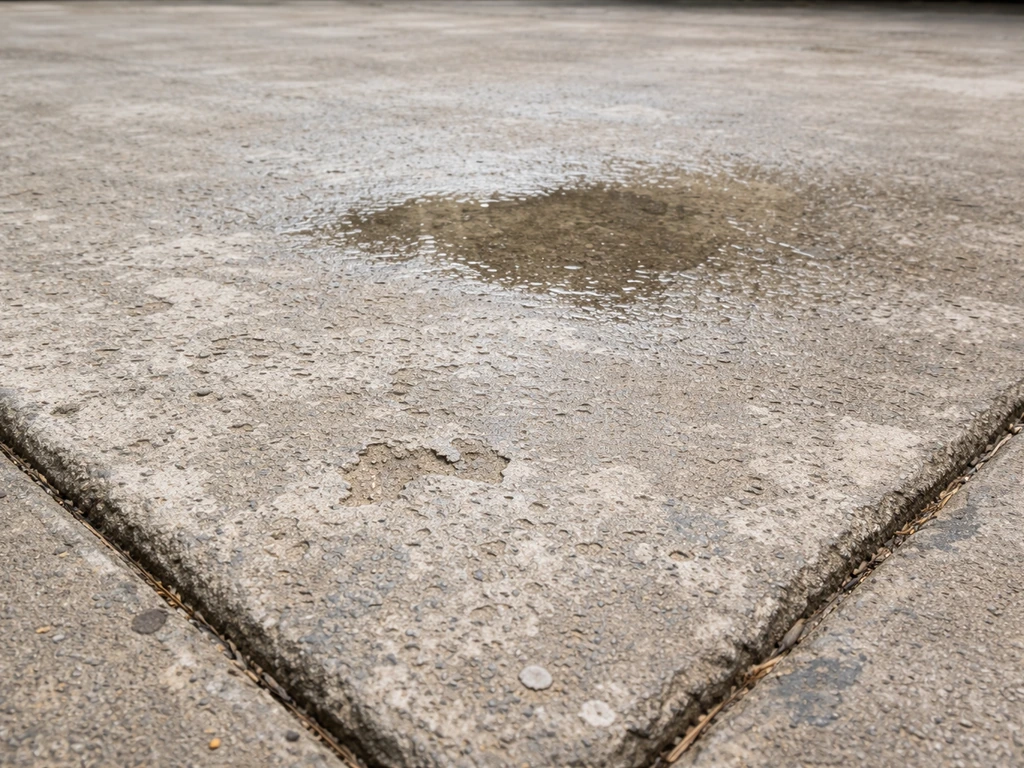
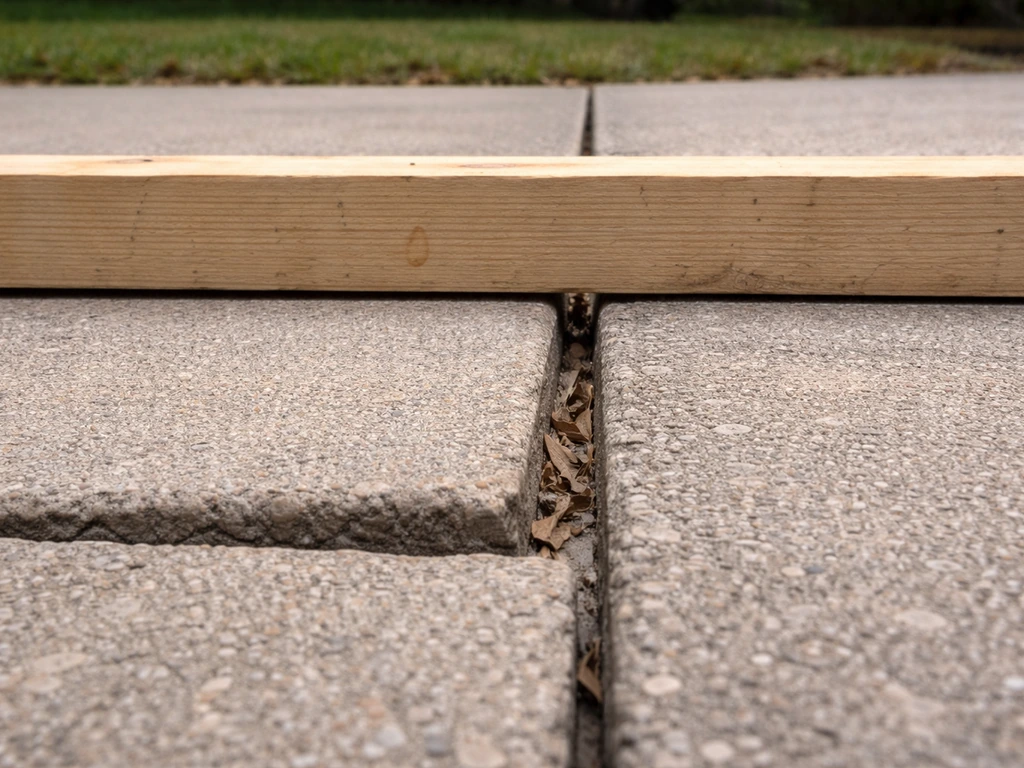
If the slab as a whole is solid and doesn't move when you walk on it, but the surface is pitted, scaled, or has areas that dip a quarter inch or less, you're dealing with surface degradation. This is the best-case scenario because it's the easiest to fix. Deicers, age, and freeze-thaw cycling of the top layer cause scaling. You can feel low spots by dragging a straight board or level across the surface. Mark any low areas with chalk before you start repair work.
Drainage and water ponding as a cause
Sometimes the patio was poured without enough slope, or settling has reduced what slope there was. The standard minimum slope for a concrete patio is about 1/8 inch per foot away from the house. If water is sitting on your patio after rain, that's both a symptom and a cause of future problems.
If you want to address water ponding specifically, focus first on correcting drainage and improving patio slope so water does not sit on the slab after storms water is sitting on your patio after rain. Standing water accelerates freeze-thaw damage and keeps working at the base. If water ponding is your main complaint, that's a specific problem with its own set of solutions worth looking into separately.
How to tell if the movement is active or done
This matters a lot. Active movement means the slab is still shifting, and any repair you put on top will crack as it moves. A quick test: mark a crack with a pencil line on both sides, or tape a piece of masking tape across it. Check back in two to four weeks. If the tape has torn or the lines have shifted, the slab is still moving. Do not apply overlays or patching compounds to a slab with active movement. Address the cause first. If there's vertical displacement across a crack (one side is higher than the other), that's a red flag that needs evaluation before any DIY repair.
Safety first, and the tools you'll actually need
Concrete work involves real hazards that a lot of DIYers skip over. Grinding concrete produces respirable crystalline silica dust, which causes serious lung disease with repeated exposure. NIOSH and OSHA are serious about this, and you should be too. Any time you're grinding, cutting, or removing concrete, wear a properly fitted N95 respirator at minimum. For extended grinding work, consider a P100 half-face respirator. Work outdoors, wet the surface when possible to knock down dust, and don't let the dust drift toward anyone else. Concrete mix and resurfacers are also caustic and will burn skin on prolonged contact, so wear chemical-resistant gloves throughout.
Safety checklist
- N95 or P100 respirator (mandatory for any grinding, cutting, or demolition)
- Safety glasses or goggles
- Chemical-resistant gloves (nitrile or rubber) for handling wet concrete and resurfacers
- Knee pads for surface prep and application work
- Hearing protection if using angle grinders or rotary equipment
Tools and materials by repair type
| Repair Type | Key Tools | Key Materials |
|---|---|---|
| Grinding high spots | Angle grinder with diamond cup wheel, vacuum with HEPA filter, straightedge/level | Water for dust suppression, PPE |
| Patching low spots | Wire brush, cold chisel, hammer, margin trowel, 4-foot level | Concrete bonding adhesive, polymer-modified patching compound |
| Self-leveling overlay | Mixing drill and paddle, gauge rake or spreader, primer applicator, straightedge | Concrete bonding primer, self-leveling resurfacer (Sakrete, Quikrete, or Sika systems) |
| Mudjacking / foam lifting | Drill for access holes (contractor handles rest) | Contractor-supplied grout or polyurethane foam |
| Crack repair before overlay | Wire brush, shop vac, caulk gun | Epoxy injection kit or polyurethane crack filler |
Quick fixes vs. full repairs: when to patch, grind, or resurface
Not every uneven patio needs a major overhaul. Here's an honest breakdown of which approach fits which situation, so you don't overbuy or undershoot.
| Situation | Best Approach | DIY Difficulty |
|---|---|---|
| High spot under 1/4 inch, no cracking | Grind down the high spot | Easy |
| Low spot under 1/2 inch, slab is solid | Patching compound or self-leveling resurfacer | Easy to moderate |
| General surface scaling or pitting, slab is structurally sound | Thin self-leveling overlay (1/4 to 1 inch) | Moderate |
| Slab settled more than 1/2 inch, hollow sound underneath | Mudjacking or polyurethane foam lifting | Hire a contractor |
| Heaved slab from freeze-thaw, slab is intact | Fix drainage, then grind or overlay after movement stops | Moderate |
| Active cracks with vertical displacement | Structural evaluation before any repair | Call a pro |
A general rule: if the slab is sound (doesn't flex, sounds solid when tapped, shows no active movement), you can DIY it. If you're dealing with settlement, voids, or anything structural, get a contractor involved before you throw money at surface repairs.
Step-by-step repair options for uneven concrete
Option 1: Grind down a high spot
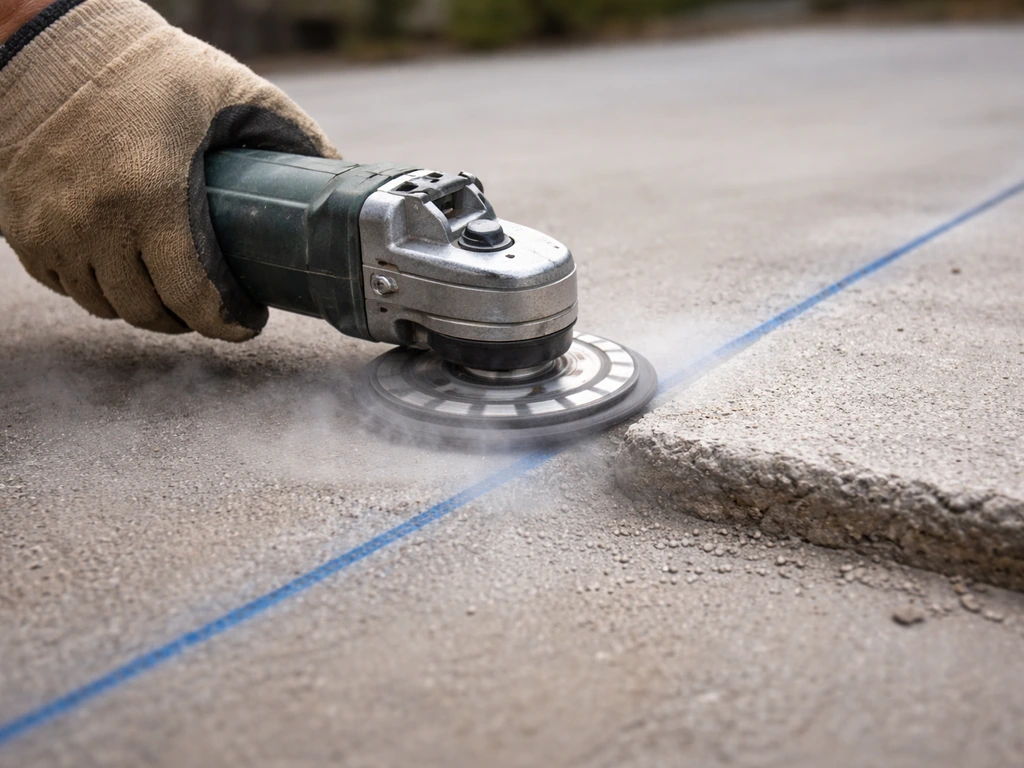
This is the right move when one area of the slab is slightly higher than another, creating a trip hazard or an edge that catches water. It's also a good finishing step after mudjacking when the lifted slab comes up slightly too high.
- Mark the high spot with chalk. Use a 4-foot level or straightedge laid across the slab to identify exactly where the transition happens.
- Put on your respirator, eye protection, and gloves before you pick up the grinder. This is non-negotiable.
- Wet the surface with a spray bottle or hose to reduce airborne dust. Keep a helper with a hose or use a vacuum shroud attachment on the grinder.
- Use a 4 or 5 inch angle grinder with a diamond cup wheel. Work in slow, overlapping passes across the high area. Keep the grinder moving, don't dwell in one spot.
- Check your progress frequently with the level. You're aiming to feather the transition, not create a flat divot.
- Once the spot is level, rinse off the concrete dust completely. Let it dry, then apply a concrete sealer to the ground area to protect the freshly exposed aggregate from water and freeze-thaw damage.
Grinding takes more time than it looks. A minor high spot the size of a dinner plate might take 30 to 45 minutes to feather properly. Don't rush it.
Option 2: Patch low spots with a mortar or polymer compound
Good for localized low areas under half an inch deep where the surrounding slab is in good shape. If the low spot is small and localized, patching is usually the simplest way to fix it localized low areas. Polymer-modified patching mortars bond well to existing concrete and handle exterior freeze-thaw exposure better than basic cement mixes.
- Clean the low area thoroughly. Remove any loose concrete, dirt, oil, or paint with a wire brush and shop vac. If there's a crack feeding into the low spot, clean and fill it with an epoxy or polyurethane filler first, and let it cure fully before patching over it.
- Check substrate suction by dripping a few drops of water onto the cleaned surface. If it absorbs within a few seconds, you have a high-suction surface. If it beads, the surface is dense. This affects how you apply bonding adhesive: a high-suction surface may need a second coat.
- Apply a concrete bonding adhesive to the repair area with a brush. Let it get tacky (usually 20 to 30 minutes depending on conditions) but do not let it dry completely before placing material.
- Mix your patching compound to a stiff, workable consistency. Follow the manufacturer's water ratios exactly, too much water weakens the patch significantly.
- Trowel the compound into the low area, slightly overfilling it. Feather the edges into the surrounding slab using a margin trowel or flexible taping knife.
- Strike off excess with a straightedge to get a flush surface. Smooth with a float.
- Cover the repair with plastic sheeting or a damp burlap for at least 24 hours to keep it from drying too fast, especially in warm or windy conditions. Rapid drying causes shrinkage cracks.
- After 24 to 48 hours, check the patch. If the edges have lifted slightly or there are shrinkage cracks, you may need a second thin skim coat.
Option 3: Apply a self-leveling concrete overlay
This is the go-to approach when the whole patio surface is uneven, worn, or has multiple shallow low spots spread across a large area. Self-leveling resurfacers from brands like Sakrete, Quikrete, and Sika are designed to flow out and find their own level with minimal screeding.
For chemical-handling warnings and PPE details for Quikrete floor resurfacer products, check the product SDS for that specific mix self-leveling resurfacers from brands like Sakrete, Quikrete, and Sika are designed to flow out and find their own level. Sakrete’s self-leveling underlayment requires the system to be installed only when product, air, and surface temperatures are above 50°F, and it specifies primer-based preparation and set-time expectations [Self-leveling resurfacers from brands like Sakrete, Quikrete, and Sika](https://www.
sakrete. com/wp-content/uploads/2021/07/Self-Leveling-Underlayment. pdf). They can be applied from feather-edge thickness up to about 1 inch per lift depending on the product.
They're not magic, though. The substrate has to be sound, clean, and properly primed, or they'll peel.
- Temperature check first. Product, air, and surface temperature all need to be above 50°F. Don't apply when temps will drop below 50°F within 24 hours. Hot, sunny days above 90°F also cause problems with rapid setting.
- Prep the slab aggressively. Remove all loose concrete, paint, sealers, oil, and laitance. Any coating that reduces adhesion will cause the overlay to delaminate. Grind or shot-blast if needed. Rinse and let dry completely.
- Fill cracks before overlaying. Any crack wider than a hairline should be filled with an epoxy injection or flexible polyurethane filler. Cracks that are not stabilized will reflect through the overlay over time.
- Apply a bonding primer designed for self-leveling systems. Quikrete recommends using a diluted concrete bonding adhesive; Sika and Sakrete have their own primer products. Apply per product instructions and let it reach the correct tack before pouring the overlay.
- Mix the self-leveling material with the exact amount of water specified on the bag. Use a heavy-duty drill with a mixing paddle, not a hand stir. Under-mixing or over-watering both ruin the flow and final strength. Sakrete's fast-setting self-leveling resurfacer achieves a flow range of 120 to 140 mm when mixed correctly.
- Pour the mix immediately and spread with a gauge rake set to your target thickness. The product levels itself within a few minutes. Work in sections small enough that you can pour the next batch before the edge sets up.
- Avoid walking on the surface until it reaches final set. Final set on fast-setting products like Sakrete's self-leveling resurfacer is typically 75 to 90 minutes under controlled conditions. In cool or humid weather, allow more time.
- Keep foot traffic off for at least 24 hours. Avoid heavy furniture or loads for 72 hours to allow full strength development.
One thing I've learned the hard way: pour a test batch first and check the flow before committing to a full mix. If it's stiff and not flowing properly, your water ratio or mixing time is off. Better to find out with a small batch than discover it mid-pour.
Option 4: Mudjacking or polyurethane foam lifting for settled slabs
When a slab section has sunk more than half an inch and there's a void underneath, you need to raise the slab itself, not build up the surface. Mudjacking (also called slabjacking) pumps a cement-soil slurry under the slab through drilled holes to fill voids and lift the panel back to grade. Polyurethane foam lifting is a newer alternative that uses expanding foam injected through smaller holes. Both are contractor jobs for most homeowners, both because of equipment requirements and because drilling in the wrong place or injecting too much pressure can crack the slab.
Before any mudjacking, the cause of settlement needs to be identified and fixed. If an underground drain is leaking, a tree root is shifting the soil, or erosion is actively removing base material, lifting the slab without addressing that will just result in it settling again. A good contractor will want to understand why it sank before agreeing to lift it. After lifting, a gap in grade of half an inch or less across a joint can often be addressed by grinding the high edge flush.
Polyurethane foam is faster and leaves smaller holes, but it costs more per square foot than traditional mudjacking. For most residential patios, either method works well when the base failure isn't ongoing.
How to stop it from becoming uneven again
Fixing the surface without fixing the conditions that caused the problem is just delaying the next repair. These are the main things that cause patios to go uneven, and what you can do about each. If you want to prevent ponding, focus on drainage so water can drain away from your concrete patio instead of collecting on the surface drain concrete patio.
Fix your drainage
Water is the number one enemy of a concrete patio base. Downspouts that drain next to the patio, garden beds that slope toward the house, or a patio that sits in a low spot in the yard all funnel water under the slab. Extend downspouts at least 6 feet away from the patio edge. Grade any adjacent soil so it slopes away at 1 inch of drop per foot. If you have chronic water ponding on the patio itself, adding a slot drain or adjusting the surface slope can prevent the cycle of base erosion that leads to settlement.
Take care of expansion joints
Expansion joints are the soft gaps between slab sections and between the slab and the house foundation. When they fill with dirt and debris, the concrete has nowhere to move seasonally and starts to heave or crack. Inspect your joints every year. Clean out any debris and refill with a self-leveling polyurethane sealant rated for horizontal joints. This is a 30-minute maintenance job that prevents a lot of grief.
Keep the base from washing away
If your patio was originally poured on a well-compacted gravel base, it's far less likely to settle than one poured on sandy or disturbed soil. You can't always fix what's already there, but for any future repairs that involve disturbing the base, use a properly compacted gravel sub-base (typically 4 inches of compacted clean crushed stone) before pouring any new concrete. If you've dealt with erosion-related voids, getting a layer of coarse gravel under the slab is important before lifting or patching. Understanding how erosion under the slab works will help you assess whether this is an ongoing issue at your property.
Seal the surface
A good concrete sealer reduces how much water penetrates the slab surface. Less water in the slab means less freeze-thaw damage, less scaling, and slower base erosion through slab pores. Apply a penetrating silane-siloxane sealer every two to three years on an exterior patio. Film-forming sealers look great but need reapplication more often. Either way, sealing after any repair work is not optional if you want the repair to last.
Avoid deicers
Rock salt and calcium chloride accelerate the freeze-thaw scaling cycle on concrete surfaces dramatically. They pull moisture in, and the repeated freezing of that moisture destroys the top layer. If you live somewhere with icy winters, switch to sand for traction, or use magnesium chloride sparingly if you need a chemical option. It's gentler on concrete than sodium or calcium chloride, though no deicer is completely harmless over time.
Uneven concrete is fixable at almost every level of severity. The key is matching the right repair to the actual problem instead of just throwing the most convenient product at it. Take the 20 minutes to diagnose what you're dealing with, check for active movement, and prep the surface properly, and you'll end up with a repair that actually holds. Skip those steps, and you'll be back here in a year looking for answers again.
FAQ
How can I tell if my uneven patio is a surface problem versus something underneath before I start grinding or resurfacing?
Do a simple two-part check: walk the slab and listen for hollow spots while also tapping with your knuckles or a small mallet. Hollow or drummy areas usually mean voids, which makes overlays likely to fail. Also watch the height trend after warm weather, if a “high” returns close to normal after thaw it points to freeze-thaw heave rather than just wear.
Is it ever safe to pour self-leveling resurfacer over existing coating, paint, or sealant?
Usually no. Sealers and coatings can block bond, causing peeling even when the slab is stable. Strip contaminants first (or grind through them) and then use the correct primer specified for that resurfacer product, because primer chemistry is often what makes or breaks adhesion.
What’s the right way to handle small cracks before applying patch or self-leveling?
First determine whether the crack is moving, use the masking tape or pencil-line check described in the article. If it is stable, widen and clean the crack so patch material can actually fill it, then use an exterior-rated patch/repair mortar. If you see vertical offset across the crack, treat it as a diagnostic issue, not a cosmetic one.
Can I fix a trip hazard on the edge of a patio by just filling low areas?
Sometimes, but edge problems often come from differential settlement near joints, downspouts, or erosion. Filling low areas without addressing the base can create new cracking around the joint. If the edge forms a step across a joint, consider grinding down the high edge only after you confirm the slab is not actively shifting.
What if only one corner is uneven, and it looks like water might be pooling there?
That pattern commonly combines drainage issues with localized settlement. Start by correcting water: extend downspouts away from the patio, regrade nearby soil, and check whether water is sitting or flowing under that corner. If the corner still sounds hollow or the height keeps changing seasonally, surface fixes alone are unlikely to hold.
How thick should patching or self-leveling be for unevenness, and what happens if it’s too thick?
Follow the product’s maximum lift thickness. Going thicker than allowed increases shrinkage and cracking risk, and can trap trapped voids or cause poor cure at the bottom. For deeper low spots, build in stages, or switch to a method that addresses voids, such as slabjacking, when settlement exceeds the article’s threshold.
Do I need to seal the patio after I repair it even if the repair is only a small patch?
Yes. The repaired area is more porous than properly sealed surrounding concrete, and it will age differently. Applying a penetrating silane-siloxane sealer after the patch cures helps reduce water absorption, which reduces future freeze-thaw scaling and slows base erosion under the repaired zones.
What’s the most common reason self-leveling resurfacers crack soon after installation?
Most early cracking is not “bad material,” it is slab movement or poor bonding. If the substrate is not clean, not properly primed, or still flexing due to differential settlement or freeze-thaw heave, the overlay will crack as the slab moves. That’s why the article’s active-movement check matters before you pour.
Should I clean and seal expansion joints before or after I do a patio resurfacer?
Before, if you are maintaining joint functionality. Clear debris from joints so seasonal movement is not forced into the overlay. After cleaning, refill with the correct joint sealant type for horizontal joints. If you attempt to “bridge” joints with rigid patch or resurfacer, you can create new cracking lines.
How do I avoid making things worse when grinding high spots?
Keep grinding controlled and verify flatness frequently with a straightedge, because removing too much can turn a high spot into a broad low zone that later needs patching. If you reach a point where edges start chipping or expose questionable areas, stop and reassess, because that can indicate delamination or a structural issue underneath.
When should I stop DIYing and call a contractor for uneven concrete?
Call for help if you detect hollow spots, settlement across joints with a noticeable step, vertical displacement across a crack, or any evidence of active movement during the waiting test. Also call if the slab appears significantly out of plane, because that often requires lifting or base stabilization rather than topping repairs.
What should I do if a downspout was draining onto the patio, but the patio is already damaged?
Fix the drainage first, then choose repair based on stability. Even if you repair surface damage, continued water from a nearby downspout can keep eroding the base and bring the unevenness back. Aim to extend runoff away from the patio edge and confirm there is no ponding after a heavy rain.