
Removing a concrete patio is a full weekend project for a small slab, or a multi-day job if you're dealing with a large or reinforced pour. You'll break the concrete into manageable chunks using a sledgehammer or rented electric jackhammer, pry and lift the pieces, haul them out, and then grade the base before whatever comes next. Follow these steps to dig up a concrete patio without damaging nearby utilities or creating unnecessary damage to the foundation.
How to Remove a Concrete Patio Step by Step Guide

Silas Morrison
2 Jun 2026
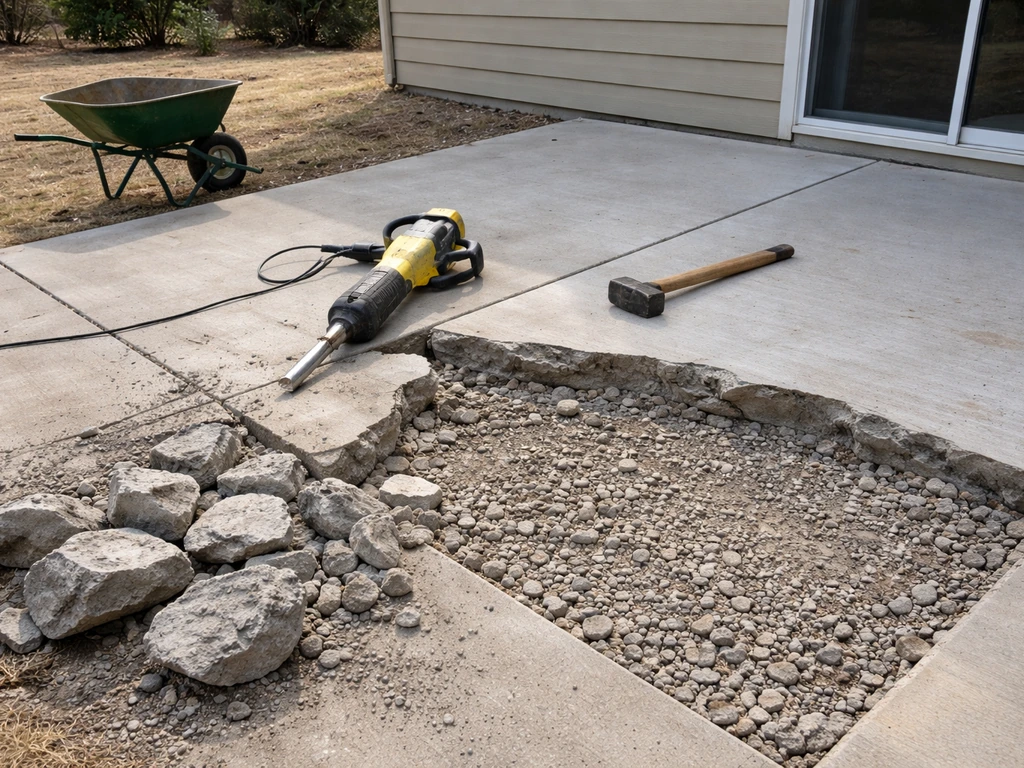
Once you’ve planned the job, the actual process of demolishing a concrete patio comes down to breaking the slab safely, dealing with rebar or mesh if present, and disposing of the debris properly demolish a concrete patio. It's hard physical work, but it's completely doable as a DIY job if you go in prepared.
First: Know What You're Actually Removing
Before you rent a single tool, walk the patio and figure out what you're dealing with. Most residential concrete patios are 3.5 to 4 inches thick, but corners, edges along the house, and areas near footings are often thicker, sometimes 6 inches or more. Thickness matters because it determines how hard the slab is to break and what tool you'll need.
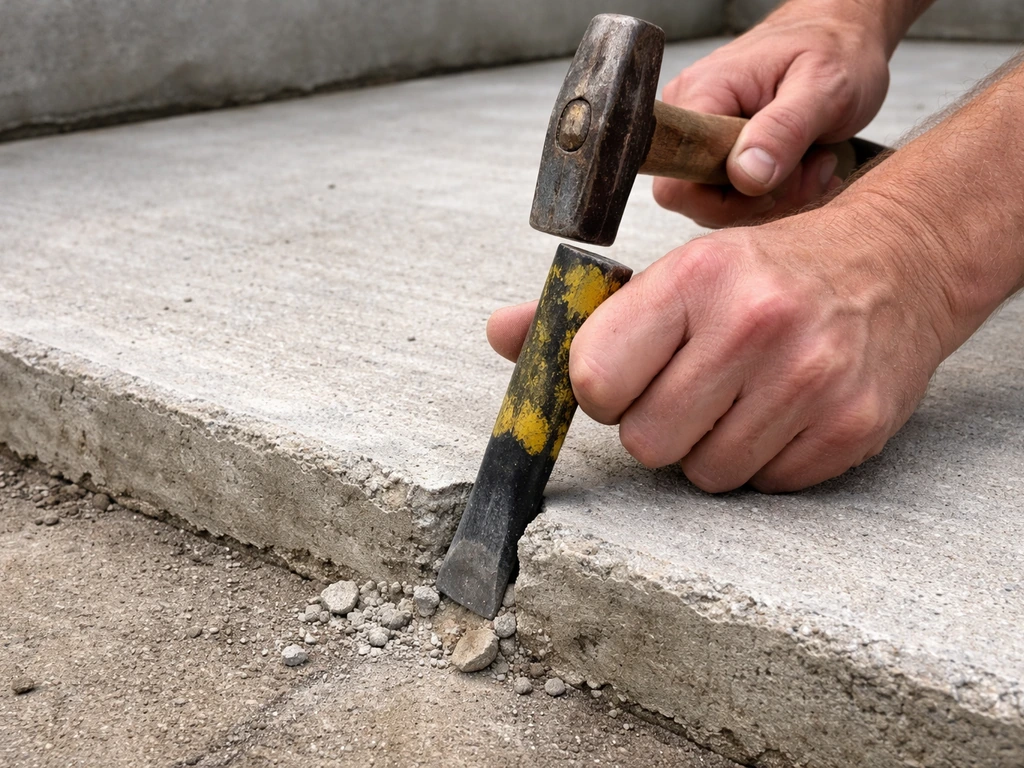
Probe a few spots if you can. Chip a small area near an edge with a cold chisel to get a sense of the depth. While you're at it, look for any expansion joint lines or saw cuts in the surface. These are natural weak points you can use to your advantage when breaking. If the patio is in sections, each section essentially becomes its own mini-demolition job.
Then there's reinforcement. Older patios (pre-1990s or so) are often unreinforced, which makes them much easier to break and remove. Newer ones frequently have either welded wire mesh or rebar inside. You won't always know until you start breaking. A quick look at any exposed edges around the perimeter can sometimes reveal whether there's metal inside. Rebar adds significant time to removal because you'll need bolt cutters or an angle grinder to cut through it.
Also check whether the patio is attached to the house foundation. A patio poured directly against the foundation footing is a different animal than a freestanding slab. Removing it without disturbing the house structure takes extra care. If your patio is attached or built against the house, that's worth reading about separately before you start swinging.
Prep and Safety Before You Touch Anything
Permits and utilities
Most municipalities don't require a permit just to demolish a patio slab, but some do, especially if the patio is attached to a structure. Call your local building department or check online before you start. It's a five-minute check that can save you a headache. More importantly, call 811 (the national "Call Before You Dig" number) at least 72 hours before you break ground. Utilities like gas, water, and electrical lines are sometimes surprisingly close to patio edges, especially in older properties.
Silica dust: the real safety issue
Breaking concrete generates a lot of respirable crystalline silica dust, and this is genuinely hazardous, not just an annoyance. NIOSH reports that silica exposure can occur during demolition-related tasks such as jackhammering, chipping, grinding, and cleaning operations [silica exposure can occur during jackhammering and chipping](https://www. cdc. gov/niosh/bulletin/2020/respirators-construction.
html). OSHA's construction silica standard (29 CFR 1926. 1153) is specifically written to cover tasks like jackhammering, chipping, and breaking concrete. [NIOSH research found that dust exposures from jackhammering concrete can be dramatically reduced by using a water-spray attachment on the jackhammer.
](https://archive. cdc. gov/wwwcdcgov/niosh/topics/silica/jackhammer. html) Even if you're doing this as a one-time homeowner project, wet methods are your best friend: keep a garden hose nearby and wet the concrete as you work.
It keeps dust down and makes the job more pleasant.
At minimum, wear a properly fitted N95 respirator, not just a paper dust mask. Add safety glasses or a face shield, work gloves, steel-toed boots, and hearing protection if you're using any power equipment. Hard hats aren't usually necessary for a patio job, but long pants and long sleeves protect your legs and arms from flying concrete chips.
Protect your property and set up your work zone
- Move any patio furniture, planters, and grills well away from the work area
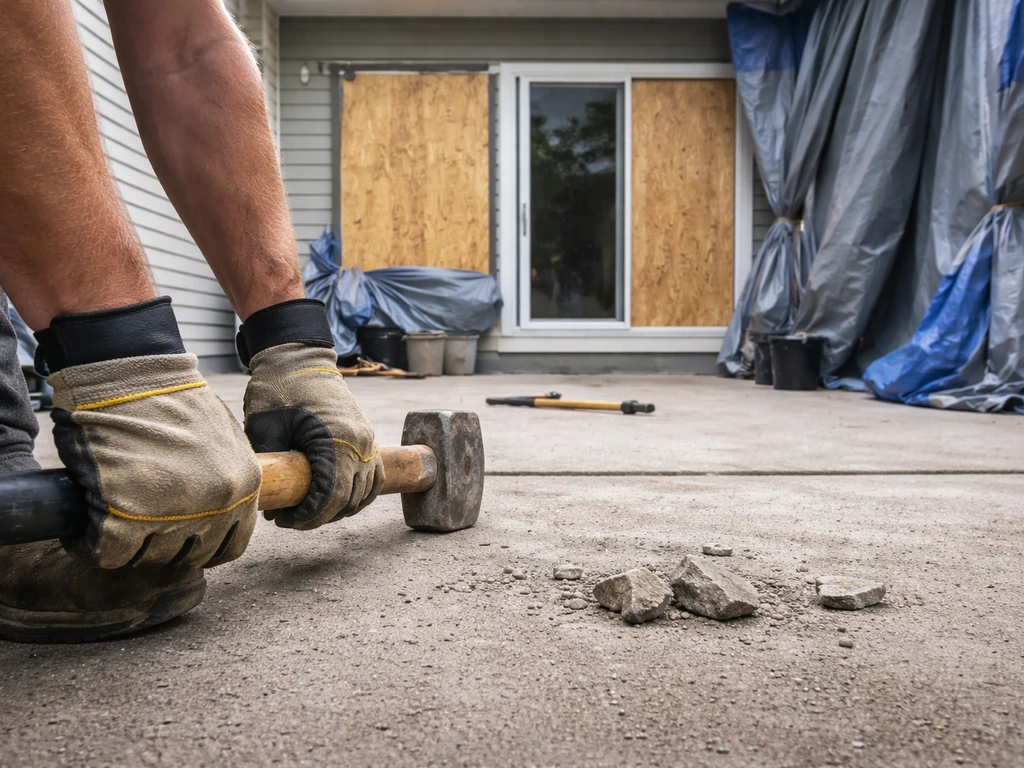
- Cover windows, sliding glass doors, and siding with plywood or heavy tarps; concrete chips travel farther than you expect
- Turn off and cap any outdoor electrical outlets on the house wall if they're nearby
- Mark where your dumpster or haul truck will be parked so you have a clear path for carrying debris
- Keep kids and pets completely out of the work zone for the entire project
Choosing Your Method: DIY, Rented Equipment, or Contractor
The method you choose depends mostly on patio size, slab thickness, and reinforcement. Here's how to think through it honestly:
| Scenario | Best Approach | Why |
|---|---|---|
| Small patio (under 200 sq ft), 3.5–4 in thick, no rebar | DIY with sledgehammer | Manageable chunks, no specialized tools needed |
| Medium patio (200–500 sq ft), standard thickness | Rent an electric jackhammer | Sledgehammer works but takes much longer and is exhausting |
| Large patio (500+ sq ft) or thick slab (5+ in) | Rent a jackhammer and consider a dumpster + helper | Volume of debris and physical effort add up fast |
| Rebar-reinforced slab, any size | Rent jackhammer plus bring bolt cutters or angle grinder | Rebar requires cutting to free chunks and load them |
| Patio attached to house foundation, reinforced, or very thick edges | Hire a contractor or demo crew | Risk of structural damage or injury makes DIY less practical |
Renting an electric demolition hammer (jackhammer) runs roughly $80 to $150 per day from most equipment rental places, and it's worth every penny on anything larger than a small slab. I've seen people attempt to sledgehammer a 400-square-foot patio and give up by noon. The rental pays for itself in time and saved energy. A gas-powered jackhammer is even more powerful but heavier and harder to control for a solo homeowner, so electric is usually the better DIY choice.
When it makes sense to hire out: if the patio is over 600 square feet, has thick sections near the foundation, or you have any doubt about what's underneath, getting bids from concrete demolition contractors is smart. A professional crew with a skid steer and trailer can remove a large patio in hours that would take you a full weekend. Get two or three quotes, and make sure hauling is included.
Step-by-Step: How to Demo a Concrete Patio
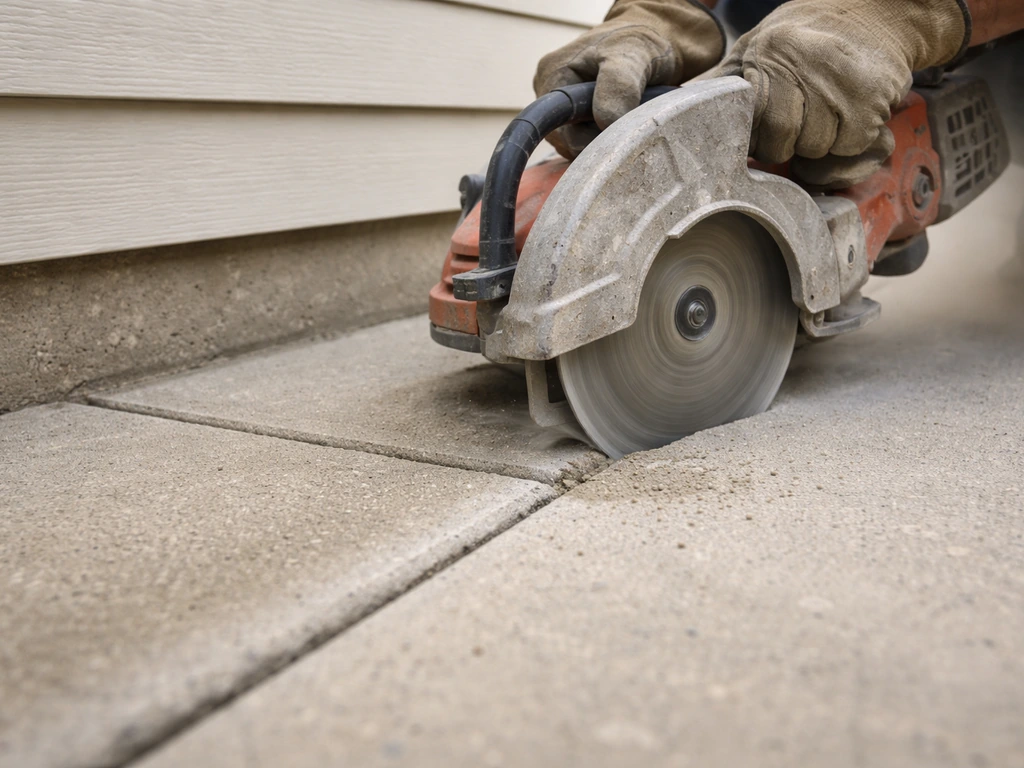
- Score the perimeter. Use a circular saw with a diamond or concrete blade to cut along the edges where the patio meets the house, any garden borders, or landscaping. This gives you a clean break line and prevents cracking from traveling where you don't want it. Keep the cut shallow, about 1 to 1.5 inches deep, just enough to score the surface.
- Wet the surface. Before you start breaking, soak the concrete with a hose. This reduces silica dust significantly and is one of the easiest safety steps you can take.
- Start at an edge or expansion joint. Never start in the middle of a slab. Begin at an outer edge or at a saw cut/expansion joint where you have room to pry pieces up. Drive the jackhammer point or your sledgehammer at a 30 to 45 degree angle into the edge rather than straight down.
- Work in a grid pattern. After you open up the edge, work across the slab in a grid, breaking sections roughly 12 to 18 inches square. Smaller pieces are easier to carry, and this size loads well into a wheelbarrow. Keep wetting the surface as you work.
- Pry up broken pieces. Use a long pry bar to lever chunks upward after breaking. Slide the pry bar under the edge of a piece and use your body weight, not just arm strength. Once a piece tips up, it's easy to grab and toss.
- Stack or immediately load. Have a wheelbarrow ready and load broken pieces as you go rather than letting them pile up on the work area. Run loads to the dumpster or truck consistently so you have room to work and keep your path clear.
- Expose and cut reinforcement. When you hit wire mesh or rebar, use bolt cutters for mesh and an angle grinder with a metal-cutting disc for rebar. Cut it into manageable lengths so it doesn't tangle and can be loaded safely.
- Continue until the slab is fully broken and removed. Don't leave "islands" of unbroken concrete, they're harder to remove once you don't have room to work around them.
Handling Stubborn Spots and Common Complications
Thick edges and corners
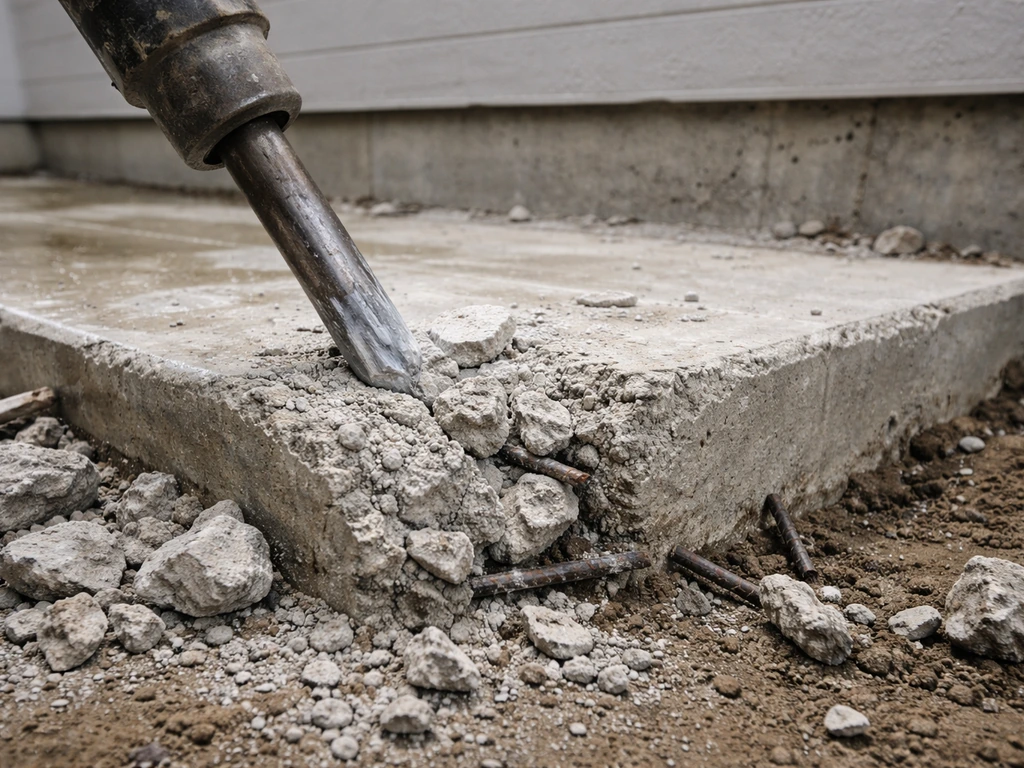
The edges of a patio slab, especially the side against the house, are often poured thicker as a kind of footing. You'll hit these spots and feel like your jackhammer isn't making progress. Don't just hammer in the same spot. Switch to a narrow pointed chisel bit (instead of a flat spade bit) and drive it into cracks to expand them. Then use your pry bar to widen the crack before hammering again. This wedging approach is much more effective than brute force on thick sections.
Rebar and wire mesh
Rebar is the biggest time multiplier in patio removal. Once you've broken the concrete away from a section of rebar, you'll have long steel rods still connecting chunks. Don't try to yank them free. Cut the rebar into 2 to 3 foot sections with an angle grinder. Wire mesh is easier, bolt cutters handle it cleanly. Keep cut rebar and mesh separate from concrete chunks when loading, since scrap metal can sometimes be recycled or disposed of differently than concrete.
Sections bonded to the house or footing
If the patio was poured against the house foundation without an expansion joint, the two may be bonded together. This is where you really need that perimeter cut done with a concrete saw before hammering. Make the saw cut as deep as you can along the house wall, typically 2 to 3 inches. This severs most of the bond. From there, work the pry bar between the patio and the foundation carefully. Go slow here. You don't want to chip the foundation or crack any siding. This is the one area where taking your time really pays off.
Concrete that won't break cleanly
Some older slabs were poured with a higher cement-to-aggregate ratio and are surprisingly hard. If your sledgehammer is just bouncing off, switch to a rental jackhammer immediately. You're not going to out-muscle a well-mixed slab. On the flip side, very old or weathered concrete sometimes crumbles more than it breaks into chunks, which is actually fine for removal but creates more dust, so wet it down thoroughly.
Breaking Down, Loading, and Disposing of the Debris
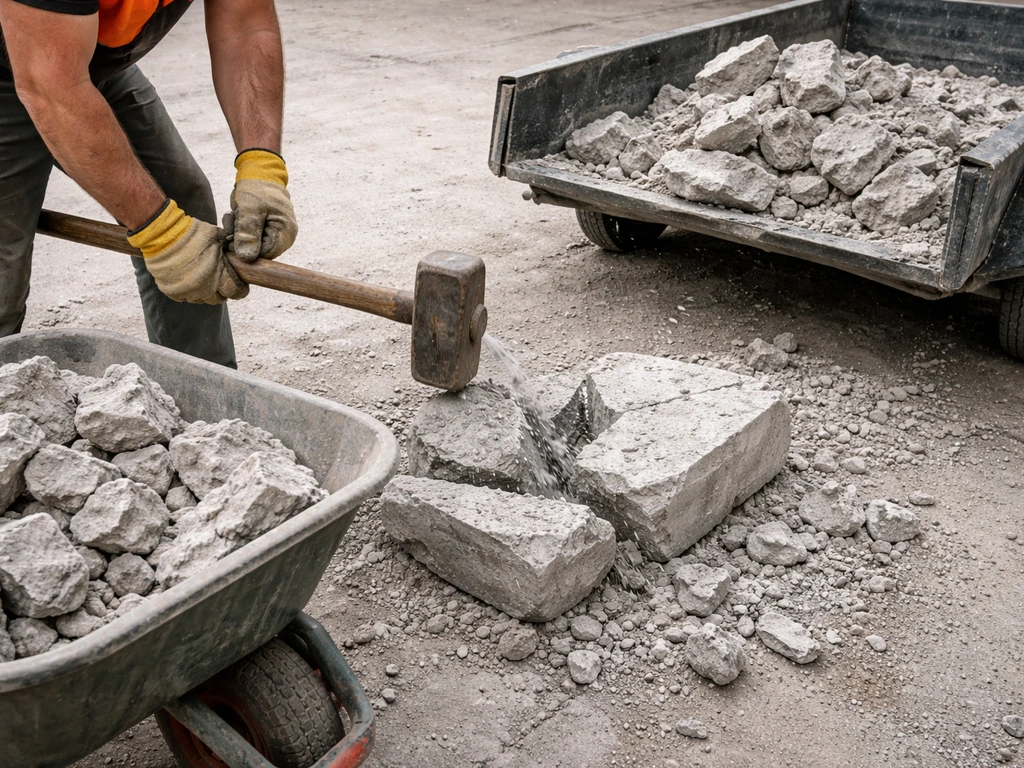
Concrete is extremely heavy. A single square foot of 4-inch concrete weighs roughly 50 pounds. Do the math on your patio size and you'll quickly understand why disposal planning matters as much as demolition planning. A 300-square-foot patio generates somewhere around 7,500 pounds of broken concrete, roughly 3.5 to 4 tons.
Keep your chunks small: pieces no bigger than 12 to 18 inches on a side and under 50 pounds each if possible. This protects your back and makes loading into a dumpster or truck much safer. If a piece is too big to lift comfortably, hit it again.
For disposal, you have a few options. A roll-off dumpster rental (typically 10 to 15 cubic yards for a medium patio job) is the most convenient option. Expect to pay $300 to $600 depending on your area and how quickly you need pickup. Check with the rental company whether they accept concrete, since some dumpster rentals restrict heavy materials.
Alternatively, you can haul to a local concrete recycling facility yourself using a rented or borrowed trailer. Many areas take concrete for free or a small fee because it can be crushed and reused as road base. Some concrete recyclers will even pick up if you have a large enough volume. A third option, for small amounts, is to break pieces small enough to fit in contractor bags and add them to multiple trash pickups if your hauler allows it.
After the Slab Is Gone: Getting the Base Ready
Once the concrete is out, you're left with the base underneath, usually a layer of compacted gravel or crushed stone, sometimes just compacted native soil. Before you do anything else, clean up all the concrete fines, small chips, and dust left behind. A stiff broom and a little water goes a long way here. You don't want debris contaminating a new base layer.
Inspect the base carefully. Look for areas that are soft, low, or where water seems to pool. If the base material is still in good shape and at the right grade, you may be able to use it as-is for a new pour. If it's disturbed, eroded, or uneven, you'll need to add and compact fresh gravel before anything new goes on top.
For a new concrete patio, the standard recommendation is 4 inches of compacted crushed stone (gravel) as a base, graded to slope slightly away from the house (typically 1/8 inch per foot). If you're planning a different surface like pavers, a paver patio base, or just lawn, the prep steps will differ, but the key is the same: flat, compacted, and properly graded to drain away from any structures.
If the removal disturbed a lot of native soil and you've got a low spot near the house, bring in fill dirt and compact it in lifts (layers of 3 to 4 inches compacted before adding the next). Don't just dump a big pile and expect it to stay put under a new slab. Settlement is the number one cause of cracked new concrete, and it's entirely preventable with proper base prep.
Give yourself a solid day after demolition just for cleanup and base prep before you schedule a new pour. It's tempting to rush to the next step, but a properly prepared base is the single biggest factor in how long your next patio lasts.
FAQ
Can I remove a concrete patio without creating unsafe dust for my family and pets?
Yes. Wear an N95 minimum and use a water-spray approach, but also stop and clean your work area often (wet sweeping and bagging dust chips). Concrete dust can linger in nearby landscaping and ventilation intakes, so cover nearby plants and keep doors/windows shut while you’re breaking and loading.
What should I do if I suspect utilities are under or near the patio, but I’m not sure where?
If you’re unsure whether you have utilities inside the patio area, don’t rely on visual guesses. After calling 811, confirm in writing or with marked maps where lines are located, then keep the heaviest impact away from those zones. When you do have to work near marked areas, switch to careful chipping by hand tools and avoid deep penetrations with the jackhammer.
How do I know when I should stop DIY removal and hire a concrete demolition contractor?
Consider stopping and getting a pro estimate if you see signs of foundation cracking, fresh mortar lines, or separation between the patio and any adjacent structure. Also pause if you hit something that doesn’t behave like concrete or reinforcement (for example, dense material that sounds hollow or very metallic). These are times to reassess before continuing demolition.
Why does a jackhammer sometimes seem to “stall,” and what’s the correct way to work thick edge sections?
A common mistake is using only a sledgehammer and never creating a controlled crack pattern. Use the slab’s existing weak points first (saw cuts, control joints), then work with a pry bar to propagate fractures. On thick or dense edges, wedge open cracks with a narrow chisel bit before switching back to demolition.
What’s the safest way to handle rebar once it starts showing up during removal?
If you encounter rebar that’s rusted in place, cut it after the concrete is broken loose enough to isolate the steel. Don’t try to pry against the foundation or pull on rods still embedded in chunks, because that can redirect force into the footing or cause uncontrolled cracking.
Should I dispose of rebar and mesh with the concrete, or separately?
Separate scrap metal from concrete chunks as you load, and plan for different disposal rules. Many areas require metal in specific containers or separate at the recycling facility, while concrete can go in the dumpster or be recycled. If you’re using contractor bags, keep cut steel from poking through by bundling it and placing it more carefully.
How do I safely remove a patio that’s bonded to the foundation without damaging the foundation or siding?
If the patio is bonded to the foundation, the perimeter saw cut is what protects the foundation from impact damage. Make the cut as deep as practical along the wall, then pry slowly with the blade angled so you’re separating concrete from concrete rather than levering into the foundation.
What’s the best disposal method for a medium-sized patio, and what common disposal mistakes should I avoid?
For many residential patios, a dumpster is the easiest option, but the real decision is weight and volume. Concrete is heavy, so confirm the dumpster company accepts concrete and won’t surcharge for heavy loads. Also arrange pickup timing before you start, since demolition will produce debris quickly and you do not want it sitting on the driveway.
After the patio is removed, how should I know if the base is ready for a new slab or pavers?
Do not start grading until you remove all dust and loose fines, because contamination can prevent proper compaction and drainage. If you see low areas or pooling, add and compact gravel or appropriate fill in lifts (about 3 to 4 inches compacted per layer). Then re-check slope before any new surface is scheduled.
Can I rush straight from demolition into a new patio pour, or should I wait?
If your next project involves concrete again, plan for the curing window and weather. Even if you’re ready immediately after demolition, a rushed base prep increases settlement risk, which leads to cracking later. Give yourself the full cleanup, inspection, and compaction time before scheduling the pour or ordering paver materials.