
Yes, you can absolutely pour your own concrete patio as a homeowner. It's one of the more satisfying DIY projects you can tackle, and plenty of people do it every weekend with no prior concrete experience. That said, it's not a casual afternoon job. A properly done pour requires real planning, the right tools, decent physical effort, and good timing. If you're willing to put in that work, you'll end up with a durable slab that can last 30 or more years and save yourself $3,000 to $10,000 in labor costs compared to hiring a contractor.
Can I Pour My Own Concrete Patio? DIY Steps and Tips

Silas Morrison
7 Jul 2026
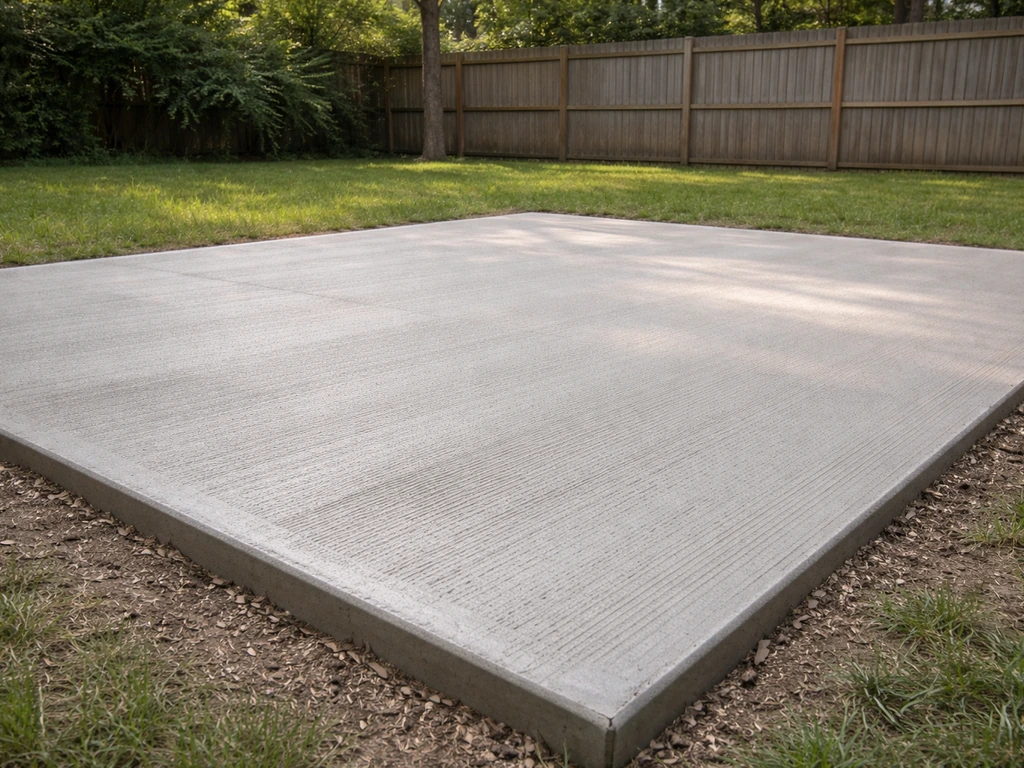
Is this project really doable for a typical homeowner?
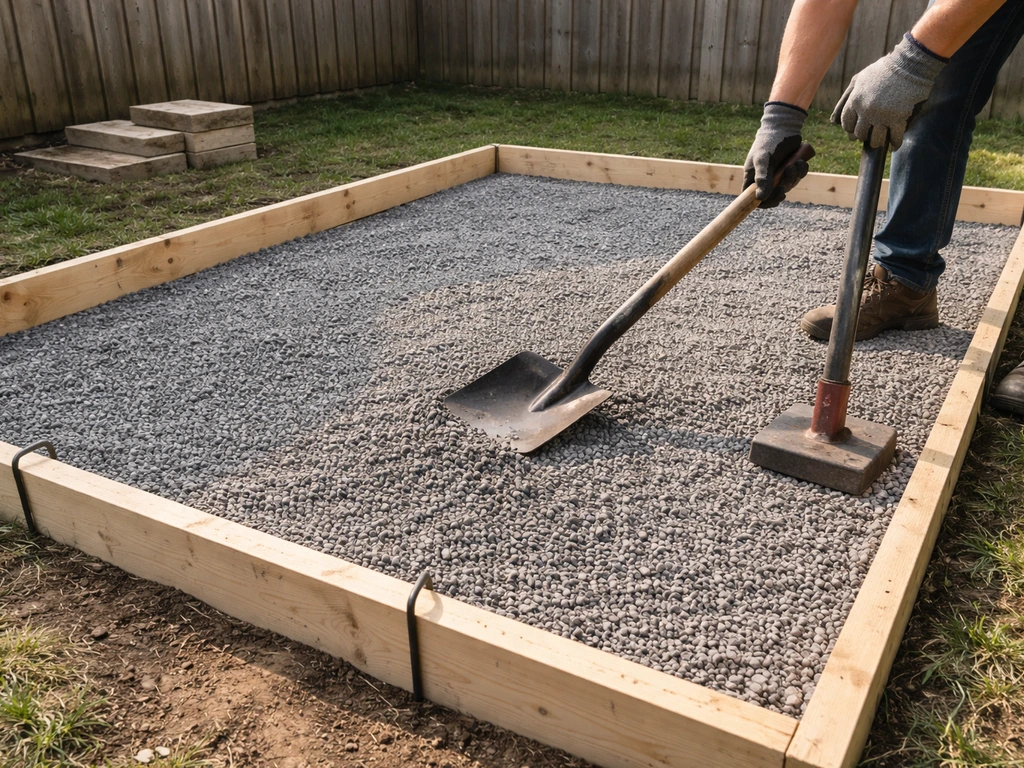
For most backyard patios in the 100 to 400 square foot range, yes. The work is physically demanding but not technically complicated. You're essentially digging, building a wood frame, pouring and spreading wet concrete, then smoothing it out before it hardens. Where people run into trouble isn't the skill level, it's the preparation and the timing.
Concrete doesn't wait for you to figure things out. Once the truck is there or the mixer is running, you have a limited window to get it placed, screeded, and finished before it starts to set. I've seen first-time DIYers pull off beautiful slabs and experienced homeowners end up with a bumpy mess because they didn't prep properly. The prep is everything.
For a large patio, planning the pour logistics and getting the concrete delivered on time matters even more than for a small slab large patio pour.
Where you might want to stop and call a pro: if your patio is over 500 square feet, if you're on clay-heavy or unstable soil, if the area has significant slope that requires grading equipment, or if your project is attached to the house foundation. For anything straightforward and detached, though, you've got this.
Before you dig: planning checklist
Skipping the planning phase is the most common way homeowners end up with a patio they regret. Work through this checklist before you buy a single bag of concrete.
- Check local permit requirements: Many jurisdictions require a permit even for a simple residential patio slab. Some only require it if the slab is attached to the house or over a certain size. Call your local building department or check their website. Don't guess. If you build without a permit where one is required, you may have to tear it out when you sell the house.
- Call 811 (or your local utility locating service): Have underground utilities marked before any digging. This is free, required by law in most states, and takes just a few days to arrange.
- Confirm your dimensions: Measure twice. A standard patio is often 10x10, 12x16, or 12x20 feet. Sketch it out on paper and mark the corners with stakes before committing.
- Plan your drainage slope: Code and common sense both require a patio to slope away from your house. The standard is a minimum 1/8 inch per foot (about 1 percent), though 1/4 inch per foot is better and what most pros aim for. This prevents water pooling on the slab and against your foundation.
- Check setback requirements: Your municipality likely has rules about how close a structure can be to the property line or fence. Patios are often exempt, but confirm this before you lay your forms.
- Determine your slab thickness: For a standard residential patio, 4 inches is the typical minimum. If you expect vehicle traffic or heavy loads, go to 6 inches.
- Decide on reinforcement: Wire mesh or rebar. More on this in the materials section.
- Estimate your concrete volume: Calculate length x width x thickness (in feet, then divide by 27 for cubic yards). Add 10 percent for waste and overage. For anything over about 1 cubic yard, renting a mixer or ordering ready-mix from a truck is far easier than mixing bags by hand.
Materials and tools you'll actually need
Concrete and reinforcement
For a small patio (under 30 square feet or so), 80-pound bags of 4000 PSI concrete mix work fine. For anything bigger, order ready-mix from a local concrete supplier. Ready-mix is sold by the cubic yard and typically comes in standard residential mixes of 3000 to 4000 PSI. For a standard patio, 3500 PSI is a solid choice. Ask the supplier about fiber-reinforced mix too, it adds crack resistance without extra work on your end.
For reinforcement, you have two main options: welded wire mesh (WWM) or rebar. Wire mesh is easier to handle and works well for typical residential patios. Use 6x6 W1.4 x W1.4 mesh and make sure it sits in the middle of the slab thickness, not on the ground (use 2-inch wire chairs or chunks of broken concrete to lift it). Rebar gives more strength and is worth using if you're in a freeze-thaw climate or anticipate heavier loads. Use #3 (3/8 inch) rebar on a 24-inch grid for a 4-inch slab.
Base and form materials
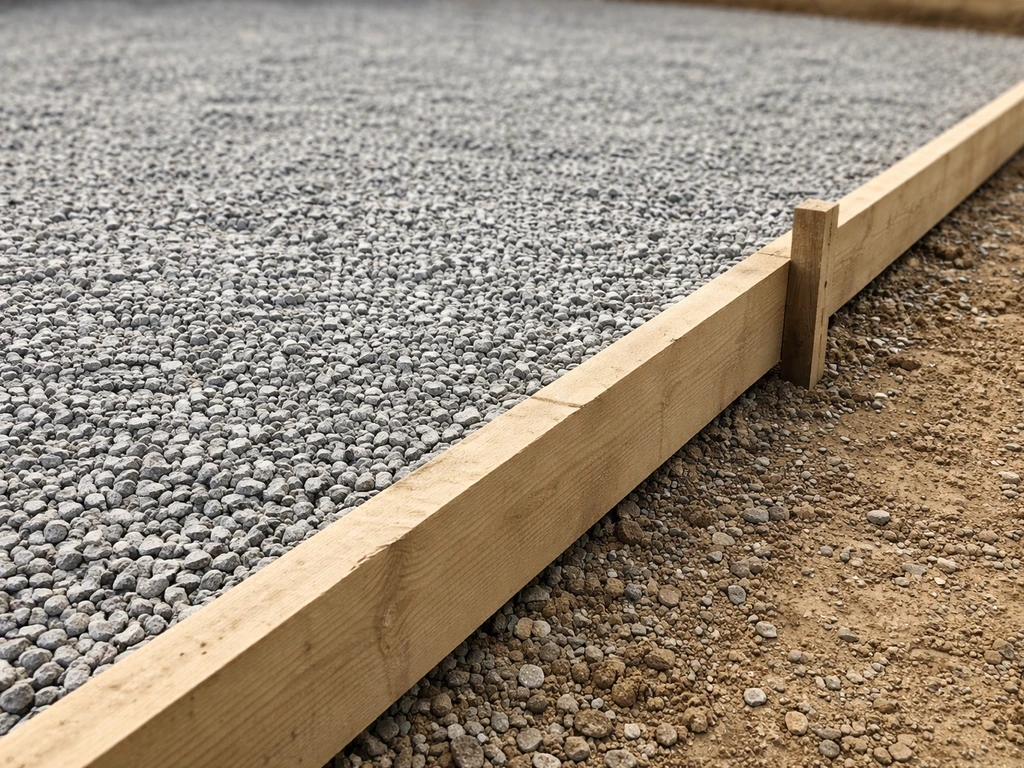
- Crushed gravel or road base: 4 inches of compacted gravel base (3/4-inch crushed stone) under the slab. This is non-negotiable for drainage and stability.
- 2x4 or 2x6 lumber for forms: Use 2x4 for a 4-inch slab, 2x6 for a 6-inch slab. Stake them with 1x4 wooden stakes or rebar stakes every 2 to 3 feet.
- Expansion joint material: Foam isolation joint strips (1/2-inch thick) go between the patio and any existing concrete or house foundation wall.
- Plastic sheeting (6-mil poly): Optional but useful under the gravel to reduce moisture migration in some climates. Check your local code.
Tools
- Shovel, wheelbarrow, and a plate compactor (rent this — don't skip it)
- Level and a long straightedge or string line
- Screed board (a straight 2x4 works fine)
- Bull float: for initial smoothing of the surface after screeding
- Edger tool: for rounding the slab edges
- Groover or jointing tool: for cutting control joints
- Mag float and steel trowel: for finishing the surface texture
- Concrete mixer (rent) or a ready-mix truck for larger pours
- Rubber boots and gloves: wet concrete is caustic and will burn your skin with prolonged contact
- Knee boards if you need to work on the surface
Step-by-step: how to pour the patio
Step 1: Excavate and grade the site
Mark out your patio area with stakes and string. Excavate to a depth that accounts for your gravel base (4 inches) plus your slab thickness (4 inches) plus an inch of clearance below your desired finished surface height. So for a typical setup, you're digging down about 8 to 9 inches. Remove all grass and organic material. Grade the soil to slope away from your house at 1/4 inch per foot as you go. Tamp the native soil with a plate compactor before adding gravel.
Step 2: Install the gravel base
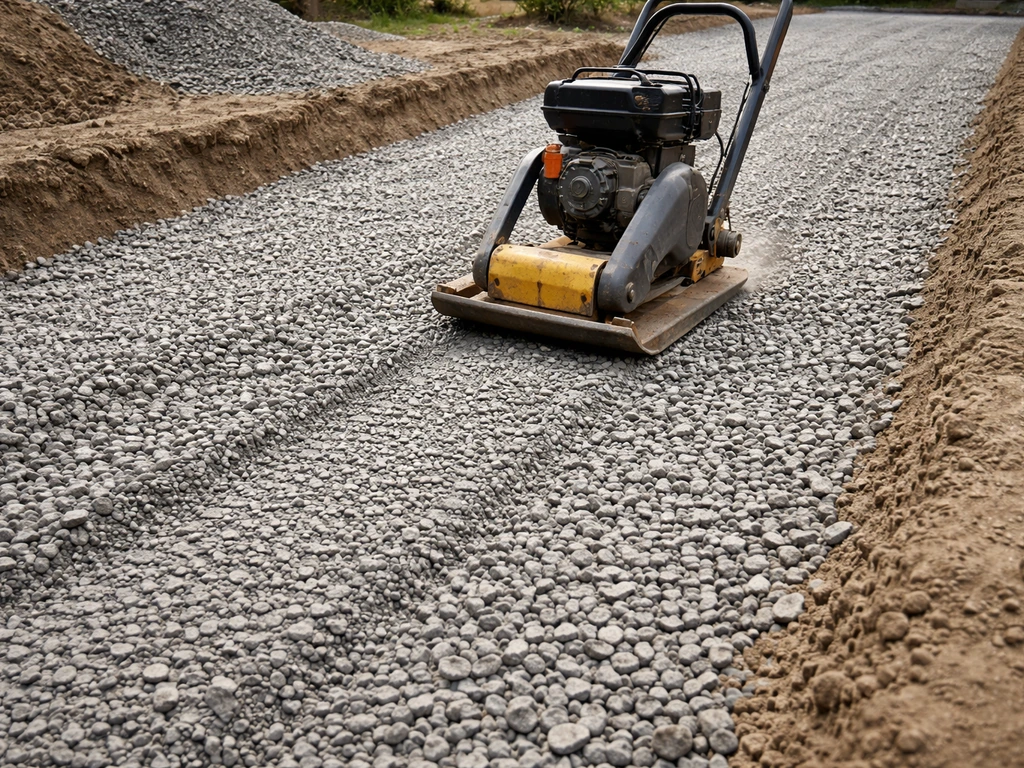
Spread 4 inches of 3/4-inch crushed gravel over the excavated area. Wet it slightly and compact it with the plate compactor in overlapping passes until it doesn't move under foot. Check that it's level (or maintaining your planned slope) as you go. This base is what keeps your slab from settling and cracking over time. A weak base is the single biggest cause of failed DIY slabs.
Step 3: Set your forms
Build your form frame from 2x4 lumber. Drive stakes on the outside of the forms every 2 feet and screw or nail through the stakes into the form boards. Use a level and string line to confirm your forms are at the right height and maintain the proper slope. The top edge of your form is your screed guide, so it has to be exactly right. Double-check the square by measuring diagonals, both should be equal. Coat the inside face of the forms with vegetable oil or a commercial form release agent so they come off cleanly after the pour.
Step 4: Place isolation joints and reinforcement
If the patio will be adjacent to the house foundation or an existing sidewalk, install foam isolation joint strips (sometimes called expansion joint strips) along that edge before you pour. These allow the slab to move independently without cracking. Then lay your wire mesh or rebar on chairs or dobies so it sits at mid-depth of the slab.
Step 5: Mix or order your concrete
For anything under about half a cubic yard, bag mix works. Follow the manufacturer's water ratio closely, too much water weakens the concrete significantly. For larger patios, order ready-mix. When you call the supplier, tell them the application (residential patio slab), the thickness (4 inches), and ask for a 4000 PSI mix with a 4 to 5 inch slump. Arrange for the truck to arrive when you have at least two helpers on site. Have all your tools ready before the truck pulls in, because once that chute starts, the clock is running. Next, you'll learn exactly how to pour and place the concrete so your patio stays level, dense, and crack-resistant how to pour the patio.
Step 6: Pour and place the concrete
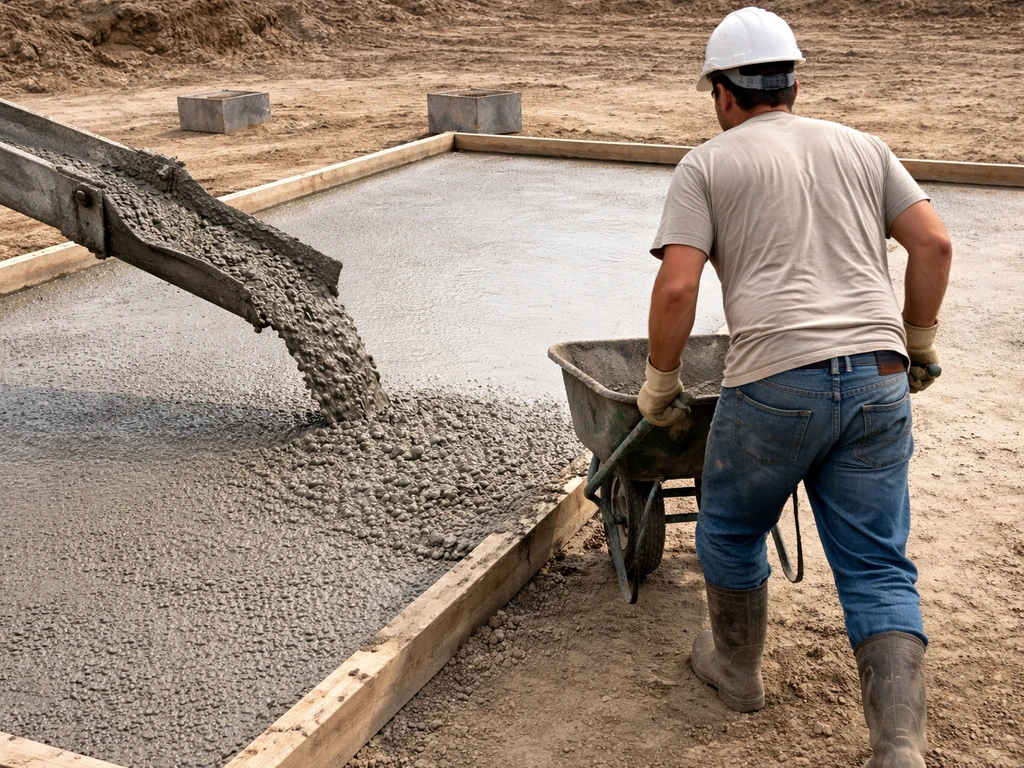
Start at the far corner from the truck and work toward the chute. Don't dump all the concrete in one pile and spread it, move the chute (or your wheelbarrow) so concrete lands roughly where it needs to be. Use a shovel and a concrete rake (not a garden rake) to roughly level it to just above the top of the forms. Work quickly.
Don't overwork the concrete and don't add water to make it easier to spread. If you are specifically using a dry-pour mix, the steps for grading, base prep, and finishing still matter, but the workflow changes, so follow a dry-pour approach for best results how to dry pour concrete patio. Use a shovel or rod to work out air pockets along the form edges.
Step 7: Screed the surface
Once the concrete is roughly in place and slightly overfilled, use your screed board (a straight 2x4 works perfectly) in a sawing, back-and-forth motion across the top of the forms to pull off the excess and level the surface. You'll need two people for this on any slab wider than 6 feet. Fill in any low spots with concrete from the excess you scraped off and re-screed. The goal is a surface that's uniformly flush with the top of your forms.
Step 8: Bull float the surface
Right after screeding, push and pull a bull float over the entire surface. This embeds the aggregate, flattens ridges, and brings a thin layer of paste (cream) to the surface. Use long, overlapping passes. Don't press too hard. This is not the final finish, it's just the first smoothing step. After bull floating, you'll often see bleed water (a shiny layer) appear on the surface. Wait for it to disappear before you do any more finishing work. Touching the surface while bleed water is present is one of the most common amateur mistakes, it weakens the top layer badly.
Step 9: Edge, groove, and finish
Once the bleed water is gone and the surface can support your weight on knee boards without leaving more than a 1/4-inch impression, run your edger along the form edges to create a rounded, finished edge. Then cut your control joints. For a 4-inch slab, control joints should be about 1 inch deep (one-quarter of the slab thickness, per standard guidelines). blank" rel="noopener noreferrer">Space them roughly 8 to 10 feet apart in each direction, that keeps the panels close to square and gives the slab a controlled place to crack if it ever wants to move. Use a groover tool with a guide board to keep lines straight.
For the final surface texture, most patios get a broom finish: drag a stiff-bristle concrete broom lightly across the surface in one direction to create a slip-resistant texture. If you want a smoother look, use a mag float followed by a steel trowel. A troweled surface is harder to execute and gets slippery when wet, so for most patios outdoors, the broom finish is the smarter choice.
Step 10: Remove forms
Leave the forms in place for at least 24 hours, ideally 48. When you pull them, be gentle. The concrete is still gaining strength and the edges are vulnerable. You can backfill alongside the slab with soil or gravel after the forms come off.
Curing, sealing, and waterproofing: the timeline that matters
Concrete curing is often the most neglected step in DIY projects, and it's where a lot of slabs develop surface problems. Curing isn't just drying, it's a chemical hydration process that requires moisture. If the slab dries out too fast, you get surface dusting, shrinkage cracks, and a weaker top layer.
| Timeline | What to Do |
|---|---|
| Immediately after finishing | Apply a liquid curing compound by sprayer OR lay plastic sheeting over the entire surface and weigh down the edges |
| First 24 hours | Keep off the slab completely. Keep the surface moist if using wet curing method. Protect from rain, direct sun, and temperatures below 50°F |
| Days 2 to 7 | Keep the slab moist by re-wetting and covering, or keep the curing compound intact. Avoid heavy foot traffic for 3 full days minimum |
| Day 7 | Concrete has reached roughly 70% of its 28-day strength. Light foot traffic is fine. Remove any plastic sheeting |
| 28 days | Full design strength reached. Safe for heavy furniture, planters, and normal use |
| 28 days or later (after full cure) | Apply a penetrating concrete sealer. Don't seal before full cure — it traps moisture and can cause discoloration or delamination |
| Every 2 to 5 years after that | Re-seal the surface. How often depends on traffic, climate, and the type of sealer used |
For sealer choice: penetrating sealers (silane or siloxane-based) soak into the concrete and protect from within without changing the look. Film-forming sealers (acrylics, epoxies) sit on top and can give a wet or glossy look but need more maintenance. For a plain broom-finished patio, a penetrating sealer is usually the easier, lower-maintenance pick.
Common DIY mistakes and how to avoid them
Getting the slope wrong (or skipping it entirely)
A flat patio will pool water every time it rains. Water pooling leads to staining, freeze-thaw damage, and eventually cracking. Set your forms with a 1/4 inch per foot slope away from the house before you pour anything. Use a level and a tape measure to confirm, not your eye.
Skimping on the base
Pouring concrete directly on dirt, or on an uncompacted base, is a recipe for a cracked slab within a few years. Settle, frost heave, and erosion will move the slab. Always compact 4 inches of crushed gravel. It takes a few extra hours but it's the difference between a patio that lasts 30 years and one that looks bad in 5.
Working the surface while bleed water is present
This is probably the most common mistake by first-timers. Troweling or brooming the surface while water is still bleeding up weakens the surface layer. The water-to-cement ratio at the surface skyrockets, and you end up with a soft, dusty, or scaling surface. Wait for the sheen to fully disappear. In hot, dry, or windy weather that can happen fast. In cool, humid weather it can take a couple of hours.
Skipping or incorrectly spacing control joints
Concrete will crack. That's not a flaw, it's physics. Control joints give it a controlled place to crack so the cracks happen where you put them (in a straight line, hidden in the joint) rather than randomly across your slab. For a 4-inch slab, blank" rel="noopener noreferrer">cut joints to about 1 inch deep and space them 8 to 10 feet apart. If your patio is an irregular shape, plan joint placement to keep panels roughly square.
Adding too much water to the mix
Wet concrete is easier to work with, which is why people do it. But every extra inch of slump you add to the mix reduces the final compressive strength. Stick to the specified water ratio. If the mix seems stiff, use the screed and float instead of adding water to compensate.
Rushing the cure
Letting the slab dry out fast in the first week, especially in summer heat, causes surface cracking and a weaker finished product. Cover it, keep it moist, and give it real time. The extra few days of patience make a meaningful difference in long-term durability.
After the pour: cleanup, maintenance, and what you can do next
Immediate cleanup
Rinse all your tools immediately after the pour, concrete is much easier to remove when wet. Wash out the mixer drum, rinse your floats, trowels, and screed boards, and hose down your wheelbarrow. Cured concrete on tools is a real pain to remove. Dispose of any leftover concrete properly; don't pour it down a storm drain.
Ongoing maintenance
Once sealed, a concrete patio needs surprisingly little maintenance. Sweep it regularly to prevent grit from scratching the surface, clean spills promptly, and re-seal every 2 to 5 years depending on wear. In freeze-thaw climates, avoid using rock salt for ice removal, it's hard on concrete surfaces. Sand or a concrete-safe ice melt product is better.
If something goes wrong or you want to upgrade later
Even a well-executed DIY pour might develop hairline cracks over time, especially if the ground underneath shifts seasonally. Small cracks can be filled with a concrete crack filler or polyurethane caulk. If the surface becomes rough, pitted, or worn, a concrete resurfacer (a thin overlay product) can give the entire slab a fresh face without tearing out and replacing it. And if you want to change the look entirely, concrete staining is one of the best upgrades you can do after the fact, acid stains and water-based stains both work well on cured slabs and can transform a plain gray surface into something that actually looks intentional.
Pouring the patio in one shot works well for smaller areas, but if you're dealing with a larger space or an awkward yard layout, pouring in sections is a legitimate approach that also manages the physical workload more reasonably. There are also specific techniques for larger pours and for handling patios that need a slope adjustment after the fact, which are worth exploring if your situation is more complex than a basic rectangular slab.
FAQ
Can I pour my own concrete patio if I don’t have a concrete mixing truck or mixer?
Yes, for very small slabs you can use bagged mix and a rented concrete mixer, or use ready-mix in a short-load option if available. For anything bigger than about half a cubic yard, bag mix usually becomes a workflow problem because you will not finish screeding and finishing inside the workable window.
How many people do I realistically need for a DIY patio pour?
At minimum, plan for two helpers besides you for anything wider than about 6 feet, because screeding and floating take coordinated, time-sensitive passes. Also have one person specifically dedicated to keeping the chute or wheelbarrow route clear, so you never pause once concrete starts landing in the forms.
What PSI or mix type should I choose for a typical backyard patio?
For a standard residential patio, 3500 PSI is a good default, and you should match the supplier’s recommended slump for patio placement (often around 4 to 5 inches). If you expect freeze-thaw or heavier foot traffic, ask about fiber-reinforced mix, it improves crack resistance without changing your forming and finishing steps.
Is reinforced concrete required for DIY patios?
Not always, but it’s strongly recommended. Wire mesh is easier to handle and works for typical patios if it sits at mid-depth on chairs or dobies. If you’re in a freeze-thaw climate or expect loads like a grill island or hot tub path, rebar on a 24-inch grid for a 4-inch slab adds extra strength.
Can I pour on top of existing concrete, pavers, or compacted dirt?
Typically no for dirt or uncompacted fill, and you should not assume an overlay will fix a failing base. If you have existing concrete or pavers, the correct approach depends on their condition and levelness, and you may need grinding, removal, or a bonding preparation strategy rather than pouring directly on top.
How do I avoid a patio that settles or cracks soon after it’s poured?
The biggest safeguard is a properly compacted gravel base and correct excavation depth. Make sure you remove organic material, compact the 4 inches of crushed gravel in overlapping passes until it won’t shift underfoot, and keep your forms set to the planned thickness and slope.
What slope do I need so my patio doesn’t puddle?
Aim for 1/4 inch per foot sloping away from the house. Confirm with a level and tape measure as you set the form height, because visual estimates usually create low spots where water will pool and cause staining and freeze-thaw damage.
If my mix looks too stiff, can I add water to make it easier to place?
Avoid adding water to the truck or wheelbarrow mix. Extra water increases the water-cement ratio and reduces strength. Instead, rely on proper screeding, correct shovel placement, and consistent timing, if the mix seems wrong for your workflow, stop and consult the supplier about slump.
When should I finish the surface, and what’s the most common timing mistake?
After screeding, bull float immediately once concrete is in place, then wait for the bleed water to disappear before you do edging or any final texturing. Touching while bleed water is present is a common reason DIY patios get a dusty, weak, or scaling surface.
Do I need control joints, even for small patios?
Yes, control joints help concrete crack in a predictable way. Plan joints to be about 1 inch deep for a 4-inch slab and spaced roughly 8 to 10 feet apart, and for irregular shapes, place joints so the resulting panels are as close to square as possible.
Should I use a broom finish or a trowel finish?
For outdoor patios, broom finish is usually the safer choice because it’s more slip-resistant and easier to execute correctly. Trowel finishes look smoother but can become slick when wet and are harder to get right without overworking the surface.
How long should I cure the patio before using it or walking on it?
Keep forms in place at least 24 hours, ideally 48, and be gentle when removing them. For actual use, curing time depends on weather and mix, so plan to limit heavy foot traffic for several days and avoid placing concentrated loads until the slab has had time to gain strength.
Do I need an isolation joint where the patio meets the house or a sidewalk?
If the patio is adjacent to the foundation or an existing sidewalk, install foam isolation joint strips along that edge. This lets the slab move independently and reduces the chance of cracking due to differential movement.
What sealer should I use, and how often should I reapply it?
For a broom-finished patio, a penetrating sealer (silane or siloxane based) is typically lower maintenance and doesn’t create a glossy look. Re-seal based on wear, commonly every 2 to 5 years, with more frequent resealing in high-traffic or harsh weather areas.
What ice melt should I use in winter?
Avoid rock salt, it can damage concrete surfaces over time. Use sand or a concrete-safe ice melt product instead, and spread it early rather than waiting until ice forms thickly.
How do I fix hairline cracks after the patio cures?
For small, hairline cracks, fill them with a concrete crack filler or polyurethane caulk to keep water and debris from working into the gap. If the surface becomes rough or pitted instead of just cracked, consider a resurfacer overlay rather than trying to patch individual spots.