
Yes, you can dry-pour a concrete patio, but only in specific, limited situations. The dry-pour (dry-pack or low-slump) method works well for small repairs, patching spalls, bedding materials under tile or stone, and filling confined voids. For a full patio slab of any real size, though, the honest answer is that standard dry-pack is not the right approach. You will end up with poor consolidation, hidden voids, and a surface that cracks and fails early. If someone told you that dry-pouring means just dumping dry concrete mix into a form and wetting it from above, that is a different (and genuinely problematic) technique that I will address too, because a lot of homeowners search for it and deserve a straight answer about why it causes trouble.
How to Dry Pour Concrete Patio: DIY Guide for Homeowners

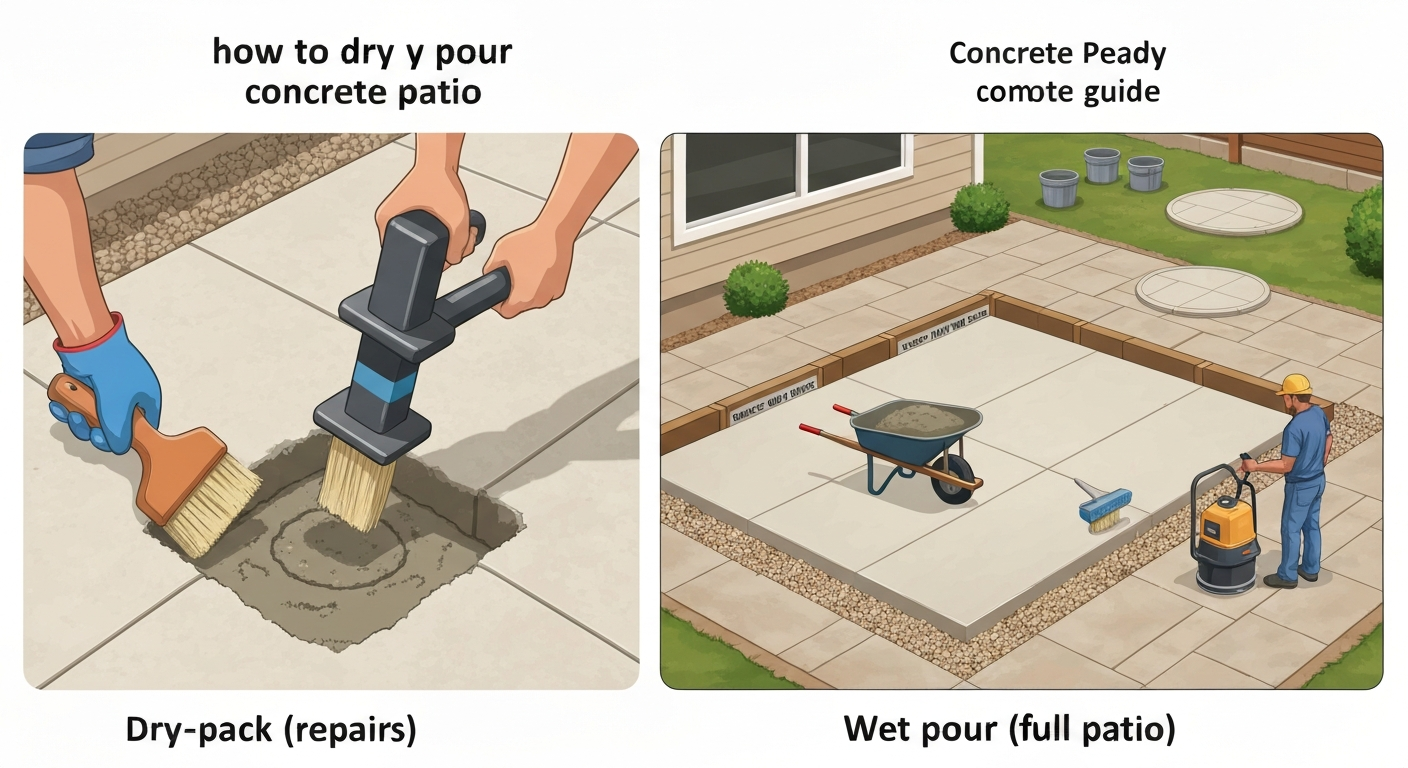
What dry-pour actually means (and the names you'll see)
The term 'dry-pour' gets used two different ways online, and mixing them up leads to bad results. The first meaning, which professionals actually use, is dry-pack or low-slump concrete: a very stiff cement-sand mortar with barely enough water to hold its shape when squeezed in your fist, placed in thin lifts and rammed or tamped into place. FHWA / DOT discussion of slump test and zero‑slump behavior (summary referencing ASTM C143) notes that the standard slump test (ASTM C143) measures concrete consistency and that a “zero slump”, no measurable drop after removing the cone, makes the test ineffective for distinguishing workability in very stiff mixes. ACI defines dry-pack as concrete or mortar deposited and consolidated by dry packing, and ASTM covers zero-slump (dry-cast) concrete under C1837. The water-cement ratio in a true dry-pack mix is typically around 0.25 to 0.35, compared to 0.45 to 0.55 in a standard poured slab. The second meaning, popular in some DIY videos, is literally pouring dry bagged concrete mix into a form and hoping rain or a garden hose does the mixing for you. That second approach is not a legitimate construction method for a patio slab. Water distribution through a dry pile of aggregate and cement is uneven, leaving pockets of unhydrated material and dramatically reduced strength.
You may also see the dry-pack method called deck mud, floor mud, or dry-mortar bed, especially in tile-setting contexts. Roller-Compacted Concrete (RCC) is a related zero-slump technology, but it requires industrial paving and compaction equipment and is not a homeowner DIY option, so I will not spend much time on it here.
| Method | Slump | Mix Type | Placement | DIY-Friendly? | Best Use |
|---|---|---|---|---|---|
| Traditional wet pour | 3–5 in | Ready-mix or bagged, water added to specification | Screeded and vibrated | Yes, with planning | Full patio slabs, driveways, sidewalks |
| Dry-pack / dry-mortar | Near zero | 1 part Portland : 2–2.5 parts sand, minimal water | Rammed in thin lifts | Yes, for small areas | Repairs, spall filling, tile bed, confined voids |
| Dry-dump (unacceptable) | N/A | Dry bagged mix placed without pre-mixing | Wetted from above | Not recommended | Nothing structural |
| Roller-Compacted Concrete (RCC) | Zero | Engineered low-w/c mix, aggregate-specific | Paving machine + vibratory roller | No | Roads, industrial pads, heavy pavements |
Dry-pour vs. traditional wet pour: how to decide
The choice between dry-pack and a conventional wet pour comes down to four things: the size of the area, whether you have containment on all sides, what the surface will carry, and your access to equipment. I have used dry-pack mortar successfully for a 6-square-foot spall repair at the edge of a patio, for filling a post-hole void, and for setting a tile bed. I have never used it for a full slab and I would not. Here is a practical breakdown of which situations favor each method.
| Situation | Use Dry-Pack | Use Traditional Wet Pour | Notes |
|---|---|---|---|
| Small repair or spall (under ~2 sq ft) | Yes | Overkill | Dry-pack excels in confined, shallow repairs |
| Tile or stone bedding layer | Yes | Not ideal | Deck mud is the industry standard here |
| Full patio slab (any size) | No | Yes | Wet pour gives proper consolidation and density |
| Overlaying existing slab (bonded topping) | No (unless <1 in patch) | Yes, with bonding agent | Polymer-modified topping mixes work better for overlays |
| Filling a form with no open top | Yes | Difficult | Dry-pack handles inaccessible/confined spaces well |
| Freeze-thaw climate, vehicle traffic | No | Yes, air-entrained mix | Structural demands exceed dry-pack's capability |
| Post or anchor base in a hole | Yes | Yes | Either works; dry-pack is neater in tight holes |
If you are planning a new patio from scratch, a wet pour is the correct method. The full process for that, including mixing ratios, forming, screeding, and curing, is covered in detail in the guide on how to pour a concrete patio. If you are tackling a larger project that needs to be broken into manageable sections, the guide on how to pour a concrete patio in sections walks through that workflow specifically. For detailed, step-by-step instructions on dividing a patio into pours and managing construction joints, see the guide on how to pour a concrete patio in sections.
Real limits: size, thickness, loads, and reinforcement
Dry-pack mortar (the legitimate kind) is not a full-slab replacement. Here is what the practical and code-related limits look like for residential concrete work, so you can make an informed decision before you buy materials.
Maximum area for dry-pack
There is no hard code-defined upper limit on a dry-pack repair area, but professional guidance from ACI 546R (Guide to Concrete Repair) treats dry-packing as a method for confined voids and spalls, not open slab placements. See ACI 309R Guide for Consolidation of Concrete (consolidation requirements and RCC notes) for specific consolidation requirements and notes on RCC compaction methods. In practice, once a repair or fill area exceeds roughly 4 to 6 square feet of open, unconfined surface, proper hand compaction becomes very difficult and consolidation quality drops off fast. For anything larger, switch to a polymer-modified repair mortar or a conventional wet pour.
Minimum thickness for a patio slab
The IRC (Section R506) and ACI 332 guidance set 3.5 to 4 inches as the minimum slab thickness for residential pedestrian slabs on grade. Four inches is standard practice for patios. If you are patching an existing slab, dry-pack repairs can be done at thicknesses as thin as a few inches in confined areas. For bonded overlays over an existing slab, most repair engineers and product manufacturers specify a minimum of 1 to 2 inches, and those are best done with polymer-modified topping mix, not straight dry-pack mortar.
Load and structural concerns
A pedestrian patio on a stable, well-compacted subbase does not typically require structural reinforcement, but there are important exceptions. If you plan to park a vehicle on the patio, you are outside pedestrian-slab territory and need a designed slab, likely 5 to 6 inches thick with rebar. If the soil is expansive clay, poorly drained, or subject to frost heave, plain unreinforced concrete (wet or dry) will crack. Dry-pack mortar does not provide the structural integrity of a properly consolidated cast slab for any meaningful load scenario.
Reinforcement requirements
For a standard 4-inch pedestrian patio on firm, non-expansive soil, many jurisdictions accept a plain unreinforced slab with control joints. When additional crack control is needed or loads increase, welded wire reinforcement (WWR, commonly 6x6 W1.4xW1.4) or fiber reinforcement is added. If you are doing a dry-pack repair, you cannot embed rebar or WWR effectively in the mix, which is another reason dry-pack stays confined to small repair applications. For a full slab with reinforcement, wet-pour is the only practical route.
Control joint spacing
ACI guidance recommends control joint spacing of roughly 2 to 3 times the slab thickness in feet for exterior unreinforced slabs. For a standard 4-inch patio, that means joints every 8 to 12 feet. This applies to wet-poured slabs. If you are patching sections of an existing patio, align new control joints with the existing joint pattern where possible.
Permits, codes, and when to check with your local authority
A lot of homeowners skip the permit question on patios, and sometimes that works out fine. But ignoring it can cost you when you sell the house or if something goes wrong. Here is what I check before any concrete work:
- Contact your local building or planning department to ask whether a concrete patio requires a permit in your jurisdiction. Thresholds vary widely: some areas require permits for any permanent concrete structure, others only above a certain area (commonly 200 sq ft) or when the patio is attached to the house.
- Check whether your property has an HOA with its own approval requirements for hardscaping. These are separate from municipal permits.
- Verify setback requirements: most jurisdictions require concrete flatwork to stay a minimum distance from property lines, drainage easements, and utility easements.
- Call 811 (in the US) before any excavation to have underground utilities marked. This is free, legally required in most states, and takes about three business days.
- In flood zones or areas with storm-water management requirements, impervious surface limits may apply to how much of your yard you can cover with concrete.
- For repairs and overlays on an existing permitted patio, a new permit is usually not required, but it is worth a quick call to confirm.
If you are sloping or re-sloping an existing patio, drainage from that patio cannot legally direct water onto a neighbor's property in most jurisdictions. That is worth keeping in mind before you cut the slope toward a fence line. More on fixing patio slope is covered in the guide on how to slope an existing concrete patio.
Full materials list
Whether you are doing a dry-pack repair or a full wet-pour patio, you need to start with the right materials. Here is a complete breakdown organized by purpose.
For dry-pack repairs and patches
- Portland cement (Type I/II): the binder in a dry-pack mix. Buy in 94-lb bags.
- Clean concrete sand (sharp, well-graded): 2 to 2.5 parts sand per 1 part cement by volume. Do not use beach or play sand; fine round grains reduce bond strength.
- Water: just enough to make the mix hold its shape when squeezed hard. If water squeezes out of your fist when you compress it, it is too wet.
- Bonding agent (cementitious grout or ASTM C881 epoxy): brush or roll onto the prepared substrate before placing dry-pack. A 1:1 cement-to-water slurry works for most repairs. Epoxy bonding agents offer stronger bonds for demanding situations.
- Polymer-modified repair mortar (optional, for larger patches): products like a polymer-modified concrete repair mortar (available at most home centers) are often easier and more reliable for repairs over about 1 square foot than hand-mixed dry-pack.
- Fiber reinforcement (polypropylene micro-fibers): can be added to repair mixes at manufacturer-recommended dosage for additional crack resistance.
- Curing compound or plastic sheeting: required for moisture retention after placement.
For a full wet-pour patio slab
- Ready-mix concrete (preferred for any slab over ~40 sq ft): specify 3,000 to 4,000 psi. In freeze-thaw climates, specify air-entrained mix with 4 to 7% air content and at least 3,500 psi.
- Bagged concrete mix (for smaller slabs or repairs): 60-lb or 80-lb bags of 4,000-psi mix. Pre-blended and reliable if mixed correctly.
- Compactable gravel base: 4 inches of crushed stone or gravel (3/4-inch minus) as a subbase. Do not skip this.
- Vapor barrier (optional but recommended): 6-mil polyethylene sheeting under the slab in wet climates or on moisture-prone soils.
- Welded wire reinforcement (WWR 6x6 W1.4xW1.4) or rebar (#3 or #4 at 12-18 in on center): for added crack control or where soil conditions demand it.
- Fiber reinforcement (polypropylene or steel fibers): a practical crack-control alternative to WWR for pedestrian slabs. Add per manufacturer dosage.
- Form lumber (2x4 or 2x6 depending on slab thickness): straight, untreated lumber for forming the perimeter.
- Form stakes and duplex nails: for securing forms.
- Expansion joint material (1/2-inch premolded fiberboard): where the slab abuts a house foundation, wall, or existing slab.
- Concrete sealer: penetrating silane/siloxane sealer or film-forming acrylic sealer, applied after curing. Essential for freeze-thaw climates.
For finishing and aesthetics
- Concrete stain (acid-based or water-based): for color after curing.
- Concrete overlay or microtop (for resurfacing existing slabs): polymer-modified skim coat products.
- Anti-slip additive: silica sand or aluminum oxide broadcast into wet sealer for traction on outdoor surfaces.
- Curing compound (ASTM C309 compliant): spray-applied immediately after finishing to retain moisture.
Full tools list
Hand tools
- Tape measure and marking chalk line: for laying out the patio area and form lines.
- Mason's string and line level or laser level: for setting elevations and checking slope.
- Shovel (square-nose and round): for excavation and moving concrete.
- Tamper or hand compactor: for compacting gravel base and for ramming dry-pack mortar.
- Screed board (2x4, straight): for striking off wet concrete to the form height.
- Bull float (36 to 48 in): for initial surface smoothing after screeding a wet pour.
- Magnesium float: for intermediate hand floating.
- Steel trowel: for final finish on wet pour slabs.
- Fresno trowel (optional): long-handled for large areas.
- Concrete edger: for creating a rounded edge along form lines.
- Grooving tool (jointing tool): for cutting control joints into fresh concrete.
- Circular saw with diamond blade or concrete saw: for cutting control joints after curing.
- Wire brush and cold chisel: for surface prep and cleaning repair areas.
- Mixing tub or wheelbarrow: for hand-mixing small batches.
- Hoe or margin trowel: for mixing dry-pack mortar.
- Paintbrush: for applying bonding agent to repair areas.
- Hammer: for staking forms and removing them after curing.
Power tools and equipment
- Electric or gas concrete mixer (or mortar mixer for dry-pack): necessary for bagged-mix slabs over about 10 to 15 bags.
- Plate compactor: for compacting gravel subbase. Rent one; a hand tamper is not adequate for a full subbase.
- Concrete vibrator (pencil vibrator): for consolidating wet-pour concrete and eliminating voids, especially near edges.
- Angle grinder with diamond cup wheel: for scarifying repair surfaces.
- Circular saw with masonry blade or walk-behind concrete saw: for cutting control joints.
- Power screed (optional, for large slabs): vibratory screed board speeds up large flatwork significantly.
Safety gear
- Rubber or nitrile gloves: concrete is highly alkaline and will cause chemical burns with prolonged skin contact.
- Safety glasses or goggles: for mixing, grinding, and cutting operations.
- Rubber boots (knee-high): for wading in wet concrete during placement.
- Dust mask or N95 respirator: for dry-cutting, mixing dry cement, or working around silica dust.
- Hearing protection: for extended use of power tools.
- Knee pads: for floating and finishing work.
Site assessment and prep: what to check before you touch a bag of cement
I have seen more concrete projects fail because of bad site prep than bad mixing. The slab is only as good as what it sits on. Here is how to evaluate your site yourself, what the red flags are, and when to stop and call someone with more expertise.
Soil type and compaction
The two soil problems that kill patios are soft/loose fill and expansive clay. Start with the jar test: dig 6 to 8 inches down and drop a handful of soil into a jar of water, shake it, and let it settle for 24 hours. Sand settles to the bottom first, silt next, and clay floats on top as a cloudy layer. If the clay layer is more than about 30 to 40% of the settled material, you have expansive soil and you need to be careful. Expansive clay swells when wet and shrinks when dry, and it will crack even a well-poured slab over time.
The probe test is quicker: push a 1/2-inch rebar or a piece of conduit 12 inches into the soil with just your body weight and a slight push. If it goes in easily without much resistance, the soil is too soft and loose material needs to be excavated and replaced with compacted gravel. If you hit consistent resistance at 4 to 6 inches, the native soil is likely firm enough to work with after proper base preparation.
For a patio on native soil in good condition, excavate to a depth of 7 to 8 inches below your finished surface elevation (4 inches for the slab plus 3 to 4 inches for your gravel base). Compact the subgrade with a plate compactor before adding gravel. Add gravel in 2-inch lifts, compacting each lift. This takes longer than dumping it all at once, but it is the difference between a slab that stays flat and one that settles unevenly in year two.
Drainage and slope
A patio that pools water becomes a slip hazard and eventually deteriorates from freeze-thaw cycling and repeated wetting. The standard slope for a concrete patio is 1/8 inch per foot (roughly 1%) away from the house. That is enough to move water without being noticeable underfoot. To set and verify this, use a laser level or a long level with a story pole. Set your forms with the high side against the house and drop 1/8 inch per foot toward the outer edge.
Check where that water goes when it leaves the patio. If it will drain toward a foundation, a neighbor's property, or a low spot with no outlet, you have a drainage problem to solve before you pour. Options include grading the adjacent soil, installing a channel drain at the patio edge, or adjusting the slope direction. If you are correcting an existing slab's drainage, that is a different project with its own set of options including grinding, overlays, and mudjacking, which are covered in the guide on how to slope an existing concrete patio.
Setting elevations
Your finished concrete surface should sit at or slightly below the door threshold it connects to (no lip to trip over) and above the surrounding grade so water does not pond against the slab edge. Measure from the door threshold down to establish your target finished elevation, then work backward: subtract 4 inches for slab thickness and 3 to 4 inches for gravel base to find your excavation depth. Mark all four corners of your form area with stakes and set your string lines at the finished surface elevation before you excavate. This makes it much easier to check your grade as you compact the base.
Red flags that mean you need professional or geotechnical advice
- The soil is visibly organic (dark, spongy, smells of decomposition): organic material compresses and rots under load. It needs to be fully excavated and replaced.
- You find more than 6 inches of uncompacted fill, especially if it was placed in the last few years: fill settlement is unpredictable.
- Water seeps into the excavation within 30 to 60 minutes of digging: you have a high water table or underground drainage issue that a slab alone will not fix.
- The ground is noticeably sloped toward the house (more than 2 to 3% grade): you may be directing water toward the foundation and need a drainage engineer's input.
- Soil probe meets no resistance at all in the top 12 inches, or you can push a piece of rebar to 18 inches by hand: soft fill or loose material requires professional evaluation.
- Existing patio shows pattern cracking, heaving, or significant differential settlement: these are signs of soil movement that will recur unless addressed at the subgrade level.
- You are in a seismic zone or known active soil-movement area: consult a geotechnical engineer before placing any slab.
Step-by-step: how to mix, place, and compact dry-pack mortar (for repairs)
If you have confirmed that dry-pack is the right method for your repair (small, confined, non-structural), here is exactly how to do it correctly.
- Prepare the repair area: chip out all loose, delaminated, or contaminated concrete with a cold chisel and hammer or an angle grinder with a cup wheel. The repair cavity should have near-vertical or slightly undercut sides (not feathered edges) to give the mortar something to key into. Minimum repair depth is about 3/4 inch; feathered edges less than 1/4 inch thick will pop off.
- Clean the substrate: wire-brush or grind the surface to bare concrete. Remove all dust, oil, curing compound residue, and standing water. The substrate should be saturated surface dry (SSD): damp but with no puddles.
- Apply bonding agent: brush a thin coat of cement slurry (1 part Portland cement to 1 part water, mix to a paint consistency) into the repair area. Let it become tacky but not dry, typically 15 to 30 minutes. If using an epoxy bonding agent (ASTM C881), follow the manufacturer's open-time instructions exactly.
- Mix the dry-pack mortar: combine 1 part Portland cement with 2 to 2.5 parts clean concrete sand by volume in a mixing tub. Add water very sparingly, mixing thoroughly, until the material just holds together when squeezed hard in your fist. If water drips out when you squeeze, add more dry sand and cement. No measuring cup needed: squeeze-test every batch.
- Place in thin lifts: add dry-pack in layers no thicker than 3/4 to 1 inch. Do not dump it all in at once.
- Compact each lift: use a hardwood dowel, piece of lumber, or a purpose-made tamping rod to ram the mortar firmly into all corners and against all surfaces. Work the rod in overlapping strokes. This step is what gives dry-pack its density. Skipping thorough compaction is the most common failure point.
- Bring to final grade: overfill the repair area slightly (1/8 inch above surrounding surface) and strike off with a straight edge or margin trowel. Then float with a wooden or magnesium float to match the existing texture.
- Cure: cover the repair with plastic sheeting or damp burlap immediately and keep it continuously moist for at least 3 to 5 days. Dry-pack mortar at this low water-cement ratio is vulnerable to rapid drying and will craze or crack if curing is cut short.
Wet-pour process overview (for a full patio slab)
Since dry-pack is limited to repairs and small confined areas, here is a condensed overview of the wet-pour process for a full patio. The full detail on forming, mixing, and pouring is covered in the how-to-pour-a-concrete-patio guide, but these are the critical steps every homeowner should understand.
- Build your forms: set 2x4 or 2x6 lumber at the perimeter of the patio at finished slab elevation. Check for level along the house side and slope (1/8 in per foot) toward the outer edge. Brace forms every 2 to 3 feet with stakes.
- Place your reinforcement: if using WWR, position it on small concrete chairs or wire supports so it sits roughly in the middle third of the slab depth, not on the gravel. If using fiber reinforcement, it goes into the concrete mix.
- Order or mix concrete to spec: for a residential patio, a 3,000 to 4,000 psi mix works for most situations. In freeze-thaw climates, order air-entrained mix (4 to 7% air, minimum 3,500 psi). A 4-inch slab needs about 1.23 cubic yards per 100 square feet of patio area.
- Place and screed: pour concrete starting at the farthest corner from the truck or mixer, work toward the exit point, and pull the mix into the forms. Screed immediately using a 2x4 in a sawing motion across the form tops.
- Bull-float and edge: run the bull float over the screeded surface to push aggregate down and bring cream to the surface. Run the edger along form faces.
- Cut control joints: for a 4-inch slab, cut joints every 8 to 12 feet in both directions with a grooving tool while concrete is fresh, or use a circular saw with diamond blade within 6 to 18 hours of pour.
- Finish to desired texture: broom finish (pull a stiff-bristle broom across the surface) for traction. Time this when the bleed water sheen has disappeared and the surface holds a slight impression underfoot.
- Cure for at least 7 days: apply curing compound immediately after finishing, or cover with plastic sheeting. Keep the slab damp. Do not let it dry out in the first week.
Working in sections and on large patios
Dry-pack is not scalable to large areas, but even with a wet pour, managing a large patio by yourself requires a different strategy. If your patio is over about 400 to 500 square feet, you are looking at multiple cubic yards of concrete that need to be placed and finished before it sets, which typically means a ready-mix truck and at least two helpers. For patios that are large but manageable solo or with one helper, dividing the work into sequential sections (each with its own pour and control joints) is a legitimate strategy. The guide on how to pour a large concrete patio goes into this in depth, including logistics for truck access, pump trucks for hard-to-reach areas, and scheduling pours.
When pouring in sections, each new section bonds to the previous one at a construction joint. Treat that joint as a control joint: straight, clean, and at a planned location. Use a wood or foam divider strip between sections if pours are more than a day apart, and dampen the hardened edge before placing the adjacent pour.
Correcting an existing patio: your options
If your existing patio is sloped wrong, cracked, uneven, or just dull, you have several options short of full demolition. Dry-pack mortar can patch surface spalls and small voids. For larger problems, here is a quick comparison of the main approaches.
| Problem | Fix Option | DIY Feasible? | Approximate Cost Range | Notes |
|---|---|---|---|---|
| Small spalls or surface voids | Dry-pack repair or polymer repair mortar | Yes | $20–$100 in materials | Prep and bonding agent are critical |
| Surface crazing or worn finish | Concrete overlay / microtop | Yes, with practice | $1–$3 per sq ft in materials | Substrate must be clean and sound |
| Wrong slope / drainage problem | Grinding high spots or overlay to build up low areas | Grinding: yes; Overlay: yes | $200–$800+ DIY materials | See sloping guide for full process |
| Settled or sunken section | Mudjacking / foam slab lifting | No (equipment required) | $500–$2,000+ contractor | Only works if slab is structurally intact |
| Severe cracking, heaving, or structural failure | Full removal and replacement | Partial DIY (demo possible) | $6–$15+ per sq ft contractor-installed | Address root cause (soil/drainage) before repouring |
Sealing, staining, and finishing
A newly poured or repaired concrete patio needs at least 28 days of curing before you apply a film-forming sealer or stain. Penetrating sealers (silane or siloxane-based) can go on earlier (as soon as 7 days) because they do not trap moisture inside the slab. For freeze-thaw climates, a penetrating sealer is the most protective option, resisting water and deicing-salt damage without a surface film that can peel.
If you want color, acid stains create a variegated, permanent color by reacting with calcium hydroxide in the concrete surface. Water-based stains are easier to work with, produce more consistent color, and are the safer choice for a first project. Either way, the surface must be clean and unsealed before staining. Apply stain before sealer, not after. For a dry-pack repair patch, be aware that the repair area will absorb stain differently than the surrounding slab because the mix proportions and surface texture differ, so do a test patch in a discreet area first.
Common problems and how to troubleshoot them
| Problem | Likely Cause | Fix |
|---|---|---|
| Dry-pack repair delaminating or popping off | Feathered edges, no bonding agent, or substrate not SSD | Chip out fully, apply bonding agent, minimum 3/4 in depth |
| Repair area cracked within days | Mix too dry, curing cut short, or rapid drying | Keep repair covered and moist 5+ days; mix should hold shape but not be bone dry |
| Wet-pour slab cracking early | Joints too far apart, mix too wet, or rapid surface drying | Cut control joints sooner; avoid adding water to stiff mix at the truck |
| Surface scaling in winter | Deicing salts on low air-content concrete | Use air-entrained mix; seal before first winter; avoid sodium chloride deicers |
| Patio holding water / poor drainage | Slope inadequate or sloped wrong direction | Grind high spots or add overlay to build low spots; see sloping guide |
| Uneven surface / settled sections | Subbase not compacted; organic material in subgrade | Foam lifting or mudjacking for sunken sections; full replacement if subgrade is organic |
| Poor bond on bonded overlay | Existing slab contaminated with oil, sealer, or curing compound | Shot-blast or grind to bare concrete before overlay; use compatible primer |
Time and cost estimates
These ranges are for a DIY homeowner with rented equipment. Contractor costs will typically be 2 to 4 times the material cost for labor, sometimes more in high-cost metro areas.
| Project | DIY Time Estimate | DIY Material Cost (approx.) | When to Hire a Pro |
|---|---|---|---|
| Dry-pack spall repair (1–4 sq ft) | 2–4 hours including prep | $20–$60 | If repair is near a structural edge or anchor |
| Bagged-mix wet-pour patio (100 sq ft) | 1 full day + 2nd day for finishing | $300–$600 | If soil issues are present |
| Ready-mix wet-pour patio (200–400 sq ft) | 1–2 full days with 2 helpers | $800–$2,000 (including ready-mix) | Large areas, vehicle traffic, or complex site |
| Concrete overlay (existing slab, 100 sq ft) | 4–6 hours plus cure time | $150–$400 in materials | If existing slab has structural cracks |
| Control joint cutting | 1–2 hours per 100 sq ft | $0 (included in saw rental) | Rarely needed; straightforward DIY |
| Full patio removal and replacement (200 sq ft) | Demo 1 day, pour 1 day | $1,200–$3,500+ all-in DIY | Any structural or soil concerns |
When to hire a pro (and when you really can do it yourself)
I am genuinely pro-DIY on most concrete patio work. A 200-square-foot patio pour with good prep, the right mix, and one or two helpers is absolutely within reach for a careful homeowner. If you're wondering whether you can do the whole job yourself, see the guide 'Can I pour my own concrete patio?' for a step-by-step evaluation and tips for a successful DIY pour. But I have also seen well-meaning people spend weekends on projects that failed because the situation called for professional judgment from the start. Here is my honest list of when to call a contractor or engineer.
- The site has soft, organic, or highly expansive soil that cannot be fully excavated and replaced by hand.
- The patio is attached to a structural element like a house foundation wall or load-bearing post base.
- The project involves vehicle parking, heavy equipment, or any loading beyond normal pedestrian use.
- You need more than about 5 to 6 cubic yards of concrete: at that volume, the logistics of placement and finishing before the mix sets requires a professional crew.
- There is an active drainage or water infiltration problem at the site that you cannot resolve with simple grading.
- The existing slab shows evidence of subsurface soil movement (heaving, settlement, pattern cracking) rather than just surface wear.
- Local code requires engineered drawings or third-party inspection for the work.
Your pre-project checklist
Before you buy a single bag of cement, run through this list. It takes about 30 minutes and will save you a lot of frustration.
- Call 811 to have utilities marked (required before any digging).
- Check local permit requirements with your building department.
- Perform the probe test and jar test to assess soil type and compaction.
- Measure and calculate the patio area; determine slab thickness and subbase depth needed.
- Set your string lines and verify finished elevation and slope (1/8 in per foot minimum away from house).
- Confirm where drainage will go once it leaves the patio edge.
- Decide: dry-pack repair, wet-pour with bagged mix, or ready-mix truck. Use the decision table in this article.
- Assemble your full materials and tools list before starting. Running out of material mid-pour is a serious problem.
- Line up helpers if the patio is larger than 100 square feet.
- Check the weather forecast: avoid pouring in temperatures below 40°F or above 90°F, in direct sun without shade/windbreak, or when rain is expected within 24 hours.
FAQ
Can a homeowner properly and safely “dry pour” a concrete patio (dry‑pack / low‑slump)?
Short answer: Mostly no for full, unconfined patios — yes for small, confined repairs, bedding, or thin bonded toppings. Dry‑pack (near‑zero slump) mortar is a legitimate technique for spalls, pockets, setting tile/stone, or narrow confined sections where you can ram and consolidate in lifts. However, placing a large, unconfined patio panel by hand‑ramming dry mix will usually yield poor consolidation, voids and premature failure. For a full patio, use conventional wet (plastic) cast concrete or a proper roller‑compacted concrete (RCC) installation with equipment and QC.
When is dry‑pour (dry‑pack / low‑slump) appropriate vs. a traditional wet pour?
Use dry‑pack when: repairing localized spalls, filling confined voids, bedding stone/fixtures, or applying a thin bonded mortar topping in small areas. Use traditional wet (plastic) concrete when: placing full slabs or large unconfined areas, needing continuous high quality consolidation, spanning more than a few square feet at a time, or where reinforcement and control‑jointing are required. Consider RCC only when you have access to continuous compaction equipment and experience (not a typical DIY option). Key decision points: area size, ability to confine and compact the material, required thickness and reinforcement, and exposure (freeze‑thaw or vehicle loads favor wet cast with air entrainment and proper mix).
What practical limitations should I know before choosing dry‑pack?
Practical limits: best for small, confined repairs and thin bedding; not suitable for large, unconfined slab panels; slabs on ground normally require minimum 3.5–4 in thickness, base preparation, and control joints; dry‑pack is not easily reinforced — full‑depth slabs with reinforcement or vehicle loading require cast concrete. Also consider climate (freeze‑thaw needs air‑entrained mixes), soil movement, and site drainage. If you need continuous, uniform surface across many square feet, choose wet cast or segmented pours with proper formwork and consolidation.
What materials and tools will I need for a DIY dry‑pack job (repairs or small sections)?
Materials: Type I/II Portland cement, clean concrete sand (washed coarse sand), potable water, bonding grout or epoxy (for overlays/repair bond), polymer additive if specified, curing compound or burlap/plastic, optional latex or polymer‑modified repair mortar for improved bond and durability. Tools: mixing tub or mortar mixer, wheelbarrow, shovels, rammers/hand tamp, magnesium or wood float, wooden striking/stiff trowel, screed board (for small formed areas), straightedge, hand vibrator or needle (for very small confined work if available), measuring buckets/scale, protective gear (gloves, eye protection, dust mask), broom, curing coverings.
What are recommended mix proportions and consistency for dry‑pack?
Typical repair/dry‑pack proportions: about 1 part Portland cement to 2–2.5 parts clean sand by volume (some specifications use 1:3 for less cementitious content). Target water‑cement ratio ~0.25–0.35 — add only enough water so the mix will hold shape when formed and compacted; it should be very stiff (near zero slump). For a bonding grout, use a cement paste (roughly 1:1 cement:sand or 1:0 by volume for pure paste) and apply damp/SSD. For overlays or higher durability use manufacturer’s polymer‑modified mortar mix and follow instructions.
Step‑by‑step: how do I prepare the site before dry‑packing?
1) Assess the site: check soil type, drainage, slope, and code requirements; verify no buried utilities; confirm if permits are required. 2) Remove unsound concrete, debris, and loose material; clean substrate to sound concrete. 3) For slabs on grade, ensure proper base: compacted granular base (4 in typical under patios) and leveling. 4) Set forms or confining edges for each work area. 5) Install reinforcement where required (wire mesh or rebar) for wet pours; for small dry‑pack repairs reinforcement is normally not used, but dowels or pins can be set into drilled holes and epoxied for large patches. 6) Pre‑wet substrate to saturated surface‑dry (SSD) condition to avoid rapid water draw from the repair mortar. 7) Apply bond grout or epoxy according to manufacturer specs immediately before placing dry pack.