
Yes, you can absolutely repair a cracked concrete patio yourself, and most cracks are exactly the kind of thing a DIY homeowner can handle in an afternoon. The key is matching the right repair method to the right type of crack. If you are dealing with the kind of damage where my concrete patio is cracked, it helps to figure out whether the crack is hairline, wider, moving, or causing spalling. A thin hairline crack gets a different treatment than a wide, moving crack or a chunk of spalled surface. Get that match right and your repair will last. Get it wrong and you'll be back out there redoing it next season.
Fix Cracked Concrete Patio: Step-by-Step DIY Repair Guide

Silas Morrison
14 May 2026
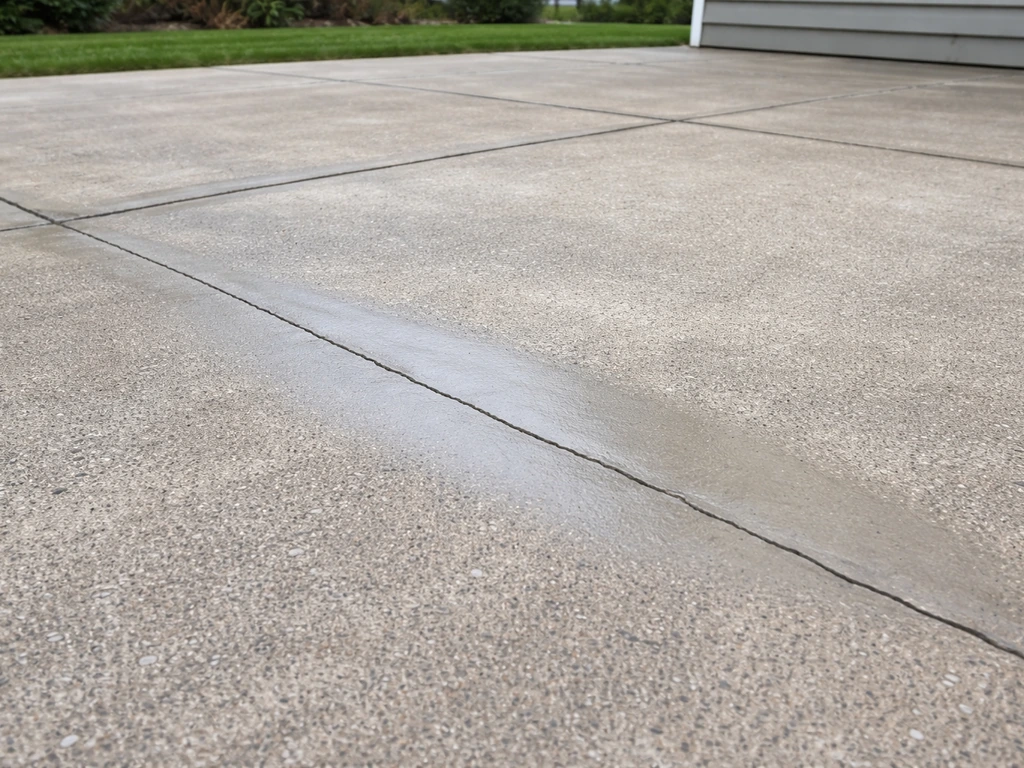
Identify your crack type first, it changes everything
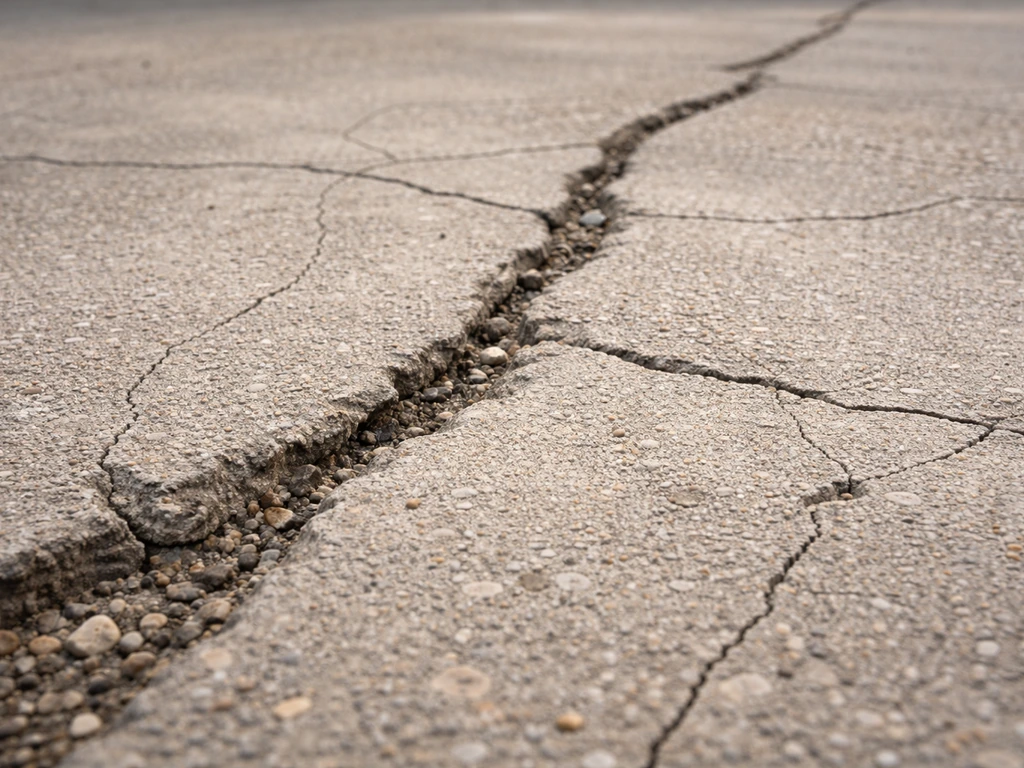
Before you buy a single product, spend five minutes actually looking at your cracks. Not all concrete cracks are equal, and treating them all the same is the fastest route to a failed repair.
Hairline cracks (under 1/8 inch wide)
These are the thin, spidery lines you see on almost every older patio. They usually form during the original curing process or from normal seasonal expansion and contraction. They look alarming but are almost always cosmetic. If water isn't pooling in them and the edges aren't raised, a liquid concrete crack sealant or filler is all you need.
Wider cracks (1/8 inch to 1/2 inch)
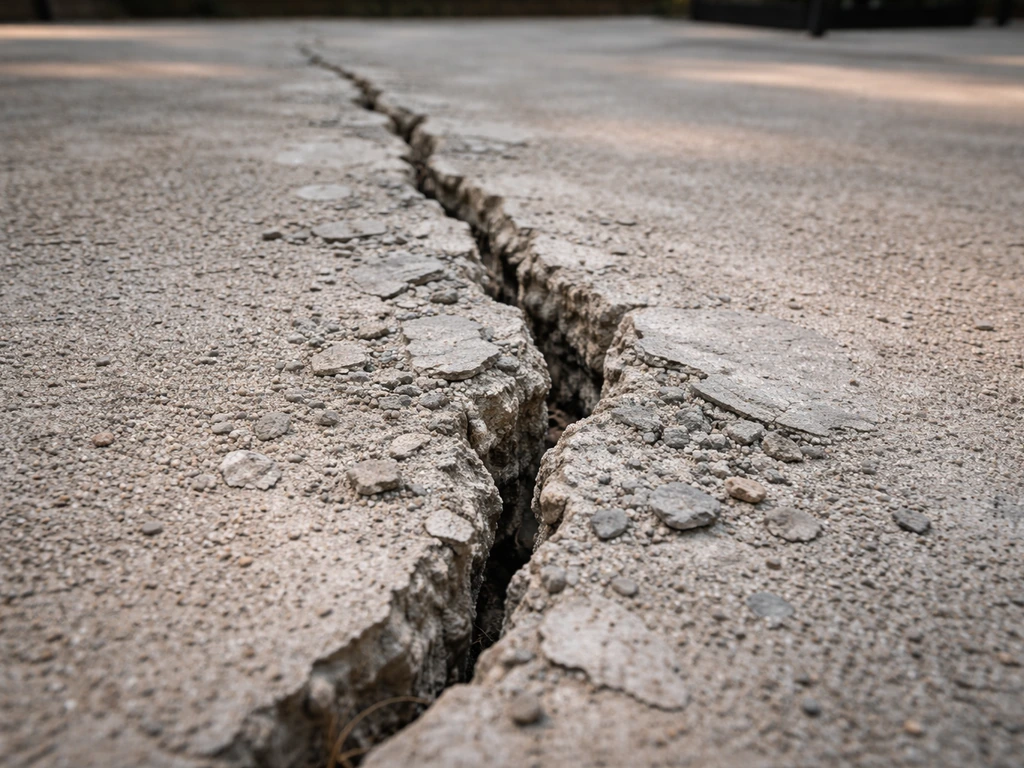
These deserve more attention. A crack in this range usually means some minor movement has already happened, whether from soil settling, tree root pressure, or freeze-thaw cycles. You'll want to use a thicker polyurethane caulk or a vinyl concrete patching compound rather than a thin liquid filler. The crack edges should be checked carefully for any looseness before you start.
Spalling and surface damage
Spalling is when the top surface of the concrete flakes, chips, or pits. This is usually caused by freeze-thaw damage, deicing salt, or a weak mix. It's not the same as a structural crack and is fixed with a surface patch or resurfacer rather than a crack filler. If the spalling covers a large portion of your patio, you're really looking at a resurfacing project rather than a spot repair. If the spalling covers a large portion of your concrete patio, focus on how to resurface cracked concrete patio rather than a small crack filler fix resurfacing project.
Active or moving cracks
This is the one that catches people off guard. An active crack is one that's still moving, either because the slab is continuing to settle, heaving from soil pressure, or shifting with temperature. The telltale signs are edges that don't match up evenly (one side is higher than the other), a crack that keeps getting wider, or a crack that runs across an entire slab section from edge to edge. A rigid filler in an active crack will just crack again. For active cracks, you need a flexible polyurethane sealant, and if there's significant vertical displacement, that's a bigger structural conversation.
| Crack Type | Width | Likely Cause | Best Fix |
|---|---|---|---|
| Hairline | Under 1/8" | Curing shrinkage, age | Liquid concrete crack sealer |
| Medium crack | 1/8" to 1/2" | Settling, freeze-thaw | Polyurethane caulk or vinyl patch compound |
| Wide crack | Over 1/2" | Settlement, heaving, root pressure | Chisel, clean, pack with patching mortar |
| Spalling | Surface only | Salt, freeze-thaw, weak mix | Concrete resurfacer or surface patch |
| Active / moving | Any width, uneven edges | Ongoing soil movement | Flexible polyurethane sealant, monitor for pro consult |
What you'll need for the repair
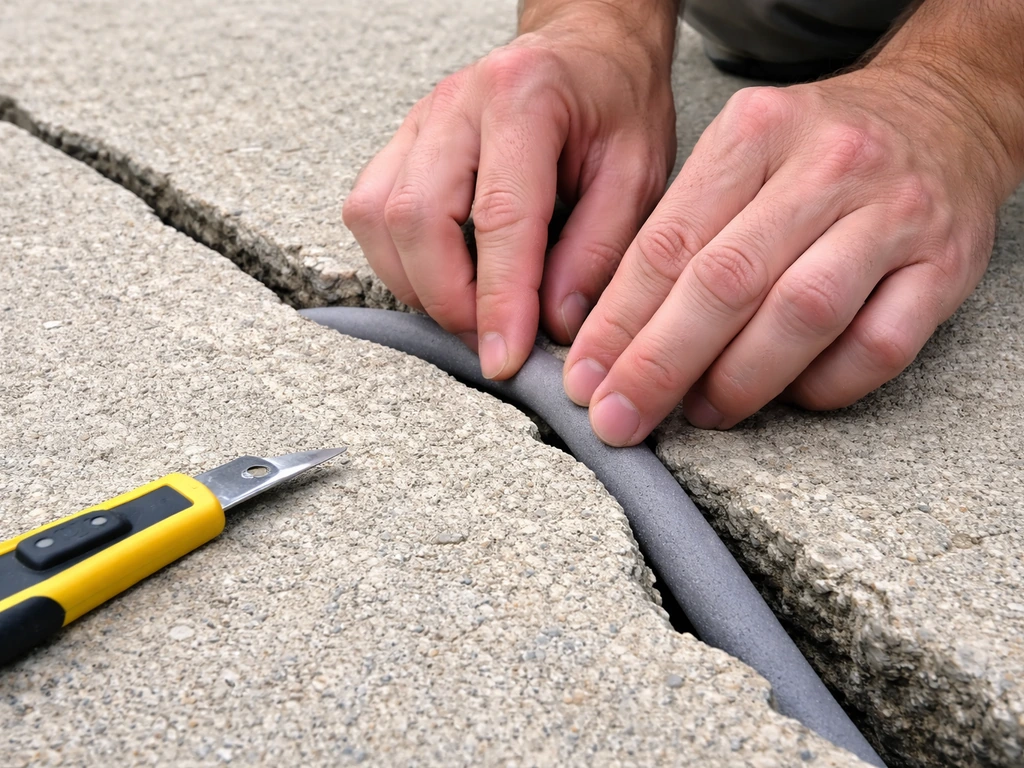
The good news is that a basic concrete crack repair kit is cheap and easy to find at any home improvement store. Here's what to grab based on the crack type you're dealing with.
For hairline to medium cracks
- Polyurethane concrete crack sealant (like QUIKRETE Concrete Crack Sealant, product 8620-17) or a comparable liquid crack filler
- Caulk gun (if using a cartridge-style product)
- Wire brush or stiff broom
- Leaf blower or compressed air (to clear dust and debris)
- Shop vacuum
- Plastic scraper or putty knife
- Painter's tape (optional, for clean edges)
For wider cracks and patching
- Cold chisel and hammer (to undercut crack edges)
- Angle grinder with a crack chaser blade (optional but faster for longer cracks)
- Vinyl concrete patch compound or hydraulic cement for deep voids
- Margin trowel or putty knife
- Stiff bristle brush
- Bucket and water
- Bonding adhesive (highly recommended for better patch adhesion)
- Safety glasses and dust mask
For finishing and sealing
- Concrete sealer (penetrating silane-siloxane or film-forming acrylic, depending on your finish preference)
- Paint roller with extension pole or pump sprayer
- Backer rod foam (for cracks wider than 1/2 inch, to avoid using too much filler)
- Concrete color pigment or caulk colorant (optional, to blend the repair)
How to fix cracked concrete patio: step-by-step
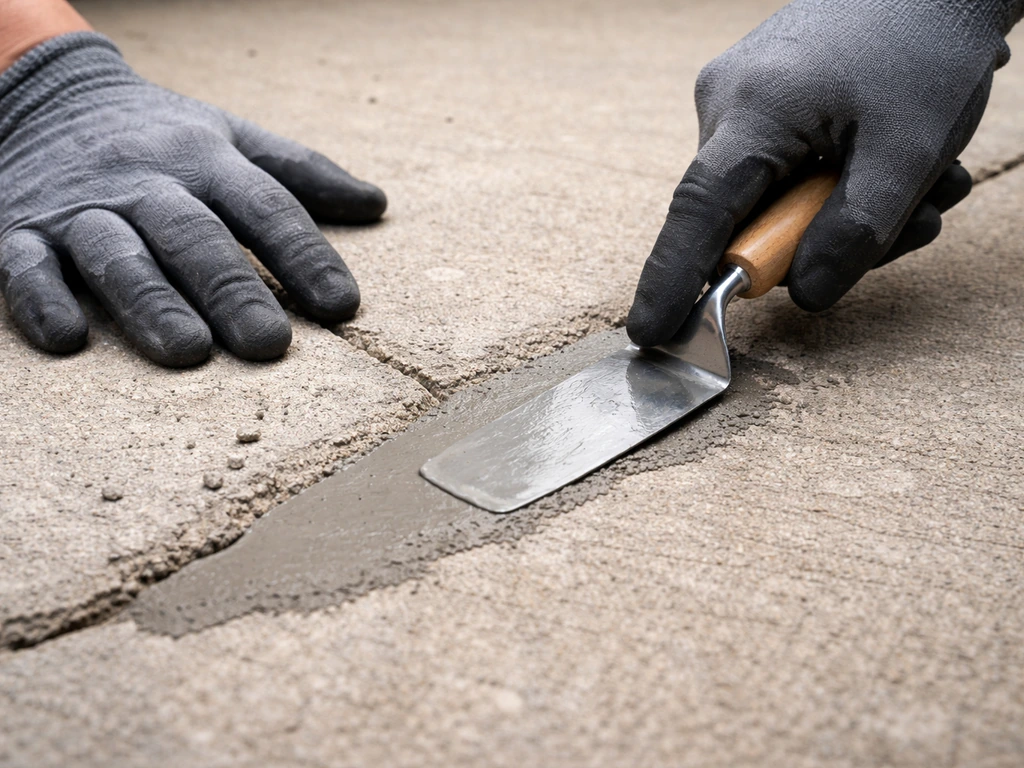
I've done this repair on my own patio twice, and the process is the same whether you're dealing with one crack or a dozen. The prep work is what separates a repair that lasts from one that pops loose in six months.
Step 1: Prep the crack
Start by removing everything loose. Use a cold chisel and hammer to chip out any crumbling or flaking concrete along the crack edges. The goal is to get down to solid material on both sides. For wider cracks, slightly undercut the edges (angle the chisel inward so the bottom of the crack is slightly wider than the top). This creates a mechanical lock for the patch material and keeps it from popping out.
Step 2: Clean thoroughly
This step matters more than most people think. Blow out all the dust, debris, and loose particles with compressed air or a leaf blower, then vacuum with a shop vac. If there's any oil, grease, mildew, or old sealer in or around the crack, scrub it out with a stiff wire brush and rinse with water. The substrate must be clean, dry, and free of anything that would prevent bonding.
blank" rel="noopener noreferrer">QUIKRETE’s crack sealant data sheet specifies that the substrate must be clean, dry, frost-free, sound, and free of oils, grease, incompatible sealers, paints, or coatings, and it’s a fast-curing, flexible one-component polyurethane sealant clean, dry, frost-free, and free of oils or incompatible coatings.
QUIKRETE and most other product manufacturers are explicit about this: oils, grease, incompatible sealers, and coatings will cause the repair to fail. Let the concrete dry completely before moving on.
Step 3: Apply backer rod for deep or wide cracks
If your crack is deeper than about 1/2 inch or wider than 1/2 inch, press foam backer rod into it first. Backer rod is a cheap closed-cell foam that fills space so you're not burning through an entire tube of filler on one crack. It also gives the sealant a proper two-point adhesion (sides of the crack) rather than three-point (sides and bottom), which is important for flexible sealants that need to move.
Step 4: Fill or patch the crack
For hairline and medium cracks, load your polyurethane crack sealant into a caulk gun and apply a steady bead into the crack, slightly overfilling. Tool it smooth with a wet finger or plastic scraper. Polyurethane sealants like QUIKRETE Concrete Crack Sealant are flexible and one-component, meaning no mixing required. They're dry to the touch within about 30 minutes, which is convenient but means you need to tool and smooth quickly after application.
For wider cracks that you've chiseled out, use a vinyl concrete patch compound or a polymer-modified mortar. If using a dry-mix product, mix it to a peanut butter consistency, no runnier. Apply a bonding adhesive to the crack interior first and let it get tacky (usually about 5 to 10 minutes). Then pack the patch material in firmly with a margin trowel, working it in layers if the crack is deep. Don't try to fill a deep crack in one thick application; it won't cure properly and will shrink and crack again.
Step 5: Finish the surface
Smooth the patched area flush with the surrounding concrete using your trowel or scraper. Feather the edges out slightly so the repair blends rather than sitting proud. For a more textured finish that matches broom-finished concrete, lightly drag a stiff brush across the wet patch before it sets. The repair will likely be a noticeably different color than your surrounding slab at first, but it tends to blend somewhat as it cures and weathers, especially once you seal the whole surface.
When to put the tools down and call a pro
I'm a big believer in DIY, but there are situations where patching is the wrong call. If any of the following apply to your patio, get a structural assessment before you spend time and money on repairs that won't hold.
- The slab has sunk or heaved more than about 1/2 inch — this is a soil or drainage problem that patch material can't solve
- There's significant vertical displacement between crack edges, meaning one side is noticeably higher than the other
- Cracks span the entire width or length of a slab section and the section moves when you step on it
- You have widespread cracking in a grid or map pattern across the whole surface, which can indicate a deeper structural or base failure
- The patio is directly adjacent to a foundation and the cracks appear to continue into the house structure
- You've repaired the same cracks more than once and they keep coming back in the same spots
These situations often involve slab lifting, mudjacking, or full slab replacement. A mudjacking or polyurethane foam lifting contractor can often re-level a settled slab for a fraction of the cost of replacement, and that's worth getting a quote on before you commit to resurfacing a slab that's still moving. If uneven sections are part of your problem, that's really a separate issue from just filling cracks, it's worth thinking through the full scope before you start. If uneven sections are part of your problem, that's really a separate issue from just filling cracks, so you may need to look at how to fix cracked uneven concrete patio before you start.
Curing, sealing, and keeping the repair looking good
The repair isn't done when you smooth the surface. What you do in the next 24 to 72 hours, and whether you seal the whole patio afterward, will determine how long this repair actually lasts.
Curing time and weather
Most polyurethane crack sealants are dry to the touch in about 30 minutes, but that doesn't mean they're cured. Give the sealant at least 24 hours before light foot traffic and 48 to 72 hours before you move furniture back on it. For cementitious patch compounds, follow the manufacturer's cure time, which is typically 24 to 48 hours for foot traffic and 7 days for full strength. Keep the patched area out of direct sun and mist it lightly with water once or twice a day during hot, dry weather to prevent the patch from drying too fast and shrinking.
Pay attention to the weather forecast before you start. Most concrete crack sealants, including QUIKRETE's polyurethane products, should not be applied if blank" rel="noopener noreferrer">rain is expected within 24 hours. Moisture getting into an uncured sealant or patch will weaken the bond and potentially wash out uncured material. Also avoid application if temps are near or below freezing. Concrete products need temperatures above 40 to 50 degrees Fahrenheit to cure properly.
Sealing the whole patio
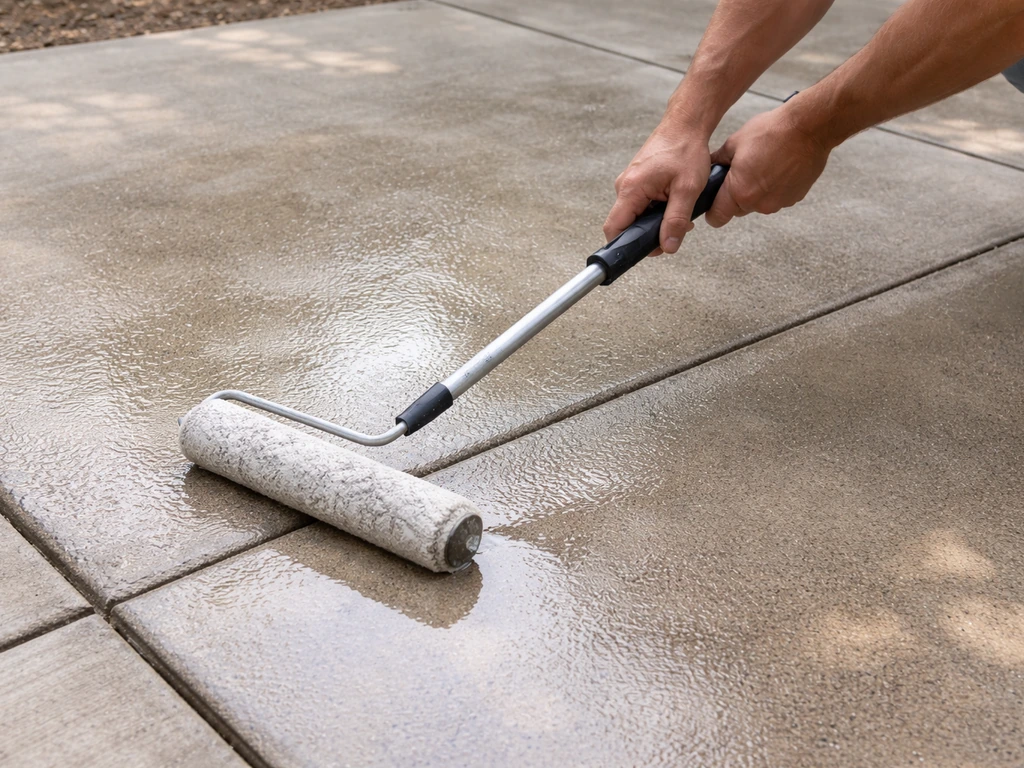
Once your repair has fully cured, this is the perfect time to seal the entire patio, not just the repaired area. Sealing serves two purposes: it protects the fresh patch from moisture intrusion and UV degradation, and it unifies the appearance of the surface so the repair blends in better. A penetrating silane-siloxane sealer works by soaking into the concrete and repelling water from within. It won't change the look of your patio much, which is ideal if you like the natural gray finish. A film-forming acrylic sealer sits on top of the surface, adds a slight sheen, and can bring out color in stamped or stained concrete. Both are valid choices, just different aesthetics.
Apply sealer with a paint roller or pump sprayer in thin, even coats. Two thin coats beat one thick one every time. Let the first coat dry completely (usually 1 to 2 hours) before applying the second. Keep foot traffic off the sealed surface for at least 24 hours and avoid dragging furniture across it for a few days.
How to reduce cracking going forward
Sealing every 2 to 3 years is the single best thing you can do to slow down future cracking. Water is the enemy: it gets into the concrete, freezes, expands, and opens up new cracks or widens old ones. If water pools on your patio after rain, address the drainage issue too. And if you live somewhere that gets hard winters, switch from rock salt to a concrete-safe deicer (calcium magnesium acetate or sand), because chloride-based salts accelerate surface spalling and breakdown.
If your patio has broader cosmetic issues beyond just the cracks, like a dull, stained, or worn-out surface, there are good options for resurfacing or covering the whole thing once the structural cracks are addressed. A solid repair foundation always has to come first, but once you have that, there's a lot you can do to make the whole patio look new again.
FAQ
Can I just seal the crack instead of doing all the chipping and prep?
Yes, but only in certain cases. If your crack is a stable hairline pattern with no lift, no spalling, and no water pooling, sealers are usually fine. If the crack is wider than a typical hairline, edges are uneven, or the crack continues to widen seasonally, you generally need a flexible polyurethane sealant and proper prep, not just a thin surface product.
How do I know whether my crack is still active (moving) and DIY repair will not hold?
Stop and reassess if you see side-to-side height differences, the crack visibly changes width over a few months, or you find signs of settlement like gaps at expansion joints. Those point to an active or structural issue, and a flexible sealant alone can fail because the movement will keep breaking the repair.
What happens if I use a rigid filler in a moving crack?
No. Don’t use a hard, rigid filler in a moving crack, even if it fills nicely at first. For active cracks, use a flexible polyurethane sealant and include a foam backer rod when the crack is deep enough, so the sealant can stretch instead of cracking or debonding.
Is spalling the same thing as a cracked line, and can I treat it like a crack?
If you repair spalling with a crack filler, it often peels because spalling is a surface deterioration problem, not a single-line gap. For spalling, use a patching or resurfacing material designed for bonding to the concrete surface, and if the affected area is large, shift to a resurfacing plan rather than spot patching.
What if the crack is along an expansion joint or control joint?
Yes, but plan for the joint behavior. If the crack is actually an expansion or control joint, you may need to clean it out and reseal it with the right sealant system rather than packing it like a typical random crack. If the joint has been filled with incompatible material in the past, remove the failed material thoroughly before redoing it.
Can I fix a cracked patio if the crack area is damp?
You should address it only if it’s present where the sealant or patch must bond. If there is dampness in the crack during prep, you may need to wait for dry weather, improve drainage, or investigate a leak. Applying sealant or patching over wet contamination can cause bubbling, weak bonding, or the material to wash out.
When should I use foam backer rod, and when is it optional?
Use a foam backer rod when the depth requires it, typically when the crack is deeper than about 1/2 inch or it would otherwise consume too much sealant. The backer rod helps you hit the right sealant profile and promotes adhesion to the sides rather than forcing the sealant to bond to the bottom.
Do I need to mist the patch while it cures, and how much is too much?
Moisture management matters a lot. Lightly misting the patch during hot, dry conditions can reduce shrinkage cracking, but don’t soak it, and do it only in a way that doesn’t wash out fresh material. If you have to keep the patch damp, do it consistently for the early cure window recommended for your specific product.
If my patio is uneven, can I still just patch the cracks?
Avoid it. Thin liquid sealers and fillers can’t compensate for an unstable slab. If the slab is lifting or you see uneven sections, get a quote for leveling solutions like mudjacking, because patching over an actively shifting surface often leads to repeat cracking.
Should I seal just the repaired crack area or the whole patio?
Yes, and it’s often worth it. If the existing finish is uniform and you want the repaired area to blend, sealing the entire patio after the repair cure helps both appearance and protection. Just make sure the repair has fully cured before sealing, and use thin coats so you don’t trap moisture.