
If your concrete patio is cracked, the first thing to know is that most cracks are fixable yourself, and even the ones that aren't DIY-friendly have clear solutions. The real job right now is figuring out which kind of crack you're dealing with, because a hairline shrinkage crack and a crack caused by soil settlement are two completely different problems that need completely different responses. Once you know what you're looking at, the path forward is straightforward: patch it, resurface it, cover it, or call someone in. This guide walks you through all of it.
My Concrete Patio Is Cracked: Diagnose, Fix, Cover & Prevent

Silas Morrison
24 Jul 2026
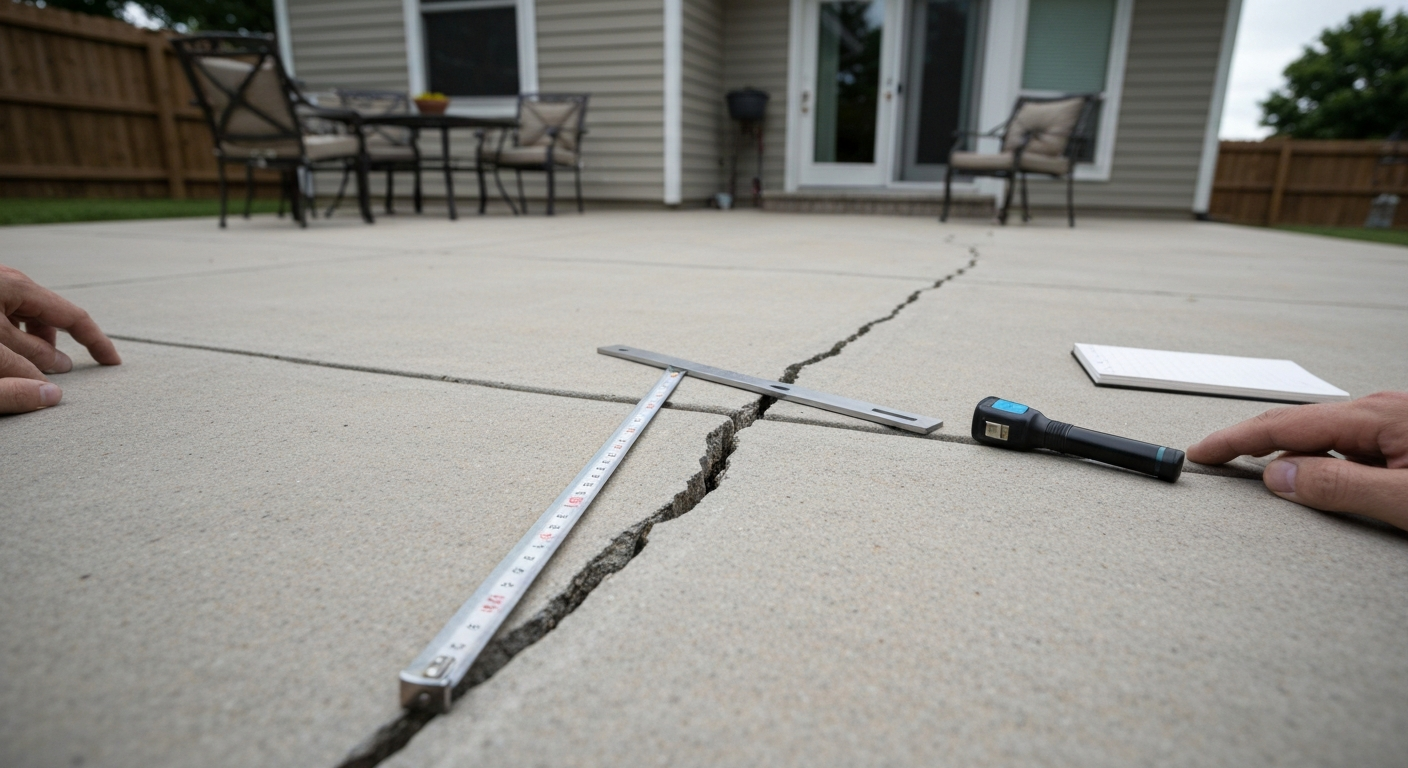
Start here: cosmetic or structural?
Before you spend a dime on materials, spend five minutes with a tape measure and a flashlight. The most important thing to check is whether the two sides of the crack are sitting at the same level. Crouch down and run your finger across the crack. If one side is higher than the other, that's a differential displacement, and it's the single most reliable sign of something structural going on beneath the slab. Width matters too, but offset is the bigger red flag.
A practical threshold used by many builder warranty programs: any crack outside a control joint that measures more than 1/4 inch wide or shows 1/4 inch of vertical displacement warrants a closer look, potentially from a pro. For the vast majority of homeowners though, the cracks you're seeing are narrower than that and sitting flat.
Quick decision checklist
- Crouch down and look across the slab surface. Do you see any sections that are raised or sunken relative to adjacent sections?
- Run your finger or a straightedge across the crack. Is there any measurable vertical step (offset)?
- Measure the crack width at its widest point. Is it under 1/8 inch (about 3 mm), between 1/8 and 1/2 inch, or wider than 1/2 inch?
- Check the crack pattern. Is it a single line, a network of map-cracks, or does it follow the slab edge?
- Has the crack appeared recently and stopped, or does it seem to be growing? (Mark the crack ends with a pencil and date it. Check again in two weeks.)
- Are there nearby trees, downspouts discharging close to the slab, or soft/wet soil under the edge of the patio?
- Does the slab rock or flex when you step on it?
| What you observe | Likely classification | Next step |
|---|---|---|
| Hairline crack, no offset, crack stopped growing | Cosmetic / shrinkage | Seal or patch yourself |
| Crack under 1/4 in wide, flat, stable | Cosmetic / minor | Patch or resurface yourself |
| Crack 1/4–1/2 in wide, no or minimal offset, stable | Moderate / cosmetic-structural boundary | Patch with polymer-modified filler; monitor |
| Any crack with measurable vertical offset | Structural / settlement | Investigate cause; consider pro evaluation |
| Crack wider than 1/2 in or growing | Structural | Pro evaluation before any cosmetic repair |
| Slab rocks underfoot, soft spots, slab edge drooping | Foundation/base failure | Stop use; get structural or geotechnical assessment |
| Map-cracking (crazing) across the surface | Surface shrinkage / curing issue | Resurfacing or sealing; no structural concern |
What caused the crack in the first place
Knowing the cause isn't just academic. If you patch a crack caused by a tree root without removing the root, you'll be patching the same spot again in two years. Here are the main culprits and how to spot each one.
Shrinkage cracks
This is the most common type, and honestly the least alarming. Concrete shrinks as it dries and cures, and that shrinkage creates tension. If control joints weren't cut deep enough or spaced correctly, or if the slab dried too fast, the concrete finds its own place to crack. Shrinkage cracks are usually thin (under 0.3 mm, roughly 0.012 inches), run in fairly straight lines, have no vertical offset, and stopped forming within the first few years after the pour. According to ACI 224R guidelines, cracks under about 0.3 mm are typically considered non-structural in most exposure conditions, though in freeze-thaw climates or around deicing chemicals even small cracks deserve sealing.
Missing or inadequate control joints
Control joints are intentional weak points tooled or sawed into the slab so that shrinkage cracks happen where you want them, not randomly. ACI guidelines call for joints at least one-quarter of the slab thickness deep, and common industry practice spaces them roughly 2 to 3 times the slab thickness in feet (so a 4-inch slab gets joints every 8 to 12 feet). If your patio has no joints or joints that are too shallow, random cracking was essentially inevitable.
Settlement and poor base preparation
If the subgrade wasn't compacted properly, or fill soil was used without adequate compaction, sections of the slab will sink as the soil settles underneath. This shows up as a crack with a vertical step between the two sides. It can also look like a slab edge that has dropped away from the house or a section that rocks underfoot. This is not a patch-and-move-on situation.
Freeze-thaw cycles
Water gets into a crack, freezes, expands by about 9 percent, and forces the crack open wider. Do this a few dozen times over a couple of winters and a hairline becomes a significant gap. This is why sealing cracks promptly matters a lot in cold climates, and why ACI guidance recommends air-entrained concrete for freeze-thaw exposure. The maximum acceptable crack width ACI 224R lists for a surface exposed to deicing chemicals is just 0.007 inches (0.18 mm), which puts things in perspective.
Tree roots
Roots exert enormous pressure as they grow. A crack near a tree (especially near the slab edge) that shows upward heave on one side is almost always root-related. The concrete isn't failing; it's being pushed. Patching without addressing the root is a temporary fix at best.
Drainage problems
Water pooling under the slab, or a downspout dumping right at the patio edge, erodes and softens the subgrade over time. Once the base softens unevenly, sections settle. Check where your gutters discharge and whether the ground around the patio slopes toward it or away from it. It should slope away at roughly 1/8 to 1/4 inch per foot.
Repair, cover, or replace: how to decide
The answer comes down to three things: the extent of cracking, whether the underlying cause has been fixed or is fixable, and your budget and aesthetic goals.
| Situation | Best approach | Why |
|---|---|---|
| 1–2 hairline or minor cracks, stable, no offset | Repair and seal | Quick, cheap, effective long-term if cause is addressed |
| Multiple cracks, surface looks worn but slab is flat and stable | Resurfacing or decorative overlay | Restores appearance and seals everything at once |
| Cracked but structurally sound slab and you want a new look | Cover with pavers, tile, or composite decking | Hides damage, adds value, no demo needed |
| Cracks with offset or active settlement, limited area | Slab lifting (mudjacking or polyjacking) + patch | Addresses root cause without full replacement |
| Widespread structural cracking, severely settled, root/drainage problem unresolvable | Partial or full replacement | Only option when base or slab integrity is gone |
| Small budget, temporary fix needed | Outdoor rug or composite tiles | Buys time; not a long-term solution |
Repairing hairline and small cracks yourself
These are cracks under about 1/8 inch (3 mm) wide, with no offset. I've repaired dozens of these, and the biggest mistake I see is people trying to fill them with regular cement mix. The aggregate is too coarse, nothing bonds properly, and the patch pops out in a season. Use the right product and the repair lasts.
Materials and tools
- Low-viscosity epoxy injection resin (for structural or dormant dry cracks, e.g., Sika Sikadur-52 or equivalent ASTM C881-compliant product)
- Polyurethane crack sealant or hydrophilic/hydrophobic polyurethane injection grout (for active or water-infiltrated cracks, e.g., SikaFix HH or equivalent)
- Concrete crack filler (self-leveling polyurethane or epoxy for surface application on horizontal cracks)
- Wire brush and vacuum or compressed air
- Cold chisel and hammer (optional, to slightly open the crack for better product penetration)
- Caulk gun (for cartridge-based products)
- Painter's tape
- Safety glasses and nitrile gloves
Time and cost
Budget 1 to 2 hours including prep and cure setup. Material costs for hairline repairs typically run $15 to $40 per crack depending on product and crack length. Epoxy injection kits for multiple cracks can cost $40 to $80. Self-leveling polyurethane sealant in a tube runs $8 to $20.
Step-by-step process
- Clean the crack thoroughly. Use a wire brush to remove loose material, then blow out dust and debris with compressed air or a vacuum. Any dirt or moisture left in the crack will prevent proper adhesion.
- For very tight hairline cracks, use a cold chisel to slightly open the crack to a V-shape (about 1/4 inch wide at the top). This gives the filler more surface area to bond to.
- For wet or actively seeping cracks: choose a hydrophilic polyurethane product. These products actually use the moisture to activate expansion and form a watertight gel. Follow the manufacturer's data sheet for the injection port spacing (typically 6 to 12 inches apart along the crack) and whether an accelerator is needed.
- For dry, stable cracks: a low-viscosity epoxy like Sikadur-52 or a self-leveling polyurethane sealant works well. Epoxy bonds rigidly and is ideal for cracks that are fully dormant. Polyurethane stays flexible and handles minor future movement better.
- Apply painter's tape along both edges of the crack to keep the repair neat, then apply your chosen product according to the manufacturer instructions. Self-leveling products will flow into the crack on their own on horizontal surfaces.
- Allow full cure before foot traffic. Epoxy systems typically reach usable strength in 24 to 48 hours at 70°F; polyurethane sealants can skin over in 1 to 4 hours but take 24 hours for full cure. Always check the product data sheet, as temperature significantly affects cure time.
- Once cured, apply a penetrating concrete sealer over the entire repaired area to protect the patch and the surrounding slab.
Troubleshooting small crack repairs
- Filler not bonding or popping out: the crack wasn't clean or dry enough before application. Strip the failed patch, reclean thoroughly, and redo.
- Self-leveling filler running past the tape: apply tape more carefully and make sure the crack is horizontal. On a slightly sloped surface, work in short sections.
- Crack reappearing in the same place: the underlying cause (tree root, settlement, drainage) hasn't been addressed. Fix the source before patching again.
- Product too thick to penetrate a hairline crack: switch to a lower-viscosity version. Many manufacturers offer multiple viscosities in their injection product lines.
Repairing medium cracks (1/4 inch to 1/2 inch wide)
Once a crack is wide enough to fit a pencil tip in it, you're past sealant territory and into patching territory. These cracks need a backer rod to control the depth of the repair and a polymer-modified patching compound to fill the gap with material that can flex slightly and bond properly to the concrete walls.
Materials and tools
- Backer rod (closed-cell polyethylene foam rod, sized to be about 25% wider than the crack so it compresses in and holds position)
- Polymer-modified cement patching compound or epoxy mortar (e.g., Euclid Chemical, Ardex, Mapei, or equivalent)
- Concrete bonding agent / slurry coat (many manufacturers require this for proper adhesion of patch to existing concrete)
- Angle grinder with diamond blade or circular saw with masonry blade (to clean up crack edges)
- Wire brush, shop vacuum
- Margin trowel and pointing trowel
- Safety glasses, dust mask (N95 minimum), gloves
Time and cost
Plan for 2 to 4 hours of active work plus cure time overnight before foot traffic. Material costs typically run $30 to $80 for a 10- to 20-foot crack, depending on the patching product. Backer rod is inexpensive (a few dollars for a roll). If you need to rent an angle grinder, add $30 to $50.
Step-by-step process
- Prepare the crack edges. Use an angle grinder or circular saw with a masonry blade to cut the crack edges straight and square (or undercut slightly). This creates a mechanical key for the patch and removes any weak, spalled material. Aim for a minimum repair depth of 1 inch.
- Clean thoroughly. Wire brush the crack faces and blow out all dust. The surface should be clean and free of any laitance, oil, or loose material.
- Pre-dampen the crack if required by your patching product. Most polymer-modified cementitious patches bond better to a saturated surface-dry (SSD) condition, meaning damp but no standing water. Check your product's data sheet.
- Press the backer rod into the crack. It should sit at least 1/4 inch below the surface to leave room for the patch material. The rod prevents the patch from being too thin at the bottom and controls the shape factor of the repair.
- Apply bonding agent. Brush a slurry of the bonding agent (or a diluted version of the patch mix itself, per manufacturer instructions) onto the crack faces and let it become tacky but not dry.
- Mix and apply the patch. Follow the manufacturer's water-to-powder ratio exactly. Overly wet mixes shrink and crack. Pack the mix firmly into the crack in layers if it's deep, and tool it flush with the surrounding slab.
- Cure the patch. Keep it moist for at least 24 hours (damp burlap or plastic sheeting works). Polymer-modified patches gain strength quickly but need moisture for proper hydration.
- Once fully cured, feather the edges with a hand grinder if needed and apply a matching sealer over the patched area.
Troubleshooting medium crack repairs
- Patch shrinking away from crack edges: mix was too wet, or bonding agent wasn't applied. Chip out and redo with the correct water ratio.
- Patch cracking again after cure: crack is still active (moving). Either address the root cause or use a flexible polyurethane patching compound instead of a rigid cementitious product.
- Color mismatch: nearly universal on old slabs. Apply a tinted sealer over the entire patio surface to blend patched areas. Alternatively, plan a full resurfacing job.
Handling large, structural cracks and uneven slabs
This is where I'll be straight with you: large cracks with offset, actively sinking sections, or cracks that have returned after previous repairs usually mean the problem is underneath the slab, not in the slab itself. You have several options, and the right one depends on how bad the settlement is, what's causing it, and your long-term goals for the space.
Slab stitching
Stitching involves cutting slots perpendicular to the crack and epoxy-grouting in U-shaped steel staples (stitching dogs) to tie the two sides of the crack together and distribute load across it. It doesn't raise sunken concrete; it stabilizes a crack that's at risk of widening further or displacing. This is a legitimate DIY approach for a crack that has offset but is otherwise stable, provided you have the right tools (angle grinder, epoxy mortar). It's common in structural repair of walls and slabs and can be a cost-effective alternative to full replacement on a salvageable slab.
Mudjacking and polyjacking (slab lifting)
If a slab section has sunk due to voids or soft subgrade, lifting it is often better than replacing it. Two main methods exist. Mudjacking pumps a cementitious slurry (cement, soil, water) under the slab through drilled holes; polyjacking (polyurethane foam lifting) injects expanding polyurethane foam through smaller holes. Polyjacking uses lighter material (important on already-weak subgrade), leaves smaller access holes (typically 5/8 inch vs 1.5 to 2 inches for mudjacking), and the foam cures in 15 to 30 minutes so the slab is usable the same day. Mudjacking costs less per job (roughly $3 to $6 per square foot vs $5 to $25 per square foot for polyjacking depending on region and extent), but the added weight of the slurry can be a concern on compromised soil. Both methods have lift limits, and over-lifting a slab that wasn't meant to move creates new problems. This work is almost always done by a contractor with specialized equipment.
Underpinning with piers
When the soil under a slab is fundamentally unable to support the load, lifting alone won't hold. Push piers (resistance piers) or helical piers are driven or screwed down to load-bearing strata and transfer the slab's weight past the problem soil. This is an engineered, permitted solution. Pier systems from manufacturers like CHANCE specify load capacities, installation requirements, and when geotechnical and structural engineering input is required. This is not a DIY project. Costs typically start at $1,000 to $1,500 per pier installed, and a typical patio repair might require 4 to 8 piers. But if the alternative is replacing the slab every five years because the soil keeps settling, piers are the permanent solution.
Partial or full replacement
Sometimes a section is beyond saving: crumbled concrete, root damage that's heaved and split the slab beyond repair, or so many structural cracks that patching would be more expensive than replacing. For a partial replacement, saw-cut cleanly at the nearest control joint or a straight line, remove the bad section, fix the subgrade, and pour a new section. Match the mix design and thickness to the existing slab, and install a proper control joint at the seam. Full replacement is the nuclear option, usually reserved for slabs that are severely settled across their entire area, contaminated with deicing salt damage, or structurally compromised by poor original construction.
| Method | Best for | Approx. cost | DIY possible? | Addresses root cause? |
|---|---|---|---|---|
| Crack stitching | Stable cracks with minor offset, preventing spread | $200–$600 DIY materials | Yes, with right tools | No, stabilizes only |
| Mudjacking | Sunk sections, moderate voids in subgrade | $3–$6 per sq ft | No, contractor equipment needed | Partially (fills voids) |
| Polyjacking | Sunk sections, faster cure, less weight added | $5–$25 per sq ft | No, contractor equipment needed | Partially (fills voids) |
| Helical/push piers | Severe settlement, failing bearing soil | $1,000–$1,500+ per pier | No, engineered installation | Yes, transfers load to stable strata |
| Partial replacement | Isolated badly damaged sections | $8–$20 per sq ft installed | Possible for small sections | Yes, if subgrade is also corrected |
| Full replacement | Slab-wide failure, severe settlement across entire patio | $6–$12 per sq ft poured | Possible DIY on small slabs | Yes, if base rebuilt properly |
Resurfacing and cosmetic upgrades
If your slab is structurally solid but looks terrible, resurfacing is one of the best value moves you can make. A thin overlay can completely transform a cracked, stained, worn surface for a fraction of replacement cost. The key rule: overlays and decorative finishes should only go over a stable, non-actively-cracking slab. Apply them over active cracks and those cracks will reflect through the new surface within a season.
Concrete overlay
Polymer-modified cement micro-toppings and resurfacing compounds can go on as thin as 1/8 to 1/4 inch for micro-topping systems, with medium-bed systems requiring more thickness. Surface prep is critical: the existing slab needs to be clean, sound, and have a proper surface profile (typically achieved by pressure washing, acid etching, or mechanical grinding) so the overlay can bond. A bonding slurry coat is usually applied first. Once cured, the overlay can be textured, broomed, or stamped. Cost for a DIY resurfacing with a bagged product typically runs $0.50 to $1.50 per square foot in materials, plus labor time of about 4 to 8 hours for an average patio.
Stamping and texture
If you're pouring a new section or applying a thicker overlay, adding a stamp pattern is realistic for a confident DIYer. Stamps are rented, and the process involves applying color hardener and release agent to fresh concrete or overlay, then pressing the stamp pattern in before the surface sets. Timing is everything here: too early and you lose detail; too late and you crack the surface pressing down. First time doing it, have a helper and start with a simple pattern.
Acid stain and concrete dye
Acid staining uses a chemical reaction between the acid and the calcium hydroxide in concrete to create color that's permanently embedded in the surface, not sitting on top. Results vary by slab (older, denser concrete takes less color) but the variegated, marbled effect is genuinely attractive. Concrete dye is more predictable in color but sits slightly more on the surface. Both require a clean, bare slab (remove any existing sealer first) and a protective topcoat sealer to finish. Cost is roughly $0.50 to $2 per square foot in materials.
Concrete paint and epoxy coatings
Standard masonry paint is the lowest-cost option but also the shortest-lived. It peels, especially if moisture is coming up through the slab. Epoxy floor coatings (two-part systems) bond much better, resist peeling, and hold up to foot traffic well. They're commonly used in garages but work perfectly on patios. Expect to spend $1 to $3 per square foot in materials and a half-day of application time. The surface must be profiled first (acid etch or diamond grind) for proper adhesion.
Sealer
A penetrating silane-siloxane sealer is the simplest, lowest-maintenance option and the one I put on every repaired patio as a final step. It soaks in, repels water and deicing chemicals, and doesn't change the appearance much. Film-forming acrylic sealers give a wet look or gloss finish but need reapplication every 1 to 3 years. Either way, sealing after any repair or resurfacing job significantly extends the life of the work.
Covering a cracked patio instead of repairing it
Sometimes covering is the smarter move. If the slab is cracked but stable, you've repaired cracks before and they keep coming back cosmetically, or you just want a completely different look, installing something on top of the existing concrete can save you significant demolition cost and effort. Here's when covering makes sense and what your options are.
When covering is preferable
- The cracks are cosmetic and stable but widespread (resurfacing costs vs. covering costs are similar)
- You want a higher-end look (natural stone pavers, porcelain tile) that resurfacing can't deliver
- The existing slab is sound and flat but badly stained or surface-damaged
- You want to add drainage between pavers rather than reseal a solid surface
- You're renting or want a removable solution
Pavers over existing concrete
Concrete or natural stone pavers can be set in a thin mortar bed or on a sand-set system directly over the existing slab. The slab adds about 1.5 to 4 inches of height (depending on paver thickness and setting method), which means checking door clearances and transitions to steps. Movement joints in the paver installation need to align over existing control joints in the slab below, or cracks from the slab will eventually telegraph up through the joints. Material and installation cost: $8 to $25 per square foot DIY or $15 to $40 installed professionally, depending on material choice.
Tile over existing concrete
Tile works beautifully over a stable slab, but the substrate flatness requirement is strict. TCNA and ANSI standards referenced for bonded tile installations call for no more than 1/4 inch variation in 10 feet and no more than 1/16 inch in 1 foot. If your slab has any displacement at the cracks, you'll need to grind high spots down or fill low spots before setting tile. For cracked slabs, installing a crack-isolation or decoupling membrane (like Schluter DITRA or a liquid membrane) between the slab and tile is strongly recommended. Without it, any crack movement in the slab will crack your tile. Budget $3 to $10 per square foot in materials for porcelain tile plus $1 to $2 for membrane; professional installation adds $6 to $15 per square foot.
Composite decking over concrete
A floating composite deck frame installed over the slab is a popular and DIY-friendly approach. You build a pressure-treated or composite sleeper frame directly on the slab (using concrete screws or adhesive pads) and install composite decking boards on top. The resulting deck sits 2 to 5 inches above the slab, completely hiding cracks and surface damage. It also adds an air gap that helps with drainage and keeps the deck surface cooler in summer. Material costs: $8 to $20 per square foot depending on composite decking brand. Expect a weekend of work for an average patio.
Outdoor rugs and interlocking tiles
These are the low-commitment, budget-friendly options. Interlocking rubber, wood, or composite deck tiles click together over the slab surface, cost $2 to $8 per square foot, and can be installed in an afternoon. An outdoor rug hides cracks instantly and costs $50 to $300 for a typical patio size. Neither is a long-term structural solution, and outdoor rugs can trap moisture that accelerates crack deterioration below. Use them as temporary solutions or supplementary coverage, not as a substitute for addressing active structural issues.
Materials, tools, time, and cost: quick reference
| Repair/upgrade approach | Key materials | Key tools | Time (DIY) | Estimated cost (materials) |
|---|---|---|---|---|
| Hairline crack sealing | Low-viscosity epoxy or polyurethane sealant, penetrating sealer | Caulk gun, wire brush, vacuum | 1–2 hours | $15–$50 |
| Small crack polyurethane injection | PU injection resin, injection ports | Caulk gun, drill | 2–3 hours | $40–$80 |
| Medium crack patch (backer rod + polymer mortar) | Backer rod, polymer-modified patching compound, bonding agent | Angle grinder, trowels, vacuum | 3–5 hours + overnight cure | $40–$100 |
| Crack stitching | Stitching dogs, epoxy mortar | Angle grinder, drill | 4–6 hours | $100–$300 |
| Concrete overlay/resurfacing | Polymer-modified resurfacer, bonding agent, sealer | Pressure washer, squeegee, trowel | 6–10 hours + 24h cure | $0.75–$2.50/sq ft |
| Acid stain + sealer | Acid stain, neutralizer, topcoat sealer | Sprayer, scrub brush, roller | 6–8 hours + cure | $1–$3/sq ft |
| Epoxy floor coating | Two-part epoxy kit, acid etch | Roller, squeegee | 4–6 hours + 24h cure | $1–$3/sq ft |
| Pavers over slab | Pavers, polymeric sand or mortar, edge restraints | Saw, level, rubber mallet | 1–2 days | $8–$25/sq ft |
| Tile over slab | Porcelain tile, decoupling membrane, thin-set | Tile saw, notched trowel, level | 1–2 days | $5–$12/sq ft |
| Composite deck over slab | Composite boards, sleeper frame, fasteners | Circular saw, drill, level | 1–2 days | $8–$20/sq ft |
| Mudjacking (contractor) | Cementitious slurry (contractor-supplied) | Contractor equipment | Half day | $3–$6/sq ft |
| Polyjacking (contractor) | Polyurethane foam (contractor-supplied) | Contractor equipment | 2–4 hours | $5–$25/sq ft |
| Helical/push piers (contractor) | Engineered pier system | Contractor equipment | 1–2 days | $1,000–$1,500+ per pier |
Stopping cracks from coming back
Prevention is genuinely cheaper than repair. The same issues that caused your current cracks will cause new ones if you don't address them. Here's what actually makes a difference.
Fix drainage first
Water under your slab is the underlying villain in most patio cracking. Check that the ground slopes away from the patio at 1/8 to 1/4 inch per foot. Make sure downspouts discharge at least 6 feet away from the slab edge, ideally through an underground drain or a splash block that directs flow further out. If water pools at the patio edge, a French drain or channel drain installed at the perimeter will intercept it before it reaches the subgrade.
Add or repair control joints
If your slab has no control joints (or ones that are too shallow), you can saw-cut new ones. Joints need to be at least 1/4 the depth of the slab (minimum 1 inch for a 4-inch slab). Space them so panels are no more than roughly 2 to 3 times the slab thickness in feet. A 4-inch slab: joints every 8 to 12 feet. Use a diamond blade in a circular saw or rent a concrete saw for longer cuts. Fill the joints with a flexible backer rod and polyurethane joint sealant, not rigid filler.
Seal regularly
A penetrating silane-siloxane sealer applied every 3 to 5 years prevents water infiltration, which is the mechanism behind freeze-thaw cracking and deicing salt damage. It's cheap insurance. In cold climates, this is one of the highest-value maintenance tasks you can do.
Manage trees and roots
If a tree near the patio caused the cracking, consider installing a root barrier (a vertical underground barrier of high-density polyethylene sheeting) between the tree and the slab before repairing. These are installed to a depth of 18 to 24 inches and redirect roots downward and away. They're not foolproof for large, aggressive species, but they buy significant time.
Avoid deicing salts
Rock salt (sodium chloride) and calcium chloride are particularly damaging to concrete. They increase the number of freeze-thaw cycles the surface goes through by lowering the freezing point of water, and chloride ions accelerate corrosion if there's any reinforcing steel. Use sand for traction instead, or switch to a concrete-safe de-icer that is explicitly labeled as safe for concrete. The ACI maximum crack-width recommendation for concrete exposed to deicing chemicals (0.007 inches) reflects just how aggressive this environment is.
Safety, permits, and when to call a pro
Permits: what typically triggers one
Cosmetic repairs (filling cracks, sealing, resurfacing) almost never require a permit. Covering the slab with pavers or a floating deck usually doesn't either, as long as you're not changing the grade or adding a structure. What typically does require a permit: replacing the slab entirely (it's considered new construction of flatwork in many jurisdictions), any work involving underpinning or engineered pier systems, or any modification that changes drainage patterns affecting neighboring properties. Permit thresholds vary significantly by municipality. Some states, like Washington, have specific trade licensing classifications for concrete flatwork. See Washington Administrative Code (WAC), trade classification & examples for concrete flatwork for an example of how the state classifies concrete flatwork and related licensing/permit categories Washington Administrative Code (WAC) — trade classification & examples for concrete flatwork. Always call your local building department before starting major slab work. A 10-minute phone call is cheaper than a stop-work order.
When to hire a structural or geotechnical engineer
- Any crack with measurable vertical or horizontal offset that wasn't caused by a visible, addressable reason (like a tree root you're removing)
- Cracks that are actively growing despite previous repairs
- A slab that rocks, flexes, or sounds hollow across a large area when tapped
- Settlement near the foundation of the house (this may indicate foundation movement, not just patio slab issues)
- Before any underpinning, pier installation, or engineered slab replacement work
- After any sinkhole activity or significant soil disturbance near the patio
Personal safety during repairs
- Wear safety glasses whenever cutting, grinding, or using a hammer and chisel on concrete. Concrete chips travel fast.
- Use an N95 or better respirator when grinding, cutting, or working with dry cement products. Silica dust is a real hazard.
- Nitrile gloves are required when working with epoxy resins, acid stains, and chemical crack products. Skin sensitization from epoxy is cumulative.
- Work in ventilated conditions with all injection and coating products. Many have significant solvent content.
- When using a concrete saw or angle grinder, secure loose clothing and keep bystanders clear.
Troubleshooting guide: common mistakes and quick fixes
| Problem | Likely cause | Fix |
|---|---|---|
| Patch pops out within one season | Poor prep: dirty or wet crack, wrong product | Strip patch, clean and dry thoroughly, use correct bonding agent and product |
| Crack returns in the same spot | Root cause not addressed (tree, drainage, settlement) | Fix root cause first, then re-patch with flexible sealant |
| Overlay cracks or delaminates | Applied over active crack, insufficient surface prep, or too thin | Remove overlay, address active crack, re-prep surface, apply minimum specified thickness |
| Tile cracks above repaired crack | No decoupling membrane, slab crack still active | Remove tile, install crack isolation membrane, re-tile |
| Sealant bubbles or peels | Moisture vapor coming through slab, or sealer applied to damp surface | Allow slab to fully dry (72+ hours), use moisture-tolerant sealer or penetrating type |
| Stain color uneven or patchy | Previous sealer residue, inconsistent surface porosity | Strip sealer completely, clean surface with acid wash, restain |
| Lifted slab settles again after polyjacking | Void not fully filled, ongoing water erosion of subgrade | Improve drainage, consider re-lift or partial slab replacement if persistent |
| New pour section cracks at seam with old slab | No proper control joint at seam, differential shrinkage | Saw-cut a joint at the seam and fill with polyurethane joint sealant |
What to photograph and document
Good documentation of your cracks helps you track whether they're growing and gives you (or a contractor) useful information later. Take these photos before doing any repair work.
- Wide shot of the entire patio surface showing the crack layout and pattern
- Close-up of each crack at its widest point, with a ruler or coin in frame for scale
- Sideview shot crouched at slab level to show any vertical offset between crack sides
- Photo of the crack endpoint with a pencil mark and written date (to track if it grows)
- Photos of any nearby trees, downspouts, or drainage features that might be contributing
- Overhead shot mapping the locations of any existing control joints relative to the cracks
- Close-up of any hollow-sounding areas identified by tapping the slab
- Before-and-after photos at each repair stage: after cleaning, after patching, after sealing
For a diagnosis diagram, a simple overhead sketch of your patio showing crack locations, crack widths, offset measurements, joint locations, tree positions, and downspout discharge points is more useful than a dozen photos. Even a rough hand-drawn sketch photographed on your phone gives a contractor immediate context if you end up calling one in.
More guides to help you fix, cover, and upgrade your patio
This article gives you the full picture from diagnosis to decision to execution. For deeper dives into specific tasks, Concrete Patio Guide has detailed how-to pages covering each major approach. If you're ready to get to work on the repair itself, the step-by-step repair guide walks you through the full process for each crack type. If you've decided the slab needs more than patching, the resurfacing guide covers overlay products, surface prep, and decorative finish options in full detail. If covering the slab entirely is your move, the guide on how to cover a cracked cement patio compares all the covering systems side by side. See the guide on how to cover cracked cement patio for a side-by-side comparison of covering systems. For a concise, step-by-step checklist of what to do with a cracked concrete patio, see the dedicated guide on that topic. And if the main goal right now is just getting the patio looking presentable again, the guide on how to make a cracked concrete patio look better focuses specifically on quick-win cosmetic fixes. For quick cosmetic fixes to get your patio looking presentable again, see the guide on how to make a cracked concrete patio look better. See the how to resurface cracked concrete patio guide for step-by-step instructions on overlay products, surface preparation, and finishing techniques. For a focused, practical walkthrough on how to fix cracked uneven concrete patio, see the step-by-step repair guide. For cracking combined with unevenness, the guide on how to fix a cracked uneven concrete patio covers the lifting, leveling, and patching sequence from start to finish.
FAQ
What primary research questions must be answered to create an accurate DIY article for homeowners who find "my concrete patio is cracked"?
1) How to classify cracks: What objective measurements (width, length, orientation, length/spacing, vertical offset/step) and observable signs (spalling, efflorescence, active water flow, progressive widening) distinguish cosmetic vs structural cracks? 2) What are the common causes and diagnostic indicators: shrinkage, settlement/differential movement, freeze–thaw, poor base/compaction, tree roots, drainage/surface water, missing or failed control joints? 3) What are acceptability thresholds: crack-width limits by exposure and offsets that typically signal durability risk or structural failure? 4) What repair categories map to crack types and causes: hairline (injection/sealant), medium (backer rod + polymer patch), large/structural (stitching, slab-lift, underpinning, partial/full replacement)? 5) What specific step-by-step procedures, materials lists, tools, surface prep, and cure/temperature limits are required for each repair method? 6) Which product types and families (epoxy injection, polyurethane injection, polymer-modified cement patches, overlays, adhesives, backer rod, sealers) are appropriate, and what PDS limitations (temperature, moisture, bond, ASTM conformance) must be followed? 7) When is covering the slab (pavers, tile, decking, overlay) preferable to repair, and what substrate/flatness/joint coordination is required for each covering? 8) What are realistic time, labor, and cost ranges (materials + equipment + labor) for DIY vs pro for each method? 9) What prevention and maintenance measures (drainage correction, slope, downspout relocation, proper jointing, concrete air entrainment, subgrade improvements) reduce recurrence? 10) What safety, permit, licensing and local-code considerations require a professional or engineered solution (e.g., underpinning, major replacement, structural movement)? 11) What troubleshooting and follow-up checks (monitoring crack activity, photographic documentation, simple settlement gauges) should homeowners perform after repair?
What authoritative source categories should be consulted to answer the research questions and produce reliable guidance?
1) Standards and consensus technical reports: ACI (224R, 302.1R, 360R) and PCA guidance for crack width acceptability, joint design, overlays and durability practices. 2) Manufacturer product data sheets (PDS) and installation guides for epoxies, polyurethane injection systems, polymer-modified cement patches, overlays, sealants, backer rods — for specs, limits and step procedures. 3) Manufacturer technical manuals for slab-lifting/underpinning systems (helical piles, resistance/piers) to define engineered underpinning triggers and installation basics. 4) Industry how‑to/installation guides from reputable repair-material manufacturers (practical port spacing, routing, port installation, cure times). 5) Tile/paver industry standards and technical manuals (TCNA, ANSI, LATICRETE) for substrate flatness and movement-joint coordination when covering. 6) DOT / agency white papers and independent comparative studies that compare slab-lifting methods and long-term performance. 7) Local building codes and permitting authorities for thresholds that trigger permits and licensed-contractor requirements. 8) Geotechnical and structural engineering literature for settlement diagnostics and indicators that require engineered evaluation. 9) Contractor warranty / builder performance standards for practical homeowner thresholds used in the field (e.g., 1/4" width or 1/4" offset triggers). 10) Reputable DIY/technical guides that provide step-by-step procedures validated by manufacturers or standards bodies for small repairs.
Which specific authoritative documents and examples should be referenced for crack-width and acceptability thresholds?
Consult ACI 224R-01 (Control of Cracking in Concrete Structures) for crack-width tables by exposure condition and general acceptability thresholds. Use engineering summaries that translate ACI ranges to homeowner-friendly bands (hairline <0.012" / 0.3 mm often non-structural in many exposures; >0.012" to 0.3–1.0 mm moderate; >1.0 mm or visible offset indicates more serious issues). Cross-check builder warranty examples and local practice (many use 1/4" width or 1/4" displacement as a practical inspection trigger) and cite manufacturer limits for specific repair products.
What diagnostic measurements and simple tests should the article teach homeowners to perform, and what do those results imply?
1) Crack width: measure with a feeler gauge or caliper at multiple points; widths <0.012" (≈0.3 mm) commonly cosmetic, >0.012" merits durability review, >1/4" often flagged for professional review. 2) Vertical offset/step: measure with a straightedge and feeler gauge; any measurable step is an indicator of differential settlement and possible structural concern. 3) Movement/activity test: mark crack edges with a date and re-measure monthly or install a simple crack monitor gauge; any progressive widening suggests active movement — call a pro. 4) Water test: run water and look for leak paths or signs of active seepage (hydrophilic polyurethane recommended for active leaks). 5) Subgrade probe: small exploratory holes near suspicious areas (where safe and permitted) to check for voids or soft subgrade. 6) Tree-root proximity check: inspect for nearby large roots or trees and correlate with crack pattern (curving/lifting adjacent to roots). Provide clear interpretation rules tied to repair choices.
What product and manufacturer information must be gathered and included for each repair method?
For every product family include: product name and manufacturer, PDS link, recommended use cases (hairline vs structural), substrate/moisture/temperature limits, required surface prep and bond-coat, pot and cure times, coverage rates, typical port spacing or patch geometry, minimum thickness, compatibility notes (e.g., overlay not suitable over active cracks), ASTM standards compliance (where applicable), and safety/handling PPE. Example products to cite: Sikadur epoxy injection resins (structural injection), polyurethane hydrophilic/hydrophobic injection grouts (active/wet cracks), polymer-modified cement repair mortars (medium cracks/patches), micro-topping overlay systems, and manufacturer slab-lifting product literature.
What step-by-step procedures (with materials/tools lists and time/cost ranges) should the article provide for common repair tiers?
Provide three-tier procedures: 1) Small/hairline cracks: materials — epoxy or polyurethane injection kit, routing tools (diamond blade or grinder if routing advised), injection ports, caulk gun/mixer, solvent, wire brush, PPE. Steps — clean, route/vee as needed, install ports, inject per PDS, finish and seal. Time — partial day; cost — $25–$200 for DIY kits depending on product. 2) Medium cracks (≥1/8" to ~1/2"): materials — backer rod, polyurethane or hybrid sealant or polymer-modified cement patch, bond coat/primer, trowels, grinder/shot-blaster for profile. Steps — widen/rout to a controlled profile, clean/degrease, insert backer rod, apply bond coat, install patch per thickness, finish, cure and seal. Time — 1–2 days; cost — $50–$400 DIY (materials) or $200–$1,000+ pro depending on extent. 3) Large/structural cracks & uneven slabs: outline options — stitching with epoxy bars, slab-lift (polyurethane foam or mudjacking), underpinning (piers), partial/full replacement. For each list required specialized equipment, need for engineer sign-off (for underpinning or major structural repair), typical timelines (1–5+ days), and cost ranges (stitching $500–$2,000; slab-lifting $500–$4,000; underpinning or replacement $3,000–$15,000+ depending on scale). Emphasize that costs vary widely by region and severity and to consult local contractor bids.