
Most old concrete patios can be fixed without tearing them out, but the right repair depends entirely on what's actually wrong. For a step-by-step walkthrough on how to fix a concrete patio, see our detailed guide. Hairline cracks, surface pitting, crumbling edges, and even sunken slabs are all fixable DIY problems if you catch them early, prep the surface properly, and use the right products. Where things go sideways for most homeowners is skipping the diagnosis step and jumping straight to patching, which means the repair fails and you're back out there in two seasons. If your patio is crumbling, see how to fix crumbling concrete patio for a focused, step-by-step guide on addressing crumbling edges and surface deterioration.
Fix Old Concrete Patio: Step-by-Step DIY Repair Guide

Silas Morrison
5 Aug 2026
Who this guide is for and what you'll learn
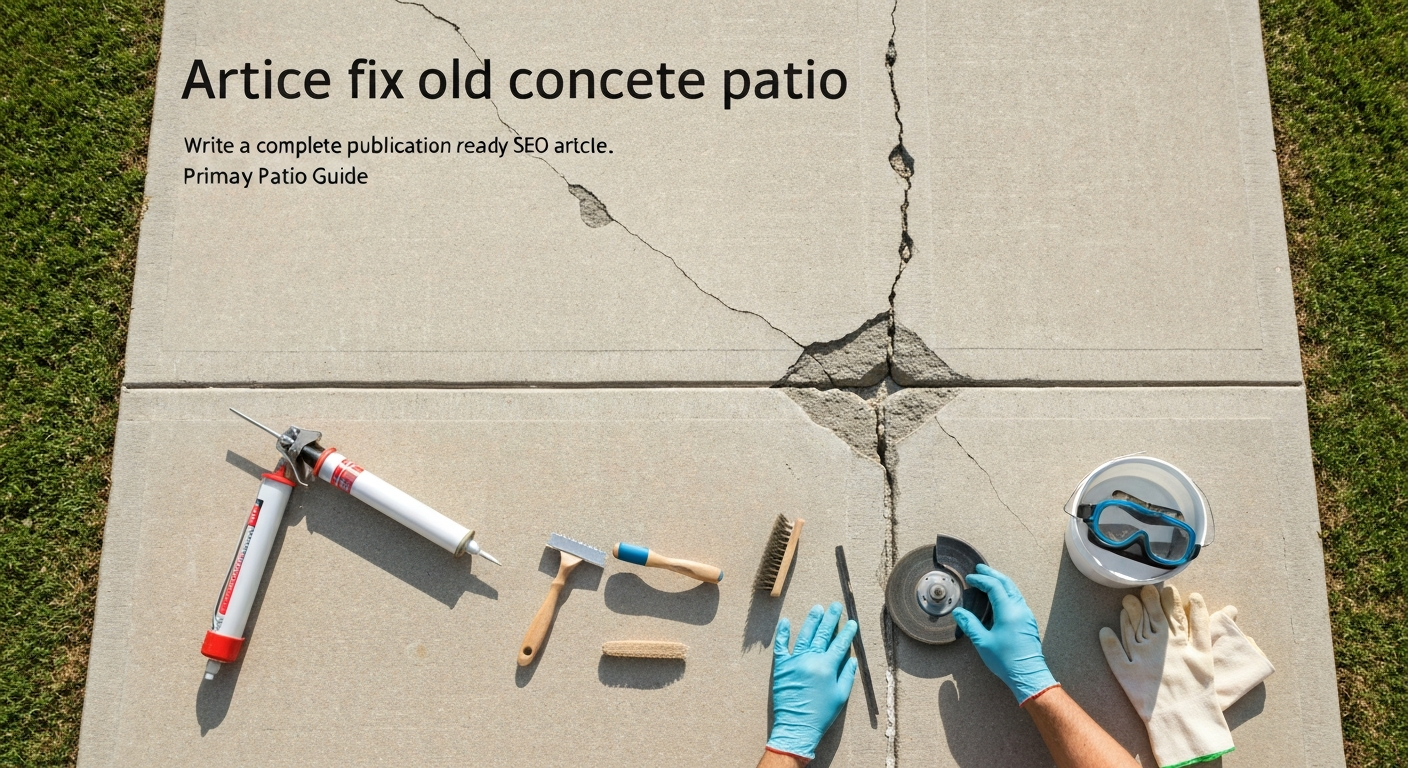
This is a complete walkthrough for homeowners who want to fix an old concrete patio themselves. Whether you're dealing with a few hairline cracks, a surface that's scaling and pitting after years of freeze-thaw cycles, crumbling edges, or a slab that's sunk on one side, this guide covers all of it. For a focused walkthrough on how to fix pitted concrete patio, see this step-by-step guide that covers diagnosis, patching materials, and finishing techniques. You'll learn how to inspect your patio and identify what's actually going wrong, what tools and materials you need for each type of repair, step-by-step procedures for hairline cracks, wide cracks, spalling, pitting, and sunken slabs, realistic time and cost estimates for each fix, and a clear decision framework for when to repair, resurface, or replace, and when to pick up the phone and call a contractor instead. I'll also flag where other guides on this site go deeper on specific problems like crumbling surfaces, pitting, and slippery finishes, since those deserve their own detailed treatment.
Safety first, before you touch anything
I want to be straightforward here: concrete repair looks deceptively simple, but it involves real health and safety hazards that don't get enough attention in YouTube tutorials. The biggest one is respirable crystalline silica. Any time you grind, cut, or sand old concrete, you generate fine silica dust that causes serious lung disease with repeated exposure. OSHA's silica standard for construction (29 CFR 1926.1153) requires engineering controls and respirator use for exactly these tasks. Don't use a dust mask, use a properly fit-tested N95 respirator at minimum, and use wet methods (keep the surface damp while grinding) to suppress dust at the source. NIOSH guidance for respirator selection and use in construction recommends fit‑tested N95 or higher respirators for silica‑generating tasks, advises employers to prioritize engineering controls (wet methods, local exhaust) first, and maintains a Certified Equipment List to help select appropriate respirators.
- PPE: N95 or P100 respirator (fit-tested), safety glasses or goggles, work gloves, and knee pads for ground-level work
- Wet concrete and repair mortars are caustic — wear chemical-resistant gloves and avoid prolonged skin contact
- Call 811 (USA) at least 48–72 hours before digging or drilling into the slab to have underground utilities marked
- Check local permit requirements — most cosmetic repairs and crack filling don't need permits, but structural slab replacement often does
- Weather: don't work in direct sun above 90°F or when temperatures will drop below 50°F within 24 hours of application; both conditions wreck cure quality
- Wet concrete on a hot, sunny day can flash-set before you finish — work in sections, use shade where possible, and mist the substrate before applying repair materials
- Keep kids and pets off the work area during and after repairs until curing is complete
Tools and materials checklist
The specific products you need depend on what you're fixing, so I've broken this out by repair type. Having everything on-site before you start saves a lot of frustration, especially with fast-setting materials that won't wait while you run to the hardware store.
| Repair Type | Tools | Materials |
|---|---|---|
| Hairline cracks (under 1/8") | Wire brush, shop vac, caulk gun, margin trowel, grinder with crack-chasing wheel (optional) | Polymer-modified concrete crack filler (e.g., Quikrete Concrete Repair in a tube), concrete bonding adhesive, sand |
| Wide cracks and control joints (1/8" to 1/2") | Angle grinder or cold chisel and hammer, wire brush, shop vac, caulk gun, trowel | Backer rod (closed-cell foam, sized to crack width), polyurethane or self-leveling sealant, polymer-modified repair mortar (ASTM C928-rated product) |
| Spalling, pitting, and crumbling edges | Angle grinder, hammer, cold chisel, wire brush, drill with mixing paddle, mixing bucket, trowels, float, edger | Bonding primer/adhesive (SBR or epoxy), polymer-modified repair mortar (Sika MonoTop, MasterEmaco, or Quikrete Fast-Setting Repair Mortar), water |
| Sunken slab leveling | Drill (for polyfoam injection — or hire a crew for mudjacking) | Polyurethane foam injection kit (DIY) or contractor-provided mudjacking grout |
| Full resurfacing / overlay | Pressure washer, broom, drill with mixing paddle, squeegee, gauge rake, bull float, finishing broom | Concrete resurfacer (e.g., Quikrete Re-Cap), bonding adhesive, water |
| Cleaning and prep (all jobs) | Pressure washer (min. 3,000 psi recommended), stiff bristle brush, garden hose | Concrete degreaser, efflorescence remover (dilute muriatic acid or commercial cleaner), TSP or similar |
How to inspect and diagnose your patio's problems
Before you buy a single bag of repair mortar, spend 20–30 minutes doing a proper inspection. The Portland Cement Association points out that most exterior concrete failures trace back to a handful of root causes: freeze-thaw cycling, alkali-silica reaction (ASR), poor original mix or curing, reinforcement corrosion, and inadequate drainage. Identifying which one you're dealing with tells you whether a patch will actually hold or whether you're wasting your time.
Step-by-step inspection checklist
- Walk the entire slab and look for crack patterns: straight cracks along control joints are normal shrinkage; map cracking (a web of cracks in all directions) suggests alkali-silica reaction or deep freeze-thaw damage — and may mean patching won't be a long-term fix
- Measure crack widths: use a crack gauge or a credit card (roughly 1/16" thick) — hairline cracks under 1/8" get one treatment, cracks over 1/8" get another
- Sound test the surface: tap with a hammer or a coin across the whole slab; a hollow or drum-like sound means the surface layer has delaminated and will need to come off before patching
- Check for spalling and scaling: surface layers flaking away in sheets is classic freeze-thaw damage; deep pitting with aggregate exposure is more advanced deterioration
- Inspect edges and corners: crumbling edges are usually a combination of freeze-thaw damage and impact; look for any exposed or rusting rebar, which means you have a corrosion problem that needs treatment before patching
- Look for rust staining: orange-brown streaks on the surface mean reinforcing steel underneath is corroding and expanding — this requires cutting out unsound concrete, treating the rebar, and using a compatible repair mortar
- Check drainage: pour a bucket of water on the slab and watch where it goes — standing water accelerates every type of deterioration and also creates a slip hazard
- Test for sunken or heaved sections: lay a 6-foot level across the slab in multiple directions; a slope toward the house is a drainage problem and may require slab raising or grinding; a trip hazard of 1/2" or more is worth fixing for safety
- Look for efflorescence: white chalky deposits are mineral salts wicking through the concrete — not a structural problem, but must be removed before sealing or resurfacing or the coating will peel
- Photograph everything: mark crack locations, hollow spots, and sunken areas on a rough sketch so you can track what you fixed and whether problems are growing
A quick note on map cracking specifically: if you see a pattern of interconnected cracks covering large areas of the surface, take a close look at whether the cracks have a yellowish gel or staining around them. That's a sign of alkali-silica reaction, where reactive silica in the aggregate combines with alkali in the cement and moisture to form an expansive gel. ASR is progressive, and surface patching alone won't stop it. In those cases, an overlay or full resurfacing with a penetrating sealant to reduce moisture ingress is a better approach, and severe ASR may ultimately require replacement.
Cleaning and prep, get this right or your repair won't bond
I've watched more DIY concrete repairs fail because of skipped prep than for any other reason. Concrete repair materials bond to clean, sound, slightly rough concrete. Dirt, grease, curing compounds, old sealers, and loose surface material all break that bond. ASTM C1583 (the pull-off bond test used by contractors and engineers) confirms what hands-on experience already teaches: substrate prep is the single biggest factor in whether a repair stays put. The Guide to Concrete Repair (ACI 546R), American Concrete Institute is ACI’s technical guide on diagnosis, selection of repair materials, and repair procedures for concrete, and is the primary ACI reference for patching, surface repairs, bonding, and quality control for concrete repairs blank" rel="noopener noreferrer">Guide to Concrete Repair (ACI 546R) — American Concrete Institute. Here's the order of operations.
- Remove furniture, planters, and debris; sweep the slab clean
- Degrease: apply a concrete degreaser to any oil or grease stains, scrub with a stiff brush, and rinse thoroughly; repeat if staining is heavy — patch mortars won't bond over oily areas
- Address efflorescence: treat chalky white deposits with a commercial efflorescence remover or a 10:1 water-to-muriatic acid solution applied carefully with a stiff brush (wear chemical gloves and eye protection, work in ventilated conditions, neutralize with baking soda solution afterward)
- Pressure wash the entire slab: use at least 3,000 psi — a standard garden-hose spray nozzle doesn't generate enough force to remove bonding contaminants or open the pore structure of the concrete surface
- Let the slab dry completely: for most repair products, 24 hours of dry weather is the minimum; for resurfacers and overlays, check the product TDS — some require a saturated-surface-dry (SSD) condition where the surface is damp but not puddled
- Profile the surface if needed: if there's an old sealer, paint, or curing compound present, it must be mechanically removed by grinding or shot-blasting before any patch or overlay will adhere
Repairing hairline cracks
Hairline cracks, those under about 1/8" wide, are the most common thing you'll find on an older patio, and they're the most forgiving to fix. The goal is to fill the crack to keep water from getting in and freezing. These cracks are rarely structural on a residential patio slab, but left open they'll become wide cracks over two or three more winters.
Materials
For hairline cracks, a polymer-modified concrete crack filler in a tube (like Quikrete Concrete Repair, No. 8620) is the most practical choice. It comes ready to use, applies directly from a caulk gun, is flexible enough to handle minor slab movement, and is sandable once cured. You don't need a mixing paddle, bucket, or repair mortar for these, keep it simple.
Step-by-step application
- Prep the crack: use a crack-chasing grinder wheel or a cold chisel and hammer to slightly widen the crack to about 1/4" and create an inverted-V profile (wider at the bottom than the top) — this gives the filler more surface area to bond to
- Clean out the crack: use a wire brush to remove all loose material, then blow or vacuum out all dust; any dust left in the crack breaks the bond
- Optionally apply a concrete bonding adhesive into the crack with a brush and let it become tacky (usually 15–30 minutes) — this improves adhesion, especially on older slabs
- Load the tube into a caulk gun, cut the tip small, and slowly work filler into the crack; overfill slightly (about 1/8" proud of the surface)
- Smooth with a margin trowel or putty knife, feathering edges flat with the surrounding surface
- Before the filler skins over, dust a small amount of dry sand over it and press in lightly — this textures the repair to match the surrounding slab
- Allow to cure according to the product TDS; most polymer-modified fillers are tack-free in 1–2 hours and reach full cure in 24 hours at 70°F
- Keep foot traffic off for at least 24 hours; avoid washing the area for 48–72 hours
Time and cost
A typical 10-foot hairline crack takes about 30–45 minutes including prep. A tube of concrete crack filler costs roughly $8–$15 at most hardware stores and covers 10–20 linear feet depending on crack width. Total material cost for a small patio with a few hairline cracks is usually under $30.
Troubleshooting hairline crack repairs
- Filler shrinks below the surface after curing: the crack wasn't underfilled — apply a second coat after the first has cured
- Repair peels or pops out in the first season: the crack had dust or loose material remaining, or the crack is still active and needs a flexible sealant rather than rigid filler
- Filler doesn't match the color: this is normal — most fillers dry slightly lighter or darker; a surface sealer applied later will even out the appearance significantly
- Crack has reappeared: the underlying cause (drainage, settlement, freeze-thaw) hasn't been addressed; fix the cause before re-filling
- Filler dried too fast and didn't bond: the surface was too hot or too dry — mist the crack lightly before application and work in the shade or during cooler parts of the day
Repairing wide cracks and control joints
Cracks wider than 1/8" and opened or deteriorated control joints are a bigger job, but still very doable as a DIY project. The key difference from hairline repairs is that you need to accommodate movement. Wide cracks and control joints exist partly because concrete moves, temperature changes cause it to expand and contract. A rigid patch in a wide crack will just crack again. The solution is a backer rod plus a flexible sealant for joints and active cracks, or a polymer-modified repair mortar for inactive, stable cracks.
How to tell if a crack is active or stable
Mark both sides of the crack with a pencil and measure the width in two or three spots. Come back in 2–4 weeks and check again. If the width has changed, the crack is active and you must use a flexible sealant system. If it's unchanged, it's stable and a rigid repair mortar is appropriate.
Step-by-step: backer rod and sealant method (for joints and active cracks)
- Clean and prep: follow the cleaning steps above; use an angle grinder with a crack-chasing wheel to clean up ragged edges and make the crack walls parallel and clean
- Size your backer rod: backer rod is a closed-cell polyethylene foam rope — choose a diameter 25% larger than the crack width so it compresses slightly when inserted; common sizes are 3/8", 1/2", and 3/4"
- Insert the backer rod: press it into the crack using a blunt tool (a screwdriver handle works well) to a depth that leaves 1/4" to 3/8" of space above it for the sealant; the rod prevents sealant from bonding to the bottom of the crack (three-point bonding causes sealant failure)
- Apply masking tape along both sides of the crack for a clean finish
- Apply self-leveling polyurethane sealant into the crack, slightly overfilling; self-leveling products will flow flat on their own for horizontal joints
- Smooth non-self-leveling sealants with a wet gloved finger or a sealant tool
- Remove the tape while the sealant is still wet; this gives you clean edges
- Allow to cure per the manufacturer's instructions — most polyurethane sealants are tack-free in 1–4 hours and fully cured in 24–72 hours depending on temperature and humidity; foot traffic is typically acceptable after 24 hours
Step-by-step: polymer-modified repair mortar (for stable wide cracks)
- Undercut the crack walls with an angle grinder to create a dovetail profile — wider at bottom than top — to a minimum depth of 3/4" to 1"; shallow repairs have a much higher failure rate
- Clean thoroughly: wire brush, then vacuum out all dust
- Apply a concrete bonding adhesive (SBR latex or epoxy-based) to all surfaces inside the crack and let it become tacky; product instructions will specify open time (typically 15–30 minutes for SBR)
- Mix your repair mortar according to the product TDS — products like Quikrete Fast-Setting Repair Mortar or Sika's MonoTop line and BASF MasterEmaco products have specific water-to-powder ratios; don't eyeball it, as too much water reduces strength significantly
- Pack mortar into the crack in layers no thicker than specified by the product (typically 1" maximum per lift for most fast-setting mortars); compact each layer with a trowel
- Strike off flush with the surrounding surface; feather the edges slightly for a smooth transition
- Texture the repair to match the surrounding concrete (broom finish, exposed aggregate, etc.) before the mortar stiffens
- Cure the repair: cover with plastic sheeting or burlap and keep moist for at least 24 hours; fast-setting mortars like MasterEmaco T series can be ready for foot traffic in as little as 1 hour, but check the specific product TDS for your temperature conditions
Movement and curing considerations
One thing I've learned the hard way: don't skip the backer rod step for any repair in a joint or an active crack. The three-point bonding problem is real, if sealant bonds to the bottom, sides, and top of a crack, it tears itself apart when the crack moves. Also, avoid rigid mortars in control joints. Those joints are designed to relieve movement stress, and filling them with mortar turns them into a stress concentration point that will crack somewhere else nearby.
Time and cost for wide crack repairs
A 20-foot wide crack or joint repaired with the backer-rod-and-sealant method takes roughly 1–2 hours including prep and cleanup. Backer rod costs about $5–$8 for a 20-foot roll; a tube of self-leveling polyurethane sealant runs $12–$20. A mortar repair on a stable wide crack adds material cost (a 50 lb bag of repair mortar typically runs $20–$40) and usually another 1–2 hours of work. Total material cost for a typical patio with 2–4 major cracks is generally in the $40–$120 range.
Troubleshooting wide crack repairs
- Sealant is pulling away from one or both walls within a year: the crack walls had contamination, or the sealant wasn't compatible with the concrete — clean walls with acetone before reapplying and confirm product compatibility
- Mortar patch is cracking across the middle: the crack was still active — remove the mortar and switch to a flexible sealant system with backer rod
- Repair mortar debonded and fell out: bonding adhesive step was skipped or adhesive was applied too early or too late; always re-prep the walls and apply a fresh bonding coat before patching again
- Sealant surface cratered or bubbled: moisture was present in the crack during application — never apply polyurethane sealants to a wet crack; let the surface dry thoroughly or use a moisture-tolerant sealant product
- Repaired control joint cracked the slab adjacent to it: a rigid mortar was used in an active joint, redirecting movement stress; remove the mortar and replace with a flexible sealant system
FAQ
Search‑oriented title and 160‑character meta description for this article
Title: How to Fix an Old Concrete Patio: Inspect, Diagnose, and DIY Repairs (Cracks, Spalling, Sunken Slabs) Meta description: Practical step‑by‑step guide to inspect, diagnose, and repair old concrete patios—cracks, spalling, pitting, sunken slabs—with tools, costs, safety, and when to hire a pro.
What are the first steps for inspecting an old concrete patio?
Walk the patio systematically and note: all visible cracks (length, width, pattern), spalled or pitted areas, crumbled edges, stains, uneven or sunken slabs, ponding/drainage, and trip hazards. Measure crack widths with a ruler, map sunken areas and gaps at joints, and tap suspect delaminated patches with a hammer (hollow sound = delamination). Photograph for records. Check for underlying causes: poor drainage, freeze–thaw exposure, vegetation roots, corroded reinforcing, or alkali‑silica reaction (map cracking). Prioritize safety hazards (large trip hazards, exposed rebar, large delaminations) for immediate action.
Which common deterioration types should I diagnose and what typically causes each?
- Hairline cracks (≤1/8"/3 mm): shrinkage, thermal movement, minor settlement. - Wide cracks and joint failures (>1/8"): structural movement, freeze‑thaw, ASR, load damage. - Spalling/scaling and pitting: freeze–thaw, de‑icing salts, poor finishing/curing. - Crumbling edges: insufficient edge support, impact, freeze‑thaw or poor consolidation. - Stains: oil, rust, organic growth—typically surface contamination. - Sunken slabs/unevenness: soil settlement/voids beneath, erosion, poor compaction. - Delamination: poor bonding or finishing over bleed water, corrosion of embedded steel. Refer to PCA and ACI guidance for root‑cause checks (PCA, ACI 546R/562).
What safety precautions are essential for DIY concrete repair?
Wear PPE: NIOSH‑approved respirator (N95 or P100 for silica dust), safety goggles, gloves (alkali‑resistant), long sleeves, and hearing protection when using grinders. Use wet methods and local dust collection for cutting/grinding to limit respirable crystalline silica (OSHA 29 CFR 1926.1153). When breaking or lifting slabs, avoid trench collapse and heavy lifting; get help for large slabs. Follow product SDS and cure ventilation guidance. For work near utilities, locate buried lines before drilling.
What tools and materials will I need for typical patio repairs?
Tools: push broom, pressure washer, wire brush, chisel and hammer, angle grinder with diamond cup wheel, cold chisel, concrete saw (for slab cuts), mixing bucket, drill with mixing paddle, trowels, margin trowel, pointing tool, caulking gun, level, straightedge, measuring tape, hammer for sounding, injection ports (for polyjacking), and respirator. Materials: polymer‑modified repair mortar/patch, concrete resurfacer, epoxy or polyurethane crack injection kit, caulk for control joints (polyurethane or silicone for exterior), bonding primer, cement, sand, concrete sealer, anti‑slip additive, polyurethane lifting foam or mudjacking grout (if raising), rust inhibitor for exposed bar. Consult product TDS/SDS and ASTM/ACI references (e.g., ASTM C928, ACI 546R) when selecting materials.
How do I clean and prepare the surface before repairs?
Checklist: 1) Remove loose, unsound concrete with hammer/chisel and mechanical grinding to expose sound substrate. 2) Clean oil/grease with degreaser; rinse and allow to dry. 3) Pressure wash to remove dust, dirt, and salts; for deep stains use Poultice or pressure washer with detergent. 4) For overlays/patches, mechanically roughen surface to a clean, sound profile and ensure concrete is free of curing compound; perform a pull‑off test if in doubt (ASTM C1583). 5) For repairs near rebar, remove rust and apply corrosion inhibitor or replace reinforcement if badly corroded. 6) Allow the surface to dry to manufacturer recommended moisture condition or use bonding agent as directed.