
You can transform a dull, stained, or worn cement patio with paint, stain, a decorative overlay, or a stamped texture coating, but the finish only lasts if you prep the surface correctly first. Clean the slab, patch every crack and low spot, let it cure fully (at least 28 days for new concrete), and then apply your chosen finish within the right temperature window (50–90°F) and humidity range (below 85% RH). Pick the right sealer for the top coat and you'll have a patio that looks sharp for years, not months.
How to Decorate a Cement Patio: DIY Steps and Finishes

Silas Morrison
5 Jun 2026
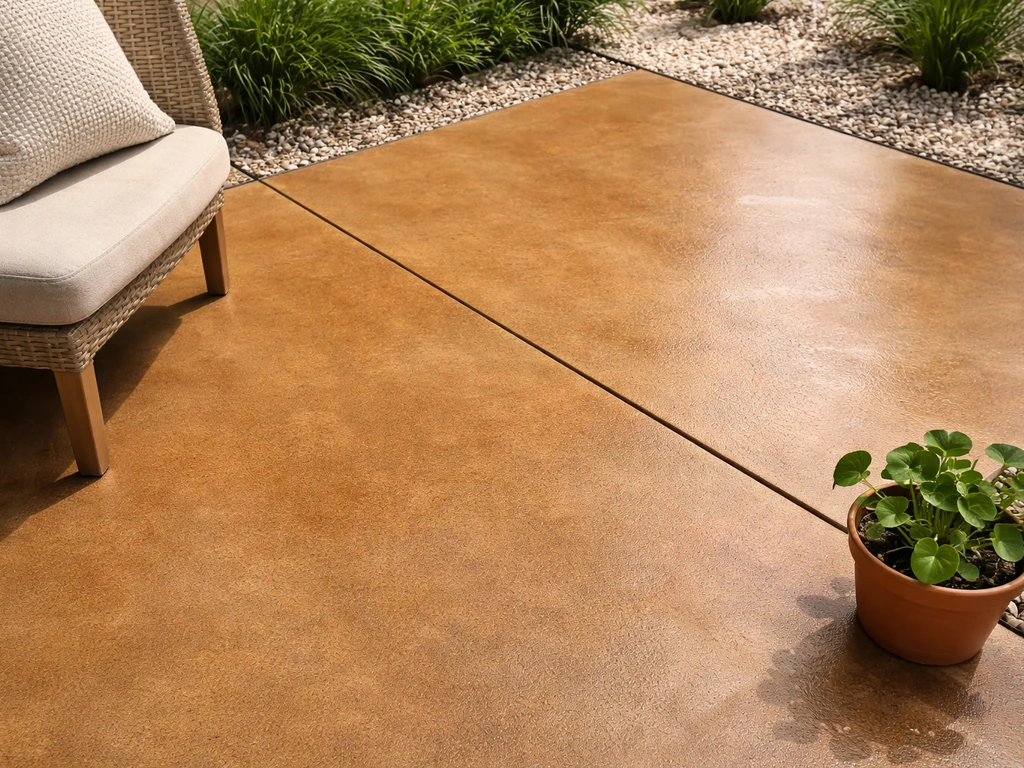
Start with your goals and assess your patio condition
Before you buy a drop of stain or paint, spend ten minutes honestly looking at what you're working with. Your patio's current condition will determine which decoration path is even available to you, and skipping this step is the number one reason DIY patio projects peel, chip, or fail within a season.
Ask yourself these questions: Is the concrete structurally sound, or are there active cracks that shift with temperature? Is the surface just dull and dirty, or is it spalling (flaking, pitting, or crumbling)? Has a sealer or coating already been applied that might block adhesion? Is it a brand-new pour or an older slab? Your answers put you in one of three starting positions:
- Good condition, just dull or stained: Clean it, lightly profile the surface, and go straight to stain, paint, or a decorative sealer.
- Minor cracks, chips, or surface wear: Patch and repair first, then decorate. You have full access to every finish option.
- Active spalling, heavy peeling of old coatings, or structural movement: Repair the root cause before doing anything decorative. An overlay applied over actively deteriorating concrete will fail. If you skip this, the overlay peels and you're back to square one.
Also think about your goal. Do you want a bold color change? A natural stone look? A simple clean finish that protects the slab? Each goal points to a different material system, so it's worth deciding this now rather than halfway through the project. If you're still in the planning phase of building the patio itself, the foundation work covered in guides on how to make a cement patio is worth reading first, since surface quality during the pour directly affects how well decorative finishes adhere later. If you're ready to start planning your patio build, follow a step-by-step guide on how to make a cement patio before you choose finishes and textures.
Surface prep: cleaning, repairs, and leveling for good adhesion
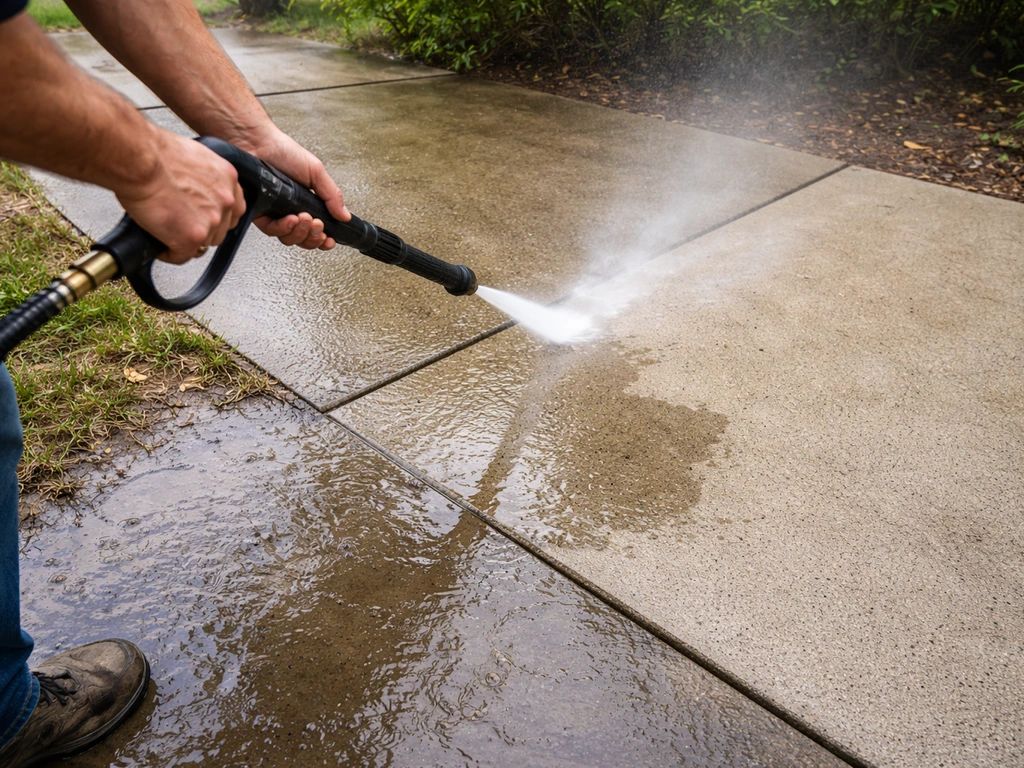
This is the unglamorous part that makes or breaks everything else. I've seen beautiful stamped overlays bubble off a slab inside six months because someone skipped proper prep. Don't let that be your project.
Clean the slab thoroughly
Start with a pressure washer and a concrete degreaser. Oil, grease, mold, algae, dirt, old curing compounds, and existing sealer all act as bond-breakers for any new coating. The substrate needs to be porous, clean, and free of dust, dirt, oil, grease, paint, curing agents, and sealers before you apply anything, that's not just advice, it's what product data sheets from manufacturers like MAPEI and Sika require. If you're planning to mix and pour a new patio section, learning how to use a cement mixer correctly will help you get consistent material and a smoother finish cement mixer for patio. If there's an old coating, test whether it's still bonded by taping a piece of plastic to the surface overnight; condensation forming underneath suggests a moisture issue, and loose or bubbling areas mean the old coating has to come off.
Profile the surface (CSP)
Coatings and overlays need mechanical tooth to grip. The industry measures this with the ICRI Concrete Surface Profile (CSP) scale, which runs from CSP 1 (nearly smooth) to CSP 10 (very rough). The rule of thumb: thin-film applications like paint or a penetrating stain need a light profile (CSP 1–2, achieved with acid etching or light grinding), while polymer coatings in the 4–15 mil range need CSP 2–3 (light grinding or a light shotblast), and thicker overlays need CSP 3–5 or higher. For most DIY patios, acid etching or a rented angle grinder with a diamond cup wheel gets you where you need to be. When in doubt, go slightly more aggressive with prep rather than less.
Patch cracks and low spots
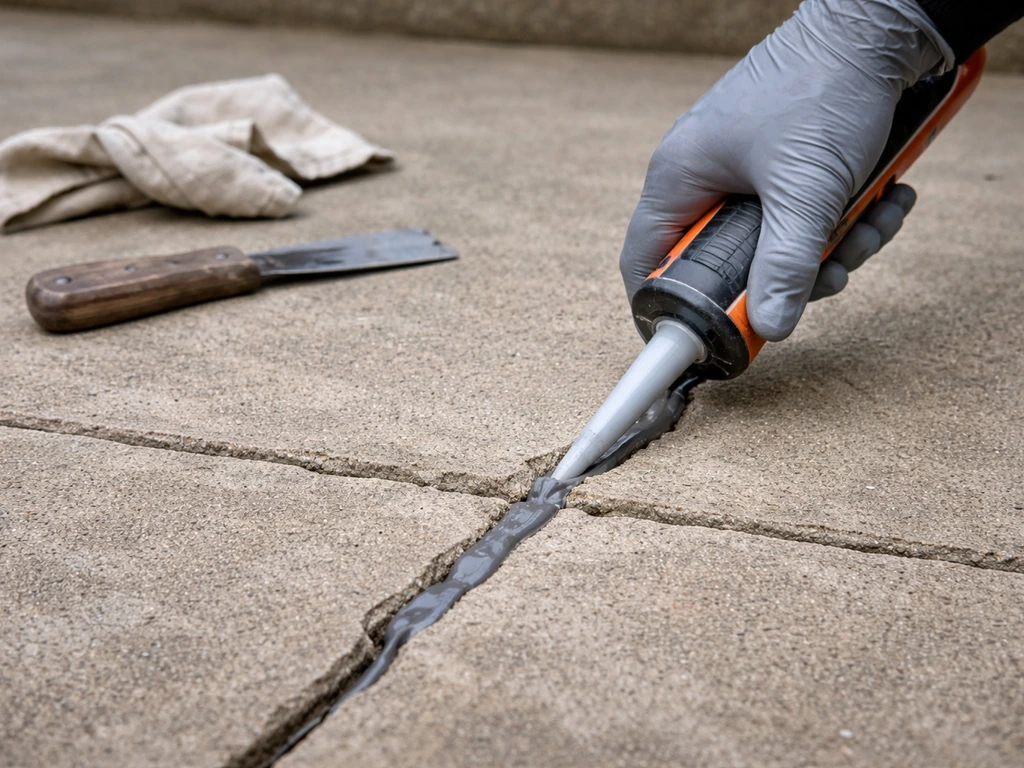
Fill hairline to medium cracks with a polyurethane concrete crack sealant like Sikaflex+ Crack Flex Sealant, which is designed for horizontal slabs and handles slight movement. For cracks wider than about 1/4 inch, use a foam backer rod first (sized about 1/8 inch wider than the crack) to control sealant depth, then apply the sealant over it. For low spots or surface pitting, a polymer-modified patching compound or a thin overlay product like Sakrete Flo-Coat (which works from 1/8 to 1/4 inch depth) can level things out. blank" rel="noopener noreferrer">Sakrete Flo-Coat is described as a polymer-modified sand-and-cement mix for resurfacing concrete at a depth of 1/8 inch to 1/4 inch. Let patches cure fully before moving on, rushing this step leads to finish failure directly above the patch. Cure time matters: SikaTop Seal-107 Standard requires a minimum cure period of 7 days before you overcoat it blank" rel="noopener noreferrer">cure fully before moving on.
Check for moisture
Moisture is the silent killer of concrete coatings. If you're working with a new pour, wait a minimum of 28 days before applying any decorative finish or sealer, this is a widely accepted industry standard, and products like Rust-Oleum's RockSolid Concrete Stain + Sealer explicitly state this on their technical data sheets. For older slabs, tape a piece of plastic sheeting (18x18 inches) to the surface with all edges sealed and leave it for 24 hours. Visible moisture on the underside means you have a vapor issue that needs to be addressed before coating. Formal testing uses ASTM F1869 (calcium chloride) for vapor emission rate or ASTM F2170 (in-situ relative humidity probe) for a deeper read of slab moisture, the RH probe method gives a more accurate picture of what's happening inside the slab, not just at the surface.
Color and finish options: paint, stain, and decorative coatings
Once your slab is prepped, you have several solid routes to a great-looking finish. Here's how they compare so you can choose the right one for your situation.
| Option | How it works | Look/Feel | Durability | DIY Difficulty | Best For |
|---|---|---|---|---|---|
| Concrete paint | Film-forming coating that sits on top of the slab | Solid opaque color; hides texture | 3–5 years before recoat; peels if prep is poor | Easy | Quick refresh on a budget; older or stained slabs |
| Acid stain | Reacts chemically with concrete minerals for color | Variegated, mottled, stone-like; semi-transparent | Very long-lasting when sealed; color is permanent | Moderate (requires neutralization step) | Natural, high-end look on sound slabs |
| Water-based stain/sealer combo | Penetrating or semi-transparent pigmented sealer | Cleaner, more uniform color; some sheen | Good with periodic resealing | Easy to moderate | Color + protection in one product; newer slabs |
| Epoxy coating | Two-part system that bonds hard to surface | High-gloss; can add flake or quartz for texture | Excellent abrasion resistance; 5–10 years | Moderate (mixing and timing matter) | High-traffic patios; garages used as patio space |
| Decorative overlay | Polymer-modified cementitious material resurfaced over old slab | Can mimic tile, slate, or stone; stamps optional | Excellent if slab is sound; can fail over spalling | Hard (trowel skill required or hire out) | Worn slabs that need more than color alone |
Working with concrete paint
Products like KILZ Porch and Patio Floor Paint are formulated for exactly this application. Apply when air and surface temperatures are between 50–90°F, and know that darker or bold colors may need two coats for full hide. Coverage on rough concrete drops significantly compared to smooth surfaces, budget for about 75–100 square feet per gallon on a rough slab versus 100–125 on a smooth one. Always prime bare concrete before painting for better adhesion and longer life.
Working with acid stain
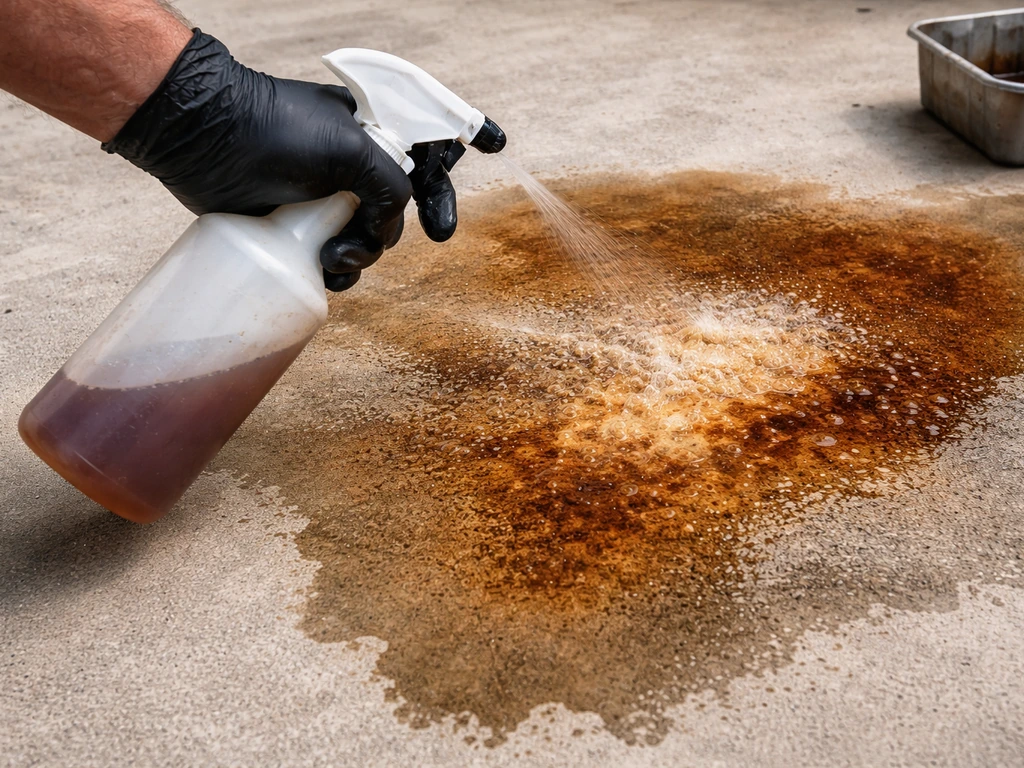
Acid staining gives the most dramatic, natural-looking results but requires the most care during application. Always test in an inconspicuous corner first, since the reaction depends on your concrete's mineral content and the color result can vary. After the stain has dried (typically 4–6 hours depending on conditions), you must neutralize the acid residue by mopping with a diluted water-and-ammonia solution, then rinse thoroughly. Seal after neutralization. Skip the neutralizing step and you'll trap acidic residue that will eat through your sealer from underneath.
Stain-and-sealer combo products
Products like Rust-Oleum RockSolid Concrete Stain + Sealer combine color and protection in one application. At 70°F and 50% RH, expect a dry-to-recoat window of about 4–6 hours, and coverage typically runs 200–400 square feet per gallon depending on slab porosity and how many coats you apply. These are a great middle-ground option: easier than acid staining, more durable than standard paint, and they protect as they color.
Texture and decorative effects: stamping, overlays, and patterns
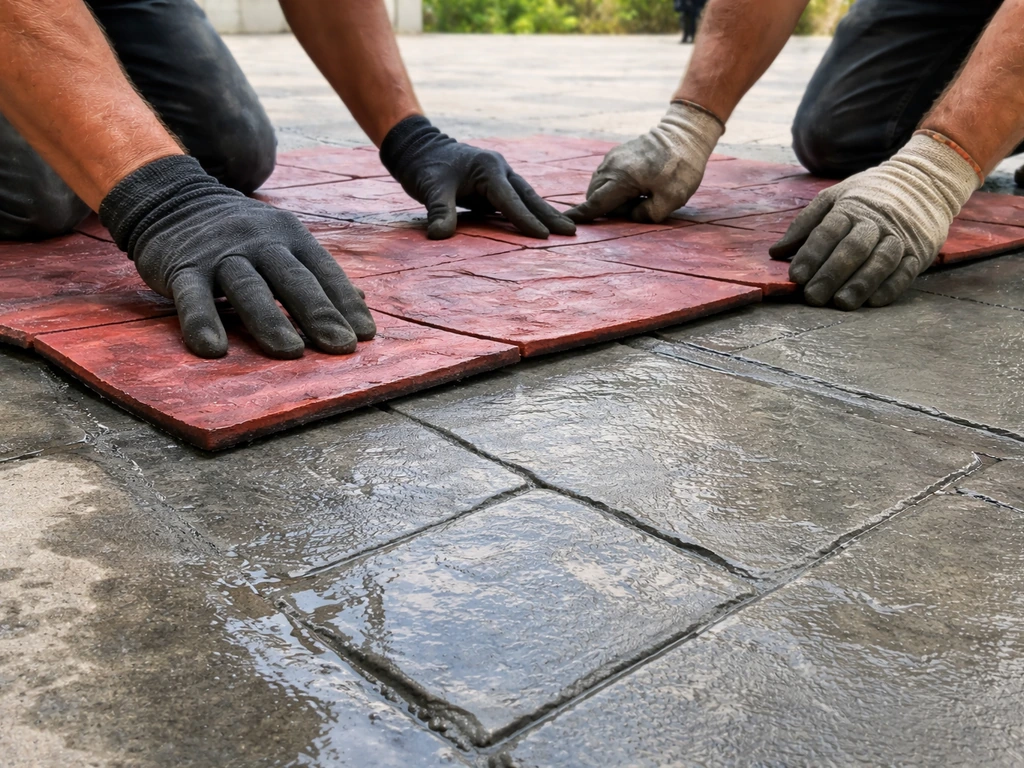
If you want more than just color, you want the patio to look like stone, slate, brick, or tile, this is where texture techniques come in. These are higher effort but genuinely transform a plain gray slab into something that looks designed.
Decorative overlays and resurfacing
A polymer-modified cementitious overlay like SikaCem-171 T1000 or Sakrete Flo-Coat is applied as a thin layer (typically 1/8 to 1/4 inch) over your existing slab to give you a fresh surface to work with. Once it's down and partially set, you can broom-finish it for texture, or apply stamps for a stone or tile pattern. This approach works beautifully on slabs that are structurally sound but cosmetically rough or stained beyond what stain can fix. The critical warning here: if your slab has active spalling or old coatings that are already flaking, an overlay will not fix that. The underlying failure will continue and push the overlay off from below. Address the root cause first, in cases of significant spalling, an epoxy resurfacer applied as a base coat before the overlay can stabilize the surface.
Stamping on fresh overlays
Stamping is done by pressing patterned polyurethane mats into the overlay material while it's still workable (the window is usually 20–45 minutes depending on temperature and humidity, so have your stamps ready and your helper in place). The result looks like natural stone, brick, or pavers but without the cost of tearing out and relaying. You can add integral color to the overlay mix and use dry-shake color hardener for depth. The surface needs a proper CSP for the overlay to bond, typically CSP 3–5, achievable with shot blasting or aggressive grinding.
Simpler texture options
If full stamping feels like too much, a broom-finish overlay gives you a clean, slip-resistant surface that looks far better than bare gray concrete. Painted concrete can also be rolled with a texture roller or broadcast with fine sand while wet for grip and visual interest. These are genuinely weekend-warrior-level projects.
Protection and longevity: sealing, curing, and weather and UV considerations
Whatever finish you apply, sealing is what makes it last. A lot of people skip the sealer or use the wrong one and then wonder why their patio looks bad again in two years. Here's how to get it right.
Choosing the right sealer
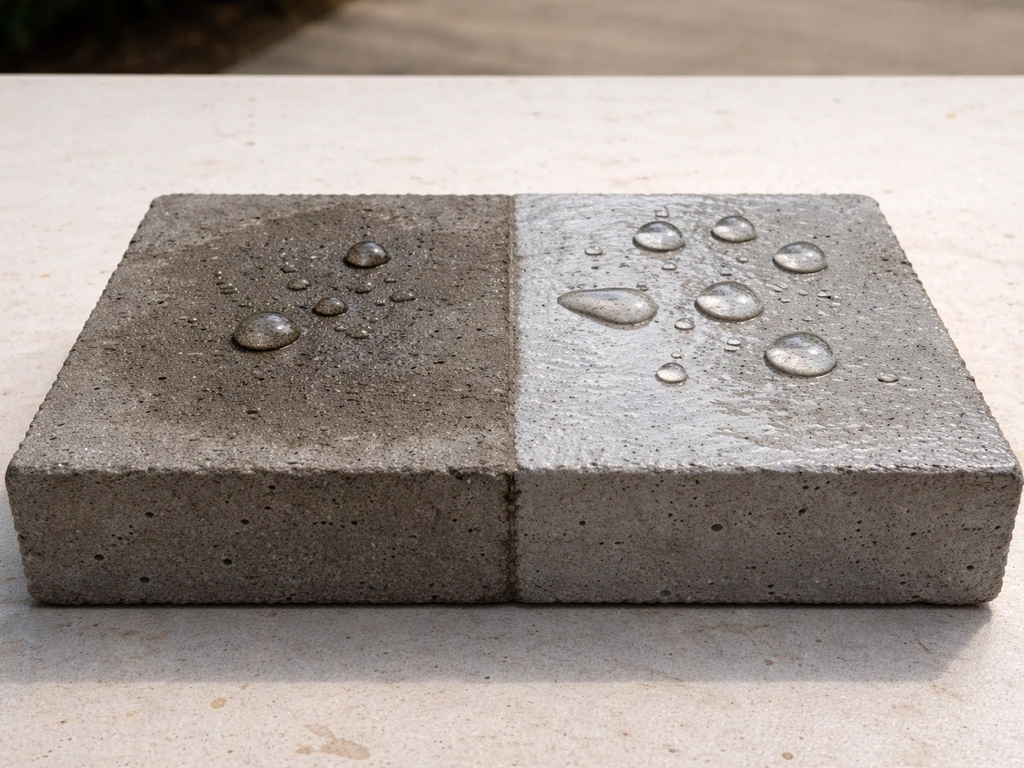
Penetrating sealers (silane/siloxane products like Armor SX5000 or SEK Surebond SB-4000) soak into the concrete and repel water without changing the surface appearance. They're the best choice for bare or stained concrete where you want a natural look. Apply them once concrete is fully cured (30 days minimum), and use two coats wet-on-wet: apply about two-thirds of your product on the first pass, then the remaining third while the first coat is still wet. Coverage runs roughly 175–225 square feet per gallon. These sealers don't peel and they're extremely durable against freeze-thaw cycles and UV, ideal for outdoor patios in climates with real winters.
Film-forming sealers (acrylic, epoxy, or polyurethane) sit on top of the surface and provide a sheen while protecting paint, stain, or overlay finishes. Acrylic sealers are the easiest to apply and reapply, while polyurethane topcoats offer the best UV and abrasion resistance for outdoor use. For painted or stained surfaces, always apply a compatible topcoat sealer, never leave decorative finishes unsealed on an exterior slab.
Application conditions that matter
Apply any sealer or topcoat when air and surface temperatures are between 50–90°F and relative humidity is below 85%. Applying in high heat causes sealers to flash too fast, leaving pinholes and uneven coverage. Applying in cold or damp conditions traps moisture under the film and causes cloudiness or peeling. Early morning on a mild day is usually the sweet spot.
UV and weather protection
UV breaks down acrylic and water-based coatings faster than anything else. If your patio gets full afternoon sun, spend the extra money on a UV-stable polyurethane or an aliphatic urethane topcoat, it will stay clear and not yellow over time. In freeze-thaw climates, penetrating sealers are especially valuable because they prevent water from entering the slab and expanding as it freezes, which is what causes that pitting and spalling you're probably trying to fix right now.
Design add-ons: borders, planters, outdoor décor, and avoiding drainage and trip problems
Color and texture get your patio looking great, but the design details, borders, planters, outdoor rugs, and furniture placement, pull it together into a real outdoor space. A few things to keep in mind so you don't create new problems while solving the old ones.
Borders and edge treatments
A decorative border painted or stained in a contrasting color around the perimeter of your slab is one of the easiest design upgrades you can make. Tape off the border zone (typically 6–12 inches in from the edge), apply a darker or contrasting color, then remove tape while the paint is still slightly wet for a clean edge. For a more permanent border, a shallow saw cut (1/8 inch deep) along the border line before staining creates a crisp physical boundary that holds color contrast through years of wear.
Planters and heavy objects
Large planters look great on a patio but trap moisture under them, which softens film-forming coatings and stains the slab. Set planters on rubber feet or pot risers to allow airflow and drainage underneath. This also prevents the circular stains and coating damage that happen when a planter sits directly on a freshly sealed surface for a full season. If you want built-in raised planters, frame them with pressure-treated lumber or concrete block and seal the interior before planting so soil moisture doesn't wick into the slab.
Outdoor rugs and mats
Outdoor rugs are a fast, non-permanent way to add color and pattern. Use rugs with an open-weave or perforated backing so water drains through rather than pooling underneath. Solid-backed rugs trap moisture and will lift or discolor your coating over time. Move rugs seasonally to let the slab beneath dry and breathe.
Drainage and trip hazards
When you add overlays, borders, or any raised element to a patio, check that you haven't created a low spot that pools water or a raised edge that becomes a trip hazard. A 1/8-inch-per-foot slope away from the house is the minimum you want for drainage. If an overlay raises the edge of the slab and creates a lip at a doorway or walkway transition, taper it with a featheredge product before it cures. These are small details that matter a lot for both safety and the long-term condition of your finish.
Maintenance and refresh plan: cleaning, re-sealing, and touch-ups
A properly finished and sealed patio doesn't need much ongoing work, but it does need some. Think of maintenance as protecting your investment rather than starting over.
Routine cleaning
Sweep regularly and hose off the patio after parties, garden work, or anything that leaves grit or organic material behind. Grit acts like sandpaper under foot traffic and wears sealers down faster than UV or moisture. For deeper cleaning, a mild concrete cleaner or dish soap solution with a stiff brush works fine. Avoid bleach-based products on stained concrete, they can fade color over time. Pressure washing annually at low pressure (under 2,000 PSI with a wide-fan tip) removes embedded grime without blasting the sealer off.
Re-sealing schedule
Acrylic sealers typically need to be reapplied every 1–3 years depending on UV exposure and traffic. Penetrating silane/siloxane sealers last 3–5 years. Polyurethane topcoats can go 5–7 years before they need attention. The easiest way to test whether it's time: pour a tablespoon of water on the surface. If it beads up, the sealer is still working. If it soaks in within 30 seconds, it's time to reseal. Clean the surface thoroughly before reapplying, and make sure the old sealer is compatible with the new product, when in doubt, use the same brand and product type.
Touch-ups and spot repairs
Small chips in a painted or coated surface are easy to touch up if you still have leftover product. Clean the damaged area, scuff lightly with 80-grit sandpaper, wipe clean, and apply a thin coat. Feather the edges so it blends. For stained surfaces, spot touch-ups are harder to blend invisibly because the original stain has weathered, sometimes a full re-stain of the affected zone is cleaner than a small patch. New cracks that appear in the slab need to be addressed before they get wider: clean the crack, apply backer rod if it's wide enough, and fill with polyurethane crack sealant. Don't just paint over them, as they'll telegraph through the coating and look worse.
How to choose your path based on what you've got
Here's a simple decision framework based on your slab's current condition. Use this to confirm which approach makes the most sense before you buy materials.
| Slab Condition | Recommended Approach | Estimated Timeline |
|---|---|---|
| New pour (under 28 days old) | Wait. Don't apply any finish yet. Use the time to plan and gather materials. | 28 days before starting |
| New pour (28+ days), sound surface | Light acid etch, then stain + penetrating sealer or stain+sealer combo | 1–2 weekends |
| Older slab, sound, just dull or dirty | Degrease, light grind or acid etch (CSP 1–2), then paint, stain, or coating | 1–2 weekends |
| Minor cracks, chips, or surface wear | Patch cracks with polyurethane sealant, level low spots, then stain or paint | 2–3 weekends |
| Worn surface needing texture/full refresh | Repair, profile to CSP 3–5, apply polymer-modified overlay, then seal | 2–4 weekends |
| Active spalling, heavy peeling, structural movement | Stabilize with epoxy resurfacer or fix underlying cause first; consult a pro if unsure | Varies; get an assessment before starting |
Core materials and tools checklist
- Concrete degreaser and stiff-bristle brush or pressure washer
- Angle grinder with diamond cup wheel (or rented acid etching supplies for lighter prep)
- Polyurethane crack sealant (e.g., Sikaflex+ Crack Flex Sealant) and foam backer rod
- Polymer-modified patching compound or resurfacer (e.g., Sakrete Flo-Coat) for low spots
- Your chosen finish: porch paint (KILZ or equivalent), acid stain, water-based stain+sealer combo (e.g., Rust-Oleum RockSolid), or two-part epoxy kit
- Primer (required for paint systems on bare concrete)
- Penetrating silane/siloxane sealer (e.g., Armor SX5000 or SEK Surebond SB-4000) OR compatible film-forming topcoat sealer
- Roller frame with 3/8-inch nap roller covers (one per coat to avoid contamination)
- Paint tray, extension pole, and natural-bristle brush for edges
- Painter's tape and plastic sheeting (for borders and protecting adjacent areas)
- Safety glasses, chemical-resistant gloves, and respiratory protection (especially for acid stain and epoxy work)
- Thermometer and hygrometer to confirm application conditions (50–90°F, under 85% RH)
Project timeline at a glance
- Day 1: Clean, degrease, and pressure wash the slab. Allow to dry completely (usually 24–48 hours).
- Day 2–3: Patch cracks and low spots. Allow patches to cure per product instructions before proceeding.
- Day 3–4: Profile the surface (grind or acid etch to the correct CSP for your chosen finish). Rinse thoroughly and allow to dry 24 hours.
- Day 4–5: Apply primer if using paint, or proceed directly to stain or coating. Apply first coat.
- Day 5–6: Apply second coat if needed (follow recoat window on your product label — typically 4–6 hours at 70°F and 50% RH).
- Day 6–7: Apply topcoat sealer once finish is fully cured per product instructions.
- Day 7+: Allow sealer to cure before placing furniture or foot traffic (typically 24–72 hours depending on product and conditions).
You can absolutely start the first steps today, even if that just means degreasing, patching cracks, and ordering materials. The patio projects that turn out best are the ones where the prep is done right and the finish is applied in the right conditions. Take your time on the boring parts, and the satisfying part (the actual transformation) will take care of itself.
FAQ
Can I decorate a cement patio if it already has an old sealer or coating on it?
Yes, but only if that coating is still firmly bonded. Do a plastic-tape moisture test (overnight, edges sealed) and check for bubbling or loose areas, if you see condensation or lifting you’ll need removal or stabilization before adding paint, stain, or an overlay.
How do I tell if my concrete is too wet for painting or sealing?
Beyond waiting 28 days for new pours, confirm moisture behavior. If water won’t bead or if you see darkening that lingers after light wetting, treat it as a moisture issue. For a more reliable read, use the ASTM RH probe method (in-situ) rather than only looking at the surface.
What temperature window matters most, air temperature or surface temperature?
Both, but surface temperature is often the deal-breaker for performance. Even when air is in the 50–90°F range, a sun-warmed slab can cause fast flashing, pinholes, and uneven dry. Plan so you coat in the morning or shade the patio if needed.
Is there an advantage to acid staining versus paint for hiding imperfections?
Acid staining won’t hide pits, spalls, or heavy texture the way opaque paint can. If your slab has uneven surface profile, paint may look smoother, while stain can accentuate mineral-driven variation. For the best look, patch and level first, then choose the finish system.
Can I decorate over hairline cracks without fixing them first?
Not reliably. Even small cracks can widen or telegraph through coatings. Use a polyurethane crack sealant rated for horizontal movement, and if you can catch a hairline with your fingernail, plan for sealing rather than just painting over.
Do I need a base coat primer before paint on concrete patios?
In most cases, yes. Prime bare concrete to improve adhesion and reduce peeling, especially if your slab is porous, dusty, or has mineral residue. If the existing surface is glossy or sealed, priming alone may not work unless you confirm bond and remove anything incompatible.
What’s the best choice if I want slip resistance, not just appearance?
Choose a finish that builds texture or has traction properties. A broom-finish overlay, or a texture roller method with broadcast grip material can help. Avoid smooth film-forming coatings on outdoor areas that get wet, and always test traction after the system cures.
How aggressive should I be when prepping the concrete surface profile?
Aim for mechanical tooth appropriate to the product thickness. If you’re unsure, err on slightly more aggressive prep, because bonding failures usually come from insufficient profile rather than “too much” surface roughness. However, don’t grind aggressively over failing concrete, address spalling first.
Can I use a cementitious overlay to fix spalling or lifting areas?
Usually no. Overlays can’t stop an ongoing failure from the slab below. If you have active spalling, flaking, or loose coating, you need to remove the failing material and stabilize with a proper base approach (such as an epoxy resurfacer system) before overlay work.
How soon after patching can I apply stain, paint, or an overlay?
Don’t rush. Patches need full cure before the decorative finish goes on, otherwise you’re coating directly over a weak spot that can break down and show through. Follow the patch product’s cure window, then do a quick surface check for sanding dust and chalkiness before coating.
How do I maintain the patio without damaging the sealer?
Use gentle cleaning and avoid harsh chemicals that can fade color, especially on stained concrete. Sweep often, rinse after events, and for deeper cleaning use mild cleaner or dish soap with a stiff brush. If you pressure wash annually, stay under about 2,000 PSI with a wide-fan tip to avoid blasting coating edges.
What’s the water bead test, and how should I interpret it for resealing?
Pour a tablespoon of water and watch how fast it changes. If it beads, the sealer is still working; if it soaks in quickly (around 30 seconds), the protective system is near the end of its life. After you reseal, keep traffic and splashes off until the sealer fully cures.
Will outdoor rugs and planters damage a newly sealed patio?
They can, especially with film-forming sealers because trapped moisture and limited airflow soften coatings and cause circular discoloration. Use pot risers or rubber feet for planters, choose open-weave or perforated rug backing, and consider moving rugs seasonally to keep the slab breathing.
How do I avoid pooling water after adding borders or an overlay?
Before the overlay or raised elements cure, check for new lips and low spots at transitions (doors, walkways, and slab edges). A practical drainage target is at least about 1/8 inch drop per foot away from the house, and if you create a raised edge, taper it with a featheredge product while it’s still workable.
Can I touch up painted concrete, or will it always look patchy?
Touch-ups can blend if you scuff properly and apply thin coats. Clean the area, scuff with 80-grit, wipe dust, then feather the edges while the paint is still workable. For stained concrete, spot blending is harder because weathered tone varies, so sometimes a small re-stain is cleaner than a patch.