
You can extend a patio without pouring concrete by using interlocking pavers, natural stone, gravel, permeable ground cover, or modular deck tiles. Each option works directly alongside an existing concrete slab, costs less than a new pour, and can be installed over a weekend with basic tools. The key is matching the finished height of the extension to your existing patio, getting the base prep right, and creating a clean border between old and new so nothing shifts, floods, or looks like an afterthought.
How to Extend a Patio Without Concrete: DIY Options

Silas Morrison
21 May 2026
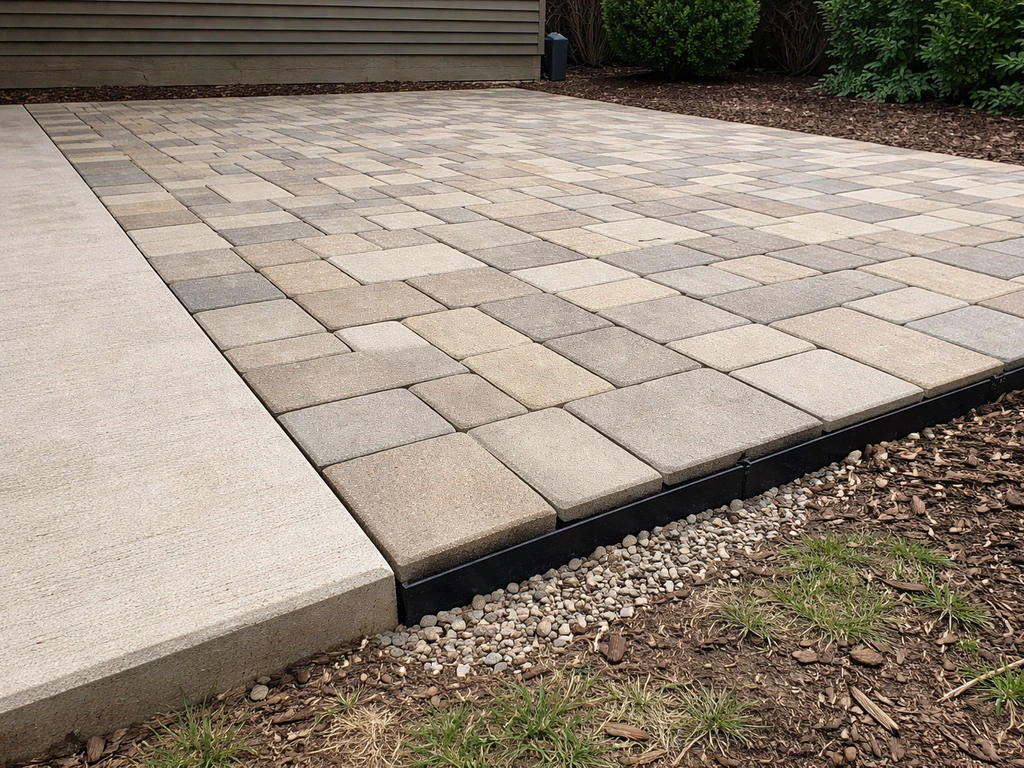
Best alternatives to concrete for extending a patio
There is no single right answer here because the best material depends on your budget, your existing slab, and how the extension will be used. That said, most homeowners land on one of five options.
| Material | Best For | Rough Cost (installed, per sq ft) | DIY Friendliness |
|---|---|---|---|
| Interlocking concrete pavers | Seamless look next to a concrete slab, heavy furniture/foot traffic | $10–$20 | Moderate |
| Natural stone (flagstone, bluestone) | Upscale look, irregular or formal layouts | $15–$30 | Moderate to hard |
| Gravel or crushed stone | Budget builds, drainage-first priorities, casual spaces | $2–$6 | Easy |
| Modular deck tiles (porcelain/wood composite) | Quick installs, raised or level surfaces, rental-friendly | $5–$15 | Very easy |
| Permeable pavers or stepping stones | Eco-friendly, garden-style paths and extensions | $8–$18 | Easy to moderate |
Interlocking concrete pavers are the most popular choice for extending next to a concrete patio because they come in colors and textures that complement or match most slabs, they interlock so they stay put, and they handle patio furniture, grills, and foot traffic without issue. If you want something warmer, natural flagstone is hard to beat visually, though it takes more work to set level.
Gravel is the easiest and cheapest to install but works better as a surrounding border or casual seating zone than a primary patio surface. Modular deck tiles snap together directly on the concrete slab or on a level gravel base and are almost impossible to install wrong. Permeable pavers and stepping stones split the difference between structure and garden feel.
Planning layout, sizing, and load considerations
Before you order anything, spend 20 minutes with a tape measure and some marking paint or landscaping flags. The biggest planning mistake I see is people sizing the extension based on what looks good in their head and then realizing the furniture does not fit or the shape fights the yard. Here is how to think through it properly. Here is how to think through it properly if you are planning how to make a concrete patio bigger and want the extension to fit your layout and loads.
Sizing and layout
Lay out your furniture in the yard exactly where you want it on the extension, then measure a 2- to 3-foot clearance all the way around. That is your minimum footprint. For most outdoor dining sets, that lands you around 12x12 feet minimum. Add it to your existing slab dimensions, sketch it on paper, and check whether any of those edges land on a slope, near a downspout, or close to a tree root zone. All of those details affect which material and base approach you need.
Height matching
This is the detail most DIYers underestimate. Your new surface needs to land within about a half inch of your existing concrete slab edge, and ideally flush or just barely lower (so water drains away from the house). Write down the thickness of the material you plan to use, add 1 inch for bedding sand, and add 4 to 6 inches for the compacted gravel base.
This Old House recommends excavating to accommodate paver thickness plus a 4, 6 inch base and about a 1-inch layer of concrete sand for bedding 4 to 6 inches for the compacted gravel base. That total tells you how deep to excavate.
For a standard concrete paver that is 2. 375 inches thick, you are digging roughly 7. 5 to 9. 5 inches down from finished grade.
Measure from the top of your existing slab down and make sure that depth clears your planned excavation zone.
Load and use
For a standard patio with chairs, a table, and maybe a grill, a 4-inch compacted base is fine. If you are parking a hot tub, a large pergola with footings, or anything over a few hundred pounds in a concentrated spot, go with 6 inches of compacted base and consider renting a plate compactor rather than tamping by hand. Deck tiles and gravel do not handle point loads well, so for heavy fixtures, pavers or natural stone on a solid base are the better call.
Prep work: base, grading, drainage, and weed control
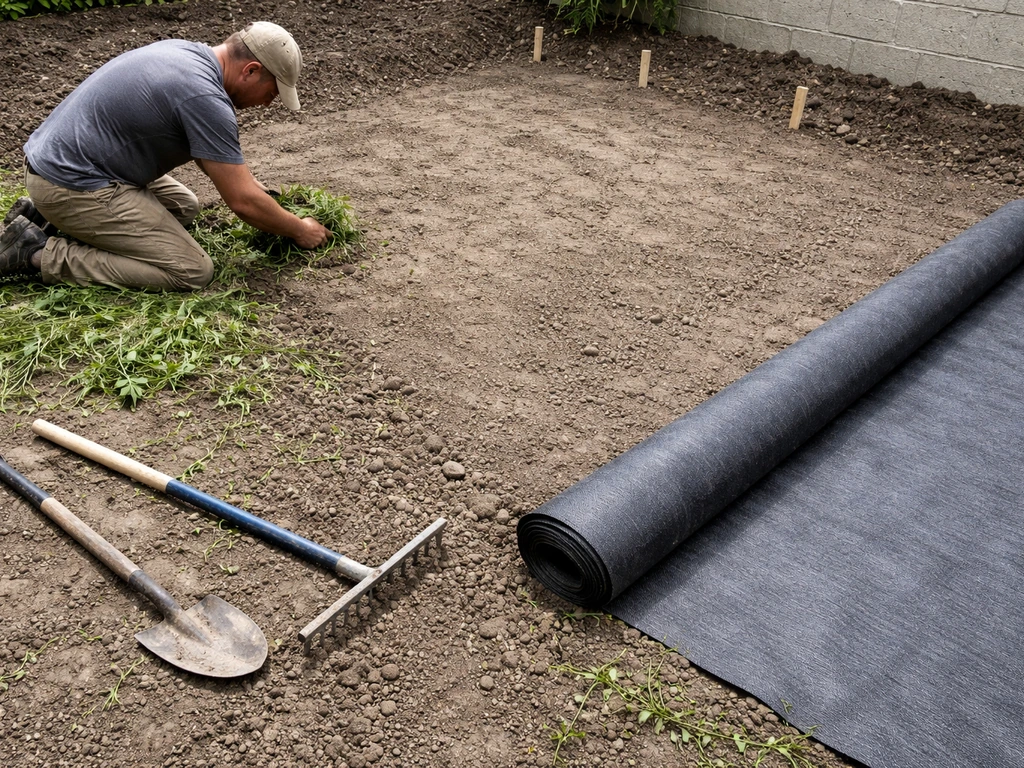
Getting the base right is 80 percent of the job. A beautiful surface on a bad base will shift, sink, and grow weeds within a season. I have gone back and re-done this step on my own projects and it is not fun. Do it right the first time.
- Mark the perimeter of the new extension with marking paint or stakes and string line. Double-check your measurements and make sure corners are square using the 3-4-5 triangle method.
- Excavate to the correct depth: paver thickness plus 1 inch of bedding sand plus 4 to 6 inches of compacted base. Typical total excavation is 7 to 10 inches from finished grade.
- Grade the excavated area to slope away from your house at roughly 1/4 inch per foot. This is the drainage slope that keeps water from pooling on or under your new surface.
- Lay a geotextile landscape fabric over the graded soil. This keeps weeds from growing up through the base and prevents fine soil particles from migrating into the gravel base over time. Overlap seams by at least 6 inches.
- Add compactable gravel (crusher run or class II base material) in 2- to 3-inch lifts, compacting each lift with a plate compactor before adding the next. Total compacted depth: 4 inches for light use, 6 inches for heavier loads.
- Check the compacted surface for undulations. You want less than 1/4 inch of variation across any 10-foot span. Low spots will cause dips; high spots will rock pavers.
- For pavers or flagstone, add 1 inch of coarse bedding sand (concrete sand) on top of the compacted base. Screed it flat using a straight board and two pipe guides at the correct height. Do not compact the bedding sand before laying the pavers.
For gravel extensions, you can skip the bedding sand step. For modular deck tiles going directly onto a flat gravel base or onto the existing concrete slab, you can also skip the bedding sand, but the base still needs to be level and well drained.
Step-by-step installation for each option
Interlocking pavers
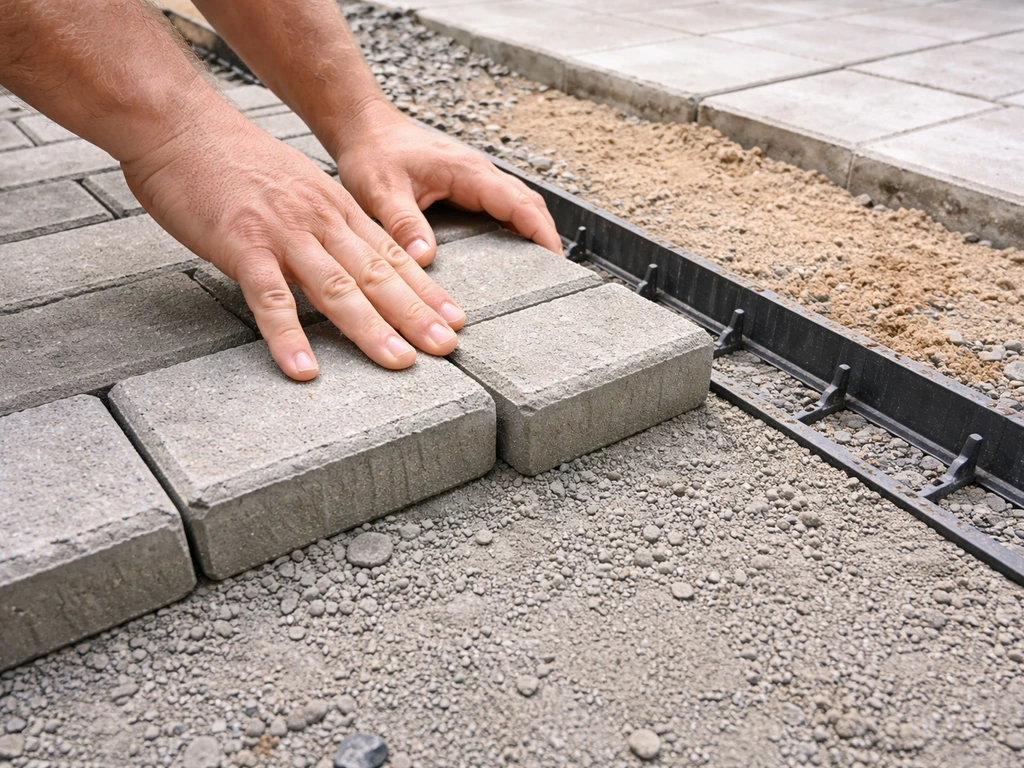
- Install plastic or aluminum edge restraints along the outer perimeter of the extension before laying any pavers. Spike them into the compacted base every 12 inches.
- Start laying pavers from the existing concrete slab edge outward, keeping consistent joint spacing (usually 1/8 to 1/4 inch). Work across the surface rather than in rows from one end.
- Use a rubber mallet to set each paver into the bedding sand. Do not step on unset pavers.
- Cut border pavers with a diamond blade saw or rent a guillotine-style paver splitter for straight cuts.
- Once all pavers are set, spread polymeric sand across the surface and work it into the joints with a push broom in multiple passes.
- Compact the entire paved surface with a plate compactor fitted with a rubber pad protector. This seats pavers into the bedding sand and locks the jointing sand.
- Sweep a final round of polymeric sand into any gaps, then lightly mist with water to activate the binding agents in the sand.
Natural flagstone or irregular stone
Flagstone can be set dry on bedding sand or mortared for a more permanent look. For a patio extension, dry-set is the practical choice: it is faster, allows for adjustment, and drains naturally. Lay the largest stones first and work outward, fitting pieces together like a puzzle with gaps of 1 to 2 inches between them. Fill joints with polymeric sand or decomposed granite. The biggest challenge is getting each stone level since they vary in thickness. Use extra bedding sand under thinner stones to compensate, and check each piece with a level before moving on.
Gravel or crushed stone
Install your edge restraints first, then pour 3 to 4 inches of your chosen gravel (pea gravel, crushed granite, or decomposed granite all work well) over the compacted base and landscape fabric. Rake it level and check the slope. Decomposed granite compacts into a firmer surface than pea gravel and tends to migrate less underfoot, which makes it a better pick for a primary seating area. Pea gravel is softer and looks great but needs containment on all edges or it will end up in your lawn.
Modular deck tiles
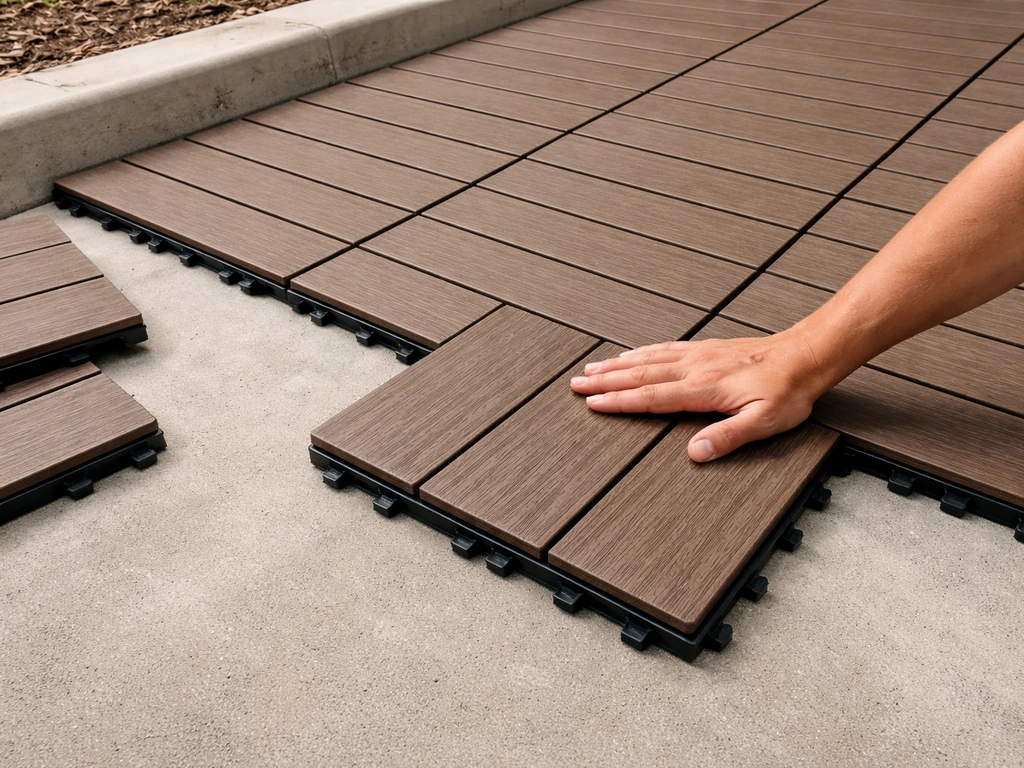
This is the fastest option by a wide margin. Modular tiles in wood composite, porcelain, or bamboo snap or clip together and can go directly on a flat concrete slab, a level gravel base, or adjustable pedestals on an uneven surface. Lay them out dry first to plan the pattern, then start from the corner closest to the existing slab and work outward. Most systems allow you to cut the edge pieces with a circular saw or angle grinder for a clean fit. No adhesive, no sand, no compaction needed on the tile layer itself.
How to border and connect the new section to the existing patio
The transition between your old concrete slab and the new extension is the spot most likely to cause problems if you are not thoughtful about it. Concrete moves over time, it settles, it expands and contracts, and so does whatever you put next to it. Here is how to handle it well.
Height and level alignment
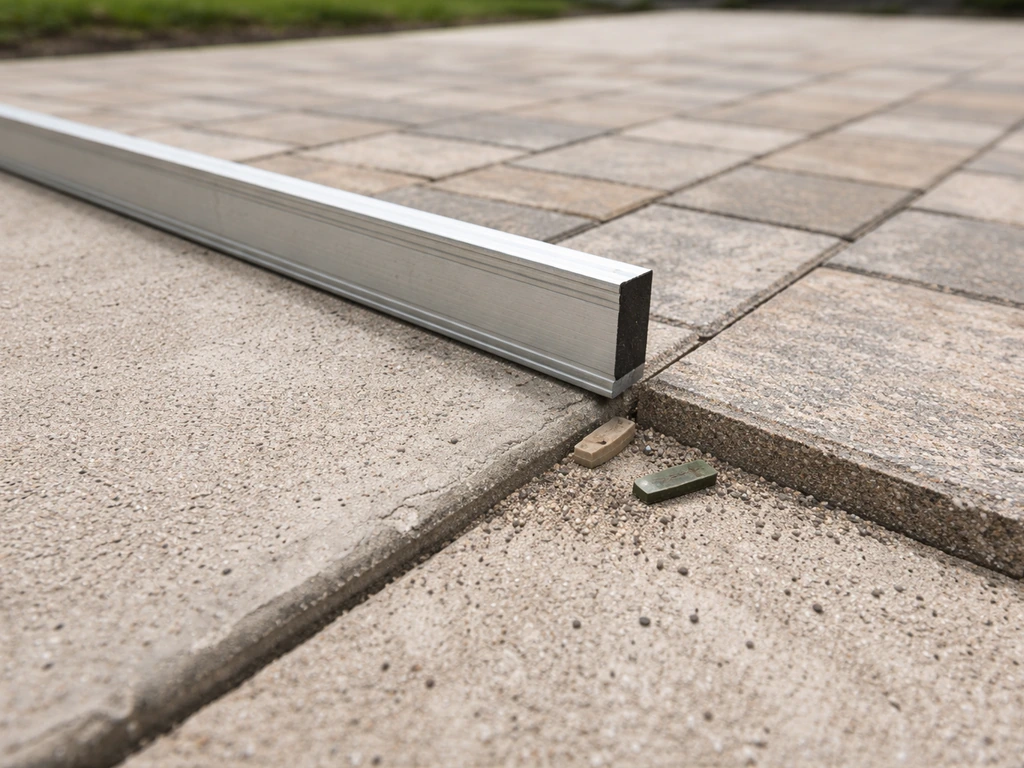
Your goal is to have the new surface blank" rel="noopener noreferrer">within about 1/4 to 1/2 inch of the existing slab surface. Slightly lower is fine and actually preferred because it keeps water draining outward. If your excavation and base math is right, this takes care of itself. If the slab has a lip or raised edge from settling or original construction, you may need to grind down that edge slightly with an angle grinder and diamond cup wheel, or build up the base slightly near the transition to compensate.
Edge restraints and transition strips
Do not rely on the concrete slab edge alone to hold your pavers in place. Install a dedicated plastic or aluminum edge restraint along the slab edge, spiked into the base material. This keeps the pavers from creeping away from the slab over time. For a cleaner visual transition, you can add a soldier-course row of pavers (set perpendicular to the others) or a course of natural stone directly at the slab edge, which creates a defined border that frames both surfaces.
Handling movement and settling
Concrete and pavers move at different rates. Leave a small gap (about 1/4 inch) between the slab edge and the first row of pavers rather than pressing them tight together. Home Depot’s paver installation PDF also emphasizes limiting undulations to under about a quarter inch to help prevent dips and humps in the finished surface [Leave a small gap (about 1/4 inch) between the slab edge and the first row of pavers rather than pressing them tight together. ](https://www.
homedepot. com/catalog/pdfImages/83/8354b9d0-3dc2-462a-ae7a-5f07cde4a70e. pdf). Fill that gap with polymeric sand or a flexible backer rod and matching caulk.
This gives both surfaces room to move without cracking or heaving against each other. If you use deck tiles, most systems have a built-in gap between tiles that naturally accommodates this movement.
Water management at the seam
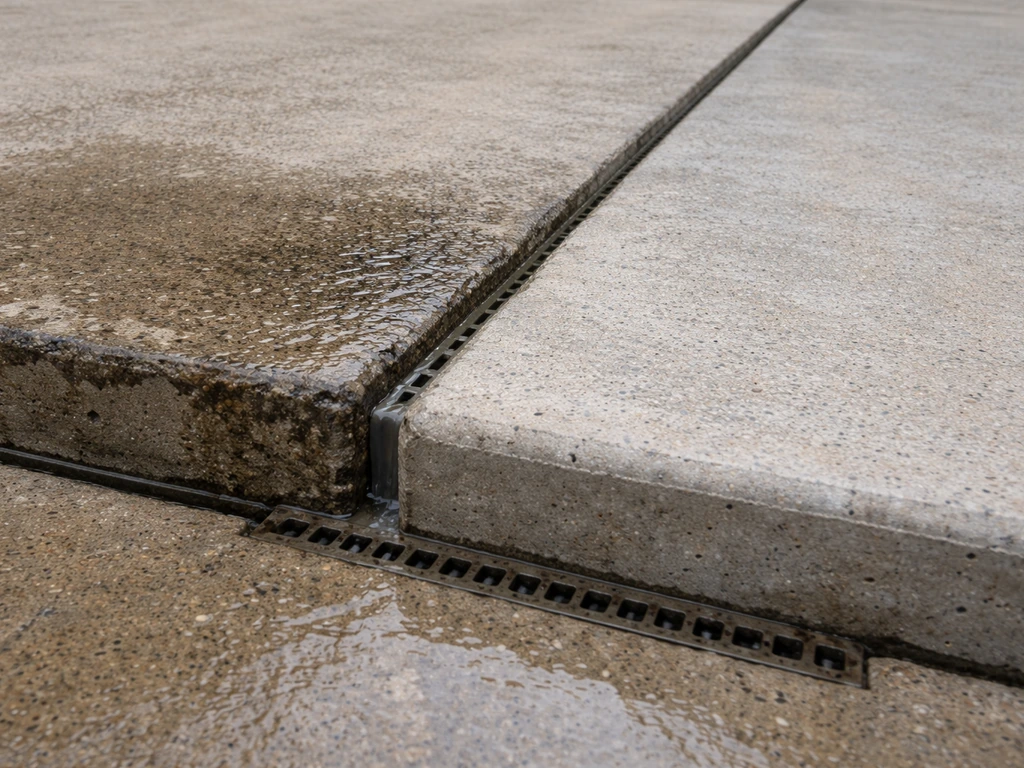
Water that pools at the transition between old concrete and the new extension is the number one cause of long-term damage. Make sure your extension surface drains away from that seam, not toward it. If your existing slab already drains away from the house, extend that same slope across the new section. If the slab has any low spots near the edge, address them before you build the extension, either by grinding down high spots or by building in a slight crown in your extension base to direct water outward.
Finishing, maintenance, costs, and durability
What to expect for durability
A properly installed paver or flagstone extension on a compacted base will last 20 to 30 years with minimal maintenance. Gravel needs refreshing every 2 to 3 years and annual weed control. Modular deck tiles typically last 10 to 15 years depending on material: porcelain tiles outlast wood composite, which can degrade faster in climates with heavy freeze-thaw cycles or constant moisture.
Maintenance by material
- Pavers: Sweep joints with polymeric sand every 2 to 3 years as it erodes. Pull any weeds that sprout in joints. Apply a paver sealer every 3 to 5 years to protect color and lock the jointing sand.
- Flagstone: Check for rocking stones annually and re-level by lifting and adding or removing bedding sand. Seal natural stone every 2 to 3 years if you want to protect against staining.
- Gravel: Top-dress with fresh gravel every 2 to 3 years. Use a propane weeder or pre-emergent herbicide in spring to manage weeds growing through the fabric over time.
- Deck tiles: Rinse periodically to remove debris. Inspect clips and connectors annually. Replace individual tiles if they crack or fade rather than replacing the whole surface.
Realistic cost breakdown
For a 200-square-foot extension, expect to spend roughly $400 to $1,200 on gravel, $1,600 to $4,000 on pavers (DIY materials and base), $3,000 to $6,000 on natural flagstone, and $1,000 to $3,000 on modular deck tiles. If you hire out the labor for pavers or stone, roughly double the material cost to estimate total installed price. Renting a plate compactor runs about $60 to $100 per day and is worth every dollar on anything larger than a small accent border.
Which option should you actually choose
For most homeowners extending an existing concrete patio, interlocking pavers are the best default. They look intentional next to a concrete slab, handle real outdoor use without maintenance headaches, last for decades, and are within reach for a capable DIYer with a weekend and a rented plate compactor. If you want something faster with zero compaction work, go with modular deck tiles, especially if the area you are expanding onto is relatively flat already. If budget is the main driver and the space is more garden than entertaining zone, a gravel extension with clean metal edging looks sharp and costs a fraction of everything else.
If you are also considering pouring new concrete to extend the slab itself, that is a different approach covered in guides on how to add onto a concrete patio and how to add concrete to an existing patio. Those routes give you a more permanent surface but cost more, require cure time, and introduce more risk of cracking at the seam. For most homeowners who want added space fast and affordably, the non-concrete options here do the job just as well and with more flexibility down the road.
Your next steps
- Measure your existing patio and mark out the extension footprint with flags or spray paint. Live with it for a day and see if the size feels right.
- Decide on your material based on your budget, how the space will be used, and how much time you want to invest in installation.
- Calculate your excavation depth: material thickness plus 1 inch sand (for pavers or stone) plus 4 to 6 inches compacted base.
- Order materials and rent a plate compactor for the install day.
- Set your edge restraints, compact your base, and build from the existing slab edge outward.
- Fill joints, seal if needed, and enjoy the extra space by the next weekend.
FAQ
Can I extend a patio without concrete even if the original slab is uneven or cracked?
Yes, but only if you still build a stable base under the new surface. Even “no concrete” options need compacted gravel and proper edging, otherwise the extension will settle unevenly and open gaps at the seam. If you are adding pavers or flagstone, plan on aligning the finished height so the transition stays within about 1/4 to 1/2 inch of the existing slab.
How much clearance should I plan for when extending the patio area for dining or grilling?
For pavers and flagstone, you want a 2- to 3-foot clearance path around your furniture so you can move chairs and sweep the area without catching edges. If you have an outdoor grill that needs space to open lids or doors, include its clearance in your footprint first, then size the extension. This avoids the common problem where the looks-good layout cannot actually accommodate real movement.
Is gravel a good option for the main patio walking and seating area?
Gravel by itself is usually a bad primary seating surface because it shifts under point loads and spreads beyond the boundary. If you want gravel, treat it as a border, a casual seating pad, or build it with full perimeter containment using metal edging, then place heavier-use furniture pads on pavers or stone. For a “main patio” feel, pavers or modular deck tiles are typically safer.
What material should I use if I’m adding something heavy like a hot tub or fire pit?
If your extension will include a hot tub, a pergola with post footings, a heavy fire pit, or any concentrated weight, avoid deck tiles and loose gravel as the primary surface. Choose interlocking pavers or natural stone on a thicker compacted base (often 6 inches for patio use) and consider using a plate compactor. Concentrated loads can cause deck tiles to rock and can create rutting in thin gravel beds.
What should I do if the edge of my existing patio is raised or has a lip from settling?
You can, but don’t rely only on “matching the slab” by eye. Measure the slab edge height in multiple spots because settled or mis-leveled concrete is common. If the slab has a raised lip, grind down the high area for a flush transition, or adjust the base thickness locally near the seam so water drains outward rather than collecting at the edge.
Do I need edge restraints when extending pavers next to concrete, or is the slab edge enough?
Use a dedicated edge restraint along the concrete interface. It should be anchored into the base, not just pressed against the slab, so it resists lateral movement from foot traffic and winter expansion. If you skip this and rely on the concrete edge alone, pavers can slowly creep away and the seam becomes messy.
Should I leave any gap between the existing concrete slab and new pavers?
Yes, and the size matters. Leave a small movement gap between the slab edge and the first row of pavers (commonly around 1/4 inch), then fill it with a flexible solution like polymeric sand or a flexible backer plus matching caulk (depending on the product/system). Filling this area solidly without flexibility increases the chance of heaving and cracking at the seam.
Do modular deck tiles need a movement gap and special drainage at the transition to concrete?
Deck tiles are designed to accommodate movement with built-in spacing depending on the system, but you still need a level, properly drained base. If you install deck tiles over a flat gravel base, make sure the gravel is compacted and graded so water can flow away from the slab. If water ponds, tiles can stay wet and degrade faster.
Can I put modular deck tiles directly on existing soil or only on concrete/gravel?
Most systems can be installed on a new paver base prepared right beside the concrete, but don’t assume you can place tiles directly on “whatever soil is there.” If the ground is soft, install compacted gravel first and use adjustable pedestals only if the area is uneven. Otherwise you risk rocking tiles and an uneven surface that becomes hard to correct later.
How do I prevent water from pooling where the new patio meets the old concrete?
Yes, and the transition plan should come before you buy materials. Common challenges include low spots that cause pooling and high spots that prevent flush alignment. If your slab already drains correctly, replicate the same outward slope in the extension. If not, correct the drainage problem by grinding high spots or building a slight crown in the extension base.
How do I avoid paver joints washing out or turning into weeds over time?
If you are using polymeric sand between paver joints, keep in mind it hardens, so you should avoid getting it wet before you are fully set and leveled. For seasonal climates, proper compaction and joint stability matter more than “more sand.” If joint sand washes out, reapplication is usually needed, but you should first confirm the base is stable.
What site conditions can change my plan for extending a patio without concrete?
Fence lines, downspouts, and tree root zones can force you to adjust the edge placement or base depth. Before finalizing the layout, check whether any part of the extension hits a downspout discharge point or sits too close to active roots. In root-prone areas, consider stepping stones, permeable pavers, or re-route the boundary rather than trying to brute-force the same footprint.