
Fill the gap between your concrete patio and house with a flexible polyurethane or polyurea sealant (like Sikaflex NP 1), backed by a foam backer rod to control depth. This combo handles seasonal movement, seals out water, and lasts years longer than rigid materials like mortar or hydraulic cement. For wider gaps over 1 inch, use expanding foam first to fill bulk, then finish the surface with sealant. The exact steps depend on how big and deep the gap is, what condition the edges are in, and whether you're dealing with a straight expansion joint or a crumbling, damaged edge.
How to Fill Gap Between Concrete Patio and House

Silas Morrison
8 Jul 2026
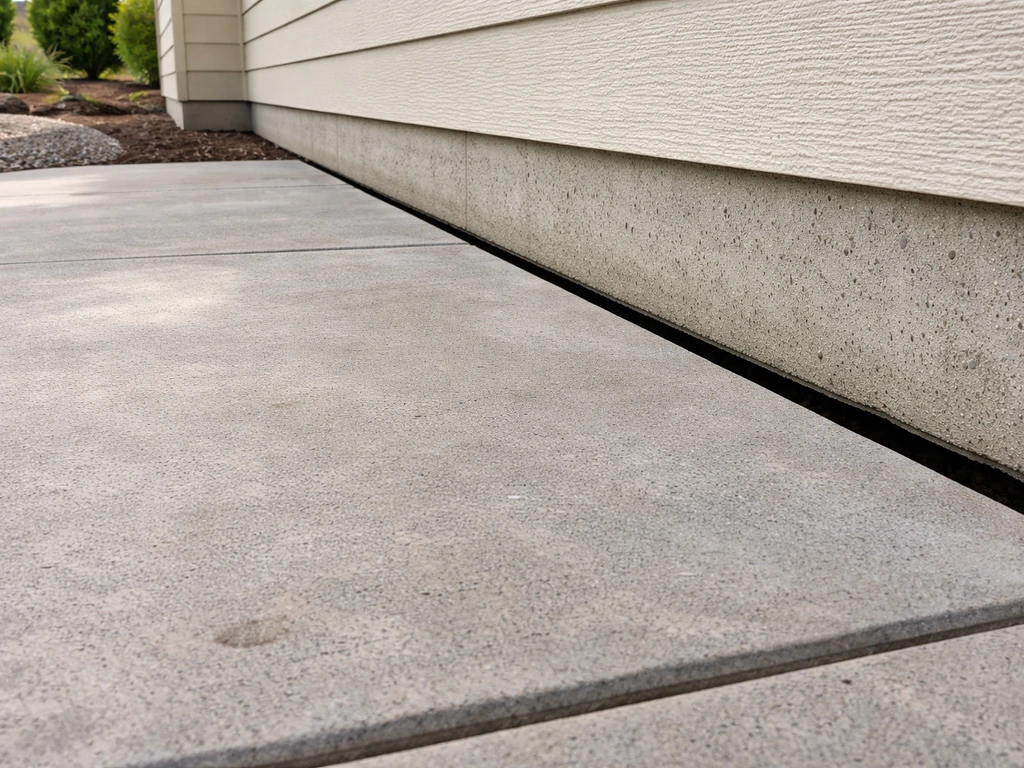
Why this gap exists and why it matters
That gap between your patio slab and the house foundation is not a mistake. It's an intentional expansion joint, or at least it should be. Concrete moves. It expands in summer heat, contracts in winter cold, and shifts slightly as the ground beneath it settles over time. If the patio slab were bonded directly to your foundation, that movement would crack both of them. So the gap is there on purpose, but left open or filled wrong, it becomes a funnel for water, insects, and cold air.
The problem most homeowners see is a gap that has grown wider over time, crumbled edges, weeds growing up through it, or visible water staining on the foundation wall below it. Sometimes the slab has dropped slightly, creating an uneven ledge. Any of these scenarios can be fixed with the right approach, and most of them are solid DIY jobs if you catch them before the gap signals something more serious underneath.
Step 1: Identify the gap type and measure it correctly
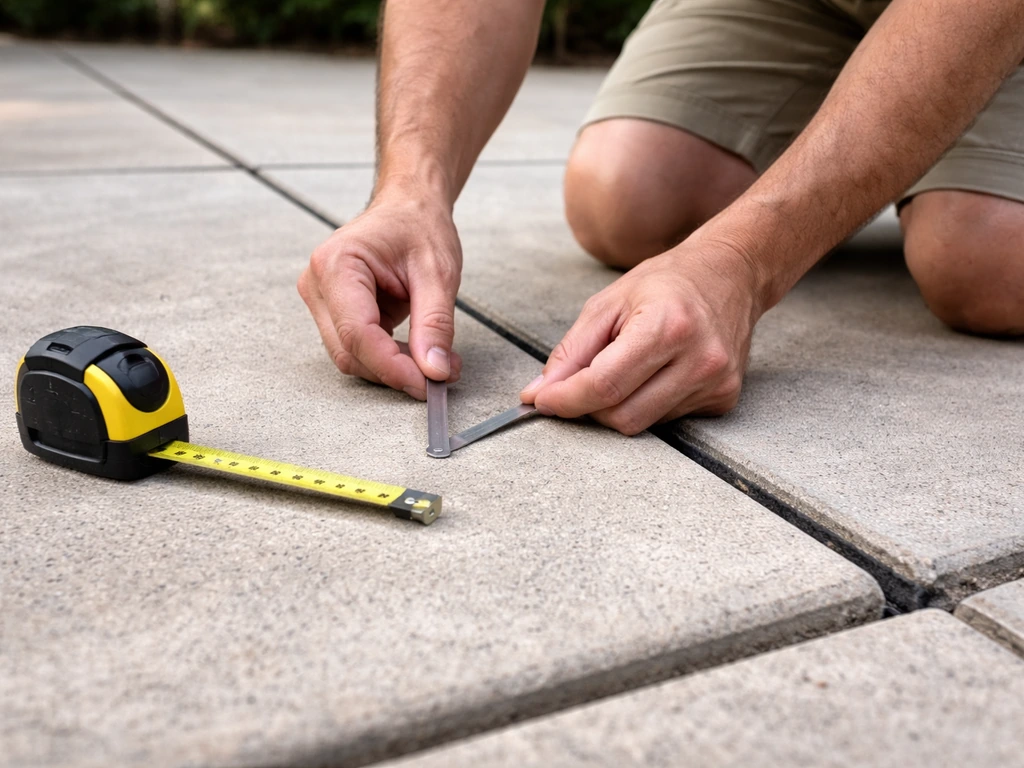
Before you buy anything, measure the gap carefully in several spots along its length. Gaps are rarely uniform. You need to know the width at its widest point, the depth where the slab edge meets the foundation, and whether there's loose, crumbling concrete that needs to come out first.
Here's how to categorize what you're working with:
| Gap Type | Width | Best Fill System | Notes |
|---|---|---|---|
| Hairline / shrinkage crack | Under 1/4 in | Self-leveling polyurethane sealant, no backer rod needed | Clean thoroughly; sealant alone is sufficient |
| Standard expansion joint | 1/4 in to 1 in | Backer rod + polyurethane or polyurea sealant | Most common scenario; this guide focuses here |
| Wide gap or damaged joint | 1 in to 2 in | Expanding foam + backer rod + sealant | May need to rebuild crumbled edges first |
| Large structural gap or offset slab | Over 2 in, or slab has dropped | Consult a pro before DIY | Could indicate slab or foundation movement |
Also check whether the slab is level with the foundation wall edge or has dropped. A gap under 1/2 inch of vertical drop is usually cosmetic. Anything more than that, or a gap that keeps getting wider year over year, needs a closer look before you seal it shut.
Step 2: Prepare the joint before anything goes in
This is the step most people skip, and it's exactly why their repair fails in one season. Sealant cannot bond to dusty, oily, crumbling, or wet concrete. Period. Spend the time here and the rest of the job is easy.
Remove loose material
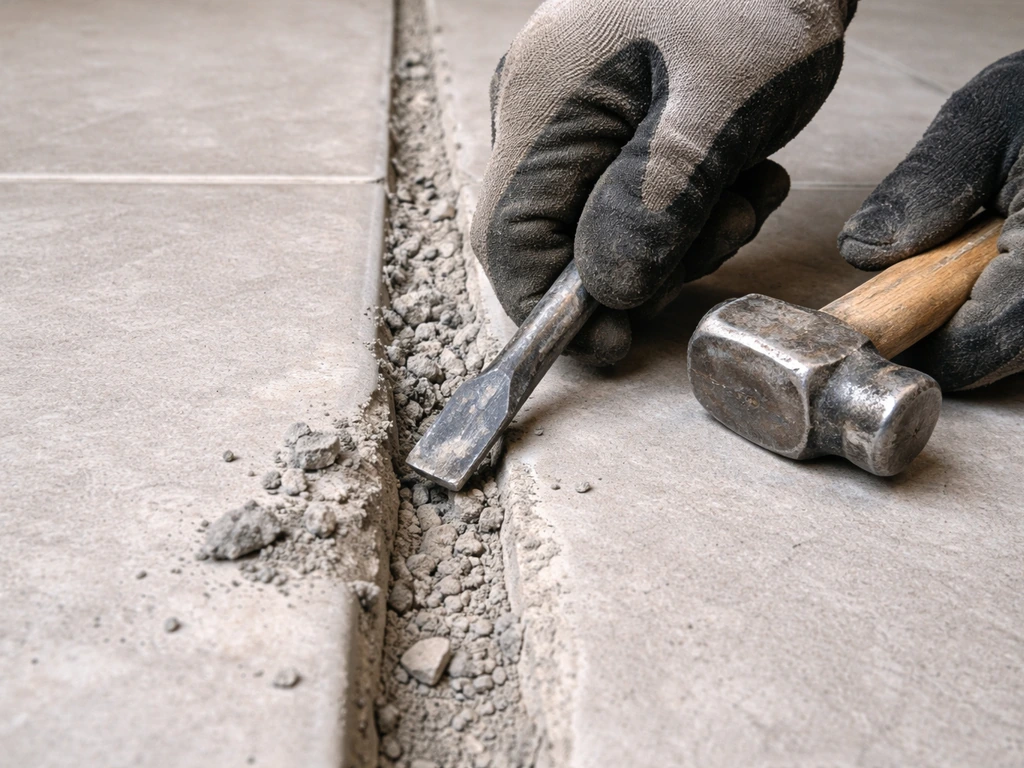
Use a cold chisel and hammer, or an oscillating tool with a grout blade, to knock out any loose, flaking, or crumbling concrete along both edges of the gap. You want solid, clean concrete faces on both sides. If the old joint has previous caulk or foam in it, dig that out completely. Old caulk does not bond well to new caulk, especially if the old stuff is already failing.
Clean the joint
Blow out the joint with compressed air, then scrub both faces with a stiff wire brush. If there's biological growth (moss, mildew, dark staining), treat it with a diluted bleach solution and let it dry fully before proceeding. The joint needs to be dry, not just visually clean. If you washed it out, give it at least 24 to 48 hours to dry in warm weather.
Get the depth right
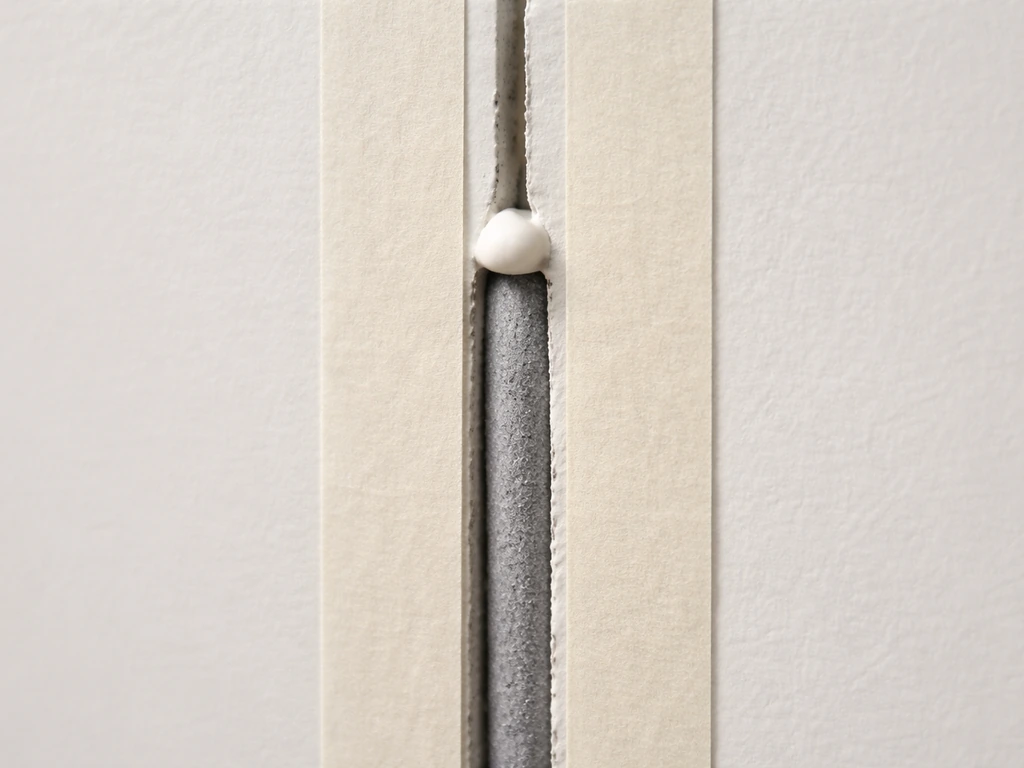
This is where most DIYers go wrong. They fill the gap all the way to the bottom with sealant, which creates what's called three-sided adhesion. When the joint moves, sealant bonded on three sides tears instead of stretching. The fix is to [use a foam backer rod to set your sealant depth correctly](https://www.
astm. org/c1472-16r22. html). [For a standard expansion joint, you want a sealant depth of 1/4 inch to 1/2 inch at the center, and the depth should be roughly half the joint width](https://usa.
sika. com/en/construction/adhesives-sealants/joint-sealants/architectural-sealants/polyurethane/sikaflex-np-1. html) (so a 1/2-inch wide gap gets 1/4-inch deep sealant). The backer rod fills the rest of the gap below the sealant, acting as both a depth gauge and a bond breaker so the sealant only grips the two vertical faces.
When selecting your backer rod, buy a diameter about 1/8 inch larger than the gap width. For a 1/2-inch gap, use 5/8-inch backer rod. Push it in with a blunt tool (a flat screwdriver works) until it sits at your target depth below the surface. Compress it about 25% as you install it, which creates a slight outward pressure that keeps it in place.
Step 3: Choose the right filling system
The material you pick depends on gap size and whether you need rigidity or flexibility. Here is a straight comparison so you can decide fast:
| Material | Best For | Movement Tolerance | Longevity Outdoors | DIY Difficulty |
|---|---|---|---|---|
| Polyurethane sealant (e.g., Sikaflex NP 1) | 1/4 in to 1 in gaps, standard expansion joints | High (stretches and compresses) | 7 to 10+ years with UV-stable product | Easy |
| Polyurea joint filler | Hairline to medium gaps, fast cure needed | Moderate to high | 8 to 12+ years | Easy to moderate |
| Self-leveling sealant | Horizontal joints, flat surfaces | High | Similar to polyurethane | Very easy (just pour and level) |
| Hydraulic cement or mortar | Filling voids behind sealant, patching crumbled edges | None (rigid) | Long, but cracks if used alone in moving joints | Easy to moderate |
| Expanding foam + sealant | Gaps over 1 inch wide | High (foam + flexible top coat) | Depends on sealant top coat quality | Easy |
My recommendation for the vast majority of patios: use a closed-cell foam backer rod plus a polyurethane or polyurea sealant rated for exterior concrete joints. Products like Sikaflex NP 1 are widely available at home improvement stores, come in gray and limestone colors to blend with concrete, and are designed specifically for this kind of moving joint. Avoid silicone for concrete joints because it does not bond as well to concrete and is harder to paint or texture-match later. Avoid mortar or Portland cement alone in the joint because it will crack within one or two freeze-thaw cycles.
Step 4: Apply and finish the joint
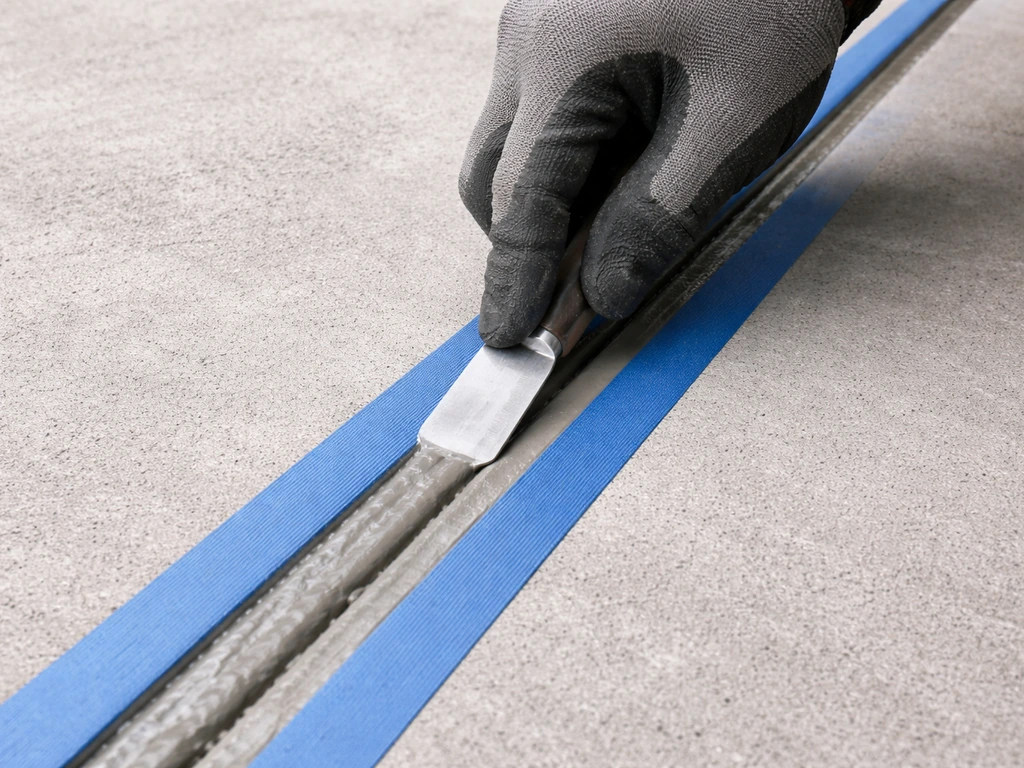
Once the joint is clean, dry, and your backer rod is set, you're ready to apply sealant. If you want to reseal a stamped concrete patio, the same gap-prep and sealant choices apply, but you should use exterior joint products made for moving concrete. Follow these steps in order:
- Apply painter's tape to both sides of the joint along the concrete surface. This keeps the sealant edge clean and makes finishing much easier. Press it down firmly so sealant doesn't bleed underneath.
- Load your caulk gun with the sealant cartridge. Cut the nozzle tip at a 45-degree angle to a size slightly smaller than your joint width.
- Apply sealant in one steady pass along the entire joint, keeping the gun moving at a consistent speed. Do not stop and restart mid-run if you can avoid it.
- Tool the joint immediately while the sealant is still wet. Use a rounded caulk tool, a wet gloved finger, or a spoon to press the sealant slightly into the joint and create a smooth, slightly concave (hourglass) profile. That slight concave shape is intentional: it gives the sealant more surface area to flex as the joint moves.
- Pull the painter's tape off while the sealant is still wet, before it skins over. Pull it back at a 45-degree angle, not straight up.
- Let the sealant cure undisturbed according to the manufacturer's instructions. Most polyurethane sealants skin over in 1 to 4 hours and fully cure in 3 to 7 days.
If you have an irregularly crumbled edge, fill that area with a concrete patching compound or vinyl concrete patcher first, let it cure fully, then come back and run the sealant joint. Trying to use sealant to span a crumbled, uneven edge never looks clean and doesn't hold well.
Step 5: Cure, seal, and weatherproof for the long run
After your sealant has fully cured (give it the full cure time on the label, not just the touch-dry time), the joint itself is sealed, but there are a few more things worth doing to protect the surrounding area for the long term.
If your patio is unsealed, this is a good time to apply a concrete sealer to the whole slab. A penetrating silane-siloxane sealer repels water at the surface and reduces how much moisture cycles in and out of the concrete near the joint. That reduces freeze-thaw stress on both the slab edges and your fresh sealant bead. Sealing the patio surface also protects any patching compound you used around the joint edges. The sealing process for the full patio is a separate topic worth exploring once this repair is done.
Also check the area where the foundation wall meets the slab, especially if there's any gap where the house siding or brick comes close to the patio surface. Water that gets behind siding and works its way down to the slab-foundation joint is a common source of repeat failure. If you see daylight or a visible gap at the base of siding, caulk that too with a paintable exterior caulk rated for wood-to-masonry transitions.
Plan to inspect the joint once a year, ideally in early spring after winter freeze-thaw cycles. If you want a lasting result, focus on how to seal concrete patio to house by using the right flexible sealant, proper backer-rod depth, and careful joint prep before you apply the bead. A flexible sealant in good shape looks smooth and adheres cleanly to both faces. If you see peeling edges, cracks running through the bead, or separation from one face, it's time to re-caulk. Catching it early means a simple re-application rather than a full re-prep job.
Common problems and how to fix them
The sealant won't bond to the concrete
This almost always comes down to one of three things: the surface wasn't fully dry, there was dust or residue left in the joint, or you used the wrong product (silicone doesn't bond reliably to concrete). Strip the old sealant completely, clean again, let it dry longer than you think is necessary, and use a polyurethane or polyurea product specifically rated for concrete-to-concrete or concrete-to-masonry joints. Some products also call for a primer on porous concrete surfaces, so check the label.
The gap keeps getting wider every year
Some widening is normal as a patio ages, especially in climates with hard winters. If the gap grows by a fraction of an inch over years, that's seasonal movement doing its job. If it's growing noticeably every season, or growing unevenly (wider at one end than the other), the slab may be settling or heaving. In that case, sealing it is a temporary fix at best. You need to understand why it's moving before you spend time and money on a repair that will fail again.
The sealant cracks or pulls away from one side
This usually means three-sided adhesion was the problem: the sealant bonded to the bottom of the joint as well as the two faces, so when the joint moved, the sealant tore instead of stretched. The fix is to remove the sealant, install backer rod at the proper depth, and re-apply. That hourglass shape mentioned earlier (slightly concave surface) also helps by giving the bead more flexibility in the center.
Water is still getting through after sealing
Check two things first. One, is the joint itself the source, or is water coming from somewhere above it (a sloped patio surface draining toward the house, or gaps around door thresholds)? Two, is there a path for water to get behind the sealant from the side? Sometimes the real problem is the patio slope directs runoff toward the house instead of away from it. Sealant alone won't fix a drainage problem.
The finished joint looks messy
Use painter's tape every time, and remove it while the sealant is still wet. If you're working in hot weather, the sealant may skin over faster than expected, so work in shorter sections: apply 3 to 4 feet, tool it, pull the tape, then move to the next section. Color-matched sealant (gray is the standard) blends into most concrete surfaces reasonably well, especially after a year of weathering.
When to stop the DIY and call a professional
Most gap repairs are straightforward and DIY-friendly. But there are clear signs that what you're looking at is beyond a sealant job, and pushing forward without professional input can mask a bigger problem or even make it worse.
- The slab has dropped more than 1/2 inch relative to the foundation wall, creating a tripping hazard or a large step-down at the joint
- The gap is growing noticeably each season and is now over 2 inches wide
- You can see the gap widening or narrowing at different points, suggesting uneven movement or rotation of the slab
- There are diagonal cracks radiating from the corners of the patio slab toward the foundation
- The foundation wall itself shows cracks, bowing, or efflorescence (white salt deposits) near the joint, which can indicate water intrusion or soil pressure problems
- The soil next to the patio has sunk or eroded noticeably, which can leave the slab edge unsupported (called voiding)
- Water is appearing inside the basement or crawl space near the location of the patio joint
Any of these signs means the movement is structural, not just thermal expansion. A concrete contractor or structural engineer can assess whether the slab needs mudjacking (lifting via injected grout), foam leveling, or full replacement, and whether the foundation itself needs attention. Filling a gap over a moving slab or a failing foundation is just cosmetic, and it won't protect your home from water damage or worsening settlement. Get a second set of eyes before you seal anything. For exposed aggregate concrete patios, the same joint prep and proper sealant depth help keep the textured surface looking good while controlling water intrusion.
For patios where the joint is the only issue and the slab is otherwise stable and level, this is a project you can knock out in an afternoon with about 30 to 60 dollars in materials. The prep takes longer than the actual application, but do it right once and a quality polyurethane sealant over a properly installed backer rod will give you many years of a clean, watertight, flexible joint that moves with your house instead of fighting it.
FAQ
Can I use spray foam or expanding foam as the final seal instead of polyurethane sealant?
No, expanding foam is for bulk fill only. It usually doesn’t have the same durable weatherproof top surface as a polyurethane or polyurea joint sealant. If you leave foam exposed, UV and moisture will degrade it faster and it will crack away from the edges, reopening the leak path.
What if the gap is wet or I can’t fully dry the joint before sealing?
Don’t seal over active moisture. Even if it looks dry on top, water vapor trapped in the joint can prevent proper adhesion and cause blistering or peeling later. If drying time is limited, pause and address the water source first (downspouts, patio slope, siding penetrations) so the joint can dry fully.
How do I know the joint is an actual movement joint versus a sign of slab settling?
Look for progressive widening or uneven change (one end widening more than the other), a noticeable vertical step, or cracks spreading away from the joint. Small seasonal changes are normal, but if the slab appears to be lifting or dropping over time, sealing may become a temporary fix that hides a structural issue.
Should I prime the concrete before applying polyurethane/polyurea sealant?
Sometimes. Many products bond well to clean, porous concrete without primer, but some require primer on porous or dusty surfaces. Check the sealant label for “primer required” guidance, especially if you patched crumbled edges or cleaned with chemicals that may leave residue.
What sealant depth should I use if my gap isn’t the standard 1/2 inch?
Use the backer rod to control depth so the sealant ends up roughly 1/4 to 1/2 inch at the center for typical expansion joints, then scale with your joint width. A practical rule from many joint systems is sealant thickness at the center around half the joint width, but always confirm with the product’s specification if you want maximum performance.
Why is my new sealant bead peeling after only a few months?
The most common causes are residue or moisture on the concrete, incorrect backer rod depth (creating bonding on three sides), or using the wrong chemistry (often silicone). Fix usually requires removing the failing bead completely, cleaning, installing the backer rod again, and resealing once the joint is dry.
How should the sealant bead look when finished, should it be perfectly flat?
A slightly concave, tooled bead is usually best because it maintains flexibility at the center while still sealing the two vertical faces. Aim for smooth contact at both sides, and avoid smearing sealant onto the bottom of the joint, which increases three-sided adhesion and early tearing.
Do I need to caulk around the foundation where siding meets the patio too?
Only if there’s a real pathway for water, like a visible gap or daylight at the base of siding or brick near the patio. If water can run behind siding and down toward the slab-foundation joint, sealing the patio gap alone may not stop repeat failures. Use an exterior caulk rated for wood-to-masonry transitions if you see a gap there.
Can I paint or stain over the sealed joint to match concrete exactly?
Most polyurethane/polyurea concrete joint sealants are not designed to be painted immediately. If color match is needed, consider choosing a color-matched sealant where available, since many sealants can darken or weather over time. If painting is desired, follow the sealant manufacturer’s recoat instructions to avoid cracking or early peeling.
How often should I inspect and rework the joint?
Inspect annually, ideally in early spring after winter freeze-thaw cycles. Re-caulking is usually simpler when failure is limited to edge separation or minor cracking, but if you see deep pulling away from one face or repeated water staining below the joint, the prep or underlying cause may need attention.
When should I stop DIY and call a pro?
Call for evaluation if the gap is associated with slab heaving or sinking, cracking that spreads beyond the joint, doors or interior drywall showing new cracks near the patio area, or evidence of water intrusion despite correct sealing. Those patterns can indicate soil movement or foundation issues where sealing is only cosmetic.