
To reseal a stamped concrete patio, you clean the surface thoroughly, let it dry completely (at least 24 hours after washing), repair any cracks or damage, then apply a thin, even coat of a compatible sealer using a pump sprayer and back-roller. You can also fill the gap between the concrete patio and the house with a proper exterior-rated joint filler so water and drafts do not get in repair any cracks or damage. That's the short version. The longer version is where most DIYers run into trouble, because skipping or rushing any of those steps is exactly what causes peeling, hazing, and streaks. This guide walks you through the full process so you get it right the first time.
How to Reseal a Stamped Concrete Patio Step by Step

Silas Morrison
23 May 2026
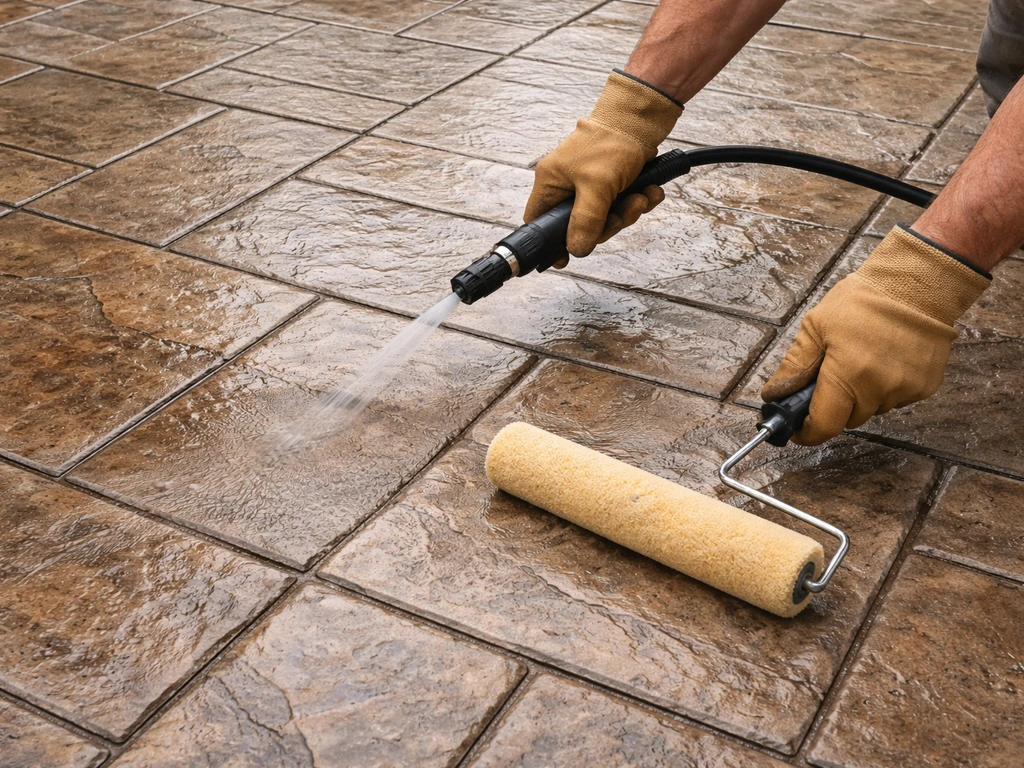
Does your stamped patio actually need resealing right now?
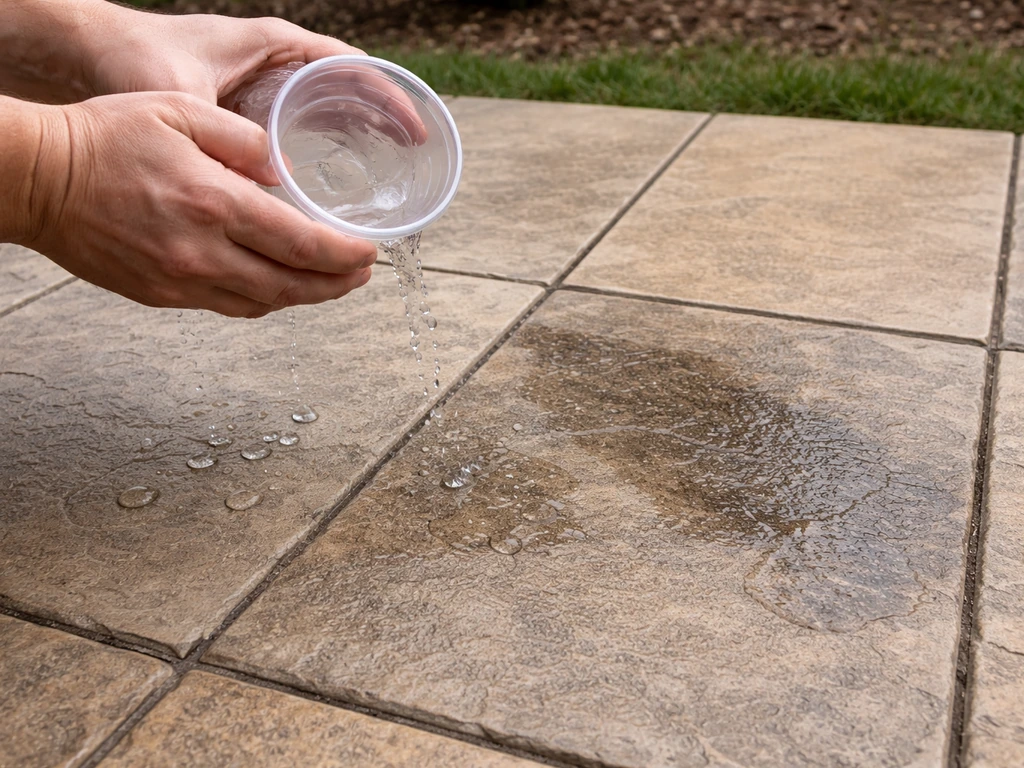
Stamped concrete typically needs resealing every 2 to 5 years, but that range is wide for a reason. A patio under a tree in a rainy climate with heavy foot traffic might need it every two years. A covered patio in a dry region might go five or six years without issue. So before you buy anything, do a quick water test to find out where you stand. After you confirm the patio needs resealing, you can seal a concrete patio by cleaning, drying, fixing damage, choosing compatible sealer, and applying thin coats in the right weather.
Splash a cup of water on different spots across the patio. If it beads up and sits on the surface, the sealer is still doing its job. If the water spreads out and darkens the concrete within a few seconds, the sealer is worn and it's time to reseal. Also look for these visual signs while you're out there:
- The surface looks dull, chalky, or faded compared to when it was freshly sealed
- You can see white or gray patches (efflorescence) coming through
- The color of the stamped pattern looks uneven or washed out
- The surface feels gritty or rough rather than smooth
- You notice small flakes or peeling of the existing sealer
If two or more of those describe your patio, you're past due. Don't wait until the concrete starts absorbing stains or showing freeze-thaw damage, because at that point you're dealing with a repair job, not just a reseal. For the final cleanup and finishing touches after resealing, follow these tips on how to finish a concrete patio.
Figure out what's already on it before you buy a sealer
This step trips up a lot of homeowners and it's probably the most important thing I can tell you: you need to know what type of sealer is currently on your patio before you apply a new one. If you're working on an exposed aggregate concrete patio, the same sealer-matching and prep rules apply before you seal it. Putting the wrong sealer over an existing coating can cause adhesion failures, milky haze, or peeling within weeks of application.
There are two main sealer categories. Film-forming sealers (most commonly acrylic, but also urethane) sit on top of the concrete and create a visible sheen. Penetrating sealers (silane, siloxane, or silicate-based) soak into the concrete and don't leave a surface film. The vast majority of stamped concrete patios were sealed with a topical acrylic at some point, because acrylics are the most commonly used option for outdoor decorative concrete. They protect well, they're affordable, and they're easy to apply.
To figure out which type you have, do a small test in an inconspicuous spot. Lightly sand a small area with 60-grit sandpaper. If white powder or flakes come off, it's a film-forming sealer. If nothing comes off and the surface stays the same, it's likely a penetrating sealer. You can also call the original contractor if you have that information, or look at the original project records.
Once you know what's there, match it. Apply acrylic over acrylic. If you're switching to a different chemistry, or if the old sealer is peeling badly, you'll need to strip it first (covered below). A UV-resistant acrylic sealer is a solid go-to for most outdoor stamped patios. It enhances color, provides good protection, and if you want to minimize fading from sun exposure, look specifically for one marketed with UV protection.
| Sealer Type | Finish | Best For | Recoat Compatibility |
|---|---|---|---|
| Solvent-based acrylic | High gloss or wet look | Enhancing color, high-traffic areas | Recoat with same type; strip before switching |
| Water-based acrylic | Low to medium sheen | Eco-friendly preference, mild climates | Recoat with same type; can sometimes go over solvent-based (test first) |
| Urethane/polyurethane | High gloss, very durable | Heavy traffic, commercial-grade durability | Usually requires stripping old sealer first |
| Penetrating (silane/siloxane) | No visible sheen | Unsealed concrete, water repellency only | Not compatible over film-forming sealers |
Clean the surface the right way
Good prep is everything. I've seen resealing jobs fail within a year because someone skipped a proper cleaning. The sealer needs a clean, open surface to bond to, and any dirt, algae, mildew, oil, or old product sitting on top will prevent that.
General cleaning and pressure washing
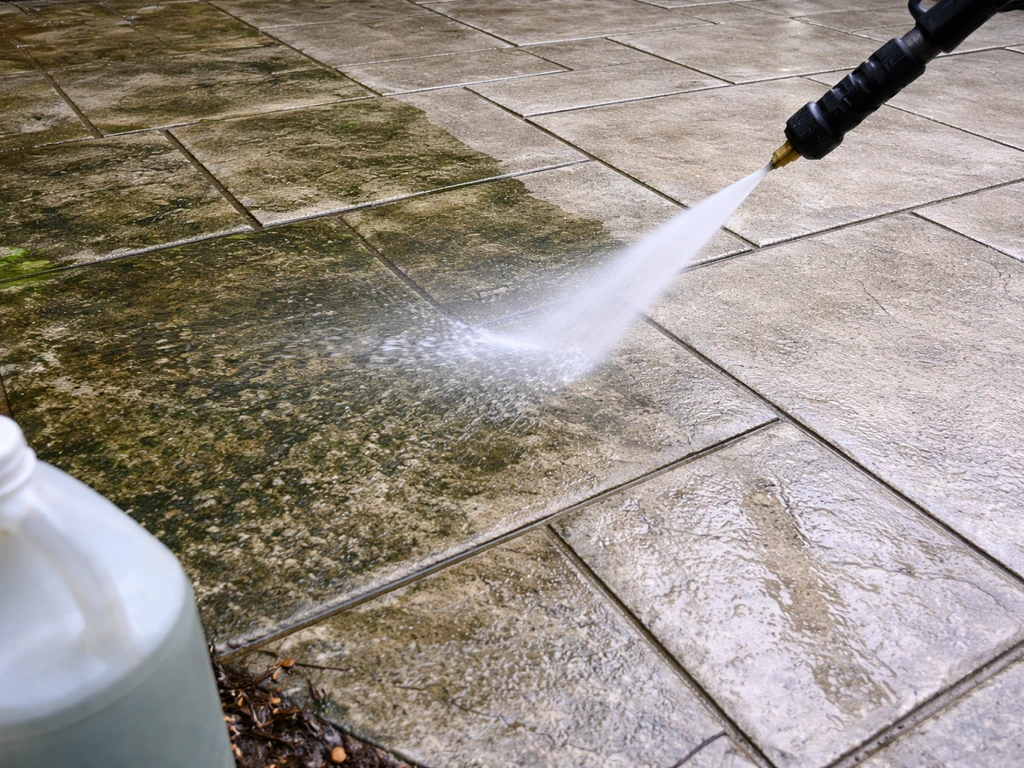
Start with a general rinse to knock off loose debris. Then apply a concrete-specific cleaner or degreaser for any oily or stained areas. For algae and mildew, a diluted bleach solution (1 part bleach to 3 parts water) works well. Scrub with a stiff brush, let it dwell for 10 to 15 minutes, then rinse thoroughly.
For the main wash, a pressure washer at 3,000 to 3,500 PSI is the standard recommendation for concrete. That said, if you have a decorative colored finish that's in decent shape, use a fan tip and keep the wand moving rather than holding it in one spot. You want to blast out the grime without blasting off the color or texture. After washing, give it a full 24 hours to dry before you even think about applying sealer. The surface must be completely dry, not just surface-dry.
Removing efflorescence
If you see white powdery deposits or crusty mineral stains on the surface, that's efflorescence, and you absolutely cannot seal over it. The mineral salts will continue to migrate through the sealer and cause bubbling, lifting, or white patches. Use a diluted muriatic acid solution (10 parts water to 1 part muriatic acid) to dissolve the deposits. Wet the surface first, apply the acid solution, scrub with a stiff brush, then rinse completely. After treating efflorescence, wait at least 48 hours before applying sealer, not just 24.
Stripping old sealer if needed
If the existing sealer is peeling, flaking heavily, or you're switching to a chemically incompatible product, you'll need to strip it. Use a chemical sealer stripper designed for concrete. Apply it per the product directions (usually a 15 to 30 minute dwell time), scrub aggressively, and rinse off. You may need a second pass for thick buildup. This step adds a day to your project timeline, but skipping it when it's needed is one of the main reasons resealing jobs fail.
Fix cracks and surface damage before you seal
Sealer won't hide cracks or surface damage. If you're also looking for guidance on sealing concrete patio areas that run up to a house, focus on matching the sealer type and sealing around edges correctly how to seal concrete patio to house. It'll actually make them more visible by adding sheen right next to a rough or discolored repair. So get these fixed before you open the sealer can.
For hairline cracks (under 1/8 inch wide), a concrete crack filler or polyurethane caulk in a color that matches your stamp works well. Clean out the crack first with compressed air or a wire brush, fill it slightly below the surface, and feather the edges. For wider cracks or spalled areas, use a polymer-modified cement patching compound. Apply it in thin layers, texture the surface to match the stamp pattern as closely as possible while it's still workable, and let it cure fully before sealing. An unmatched texture is going to stand out, so take your time here.
After any patching, let the repairs cure for at least 48 to 72 hours before applying sealer. Fresh patches need time to dry out or they'll trap moisture under the sealer and cause the exact kind of hazing or bubbling failure you're trying to avoid.
How to apply the sealer correctly
Pick the right weather window
Temperature and humidity matter more than most people realize. Apply sealer when the air temperature is between 50°F and 90°F and relative humidity is below 70%. Avoid applying in direct, intense sunlight on a hot day since the sealer can flash-dry too quickly and leave lap marks. The best practice is to apply in the late afternoon or early evening when the slab temperature is falling rather than rising. This gives the sealer more time to flow and self-level before it skins over. Never apply sealer to a hot slab that's been baking in the sun all day.
Tools you'll need
- Pump sprayer with a fan tip nozzle (a garden-style pump sprayer works fine for most DIY jobs)
- 3/8-inch nap roller and roller frame (use a 1/2-inch nap if the stamp texture is very deep)
- Extension pole for the roller
- Painter's tape and plastic sheeting to protect adjacent surfaces
- Safety glasses and chemical-resistant gloves
- Respirator if using a solvent-based sealer (non-negotiable)
The spray-and-back-roll method
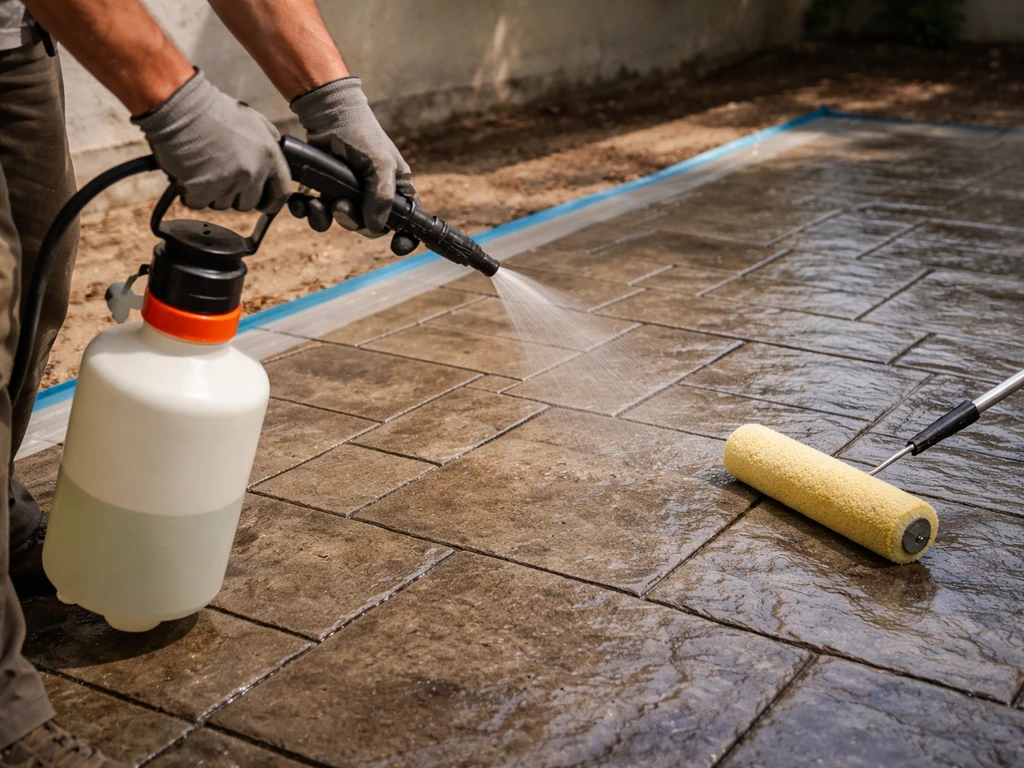
The spray-and-back-roll technique is the go-to method for stamped concrete, and for good reason. Spraying alone can leave puddles in the low spots of the stamp pattern, and rolling alone can drag and streak on a textured surface. Together, they give you consistent, thin coverage.
- Tape off any edges, house walls, or landscaping you don't want sealer on
- Stir (don't shake) the sealer thoroughly before you start
- Starting at the far end of the patio away from your exit, spray a 3 to 4 foot wide strip of sealer in a sweeping back-and-forth motion, keeping the nozzle about 12 to 18 inches from the surface
- Immediately back-roll that strip with your roller using light, even strokes to spread the sealer into the texture and eliminate any pools or drips
- Move in sections, keeping a wet edge so you don't create visible overlap lines
- Do not go back over areas that have started to tack up — this is what causes drag marks and streaks
- Let the first coat dry to the touch (about 1 to 2 hours at 70°F) before applying a second coat
- Apply the second coat perpendicular to the first for more even coverage
Two thin coats are always better than one thick coat. Thick coats trap moisture, bubble, and peel. Thin coats bond properly and build a uniform film. Keep a consistent pace and avoid stopping mid-section if you can help it.
Drying and curing times
At around 70°F, most acrylic sealers will be dry to the touch in 1 to 2 hours and ready for light foot traffic in 3 to 4 hours. Don't put furniture back on the patio or allow vehicles on it for at least 24 hours. Cooler temperatures or higher humidity will extend these times, so factor that in before you commit to a start time.
When something goes wrong: fixing common resealing problems
Even when you do everything right, issues can still pop up. Here's what to do about the most common ones.
White haze or milky cloudiness
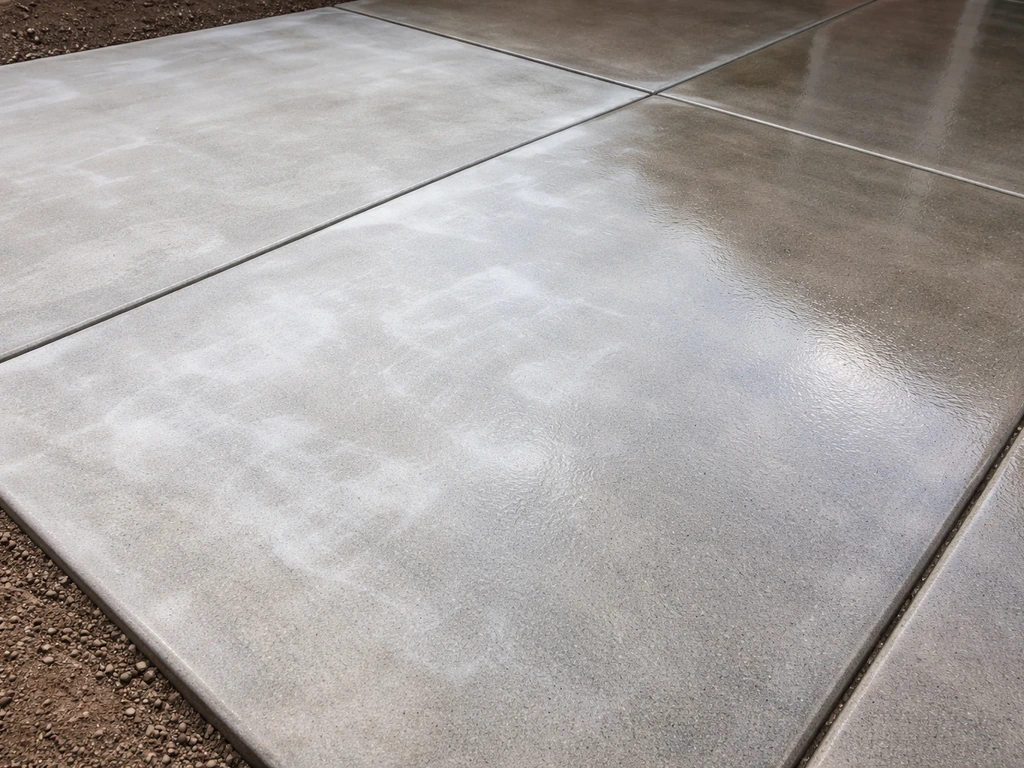
This is almost always a moisture problem. Either the concrete wasn't fully dry when you applied the sealer, or it rained or heavy dew occurred before the sealer cured. For mild haziness, try applying a thin coat of the same solvent-based sealer on top (the solvent can re-emulsify and clear up a water-based haze). For severe haziness or an opaque white appearance, you'll need to strip and start over. It's frustrating, but sealing over it won't fix it.
Streaks and lap marks
Streaks usually mean the sealer started to set before you back-rolled it, or you applied it in too-hot conditions. If the sealer is still fresh (within the first hour), you can sometimes blend streaks by lightly back-rolling with a nearly-dry roller. If it's already cured, you'll need to apply another thin coat and work faster this time, or thin the sealer slightly according to the manufacturer's directions for hot conditions.
Peeling or flaking
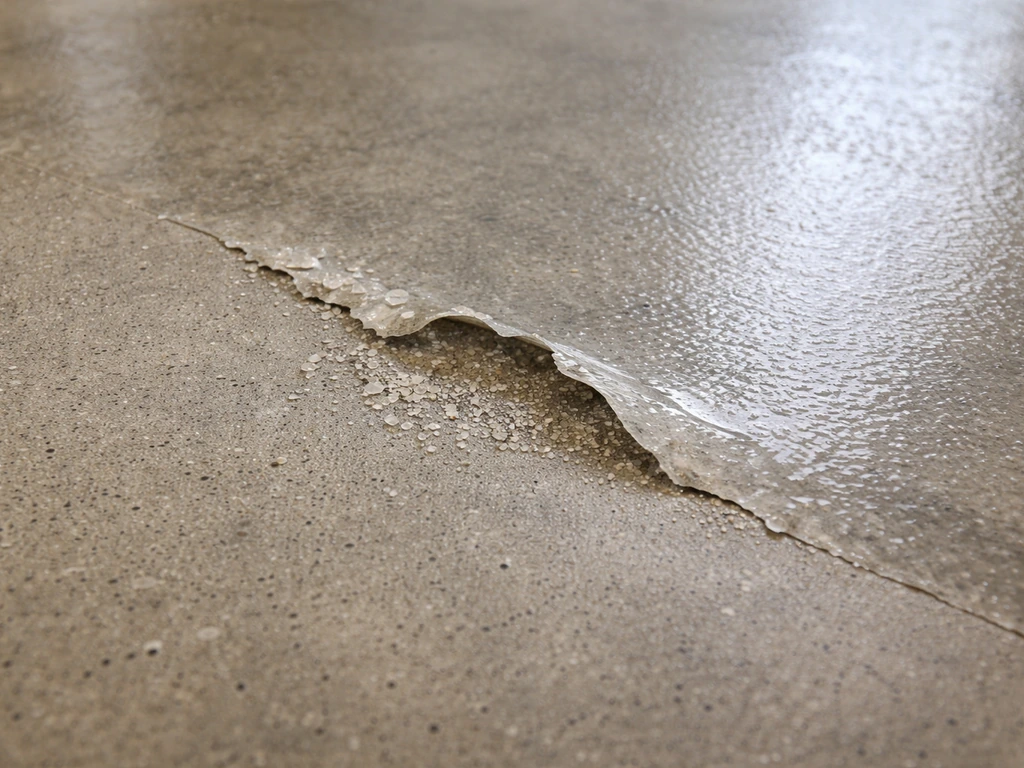
Peeling is a compatibility or prep failure. Either the sealer didn't bond to the surface because of contamination or an incompatible product underneath, or too many coats have built up over the years and the film has become too thick to stay adhered. The only real fix is to strip the sealer completely, clean and prep the surface from scratch, and reapply. There's no shortcut here.
Bubbling
Bubbles form when the sealer is applied too thick, when it's applied to a hot slab (the concrete off-gasses as it cools), or when there's trapped moisture. If you catch them while the sealer is still wet, back-roll immediately to pop and flatten them. If they've cured, sand them lightly with 120-grit sandpaper, clean the dust off, and apply a thin corrective coat.
Slippery finish
A freshly sealed patio, especially with a high-gloss solvent-based acrylic, can become dangerously slippery when wet. The fix is to add an anti-slip additive to the sealer before application. These are typically fine polymer or aluminum oxide beads that you mix in. If you've already sealed and it's slippery, you can apply a thin topcoat with the anti-slip additive mixed in. Don't skip this step if the patio is near a pool, in a rainy climate, or used by older adults or kids.
Blotchy or uneven color
Blotchy coverage is usually from uneven application, some areas got more sealer than others. A second thin coat applied carefully with the spray-and-back-roll method will usually even things out. If the blotchiness is coming from the concrete itself (old stains, patched areas showing through), the sealer will make those variations more visible, not less. That's why surface prep and matching patch colors matters so much before you start.
Keeping it looking good long-term
Once you've resealed and everything looks great, the goal is to extend that as long as possible. Regular maintenance makes a real difference in how long you go between full resealing jobs.
- Sweep the patio regularly to keep abrasive grit from wearing down the sealer surface
- Rinse off spills (especially oil, grease, or acidic liquids like wine or citrus juice) as soon as possible
- Clean with a pH-neutral cleaner — avoid anything acidic or bleach-heavy for routine cleaning since it can break down the sealer over time
- Place felt pads under furniture legs to prevent scratching
- Avoid using metal shovels or ice scrapers directly on a sealed surface in winter; use a rubber blade or plastic shovel
- Skip the rock salt for ice control — it's harsh on sealers and the concrete itself; use sand or a calcium chloride product instead
Do the water bead test once a year, or after any particularly harsh winter. If water stops beading consistently across the surface, that's your cue to plan a reseal. A light maintenance coat (single thin coat over a clean, intact sealer) every 2 to 3 years is much easier than a full strip-and-reseal every 4 to 5 years, and it keeps the pattern looking sharp and the color staying vibrant.
If you're also working on other concrete surfaces nearby, the same general sealing principles apply whether you're dealing with a plain concrete patio or an exposed aggregate finish. The stamped surface just requires more care around texture compatibility and product matching. Get the prep right, apply thin coats, and work in good weather conditions, and you'll have a patio that looks freshly done and stays protected for years.
FAQ
Can I reseal stamped concrete if there’s still old sealer on the surface but it’s not peeling yet?
Yes, in many cases. The key is compatibility, so confirm whether the existing product is film-forming (sanding transfers white powder or flakes) or penetrating (little to no residue after sanding). If the old sealer is intact and the water test shows it’s failing, you can usually apply the same chemistry over it, but you still need a fully clean, dry, and uncontaminated surface.
What should I do if the patio stays dark for a long time after the water test?
If water soaks in slowly and stops beading across most of the surface, that can indicate the current sealer is worn and the concrete is open. In that situation you should plan a full reseal, not just a spot treatment, and ensure the slab dries completely before applying to prevent trapped moisture (more time than 24 hours may be needed in humid weather).
Do I need to wait 48 to 72 hours after patching even for hairline cracks?
It’s usually safer to do so. Hairline cracks filled with crack filler or polyurethane caulk still benefit from a longer cure window so you do not seal in moisture or stress. If your filler label lists a shorter cure time, follow the label, but err on the longer side when humidity is high.
Can I reseal a patio the same day I pressure wash it?
Typically no. The slab must be completely dry, not just surface-dry. Plan on at least 24 hours after washing, and add extra time if it’s humid, shaded, or the patio has low spots that hold water. A quick check is to tape a small plastic sheet to the surface and look for condensation after a few hours.
How do I handle efflorescence if I already see white spots returning after I rinse them?
White deposits that keep coming back usually mean salts are still migrating out, so you need to fully dissolve them and allow enough drying before sealing. After muriatic acid treatment and a thorough rinse, wait at least 48 hours, and if the powder reappears quickly, repeat treatment rather than sealing over it.
Is it okay to reseal over algae stains if I clean them first?
You should remove the organisms and the residue completely. The article mentions bleach dilution and scrubbing with a dwell time, but also make sure you rinse until runoff is clear, then allow full drying. If algae returns soon after, the area may need a repeat treatment and more aggressive cleaning before sealing.
What’s the safest way to avoid lap marks when using the spray-and-back-roll method?
Avoid stopping mid-section, and work with overlapping passes while the previous area is still wet enough to blend. Keep a consistent pace and use a manageable spray width, then back-roll immediately. If you must pause, plan to stop at natural breaks (edges, control joints) and avoid creating a hard start-stop line in the field.
Can I add anti-slip grit if I already applied a sealer topcoat?
Yes, but only if the surface is clean and you use a thin corrective application. Mix the anti-slip additive into a fresh sealer topcoat and apply lightly so you do not create an uneven, thick layer. If the first coat is fully cured and glossy, lightly clean and ensure good bonding before applying the anti-slip layer.
How many coats should I apply to restore faded color on stamped concrete?
Usually two thin coats are recommended rather than one thick coat. If color still looks uneven after two coats, address the cause, like patch areas showing through or incomplete prep, because adding more thickness can increase peeling risk. In many cases, a second thin coat is enough to even the look if the first coat bonded correctly.
What if I’m not sure the original sealer is acrylic, but my sand test shows white powder?
Treat it as film-forming until you prove otherwise, and match with an acrylic sealer for compatibility. Also check for peeling or poor adhesion, if there’s extensive peeling, plan to strip rather than coating over. When uncertain, a small test patch is the safest decision before committing to the entire patio.
Should I reseal if the patio has standing water after rain?
If water pools, you need to determine why before sealing. Sealer cannot correct drainage, and trapped moisture increases the risk of hazing, bubbles, and premature failure. Consider addressing grading, downspouts, or low spots first, then reseal once the surface dries normally.