
To seal a concrete patio, you clean the surface thoroughly, repair any cracks, strip old failing sealer if needed, confirm the concrete is dry, then roll or spray on two thin coats of the right sealer with a 1 to 4 hour window between coats for acrylics. To finish your concrete patio correctly, focus on prep, correct timing, and applying the right sealer in thin coats seal a concrete patio. Do it when temps are between 50 and 90°F, keep foot traffic off for at least 8 hours, and plan on resealing every 1 to 5 years depending on the sealer type you choose. That's the core of it. Everything below is about doing each of those steps right so the sealer actually holds.
How to Seal a Concrete Patio: Step-by-Step Guide

Silas Morrison
13 May 2026
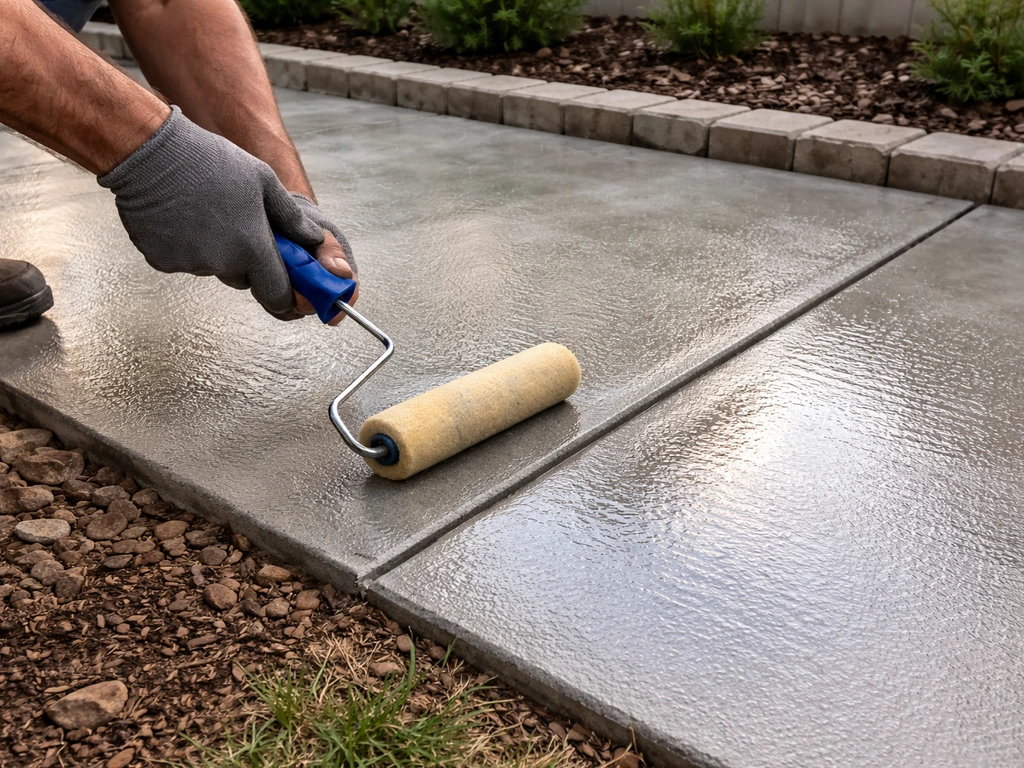
When to seal vs reseal your patio
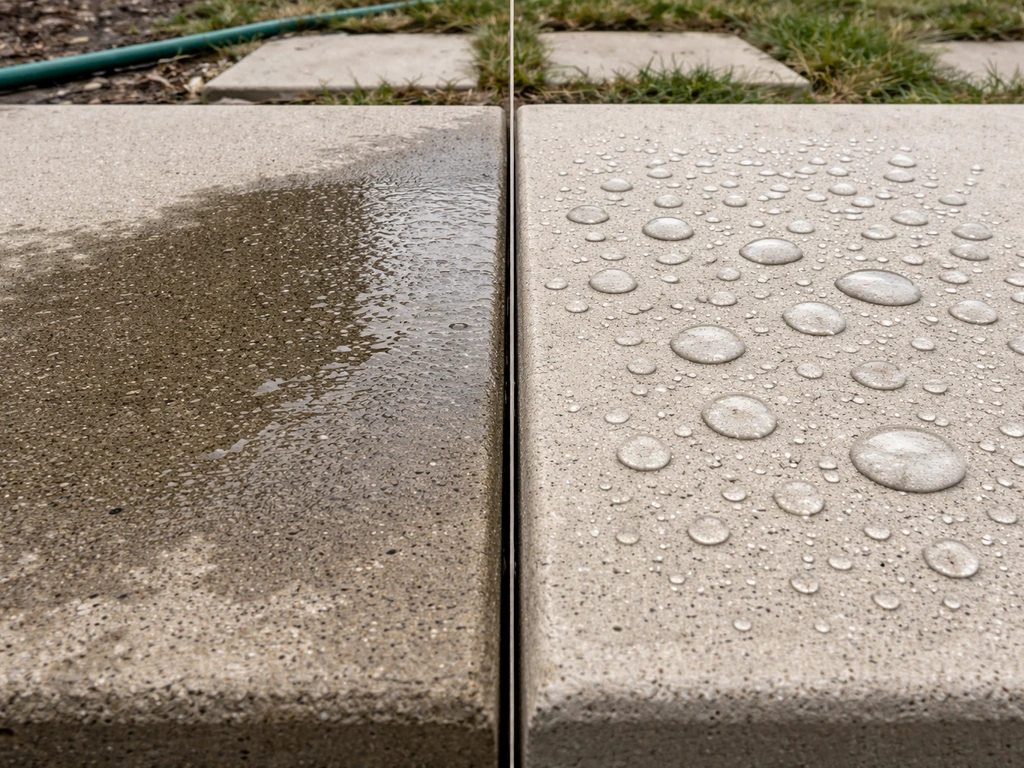
If your patio has never been sealed, you're sealing for the first time. If it's been sealed before, you're resealing, and that distinction matters because resealing over a failing or delaminating sealer is just a band-aid. You need to deal with the old material first.
The easiest way to know if your patio needs resealing is the water test. Pour a small amount of water on the surface. If it beads up and sits on top, the sealer is still doing its job. If the water darkens the concrete and soaks in within about 30 seconds, the protective barrier is gone and it's time to reseal. That darkening and absorption is your slab telling you it's unprotected.
Other signs you need to reseal: the surface looks dull or chalky, you can see flaking or peeling film, or the concrete is visibly absorbing stains or moisture. If the existing sealer is bubbling or delaminating in patches, don't just recoat over it. Strip it first, or you'll trap the problem under a new layer and end up peeling everything off within a season.
For new concrete, the rule is simple: wait at least 28 days before sealing. Fresh concrete needs to off-gas moisture as it cures, and sealing too early traps that moisture, which causes whitening, bubbling, and adhesion failure. Some sealers allow earlier application, but always check the product specs before assuming.
Choosing the right sealer for your patio
There's no single best sealer for every patio. The right choice depends on whether your concrete is plain, stained, or painted, how much sheen you want, and how often you're willing to reseal. Here's how the main categories break down for outdoor use.
| Sealer Type | Finish Look | Typical Lifespan | Best For | Key Limitation |
|---|---|---|---|---|
| Acrylic (film-forming) | Wet-look or satin sheen | 1–3 years | Plain or stained concrete, budget-friendly option | Shorter lifespan, can build up with repeated recoating |
| Penetrating (silane/siloxane) | Natural, no sheen | 3–10 years | Plain concrete, freeze-thaw climates, natural appearance | Limited wear resistance, some UV sensitivity |
| Polyurethane (film-forming) | High gloss to satin | 3–5 years | High-traffic patios, stained or decorative concrete | Longer recoat window (8–12 hrs between coats) |
| Epoxy (film-forming) | High gloss | 3–5 years | Garages, indoor/covered patios | Can yellow under UV, not ideal for fully exposed outdoor slabs |
For a standard outdoor patio exposed to sun, rain, and freeze-thaw cycles, a penetrating silane/siloxane sealer or a quality acrylic sealer are the most practical choices. Penetrating sealers soak into the concrete pores rather than sitting on top, which makes them breathable (water vapor can pass through) and invisible. They won't peel because there's no film to peel. Acrylics are easier to find at any hardware store and give that classic slightly wet look, but they need reapplication more often, and stacking too many coats over time can cause the film to get too thick and eventually delaminate.
One thing worth noting on epoxies: if your patio is in full sun, skip the epoxy. Epoxies yellow under UV exposure. Choose a polyurethane or acrylic instead, and make sure the label says non-yellowing or UV-stable if that matters to you.
On the water-based vs solvent-based question: solvent-based sealers tend to penetrate better and are usually best applied by sprayer. Water-based versions are lower odor, easier to clean up, and work well with a roller. For most DIY patios, a water-based acrylic or penetrating sealer rolled on is totally sufficient.
Prep work: the step most people rush through
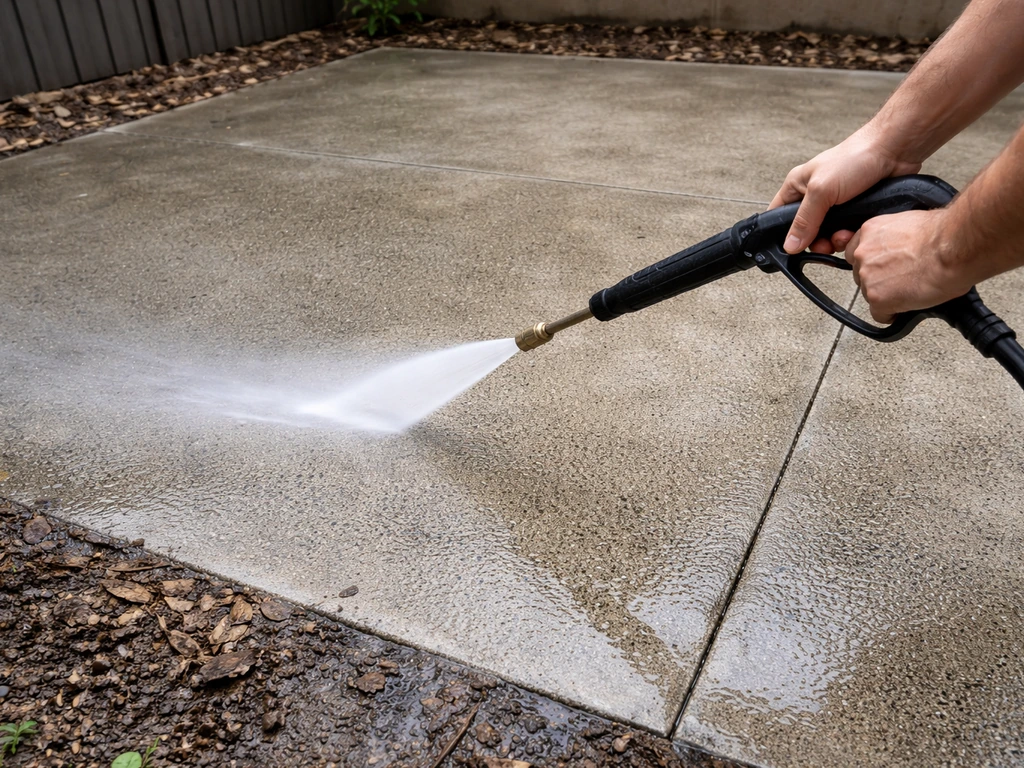
I'll say this plainly: sealer failure almost always starts with bad prep. A clean, dry, structurally sound surface is the only foundation a sealer can bond to properly. If you skip or rush this part, you will be stripping and redoing it within a year.
Clean the surface
Start with a thorough pressure wash or power brooming to remove loose dirt, debris, and any dissipating curing compounds left from the original pour. For organic stains (mold, mildew, algae), use a concrete cleaner or diluted bleach solution and scrub with a stiff brush. For grease or oil spots, use a degreaser and let it dwell before scrubbing. Rinse everything completely with clean water.
If you see white powdery deposits on the surface, that's efflorescence, which is salt migrating out through moisture. Remove it with an efflorescence cleaner or a diluted acid wash, then neutralize the surface and rinse thoroughly. After any acid-based cleaning, the slab needs to dry completely before you apply sealer, and whatever neutralizer you used needs to be fully rinsed out. Residue from cleaners is one of the sneaky reasons sealers fail to bond.
Strip old sealer if it's failing
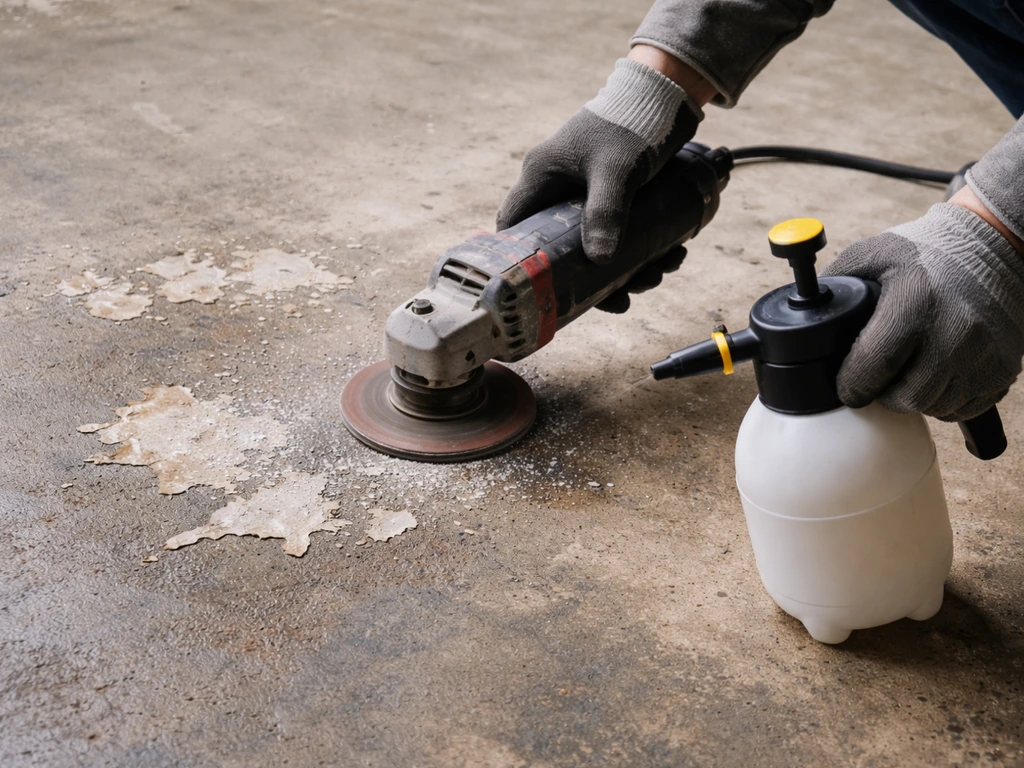
If the existing sealer is peeling, blistering, or flaking, it needs to come off before you apply anything new. You've got two options: chemical stripping or mechanical removal. Chemical stripping (using a stripper product designed for acrylics or polyurethanes) is usually the easier route for patios. Apply the stripper, keep it wet so it doesn't dry out, let it work, then scrape off the sludge and scrub the surface with soap and water before rinsing clean. Concrete Network notes that chemical stripping requires keeping the stripper active so it does not dry out, then removing the sludge or residue and rinsing thoroughly keep it wet so it doesn't dry out. Products like PROSOCO SureStrip are designed specifically for acrylics and resin coatings and include rinse technology that helps flush away residue.
Mechanical removal, which means grinding or sanding, works too but is more labor-intensive and can be very difficult on textured or stamped surfaces. For stamped concrete, chemical stripping is usually the more practical call. If you have a stamped patio that needs resealing, that process is its own topic worth reading up on separately. For stamped concrete, knowing how to reseal the patio correctly starts with matching the right prep and sealer type to the texture and prior coating how to reseal stamped concrete patio.
Repair cracks and spalls
Fill any cracks or spalled areas with a concrete patching compound or crack filler before sealing. Sealer is not a structural fixer. It protects the surface but won't bridge or fill gaps, and water will find its way into unsealed cracks and cause freeze-thaw damage from below. To address the joint between a concrete patio and the house, you generally need a proper gap filler and sealing approach so water can't infiltrate behind the slab gap between concrete patio and house. Let all patches cure fully before moving on.
Confirm the concrete is dry
Moisture is the number one cause of sealer failure. Before applying, you need to know the slab is dry enough. The easy test is the plastic sheet test (ASTM D4263): tape a 12x12 inch piece of plastic sheeting directly to the concrete, seal all four edges with tape, and leave it for 16 to 24 hours. If you see condensation or the concrete looks darker under the plastic when you peel it up, the slab still has too much moisture and you need to wait longer. Also check that relative humidity is below 85% on the day you're applying, and that temps will stay between 50 and 90°F for at least 24 hours after application.
Step-by-step sealer application
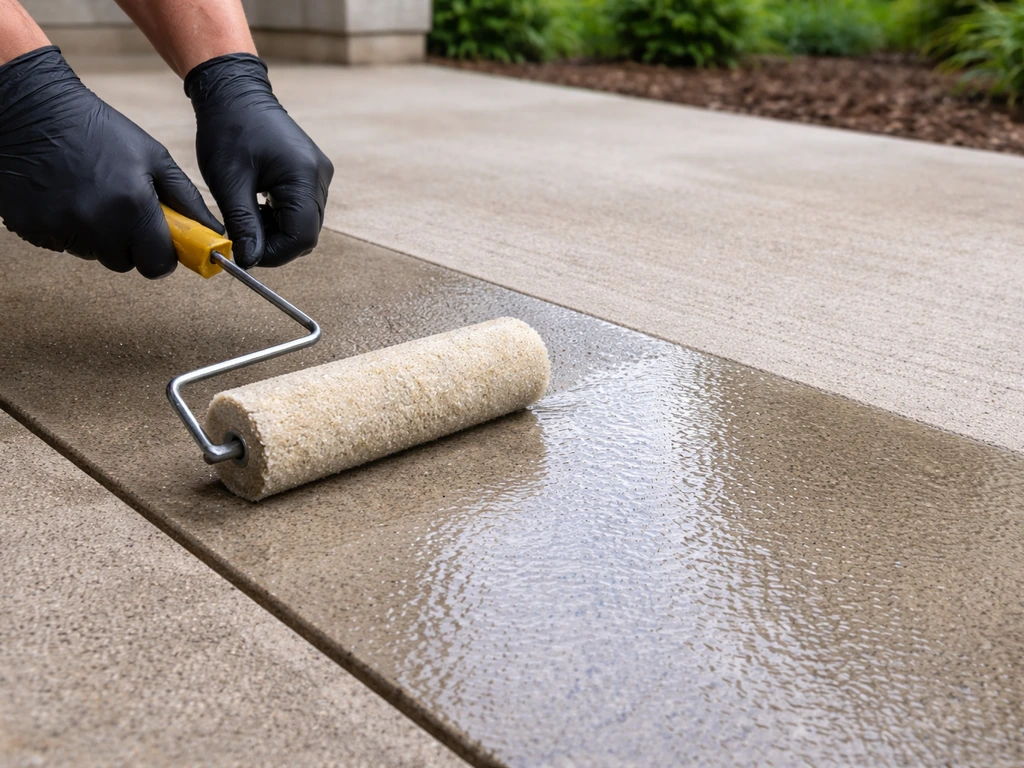
Once the surface is clean, dry, repaired, and your conditions are right, here's how to actually apply the sealer. Read your product's technical data sheet before starting, because timing windows and application rates vary by brand.
- Gather your tools: a 9-inch roller with a 3/8-inch nap for smooth surfaces (thicker nap for textured or exposed aggregate concrete), a paint tray, a trim brush for edges and tight spots, and if you're using a solvent-based sealer, a pump sprayer rated for solvents.
- Mask off any areas you don't want sealed, like wood trim, garden beds, or adjacent pavers.
- Apply the first thin coat. Work in 3 to 4 foot sections and keep a wet edge to avoid lap marks. With a roller, use light, even pressure. With a sprayer, hold the nozzle 12 to 18 inches from the surface and use a consistent misting pass. Don't flood the surface.
- Let the first coat reach tack-free but not fully cured. For most acrylics, that's about 1 to 4 hours depending on temperature and humidity. Polyurethanes and epoxies need 8 to 12 hours between coats. Check your product specs.
- Apply the second thin coat in the opposite direction from the first. Crossing the direction helps eliminate roller lines and ensures even coverage.
- Let the sealer cure. Most sealers are tack-free within 30 to 60 minutes, ready for foot traffic in about 8 hours, and ready for furniture and normal use within 24 to 72 hours. Avoid water exposure until fully cured.
The most common application mistakes are going too thick on a single coat and applying in the wrong weather. Too thick traps solvents or air underneath, which causes bubbling, cloudiness, or peeling. Two thin coats always outperform one heavy coat. And if rain shows up before your sealer has cured, you can end up with whitening or a blotchy finish. Check the forecast before you start.
New vs old concrete: what changes
Sealing new concrete
New concrete needs at least 28 days to cure before you apply sealer. During those 28 days, the concrete is off-gassing moisture and going through a chemical hardening process. Seal it too early and you trap moisture, which causes whitening and bonding failure. After 28 days, clean the surface (no stripping needed obviously), do the moisture test, and apply your sealer in the normal way. Some manufacturers specify a curing compound that can be applied much earlier, but those are different from protective sealers and are specifically designed for that use.
Resealing an old patio
Old concrete that's been through years of weather cycles may have more porosity, more staining history, and potentially a previous sealer that needs to be assessed. Run the water bead test first. If water still beads, you might not need to reseal yet. If it absorbs fast, you do. If the previous sealer is still in decent shape (no peeling, no delamination), a light clean and a fresh topcoat may be all you need. If it's failing, strip it fully before recoating. Layering a new sealer over a failing old one is one of the most common DIY mistakes I see, and the result always peels.
Sealing stained and painted concrete patios
If your patio has been acid-stained, water-based stained, or painted, the sealer serves as both a protective topcoat and the layer that locks in the color. Stain manufacturers consistently recommend applying multiple coats of clear sealer over stained concrete outdoors because UV, rain, and foot traffic will break down unprotected stain relatively quickly.
Compatibility is important here. RadonSeal also advises compatibility testing for stain versus sealer systems, since oils, mold, or efflorescence can show through and prevent proper adhesion. For stained concrete, an acrylic or polyurethane sealer is the standard choice. The sealer needs to bond to the stain without reactivating or lifting it. Water-based sealers are generally safer to apply over water-based stains. For acid-stained concrete, wait until the neutralization and rinse process is fully complete and the slab is dry before applying any sealer.
For painted concrete, the sealer goes on top of the paint as a clear protective layer. Make sure the paint is fully cured and bonded before sealing over it, and check that your sealer is compatible with the paint type. Applying a film-forming sealer over paint that hasn't fully adhered will just peel the whole system off the slab. Test adhesion in a small corner area first if you have any doubts.
One thing to watch for with stained patios: oils, mold, or efflorescence under the surface can bleed through and prevent adhesion. Address those issues fully during prep before laying down any topcoat. If you're working on an exposed aggregate patio, the approach to sealer application changes slightly due to the texture, and that's worth looking into as a separate topic. If you need a detailed walkthrough for an exposed aggregate concrete patio, the sealer application steps differ from smooth slabs exposed aggregate patio. If you’re working on an exposed aggregate patio, the approach to sealing the textured surface is slightly different, so it’s worth reviewing the specific steps for that finish how to seal aggregate concrete patio.
After sealing: cure time, traffic, and keeping it going
Once you've applied the final coat, give it time. Most sealers hit tack-free within 30 to 60 minutes, but that doesn't mean they're ready for use. Light foot traffic is typically safe after about 8 hours. Furniture and heavier use should wait 24 hours minimum. Full cure (where the sealer reaches its maximum hardness and chemical resistance) can take up to 72 hours or longer for some polyurethanes and epoxies. Keep water off the surface during that initial cure window, and don't let leaves or debris stick to it while it's still soft.
For long-term maintenance, clean the sealed patio regularly with a mild soap and water solution. Avoid harsh chemical cleaners that can degrade the sealer film over time. Don't use deicing salts on a sealed patio in winter. Salt and sealer are a bad combination that accelerates surface breakdown.
On how often to reseal: acrylic sealers typically need reapplication every 1 to 3 years for outdoor patios. Penetrating sealers can last 3 to 10 years before needing attention. Polyurethanes typically fall in the 3 to 5 year range. Stained concrete that's sealed should be resealed every 2 to 5 years depending on exposure and traffic. Use the water bead test every spring and fall to check. When water stops beading, it's time.
If you have a stamped concrete patio or you're dealing with the joint where the patio meets the house, those are slightly different situations that each have their own considerations for sealing approach and product choice. Getting those details right matters for the longevity of the whole system, not just the flat slab surface.
FAQ
Can I seal over concrete that looks clean but still has dark spots or stains?
Yes only if those spots are not actively absorbing water. If the dark area was caused by moisture migration, sealers may fail early. Do the water bead test on stained areas specifically, not just the center, and if water absorbs quickly in those spots, strip/clean the source stain fully and dry longer before sealing.
What happens if it gets a little rain after I apply the sealer?
It can ruin the appearance and sometimes the bond, especially if the sealer was not fully cured. If rain hits before the surface is tack-free, wait for it to dry completely, inspect for whitening or tackiness, and test adhesion in a small area. You may need to spot-recoat or redo the whole coat if the finish is blotchy or peeling.
Should I use a sprayer or a roller for sealing?
Use the method the product is designed for. Sprayers help you apply more evenly with solvent-based penetrating products, but they can cause over-atomization and overspray if you are inexperienced. Rollers are usually safer for water-based acrylics, and either method still requires thin, even coverage to prevent bubbling from excess film thickness.
How do I know if my existing sealer is acrylic vs penetrating, before I strip it?
Do the water test, then look for film behavior at edges. Beading suggests a topcoat film, absorption suggests penetrating. Also try a small hidden spot with gentle abrasion or a small strip test per the product label, because if it is delaminating, recoating over any unknown failing coating often leads to rapid peeling.
Is it okay to apply more than two coats to get better protection?
Usually no. More coats beyond the recommended system can trap solvents, build a film that can delaminate, and create cloudy or peeling patches, especially in sun and freeze-thaw areas. If you need more protection, choose the right sealer category and apply the correct number of coats at the correct thickness, then maintain on schedule.
Do I need to seal cracks that are hairline, or only wider cracks?
Seal cracks need treatment when water can enter them. Hairline cracks can still be pathways during freeze-thaw cycles. Fill them with a compatible crack filler or patching compound, then seal over after the filler cures fully. If the slab is actively moving or has large spalling, address structural issues before sealing.
Can I seal if the patio has efflorescence or white powder recently appeared?
You should not seal over active efflorescence. Treat and remove it, neutralize if you used acid, then rinse thoroughly and allow full dry time. Recheck after drying; if white powder returns quickly, there is ongoing moisture movement and you may need to correct drainage or moisture sources before sealing.
What’s the safest way to protect plants and nearby surfaces during sealing?
Mask edges and rinse runoff control. Use plastic sheeting or masking tape for landscaping borders, and protect painted surfaces, railings, and outdoor furniture, because overspray and splatter can stain concrete and damage finishes. Plan your application so you can keep foot traffic and pets off the area during the dry and cure windows.
How long should I wait before placing furniture or letting kids play on the patio?
Tack-free is not the same as cured. Light traffic is often safe around the 8-hour mark, but furniture should usually wait at least 24 hours, and heavy use often needs closer to 72 hours or longer depending on the product type. Keep water away until the sealer reaches full cure.
Can I use deicing products on a sealed concrete patio?
Avoid deicing salts. Salt can accelerate surface breakdown even with a sealer, and it can also leave deposits that interfere with bonding and appearance. Use sand or non-salt alternatives when possible, and clean off any residue promptly after winter storms.
Should I reseal if the water stops beading but the surface is not peeling?
That is often the right time to plan maintenance. When water no longer beads, the protective barrier is diminished, even if the coating looks fine. Clean and reapply based on the current sealer condition, and if there is any delamination or peeling, strip first instead of recoating.
Can I seal painted or acid-stained concrete without damaging the color?
Yes, but compatibility and cure matter. For painted concrete, confirm the paint is fully cured and bonded, then test adhesion in a small corner before sealing over the full area. For acid-stained concrete, ensure neutralization and rinsing are fully complete and the slab is dry, since trapped moisture or leftover residue can cause hazing and poor adhesion.