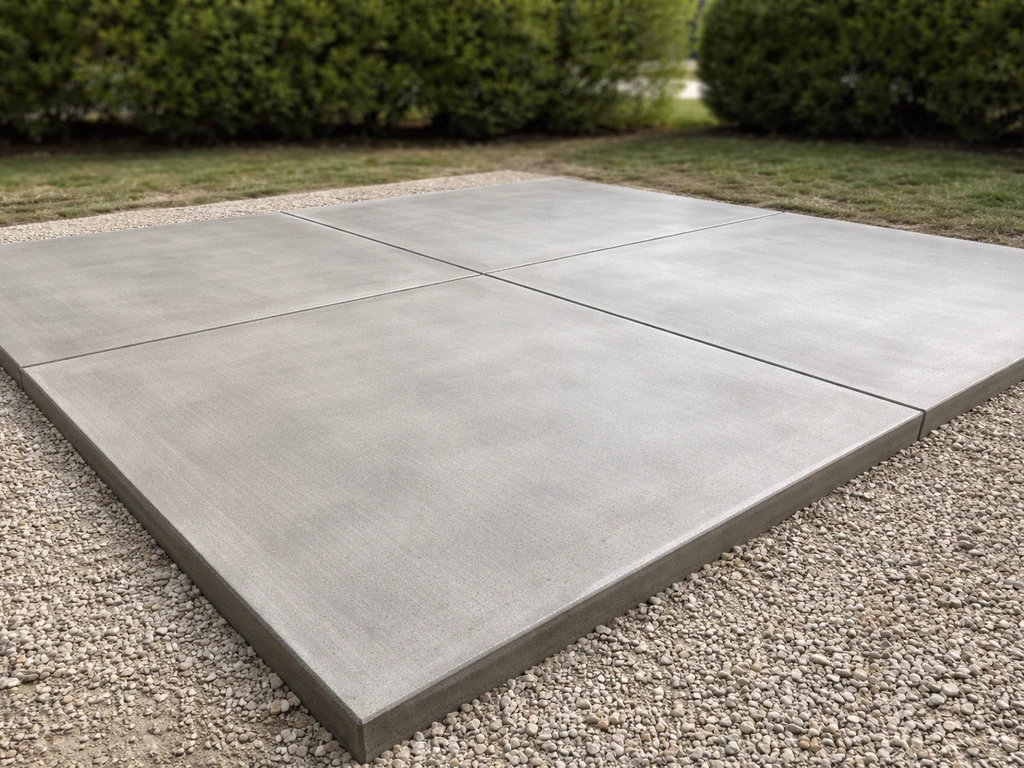
Constructing a concrete patio from scratch takes about a weekend of active work, but done right it will last 30 or more years with minimal maintenance. If you want the complete checklist from start to finish, see how to install concrete patio for the full sequence from prep through curing. The core process is: plan your layout and drainage, excavate and compact a solid base, set your forms, pour and screed 4 inches of concrete, finish the surface, cut control joints, and cure it for at least a week. If you already have a concrete slab, you can build on top of it instead, but that requires its own prep steps to avoid cracking and delamination. Either way, this guide walks you through everything in order so you know exactly what you're doing before the truck shows up.
How to Construct a Concrete Patio Step by Step

First: New Build or Building Over Existing Concrete?
This is the most important decision you'll make, and getting it wrong costs real money. If you are wondering how to put in a concrete patio step by step, start by choosing whether you are building from scratch or building over an existing slab. If you're starting on bare ground, you follow the standard excavation-and-pour process covered in the next several sections. If you already have a concrete slab that's structurally sound, you may be able to skip excavation entirely and pour or install over it. The two paths share some steps but diverge significantly at the base preparation and forming stages, so I'll flag which path applies as we go. There's also a dedicated section later specifically on building over an existing slab, including how to bond new concrete, when to use a self-leveling overlay, and how to prevent the failure modes I've personally seen on these projects.
Plan Your Layout, Slope, Dimensions, and Drainage
Before you touch a shovel, spend real time on the plan. A patio that pools water against your house foundation is worse than no patio at all. Concrete patios need a minimum slope of 1/8 inch per foot away from the house, I usually shoot for 1/4 inch per foot to give myself a margin. That means a 10-foot-deep patio should drop between 1.25 and 2.5 inches from the house edge to the outer edge.
For dimensions, think about how you'll actually use the space. A table with four chairs needs at least a 12x12-foot slab comfortably; add 2 to 3 feet on each side if you want to pull chairs out without falling off the edge. Standard patio thickness is 4 inches for pedestrian use. Standard patio thickness is an important part of how to lay concrete for a patio that performs well long-term. Go to 5 or 6 inches if you're parking a vehicle or anticipate heavy loads. Sketch your layout on graph paper, mark where the slope runs, and flag where water will exit the patio perimeter. If it's running toward a garden bed or lawn, great. If it's heading toward a fence or neighbor's yard, you need to plan a drainage channel or redirect the slope before you dig a single inch.
Also plan your control joint locations at this stage. ACI 302.1R recommends spacing them no more than 2 to 3 times the slab thickness in feet. For a 4-inch slab, that means joints every 8 to 12 feet in each direction. Mark those on your sketch now so you build the spacing into your form layout.
Site Prep: Excavation, Compaction, and Base
Proper base prep is the difference between a patio that lasts decades and one that cracks in three years. Knowing how to concrete patio slab starts with nailing your base prep and mix, but this article continues through forms, reinforcement, finishing, and curing. Don't skip this.
Excavation
Mark out your patio perimeter with stakes and string lines, then call 811 (or your country's utility-locate service) before you dig. For a 4-inch slab on a 4-inch gravel base, you need to excavate about 8 to 9 inches below your finished surface elevation, plus a little extra to account for your form board thickness. Strip all sod and organic material completely, roots and organic matter compress and decompose, and either will cause settling and cracking later. Use a flat spade or a sod cutter rental for clean edges.
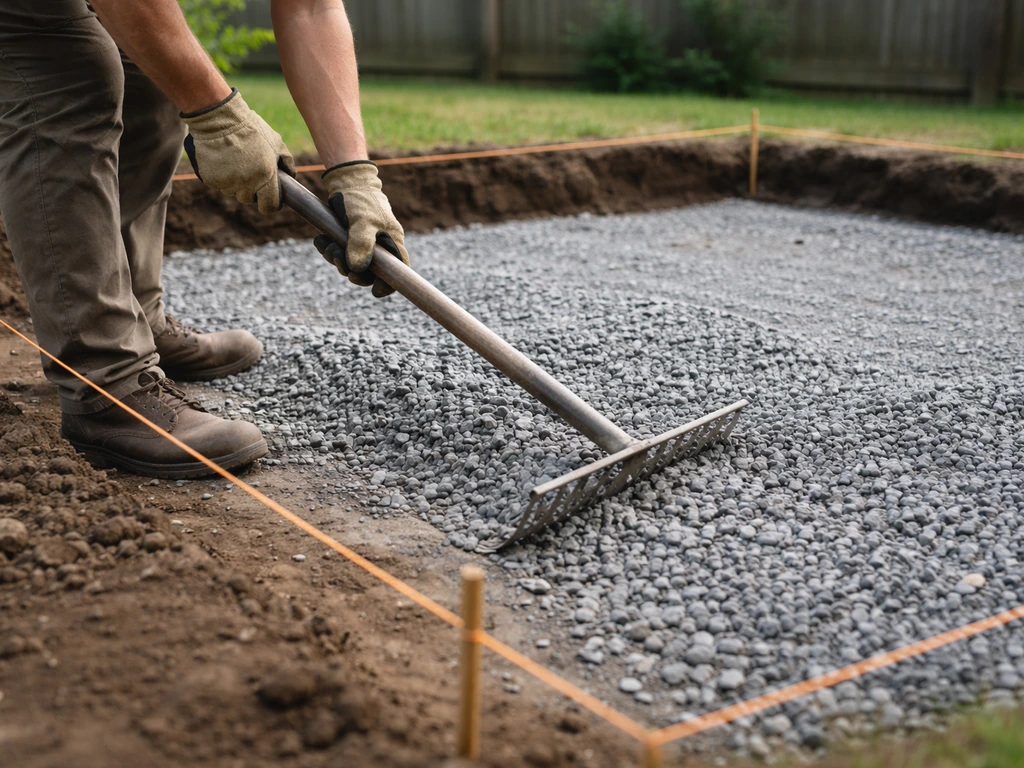
Subbase and Compaction
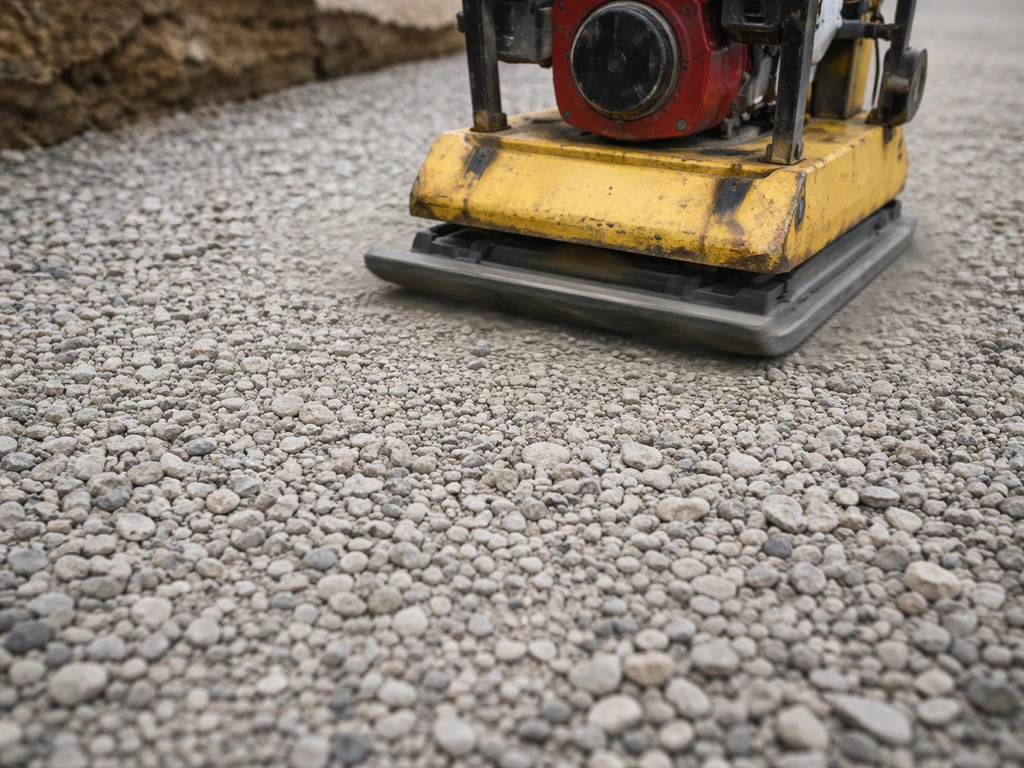
Fill the excavated area with 4 inches of compactable gravel, crushed stone or road base aggregate works well. For a complete walkthrough, see the step-by-step process in how to build a patio concrete slab from excavation to curing Proper base prep. To get better results, follow the full process for installing concrete patio slabs, from excavation through curing Proper base prep. Spread it in 2-inch lifts and compact each lift with a plate compactor. Do not just dump it all in and run the compactor once; layers compact properly, one big dump does not. The finished gravel base should feel completely solid underfoot with zero movement. In areas with expansive clay soil, consider going 6 inches of gravel to give yourself extra insurance against frost heave and soil movement.
Weed Barrier and Vapor Considerations
Lay a 6-mil polyethylene vapor barrier over the compacted gravel before pouring. Concrete Network also recommends sealing the vapor barrier seams using the tape provided by the vapor barrier manufacturer during under-slab installation seam sealing. This does two things: it slows moisture migration up through the slab (which matters if you ever plan to seal or coat the surface), and it keeps the wet concrete from losing water too quickly into the dry gravel below, which would rob the mix of the moisture it needs to cure properly. A weed barrier fabric under the gravel can also be useful if your site has aggressive roots nearby, though it's optional in most residential situations.
Formwork, Reinforcement, Edges, and Joints
Setting the Forms

Forms define your slab's shape and hold the concrete in place until it sets. For a 4-inch slab, use 2x4 lumber (which has an actual thickness of 1.5 inches, you'll double it or use 2x4 on edge to get your 4-inch form height). Stake the forms every 2 to 3 feet using 1x2 or 2x2 stakes driven into the ground on the outside. Set the forms to your finished-surface elevation, already accounting for the slope you planned. Check with a long level and a tape measure constantly as you go. Once the forms are staked, double-check your corners are square by measuring diagonally corner to corner, both measurements should match.
Reinforcement
For most residential patios, you have two main reinforcement options: #3 or #4 rebar on an 18-inch grid, or 6x6 welded wire mesh. Rebar gives better crack control and is my preference for anything larger than about 100 square feet. Wire mesh works but has a reputation for ending up at the bottom of the slab instead of the middle, use chairs or small rocks to keep it elevated to the center of the slab. For rebar, lay a grid with 18-inch spacing and wire the intersections together. Keep rebar at least 1.5 to 2 inches from the forms and the surface, cover matters for durability.
Edges and Isolation Joints
Anywhere your new slab butts up against an existing structure, a house foundation, a step, a wall, you need an isolation joint, not a direct bond. Use 1/2-inch foam expansion joint material (sold in rolls at any masonry supplier) placed against the structure before you pour. This allows the slab to move slightly without cracking when it expands and contracts or when the soil shifts. FHWA technical guidance on concrete pavement joints explains that isolation joints use an appropriate filler to accommodate anticipated movement between pavement and adjacent structures while helping prevent restraint forces that can contribute to joint spalling or blowups This allows the slab to move slightly without cracking when it expands and contracts or when the soil shifts.. Skipping this is one of the most common mistakes I see on DIY patios.
Control Joints
Control joints are planned weak points that guide where the slab cracks as it shrinks during curing. You can either form them using a groover tool during finishing (which creates a groove about 1/4 of the slab depth, 1 inch deep for a 4-inch slab), or you can saw-cut them later. If saw-cutting, do it within 4 to 12 hours of pouring, depending on temperature, the window is shorter in hot weather. Per ACI 302.1R, space them no more than 8 to 12 feet apart for a 4-inch slab. Mark the joint locations on your forms so you don't forget once concrete is flowing.
Mixing and Choosing the Right Concrete
For most patios, I strongly recommend ordering ready-mix concrete from a local batch plant rather than mixing bags yourself. A standard 10x12-foot patio at 4 inches thick needs about 1.5 cubic yards of concrete. That's roughly 18 to 20 bags of 80-pound mix, mixed by hand or with a rented mixer. It's exhausting and introduces inconsistency. A ready-mix truck delivers exactly what you need at the right slump and you can get to work immediately. Order a 3,500 to 4,000 psi mix with a water-cement ratio around 0.45 to 0.50. Ask for air entrainment (3 to 6 percent air content) if you're in a freeze-thaw climate, it dramatically improves durability through winter cycles.
If your project is small, under 50 square feet, bagged mix is reasonable. Use a 5,000 psi fast-setting or standard 4,000 psi bag mix, follow the water ratio on the bag exactly, and never add extra water to make it easier to pour. A wetter mix is weaker. Target a slump of about 4 to 5 inches, which should feel like thick oatmeal, workable but not soupy. Use a slump cone to check it if you're mixing your own batches. If you're renting a mixer, don't overload it; mix in smaller batches for better consistency.
| Option | Best For | Approximate Cost | Pros | Cons |
|---|---|---|---|---|
| Ready-mix delivery | Patios over 1 cubic yard (~80 sq ft at 4 in) | Varies by region; typically $125–$175/cu yd | Consistent mix, fast, less labor | Minimum delivery charges, must pour quickly |
| Bagged 4,000–5,000 psi mix | Small patios under 50–60 sq ft | $6–$8 per 80-lb bag | No minimum order, flexible timing | Labor-intensive, inconsistency risk, expensive per yard |
| Site-batched (cement + aggregate + sand) | Very large projects with access to bulk materials | Lowest material cost at scale | Full control over mix design | Requires experience, proper ratios critical |
Pouring, Screeding, Finishing, and Curing
The Pour
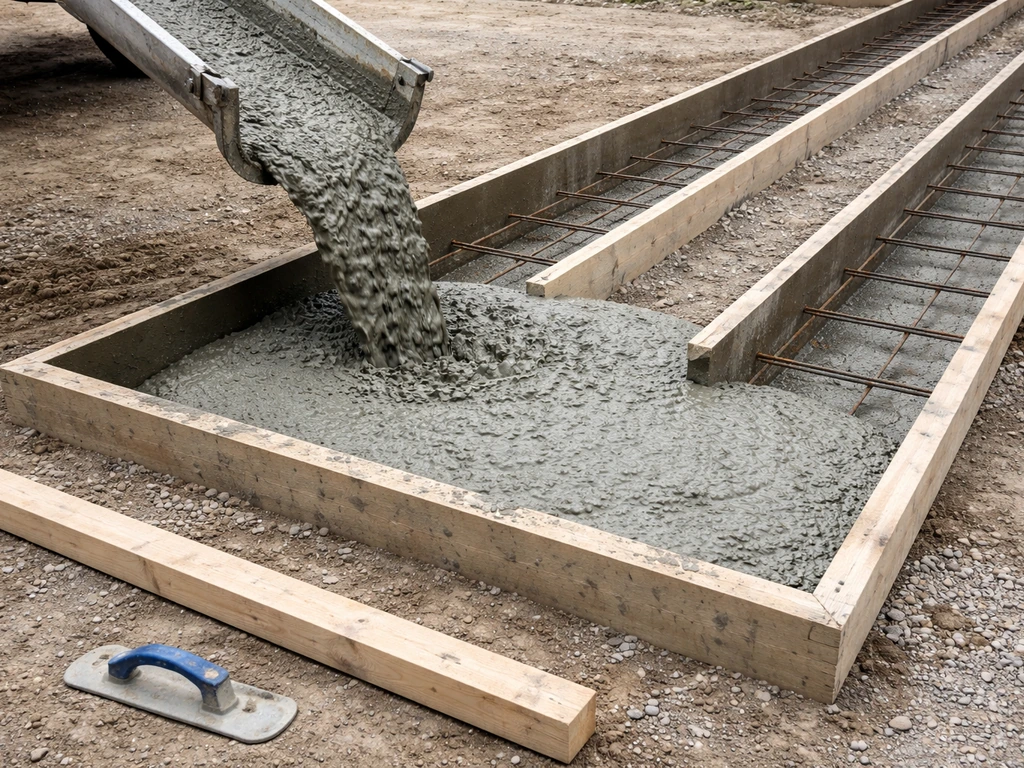
Have everything in place before concrete arrives: forms set, rebar in, tools laid out, and helpers ready. Concrete does not wait for you. Start pouring at the farthest corner from the truck and work toward it. Use a come-along rake or concrete rake to spread the mix evenly into the forms. Fill to slightly above the form tops, you'll screed it down flush. Work quickly but don't rush to the point of sloppiness. Avoid carrying concrete long distances with the chute; let the truck move rather than raking the mix 10 feet. Raking causes segregation, the aggregate sinks and you get a weak surface.
Screeding
Screeding is how you get a flat, level surface at the right elevation. Use a straight 2x4 or a dedicated screed board that's long enough to rest on both form edges. Pull it toward you in a back-and-forth sawing motion while moving it forward. Fill any low spots with a shovel, then screed again. Two or three passes usually gets you flat and flush. Work methodically from one end to the other without stepping on freshly screeded areas. If you have a large pour, set intermediate screed rails, temporary pipes or boards at the right elevation, and work in strips.
Bull Float and Initial Finishing
Immediately after screeding, use a bull float to close up the surface. Push the leading edge up slightly on the forward pass and tilt it down on the pull-back to avoid digging in. The bull float embeds aggregate and brings a thin layer of cement paste to the surface, which is what you'll finish. You're not done yet, this is just the first finishing pass. After the bull float, let the concrete bleed and begin to set. You'll see the sheen disappear from the surface; that's your cue to start detail finishing.
Edging, Jointing, and Texture
Once the surface can support your weight on a knee board without leaving a deep impression (typically 1 to 3 hours after the pour, depending on heat and humidity), it's time to edge and joint. Run an edging tool along all form edges to create a rounded, durable edge that won't chip. Use a groover tool to cut your control joints along your pre-marked lines. After edging and jointing, finish the surface texture. For outdoor patios, a broom finish is the standard choice, drag a stiff-bristle broom across the surface in one direction to create a slightly rough texture that's slip-resistant when wet. Do this after a light hand-float to smooth any high spots. Avoid over-troweling a patio surface; a steel-troweled finish is too slick for exterior use and gets dangerously slippery.
Curing: Don't Rush This Part
Curing is where most DIYers drop the ball. Concrete doesn't dry, it cures through a chemical reaction that requires moisture. If it dries out too fast, it loses significant strength and surface durability. The minimum cure time is 7 days; 28 days is full design strength. Keep the surface moist by covering it with plastic sheeting or wet burlap and wetting it down daily. You can also apply a liquid curing compound immediately after finishing, spray it on evenly and don't disturb it. Don't walk on the slab for 24 to 48 hours, don't put furniture on it for at least 7 days, and don't drive on it for 28 days.
Temperature and Weather Considerations
Concrete has a narrow comfort zone. Ideal pouring temperature is between 50°F and 90°F. Below 40°F, hydration nearly stops and the slab can freeze before it gains strength, use heated enclosures and blankets if you're working in cold weather, or just reschedule. Above 90°F, the mix sets too fast, you lose working time, and plastic shrinkage cracks become a real risk. Pour early in the morning in hot weather, keep the base and forms misted before the pour, and have your crew ready to work fast. Wind also accelerates surface drying, use windbreaks if needed.
Building a New Patio Over an Existing Concrete Slab
If you're working with an existing slab, the process looks different. This approach skips excavation, which is a real time and cost saver, but it only works if the existing slab is structurally sound. If it's heaving, crumbling, or has significant settlement cracks, you need to break it out and start over. Pouring over a failing slab just creates a failing slab with an extra inch of concrete on top.
Assess and Prep the Existing Slab
Sweep and pressure wash the existing surface thoroughly. Look for cracks wider than 1/4 inch, fill them with a polyurethane caulk or epoxy crack filler and let it cure before proceeding. Check for high and low spots using a long straightedge; anything more than 3/8 inch deviation over 10 feet is going to give you grief. Grind down high spots with an angle grinder or diamond cup wheel. For low spots, fill with a patching compound compatible with your overlay system. The surface must also be clean of oil, curing compounds, sealers, paint, and any other bond-breaker, acid etching or mechanical scarifying (grinding) opens the pores and gives new material something to bite into.
Bonding and Leveling Options
You have a few directions to go here, depending on the condition of the existing slab and how much height you're adding.
- Bonded concrete overlay (1.5 to 2 inches thick): Works well if the existing slab is level and sound. Use a bonding agent (acrylic or epoxy-based) applied to the existing surface, then pour a thin concrete mix or high-strength overlay material. The bond agent must be tacky but not dry when you pour—check the manufacturer's timing window.
- Self-leveling underlayment: Great for filling dips and leveling a wavy slab before tiling or coating. Not a standalone wearing surface for outdoor use; use it as a prep layer.
- Unbonded overlay (2 inches or more with a separation layer): You intentionally don't bond to the existing slab. Lay a polyethylene sheet, then pour the new concrete on top. The overlay acts as its own slab. This avoids adhesion failure but requires enough thickness and reinforcement to function independently.
- Concrete pavers or patio slabs set in a thin mortar bed: An option when you want a finished look without a full pour. Requires the existing slab to be level and stable.
Common Failure Modes to Avoid
Delamination, where the new layer peels or pops off the old one, is the number-one failure mode on overlay projects. It almost always comes from one of three causes: a dirty or sealed substrate that prevented bonding, adding too much water to the overlay mix making it weak, or pouring over a slab that was already cracked and moving. Any cracks in the existing slab will eventually telegraph through to the new surface too, so either fill them properly or plan for matching control joints directly above them in the new pour.
Sealing, Staining, and Fixing Common Problems
Sealing Your Patio
Sealing is not optional if you want the slab to look good long-term. Wait at least 28 days after the pour before applying any sealer, the concrete needs to finish curing first. For outdoor patios, a penetrating silane-siloxane sealer is my first recommendation: it soaks in, repels water and deicers, doesn't change the look significantly, and lasts 3 to 5 years. If you want a glossier look, an acrylic topical sealer adds sheen and enhances color but needs reapplication every 1 to 3 years and can get slippery when wet, add an anti-slip additive (fine silica sand) to the last coat. Apply sealer with a pump sprayer or roller in thin, even coats. Two thin coats beat one thick coat every time.
Staining and Aesthetic Upgrades
A plain gray slab doesn't have to stay that way. Acid staining creates a mottled, variegated look by reacting with the calcium in the concrete, colors range from earthy tans and browns to blues and greens. Water-based concrete stains give more predictable, solid color. Both require a clean, unpainted, unsealed surface to penetrate. After staining, apply a sealer to lock in the color and protect the surface. Stamped concrete overlays and decorative toppings are also options for an existing slab that's structurally sound but aesthetically tired.
Fixing Cracks
Hairline cracks (under 1/8 inch) are mostly cosmetic and can be sealed with a flexible polyurethane caulk or a penetrating crack sealer. Wider cracks (1/8 to 1/2 inch) need to be chiseled out slightly (undercut the edges) and filled with a polymer-modified concrete patching compound or epoxy filler, then sealed over. Cracks wider than 1/2 inch, or any crack where one side is higher than the other, indicate structural movement, you need to address the cause (usually soil settlement or poor drainage) before patching, or the crack will just come back.
Fixing Unevenness
If you have a slab that's uneven, one section higher than another, grinding down high spots is the most practical fix for small elevation differences under 1/2 inch. A concrete grinder with a diamond cup wheel can shave a surface down fairly quickly. For low spots or significant unevenness, a self-leveling concrete underlayment can fill and level the area before you apply a finish coating or overlay. Just remember that any leveling compound needs to be bonded properly and compatible with whatever finish you're applying on top.
Dealing with a Dull or Tired-Looking Finish
If your existing patio just looks worn out and gray, cleaning and sealing alone can make a dramatic difference. Start with a thorough pressure wash, then apply a degreaser to any oil stains. Let it dry completely, then apply a fresh coat of acrylic or epoxy sealer. If you want more transformation, an overlay system (a thin polymer-modified topping at 1/4 to 3/8 inch thick) lets you essentially resurface the slab with a fresh, even surface that accepts stain, stamp, or texture. Products like concrete resurfacer are sold at major home improvement stores and are genuinely DIY-friendly as long as your base slab is solid.
Tools and Materials Checklist Before You Start
- Stakes, string line, and a line level for layout
- Flat spade, square-nose shovel, and wheelbarrow
- Plate compactor (rental) for base compaction
- 2x4 or 2x6 lumber for forms, plus 1x2 stakes
- Rebar (#3 or #4) and tie wire, or welded wire mesh with chairs
- 6-mil polyethylene sheeting for vapor barrier
- 1/2-inch foam expansion joint material
- Concrete rake and come-along
- Screed board (a straight 2x4 works fine)
- Bull float with extension handles
- Knee boards for floating the surface
- Edger, groover, and steel trowel
- Stiff-bristle push broom for broom finish
- Liquid curing compound or plastic sheeting for curing
- Safety gear: gloves, eye protection, rubber boots (concrete is caustic)
If you're pouring your own mix, add a rented concrete mixer and a slump cone to that list. For large pours, rent a concrete vibrator to consolidate the mix and eliminate voids near the forms, it's worth every penny.
How Long Does the Whole Project Take?
For a typical 200-square-foot patio starting from bare ground, expect excavation and base prep to take one full day, form setting and rebar to take a half day, and the pour plus finishing to take most of a day (with 2 to 3 helpers). You can't shortcut the 7-day cure period. Realistically, you're looking at a project spread over 10 to 14 days from first dig to first use. The upfront planning, layout, drainage, and joint spacing, is what separates a patio that looks great in 10 years from one you're patching in 3.
FAQ
How do I make sure my patio drainage plan does not send water toward my house?
Before the pour, verify that the slab will not block existing weep holes or water channels from the house. If your patio sits near a crawlspace or foundation vents, plan the slope so runoff drains away, not toward the structure, and consider adding a dedicated drain line where water exits the slab.
What if I need part of the patio to be higher for steps or a threshold?
Yes, you can build a slightly thickened edge or keep the slope using your forms, but avoid changing thickness haphazardly. If you need a higher perimeter for steps or a wall line, set your form height based on finished elevation so you still maintain the overall slope across the slab.
What is the difference between control joints and isolation (expansion) joints?
Control joints are not the same as expansion joints. Use expansion joints at interfaces with rigid structures (house, walls, steps) with foam material, and use control joints across the field of the slab to guide shrinkage cracking.
Can I add control joints after the concrete has already cured?
If you accidentally skip or misplace a joint near a large open area, you cannot reliably “fix it after the fact” by just adding filler. The practical workaround is to cut joints as soon as you can still saw-cut the concrete without damaging edges, then seal the cracks later if needed.
If I use welded wire mesh, how do I prevent it from ending up at the bottom?
On small slabs, you can reinforce with wire mesh, but the key is placing it at mid-depth. If you notice the mesh sagging or lying on the base before the pour, stop and add spacers (chairs) so the mesh stays centered.
How much cover should I leave on rebar so it does not contact the base or forms?
For rebar, avoid tying it directly to the forms or letting it touch the base. Use rebar chairs or small concrete/epoxy-safe supports to maintain the cover, which improves durability and reduces rust risk.
What if water collects in the excavation area before I place the gravel and vapor barrier?
A plastic vapor barrier helps, but it is not a substitute for correct base compaction and correct slope. If you see standing water in the base before the pour, do not pour, fix the subgrade drainage or add base where it is soft.
When is it a mistake to build a new patio overlay on top of an existing slab?
If you are relying on an existing slab, do not overlay if the original slab is actively moving or has wide, repeating cracks. A practical check is to confirm whether cracks widen after wet and freeze cycles, then plan bonding only when the existing slab is stable.
How can I tell if my existing slab is too contaminated for an overlay?
Delamination risk increases when the existing surface has bond-breakers like paint, curing compounds, or sealers, or when it remains contaminated. Make sure you remove those coatings and create mechanical profile, then verify compatibility with your chosen overlay system.
What should I do if the surface looks dusty, scaled, or has minor pinholes after curing?
If you get small surface pinholes or sandy scaling, it is often a finishing or curing issue, not necessarily structural failure. Keep curing moisture consistent, avoid over-troweling outdoors for slip safety, and only seal after the slab reaches the full cure window.
When should I seal, and how do I choose a sealer that does not turn slick in wet weather?
Wait at least the minimum cure time for the sealer to avoid trapping moisture, and also plan for traction. If the patio is near a pool area, entry path, or where ice/snow occurs, choose a penetrating sealer system and add anti-slip texture rather than a high-gloss topical layer alone.
Can I stain or acid-stain a patio that has never been sealed before, and what can prevent good color?
If you do not want the look of a dense gray slab, consider staining only after curing is complete and the surface is properly cleaned and left unsealed prior to stain. Staining will not bond well to sealed or painted concrete.
If I see cracks forming soon after curing, how do I decide between patching and fixing the underlying cause?
Yes, but treat it like structural troubleshooting. If cracking is paired with uneven settlement, patching compounds will often re-crack, so first fix drainage, remove weak base material, and address the soil movement, then patch and seal.
What is the biggest mistake people make when mixing concrete bags instead of using ready-mix?
If you are mixing bagged concrete, do a slumps-and-workability check. A wetter mix can pour easier but leads to weaker concrete, higher shrinkage, and more surface scaling, so follow the bag water exactly and stop adding water on site.
What should I do if I realize I put a control joint location in the wrong spot while the slab is still fresh?
Within the first day after pour, you can re-cut or adjust joint lines if you have access to fresh concrete. After the window closes, forcing changes tends to create jagged edges and weak spots, so it is safer to follow the pre-marked layout and only proceed with jointing within the proper saw-cut time.