Installing a concrete patio from scratch takes a full weekend (sometimes two), some muscle, and about a dozen tools you probably already own. If you want a step-by-step guide on how to put in a concrete patio, start by following the workflow below and plan your layout first.
How to Install a Concrete Patio Step by Step

Silas Morrison
28 Apr 2026
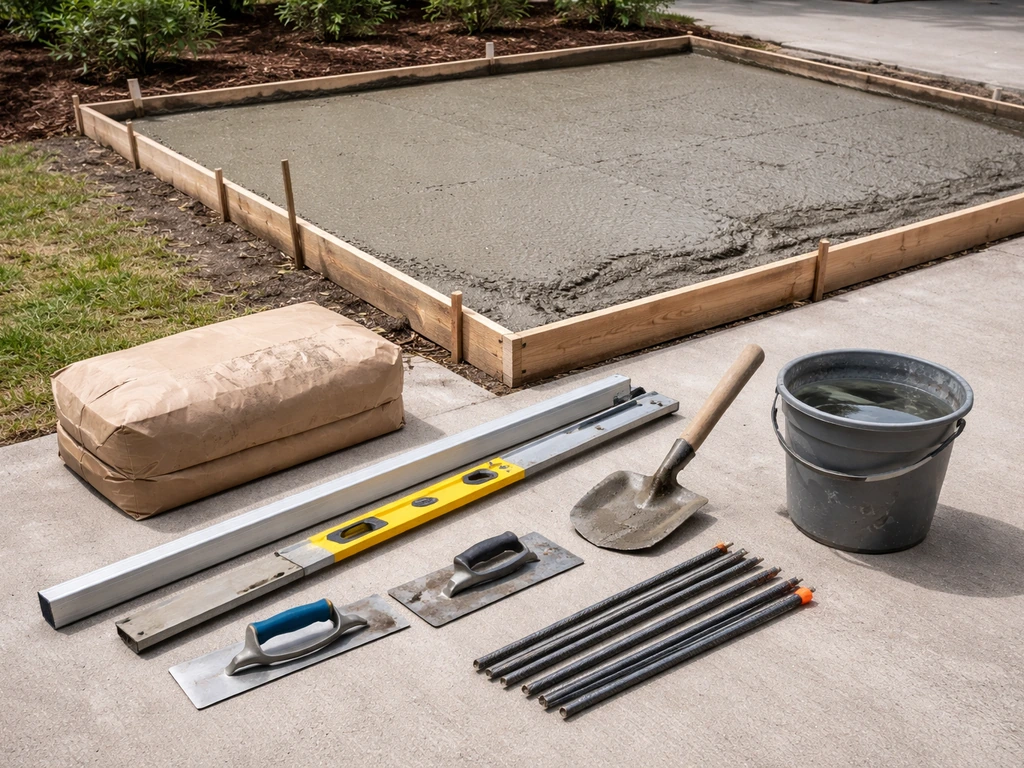
The basic workflow is: mark the layout, excavate 7 to 10 inches deep, compact a 3 to 4 inch gravel base, set wood forms at the right slope, add reinforcement, pour and finish the concrete, then cure and seal it properly. After you build the forms and add reinforcement, you can pour, screed, and finish the concrete in the same way described in how to lay concrete for a patio.
Do each stage right and you'll have a patio that lasts decades. Once you have the basic workflow down, you can follow these steps for concrete patio results that last decades. Skip steps, and you'll be chasing cracks by spring.
Planning and measuring the patio layout
Before you touch a shovel, spend real time on layout. A poorly measured patio is almost impossible to fix once the concrete is down. Start by deciding the size and shape. A 10x12 foot patio is a practical starting point for most backyards, but measure your actual space and think about how you'll use it: furniture placement, foot traffic, access to doors. Sketch it on paper first.
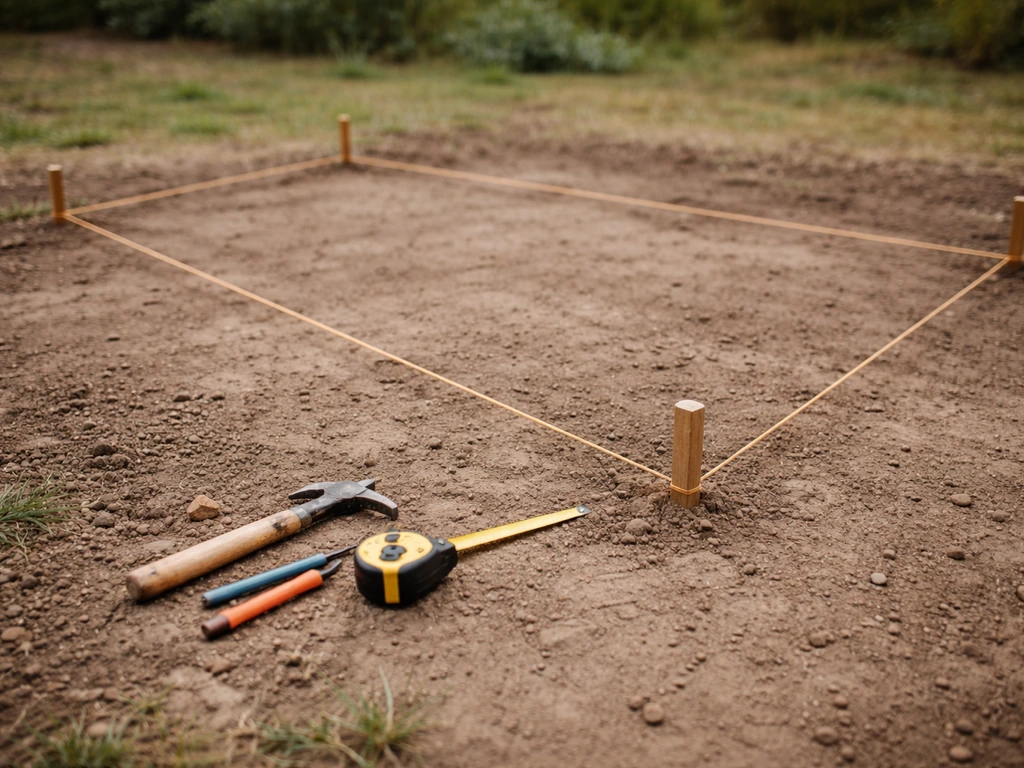
To mark the layout on the ground, you'll need a tape measure, mason's string, a carpenter's square, and a line level. Drive stakes at the corners and run string lines around the perimeter. Use the carpenter's square or the 3-4-5 triangle method to confirm your corners are actually 90 degrees, this matters more than people think. A skewed layout means forms that fight you every step of the way.
Plan for drainage from day one. The slab needs to slope away from your house (or any structure it sits against) at about 1/4 inch per foot. That's not a lot visually, but it's enough to shed water and prevent pooling. Mark that slope into your string lines using the line level before any digging starts. For a 12-foot-deep patio, that means the far edge sits 3 inches lower than the edge against the house.
Also decide on thickness now. For a standard residential patio with foot traffic and maybe some light furniture, 4 inches is the minimum you want. Some sites with softer soil benefit from 5 inches. Lock in your target thickness before you start digging because it controls your entire excavation depth.
Site prep and base construction
Excavation
Strip out grass, roots, and any organic material within your layout lines. Organic matter decomposes over time and creates voids that cause slabs to settle and crack. You need to dig deep enough to accommodate both the gravel base and the slab itself. A typical residential patio requires removing about 7 to 10 inches of material: plan on 3 to 4 inches for the gravel subbase plus 4 inches for the concrete. That puts the top of your finished slab at or slightly above grade, which is exactly where you want it.
If you hit soft or clay-heavy soil at the bottom of your excavation, go a bit deeper and add more gravel. Clay holds water, which is bad news under a slab through freeze-thaw cycles. Don't rush this part.
Gravel base and compaction
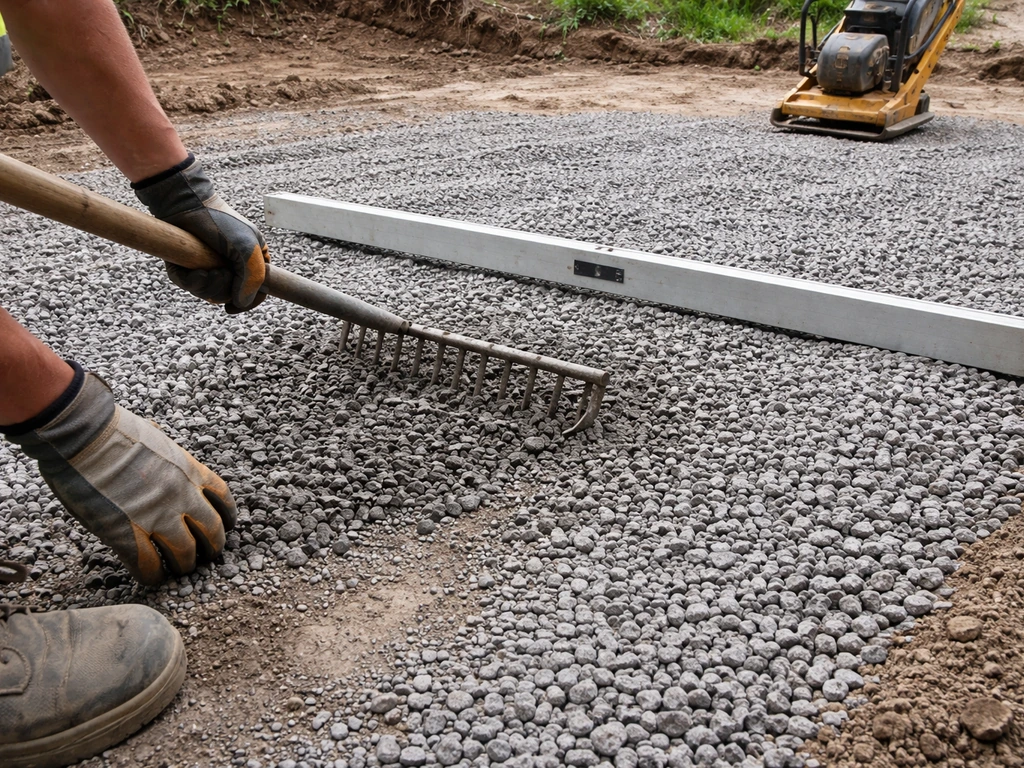
Once you've excavated, spread compactible gravel (crushed stone, not pea gravel) in 2-inch lifts and compact each layer with a plate compactor. A plate compactor rental runs about $50 to $80 a day and is worth every penny. Don't try to tamp by hand for a slab of any real size. Compact until the surface feels rock solid. A simple field check: walk across it after compaction. If you're not leaving impressions deeper than about 1/8 inch, your base is in decent shape.
The gravel base does two jobs: it improves drainage by letting water move away from underneath the slab, and it distributes the weight of the concrete evenly so the slab doesn't develop pressure points. Don't skip or shortcut this layer. It's the main reason residential patios crack prematurely.
Forms, reinforcement, and setting levels
Forms are what hold your concrete in place while it sets, and they also define the finished thickness and slope of the slab. Use 2x4 lumber for a 4-inch slab (the actual 1.5-inch thickness of the lumber doesn't matter here, what matters is that the top edge of the form represents your finished concrete surface). Drive stakes on the outside of the forms every 2 to 3 feet to keep them from blowing out when you fill with wet concrete. That pressure is real, and an unsupported form will move on you.
Before pouring, coat the inside faces of the forms with a release agent so they come off cleanly afterward. Vegetable oil works fine and costs nothing. Commercial form release works slightly better. Either way, don't skip this step or you'll be hammering and prying to get the lumber off, which can chip fresh concrete edges.
Check your slope again once the forms are set. Lay a long level or straightedge across them and measure the drop from the high side to the low side. Adjust your stakes until you hit that 1/4 inch per foot fall toward the drainage direction.
Reinforcement options
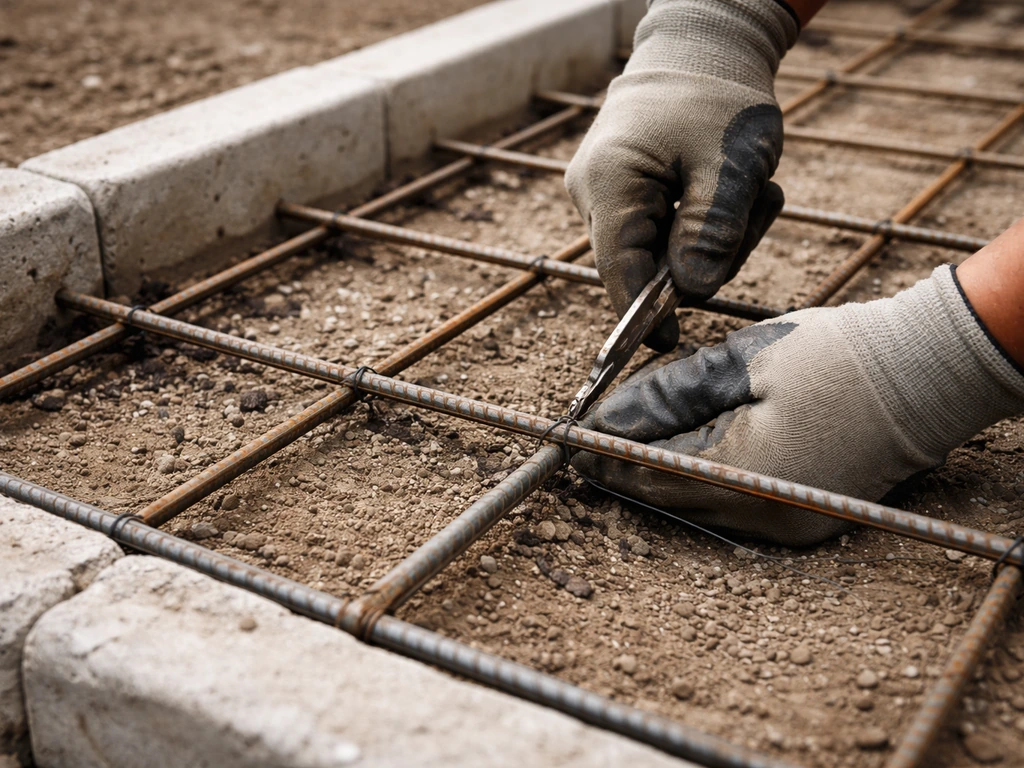
Reinforcement isn't strictly required for a small residential patio with a good base, but it's cheap insurance against cracking and worth adding. You have two practical options: welded wire fabric (WWF) or fiber mesh added to the concrete mix. WWF 6x6-10/10 is the common choice for patios, sheets of wire grid that you place inside the form before pouring. It should sit at about 1/3 of the slab depth from the bottom, so roughly 1.5 inches up from the base in a 4-inch slab. Use small stones or plastic rebar chairs to hold it off the gravel so it ends up embedded in the concrete, not lying on the ground underneath it.
Fiber mesh is the easier option: you mix it directly into the concrete before pouring. It reduces plastic shrinkage cracking during the early cure period but doesn't provide the same structural reinforcement as wire fabric. For most standard patios, either method works. For larger slabs or softer soil, go with the wire fabric.
Concrete mix design, pouring, and finishing
Choosing your concrete
For patios, you want a mix that reaches at least 3,000 psi compressive strength. If you're ordering ready-mix from a truck, just ask for a standard 3,000 to 4,000 psi exterior mix with air entrainment if you live somewhere that freezes. Air entrainment builds microscopic air bubbles into the mix that give water somewhere to expand during freeze-thaw cycles, which dramatically reduces surface scaling.
If you're mixing bags yourself (manageable for small patios, exhausting for anything over 200 square feet), follow the bag instructions exactly for water ratio. Too much water weakens the slab. If you want full, from-ground-up details for this whole process, use the step-by-step guide on how to build a patio concrete slab as your next reference.
Pouring and screeding
Pour concrete into the forms starting at the corner farthest from your truck or mixer. Work it into corners and against the forms with a shovel or concrete rake, making sure there are no voids or air pockets. Fill to slightly above the form edges. Then screed: drag a straight 2x4 across the top of the forms in a side-to-side sawing motion to strike off the excess and bring the surface to the correct level. You'll need a helper on the other end of the screed for any patio wider than about 8 feet.
Floating, edging, and broom finishing
Once you've screeded, run a bull float over the surface (a large rectangular float on a long handle) to smooth out screed marks and push aggregate slightly below the surface. Do this while the concrete is still wet. After the surface sheen disappears (meaning the bleed water has evaporated), come back with a hand float to work out any remaining rough spots. Then run an edging tool along the perimeter inside the forms, this rounds the slab edge and helps prevent chipping later.
For the final texture, drag a stiff-bristle broom lightly across the surface in one direction to create a broom finish. This gives traction and looks clean. Pull the broom consistently in parallel strokes. Don't overwork the surface or add water to sticky spots, both weaken the top layer. Timing is everything here. Too early and the broom drags aggregate out of place. Too late and the surface is too stiff to texture. You're aiming for that window when the concrete holds a mark but isn't soupy.
Curing, joint placement, and sealing
Curing the slab
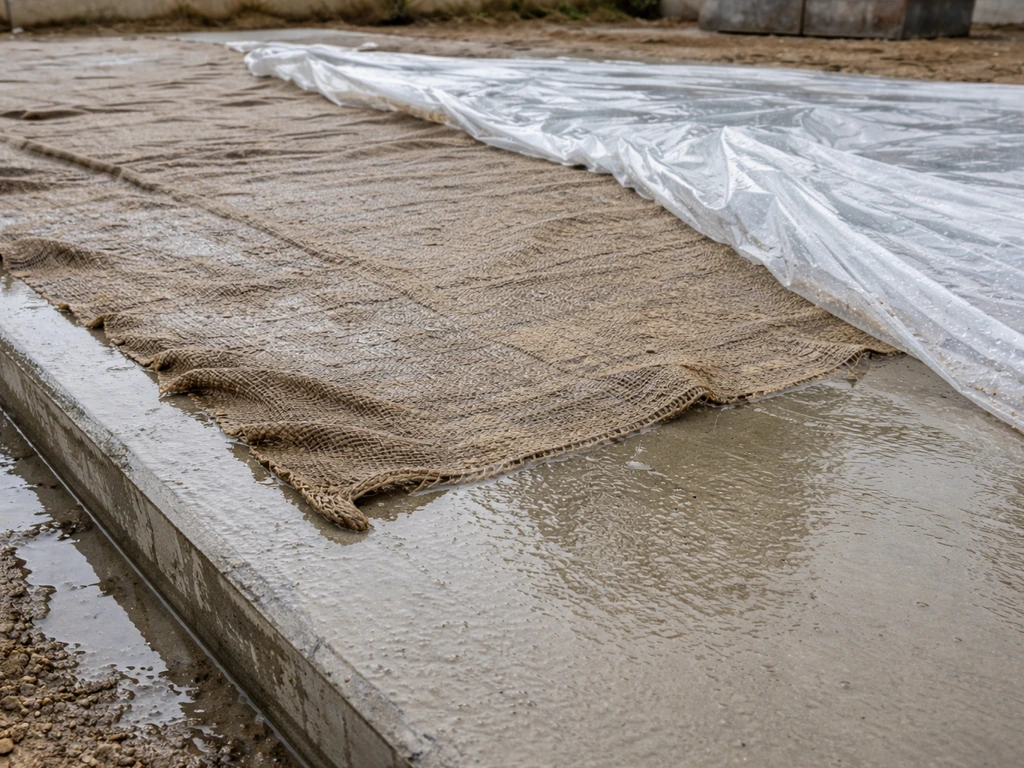
Curing is just keeping the concrete moist while it gains strength. Concrete doesn't dry, it cures through a chemical process, and that process needs water. If the slab dries out too fast in the first week, the surface layer weakens and you get dusting and scaling. Cover the slab with blank" rel="noopener noreferrer">plastic sheeting or burlap the day after finishing and keep it damp for at least 7 days. In hot or windy weather, this matters even more. Alternatively, you can apply an acrylic cure-and-seal product immediately after finishing, which forms a membrane that locks in moisture and eliminates the need for wet curing, depending on the product. Read the label to confirm.
Control joints
Concrete shrinks as it cures, and that shrinkage causes cracking. Control joints give the concrete a weak plane to crack along in a straight, predictable line rather than randomly across the surface. Cut them with a circular saw and concrete blade (or a rented walk-behind saw) within 4 to 12 hours after placing, once the surface is firm enough to walk on without damaging it.
The depth should be about 1/4 of the slab thickness, for a 4-inch slab, cut about 1 inch deep. Space joints so the sections between them are roughly square, and no panel is longer than about 10 feet in any direction. You can also use a hand groover right after finishing to press joints in before the concrete stiffens, though saw cuts are more reliable for spacing and depth.
When and how to seal
Wait a full 28 days before applying a sealer. That's how long concrete takes to reach its design strength, and sealing too early can trap moisture inside and weaken the surface. For a standard exposed patio, a penetrating silane or siloxane sealer is a good choice: it soaks into the concrete and creates a chemical barrier against water without changing the appearance. It's also breathable, which matters in climates with freeze-thaw cycles because it lets vapor escape instead of trapping it. If you used a curing compound on the slab, check that your sealer is compatible with it before applying.
What to do when things go wrong
Even a well-poured patio can develop issues in the weeks and months after installation. Here's how to read what you're seeing and what to do about it.
| Problem | Likely Cause | What to Do |
|---|---|---|
| Hairline cracks forming | Normal shrinkage, especially if joints were spaced too far apart or cut too late | Monitor — cracks under 1/8 in wide are usually cosmetic. Fill with a flexible polyurethane or epoxy crack filler if they grow. |
| Larger cracks (1/4 in or more) | Poor base support, missing reinforcement, or frost heave | Fill structurally with epoxy injection or a rigid crack filler. If the slab is shifting unevenly, a base issue needs addressing. |
| Uneven surface / settled section | Soft or poorly compacted subbase, organic material that decomposed | Small deviations can be leveled with a polymer-modified concrete overlay. Significant settlement may require mudjacking or slab removal. |
| Surface scaling or flaking | Premature drying during cure, overworking the surface, freeze-thaw without sealing | Resurface with a concrete resurfacer product after cleaning and preparing the surface thoroughly. |
| Dull or dusty surface finish | Weak top layer from too much water in the mix or poor curing | Grind lightly and apply a penetrating sealer or densifier, or use a resurfacing overlay for a fresh surface layer. |
For surface scaling and a rough or dull finish specifically, a concrete resurfacer is your best friend. Clean the surface well, open up any loose material with a wire brush or grinder, then apply the resurfacer in manageable sections of about 50 to 100 square feet at a time. It bonds to the existing slab and gives you a new top layer that you can broom-finish again. After it cures, seal it the same way you would a new pour, wait for full cure and use a compatible sealer.
Finishing upgrades and next steps
Once your patio is cured, sealed, and solid, there's a lot you can do to make it look better and hold up longer. These are the upgrades that turn a plain gray slab into something you're actually proud of.
- Staining: Acid stains or water-based concrete stains penetrate the surface and add earthy tones or bolder colors. Apply after the 28-day cure, clean the surface thoroughly, and follow the stain manufacturer's instructions for neutralizing and sealing afterward.
- Stamping: If you want the look of stone, brick, or wood, stamped overlays can be applied to an existing slab. The slab needs to be in good structural shape (no major cracks or settlement) before you add a decorative layer.
- Exposed aggregate finish: If you're planning a new section or redoing a slab, exposed aggregate is worth considering at the pour stage. You seed decorative aggregate on the surface and wash the top cement paste off before it fully hardens.
- Adding a border or edge treatment: Cut a saw-cut border a few inches from the perimeter to visually define the slab, then stain or paint inside vs. outside the border for a clean framing effect.
- Outdoor rugs and furniture pads: Not a concrete upgrade, but protecting the surface under furniture legs and traffic areas extends the life of your sealer and finish significantly.
If you found yourself wanting to install concrete patio slabs in a modular or segmental layout rather than a poured slab, that's a related but different process worth exploring separately. Similarly, if you're converting an existing slab into a patio-style space, that involves its own prep and finishing decisions.
If you're converting an existing slab into a patio, you need to focus on prep, leveling, and finishing so it looks good and performs well turn a concrete slab into a patio. For now, if you followed this guide from planning through pour, you've done the hard part. Next, apply what you learned to the actual pour and finishing steps for how to construct a concrete patio that lasts.
Keep it sealed every two to three years, fill any cracks when they're small, and the slab you just built should outlast most of the things around it.
FAQ
What’s the biggest reason a new concrete patio cracks even if I followed the steps?
Most “mystery” cracks come from curing or joint timing issues. If you broom-finish too late, overwork the surface, or don’t keep the slab moist for the first week, the top layer can weaken. Also, if you cut joints too early or too late (instead of when the surface is firm), cracking may occur randomly rather than along the joint lines.
Do I need to remove existing pavement or slab before installing a new concrete patio?
If you’re pouring on top of an existing concrete surface, it generally won’t perform the same as a new slab on a properly excavated base. Typical practice is to remove failing material or at least verify it’s stable, well bonded, and in the correct thickness and elevation, then still build a proper base underneath your new slab. If height changes or drainage slope is affected, the patio can pond water even if the concrete itself is fine.
Can I install a concrete patio directly over compacted soil without gravel?
It’s not recommended. The gravel base is doing two jobs, distributing load evenly and improving drainage beneath the slab. Without it, you’re more likely to get pressure points, settlement, and freeze-thaw damage, especially on clay-heavy or water-holding soils.
How do I handle patios that are larger than about 10 feet in one direction?
Plan extra joints so no panel gets too large. The article notes limiting panel size to keep sections roughly square and no panel longer than about 10 feet in any direction. For wider patios, you’ll usually need additional control joints, and sometimes stronger reinforcement choices, to keep cracking predictable.
What if my patio has a slope that’s steeper than 1/4 inch per foot, or a level area?
A slope that’s too steep can make water run off too fast and cause surface washout at edges, while a slope that’s too flat leads to pooling. If you realize the slope after forms are set, adjust the form stakes and re-check with a long straightedge before pouring. It’s far easier to fix grade early than to correct drainage after the slab cures.
Do I need reinforcement if I’m only putting in a small patio and I’m using a good gravel base?
For small slabs, reinforcement is often optional, but it’s still a low-cost way to reduce the risk of cracking and improve crack behavior. Use welded wire fabric when you want the most crack-control benefit in bigger or softer-soil areas, and use fiber mesh when you want easier placement and reduced plastic shrinkage cracking.
Where should welded wire fabric sit inside the slab, and what happens if it’s too low or too high?
It should end up embedded in the concrete, not resting on the gravel and not floating near the surface. If it sits too low, you lose much of its benefit, and if it’s too high, it can interfere with the desired surface performance and durability. Use spacers or chairs so the fabric stays at roughly the recommended embedded position (about one third of the slab depth from the bottom for a typical 4-inch slab).
Can I use rebar instead of welded wire fabric or fiber mesh?
Rebar can work in some patio designs, but you’d need to place it with the right spacing, cover, and support so it’s embedded correctly. For typical residential patios, the guide’s common options are welded wire fabric or fiber mesh, because they’re practical for slab thickness and placement. If you want rebar, confirm your layout and tie-down approach so it stays centered during the pour.
What’s the safest way to choose between a fiber mesh mix and a welded wire mix?
If the patio will see more movement, is larger, or sits on softer or water-prone soil, welded wire fabric is the more predictable choice for crack control. If it’s a standard-size patio and you want easier handling, fiber mesh is usually sufficient for reducing early plastic shrinkage cracking. In either case, keep the base well-compacted and use the correct concrete strength.
How do I prevent the slab from “curling” or having uneven edges after the pour?
Curling and uneven edges usually relate to inconsistent thickness, poor base uniformity, or finishing too aggressively on one side. Make sure the forms accurately reflect the finished thickness, keep the base compacted uniformly, and don’t add extra water during finishing. If one side is wetter and you overwork it, the surface can settle differently as it cures.
When exactly should I cut control joints, and how can I tell the slab is ready?
The guideline is to cut within the 4 to 12 hour window after placing, once the surface is firm enough to walk on without damaging it. If you cut too soon, you can ravage the edges. If you wait too long, cracking may occur before the saw cuts create the weak plane.
Do I have to seal the patio, and can I wait longer than 2 to 3 years to re-seal?
Sealing helps protect against water and improves freeze-thaw durability, but the timing depends on climate and exposure. The article suggests re-sealing every two to three years. If you delay much longer, you may see increased staining, higher water absorption, and more surface wear, especially in freeze-thaw areas.
What should I do right away if I notice hairline cracks after curing?
If the cracks are small and stable, it’s usually best to address them when they’re still minor rather than waiting for them to widen. Clean the crack and use an appropriate crack filler or patch system compatible with your sealer plan. Avoid flooding the surface with water-based products before you confirm the slab has fully cured.
Can I pour concrete in cold or hot weather, and do I need to change anything?
Yes. Cold can slow setting, increase freezing risk, and affect curing schedules, while hot or windy weather increases evaporation and can dry the surface too fast. The article emphasizes stronger curing attention in hot or windy conditions, covering the slab and keeping it damp. For cold weather, you’ll generally need weather-specific protection and timing adjustments so you don’t end up with weak surface strength.
Is a broom finish always the right choice for traction?
A broom finish is a common default because it provides traction without much equipment. However, if your patio is in a freeze-thaw climate and gets slick, make sure the timing produces a consistent texture, not grooves that are too deep or too shallow. Consistent, lightly applied strokes in one direction usually perform best and are less likely to chip than overworked finishes.