
A crumbling concrete patio is fixable in most cases, and you can do it yourself. If the damage is shallow and localized (think pitting, small spalls, or surface crumble covering less than a third of the slab), a polymer-modified patch mix or a resurfacing overlay will restore it for a fraction of replacement cost. If the slab is heaving, settling, or crumbling all the way through, replacement is the smarter call. This guide walks you through diagnosing what you're actually dealing with, choosing the right fix, and completing the repair correctly so it lasts. For step-by-step repairs and product recommendations to fix old concrete patio, see our detailed guide on fixing old concrete patios. For a step-by-step concrete patio fix, see the linked guide for diagnosis and repair.
How to Fix Crumbling Concrete Patio: Patch, Resurface, Replace

Who this guide is for
This is written for homeowners who've walked outside and thought 'my concrete patio is crumbling' and want to know exactly what to do next. Whether you're staring at a few pitted patches or a surface that looks like it survived a hard winter (or several), you'll finish this guide knowing what type of damage you have, whether to patch, resurface, or replace, and how to do the work step by step. I'll also cover anti-slip finishes, sealing, costs, and the honest signs that it's time to call a pro instead of DIYing it.
Recognizing the damage: what 'crumbling' actually means
Crumbling is a catch-all word that covers several distinct failure types, and telling them apart changes everything about your repair approach. The Portland Cement Association breaks these out clearly, and it's worth knowing the differences before you buy a single bag of patch mix.
- Scaling: the top layer of the slab surface flakes off in thin, papery sheets, usually starting at the edges. Classic symptom of freeze-thaw damage or early deicing salt use on immature concrete.
- Spalling: deeper chunks breaking away from the surface, often exposing aggregate or even rebar. Can result from freeze-thaw, rebar corrosion expansion, or poor original curing.
- Pitting: small holes and craters across the surface, often caused by popouts (aggregate alkali-silica reaction) or air pockets from inadequate consolidation during the original pour.
- Delamination: a thin skin of concrete separating from the layer beneath it. It looks solid until you tap it and it sounds hollow. Often caused by premature troweling that trapped bleed water.
- Structural cracking and settlement: wide cracks (typically 1/4" or wider), uneven slabs, or sections that move when you push on them. This indicates subbase failure, drainage problems, or full-depth deterioration.
- Edge crumble: corners and edges breaking off, which is common when thin sections were poured or where water persistently pools and freezes.
The root cause matters as much as the symptom. ACI 546R (the industry's primary guide to concrete repair) is firm on this: you need to find and address the cause, not just the visible damage. If drainage is funneling water under your slab and freeze-thaw is doing the damage, patching the surface without fixing the drainage means you'll be back here in two seasons.
Immediate safety checks and temporary measures
Before you spend a weekend repairing anything, do a quick safety walkthrough. Crumbling concrete creates trip hazards, and loose chunks can be a real problem for kids, dogs, and anyone walking barefoot.
- Walk the entire patio and mark raised edges, sunken sections, and any areas where the surface moves or flexes underfoot. Use spray paint or tape to outline these zones.
- Check for exposed rebar. If you can see or feel metal through the surface, that's a structural concern, not a cosmetic one. Rebar corrosion is expansive and will keep pushing concrete apart.
- Look at drainage: does water run toward the house foundation, pool in the center, or disappear under the slab edge? Any of these point to subbase issues that need addressing alongside the surface repair.
- Temporarily knock off any loose chunks that could become trip hazards. Sweep the area clear. You're not starting the real repair yet, just making it safe to use in the meantime.
- If sections are significantly raised (more than 3/4") or sunken, rope off or cover those areas until you're ready to repair.
Diagnosing severity: how bad is it really?
The single most important thing you can do before buying materials is figure out how deep the damage goes and how much of the slab is affected. I've seen people spend $200 on a bag of resurfacer only to realize their slab has a delaminated layer underneath that will cause the whole overlay to peel off in a year. Spend 30 minutes on diagnosis and you'll save yourself a lot of frustration.
The tap test (sounding)
Grab a hammer and slowly tap across the entire patio surface. Sound concrete produces a solid, ringing tone. Delaminated or hollow concrete sounds dull and dead, like tapping on cardboard. Mark every hollow-sounding area with chalk or spray paint. This is the same method professionals use and it's called 'hammer sounding' or 'chain drag testing' on larger slabs. Professionals also use pry‑bar probing and ASTM C1583/C1583M, Standard Test Method (pull‑off) for tensile strength of concrete surfaces and bond strength of repair/overlay materials to quantify near‑surface tensile strength and bond before overlay or repair blank" rel="noopener noreferrer">ASTM C1583/C1583M — Standard Test Method (pull‑off) for tensile strength of concrete surfaces and bond strength of repair/overlay materials. Any hollow areas need to come off completely before you repair or resurface. Trying to bond over a delaminated layer is the single most common DIY repair mistake.
Depth testing
For areas with visible spalling or pitting, probe with a flat-head screwdriver or pry bar. If you can flake or lever off material easily, the damage extends further than the surface suggests. Measure the depth of the deepest damage: anything shallower than 1/2" is typically patchable in a single lift with most polymer-modified mortars. Deeper damage (up to about 1") may require two passes or a heavier-bodied product. Below that, check manufacturer specs carefully.
Estimating affected area
Measure the total patio area, then estimate the percentage of visibly damaged surface. A few scattered pits covering maybe 5-10% of the slab? That's spot patching. Widespread surface scaling or pitting across 30-50% or more of the slab? That's a resurfacing candidate. More than 25-35% of the slab showing structural issues (movement, settlement, deep spalling)? That's the threshold where replacement becomes the practical answer. These thresholds are consistent with what engineers and experienced contractors use in the field.
Checking for movement and subbase problems
Press down on different sections of the slab with your foot or a pry bar. Any rocking, flex, or movement means the subbase beneath has washed away or settled. If you find voids under the edges, you can often see them by shining a flashlight along the slab edge. Drainage problems are usually visible: look for soil erosion patterns, efflorescence (white mineral deposits) on the slab underside or edges, or areas where the slab has clearly dropped. None of these problems are fixed by surface repair alone.
Patch, resurface, or replace: how to decide
This is the decision that determines your budget, timeline, and outcome. Here's the decision flow I work through on every job.
- Is the slab moving, rocking, or significantly settled (more than 1")? If yes, go to replacement. Surface repair on an unstable slab is wasted money.
- Is there exposed or corroding rebar? If yes, assess whether it's isolated (patchable) or widespread (replacement territory). Rebar corrosion that's actively expanding the concrete will continue regardless of surface repair.
- Does the hammer test reveal hollow sections across more than 25-35% of the slab? If yes, full resurfacing or replacement depending on whether the underlying slab is sound.
- Is the damage shallow (under 1") and confined to identifiable areas covering less than roughly 30% of the slab total? If yes, spot patching is appropriate.
- Is the surface broadly deteriorated (scaling, widespread pitting, worn finish) but the slab is structurally solid and not moving? If yes, resurfacing with a bonded overlay is the right call.
- Is the damage isolated but deep (over 1") or concentrated in one or two areas with sound concrete elsewhere? Larger localized repair with formwork and reinforcement is the approach.
| Repair Type | When to Use It | Approx. Cost (DIY) | Expected Lifespan | Difficulty |
|---|---|---|---|---|
| Spot patching | Isolated spalls, pits, small cracks; < ~30% of slab; shallow (under 1") | $50–$150 in materials | 8–15 years with proper prep | Beginner–Intermediate |
| Larger localized repair | Deep or wide damage in one area; undermined edges; isolated structural spalls | $100–$400 in materials | 10–20 years if well executed | Intermediate |
| Full resurfacing/overlay | Widespread surface deterioration; structurally sound slab; cosmetic renewal | $300–$800 in materials | 10–20 years depending on system | Intermediate–Advanced |
| Replacement | Slab movement, settlement, rebar corrosion throughout, > ~35% structural loss | $3,000–$8,000+ (hired out) | 25–40 years (new slab) | Leave to pros |
Small repairs: spot patching step by step
Spot patching is the most common DIY concrete fix, and it's genuinely manageable if you do the prep right. Skipping prep is why most patches fail within a year or two. Here's the workflow I follow every time.
Tools and materials for patching
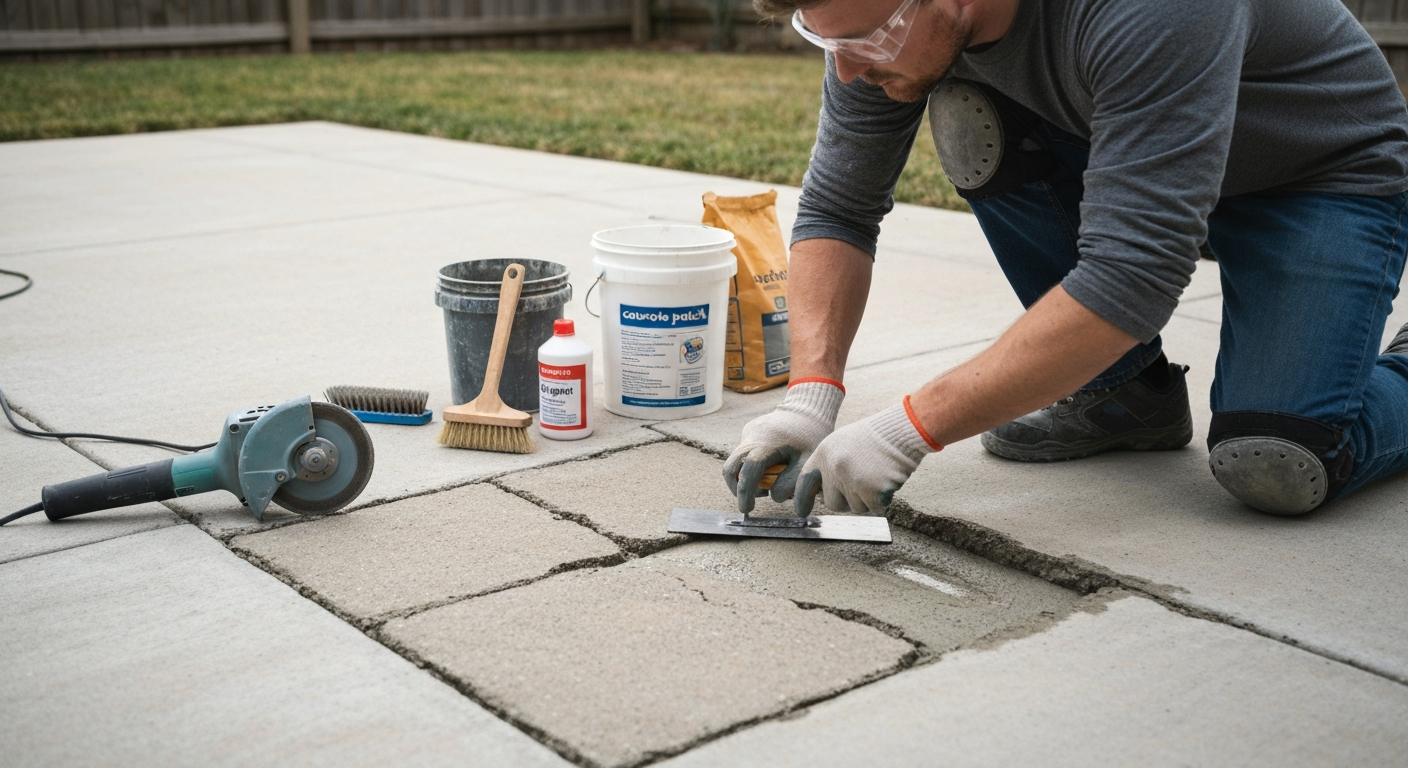
- Angle grinder with diamond cup wheel or rotary hammer with chisel bit (for removing loose concrete)
- Wire brush and stiff-bristle broom
- Pressure washer (minimum 1,500 psi) or shop vacuum
- Margin trowel and steel finishing trowel
- Bucket and mixing paddle or drill with paddle attachment
- Polymer-modified concrete patch mix (Quikrete Vinyl Concrete Patcher or equivalent)
- Bonding agent: cementitious latex-modified slurry or acrylic bonding agent per product TDS
- Plastic sheeting or damp burlap for curing
- PPE: safety glasses, dust mask (N95 minimum), work gloves, knee pads
Step 1: Expand the repair to sound concrete
Don't just patch the visible damage. Use your angle grinder or rotary hammer to cut back the repair area until every edge is solid, sound concrete. Create perpendicular (square) edges, not feathered edges. Feathered thin edges of patch material are the first thing to pop off. Aim for edges that are at least 1/4" deep and ideally cut at a 90-degree angle to the surface. If the area is shallow (under 1/4"), use your grinder to slightly deepen it so the patch has something to hold onto.
Step 2: Remove all loose material and clean thoroughly
Knock out every bit of loose concrete within your marked repair area. Use a hammer and cold chisel or a rotary hammer. Then clean the area completely: pressure wash to remove dust, oil, and loose particles, then let it dry (or vacuum it dry if rain isn't convenient). Any contamination between the patch and the substrate, even a thin layer of dust, will kill your bond. For pitting, make sure each pit is cleaned out individually; a blowgun with compressed air works well here.
Step 3: Apply the bonding agent
This step gets skipped more than any other, and it's the main reason patches come loose. A cementitious latex-modified bonding slurry (neat Portland cement mixed with a latex bonding liquid to a paint-like consistency) is the standard choice for cementitious patch mixes. It's breathable, compatible, and forgiving. Epoxy bonding agents (ASTM C881 types) offer higher bond strength but create a vapor barrier and require careful temperature control and film thickness, typically around 3/16" max coverage as a bond coat. For most DIY patio patches, stick with the latex-modified slurry. Apply it to the substrate, scrub it in with a brush, and place your patch mix while the slurry is still tacky but not dried out. If it dries before you get the patch on, apply a fresh coat.
Step 4: Mix and apply the patch
Mix your polymer-modified patch mortar to the consistency specified on the product TDS. It should be stiff and workable, not soupy. Products like Quikrete Vinyl Concrete Patcher are designed for repairs exactly like this, and they're formulated for thin repairs to spalls and pits. Press the mix firmly into the repair area with a margin trowel, working it into corners and pits to eliminate air pockets. Build up in lifts no thicker than about 1/2" per pass for most products (check your product TDS for exact limits). If the repair is deeper than that, let the first lift firm up before adding the next.
Step 5: Finish and cure
Finish the surface with a steel trowel to match the texture of the surrounding patio as closely as possible. If the patio has a broom finish, drag a damp brush across the patch before it fully sets. Wet-cure the patch: cover it with plastic sheeting or damp burlap immediately after finishing and keep it moist for at least 24-48 hours, longer in hot or windy conditions. Rushing curing is the second most common reason patches crack. Keep foot traffic off for at least 24 hours; full cure is typically 28 days.
Larger localized repairs: removing undermined concrete and rebuilding
When you've got a section that's more deeply damaged, an edge that's broken off in chunks, or an area where the concrete is hollow underneath, the job is bigger but still DIYable if you're comfortable using a rotary hammer and building simple formwork.
Removing undermined concrete
Any concrete that sounds hollow must come out completely. Use a rotary hammer with a chisel bit to remove the entire delaminated or undermined section back to solid material. This almost always means the repair gets bigger than it looked from the surface, which is frustrating but necessary. Once you're down to solid concrete on all sides and the substrate below, you have a proper repair cavity. For edge damage, you'll often end up with a near-full-depth repair at the perimeter of the slab.
Building formwork
For broken edges and large deep cavities, you need formwork to hold the repair material in place while it cures. Use scrap 2x4 or 2x6 lumber, held in place with stakes or bricks. Oil or wax the inside face of the form so it releases cleanly after curing. For edge repairs, the form creates a vertical face that matches the original slab edge.
Reinforcement for deeper repairs
For repairs deeper than about 2" or for large areas, add some reinforcement. You can drill holes into the surrounding sound concrete and epoxy-set short sections of rebar or concrete screws to act as mechanical anchors. Wire mesh cut to fit the cavity also helps tie the repair to the substrate. This is especially important at slab edges where the repair is exposed on one or more sides.
Placing the repair material
For large deep repairs, a non-shrink grout or a structural repair mortar (rather than a standard patch mix) is the right product. Follow the same bonding agent and lift-thickness discipline as for small patches. Consolidate the material thoroughly by rodding or tamping to eliminate air pockets, especially in corners and against the form. Keep the repair damp-cured for a minimum of 3-7 days for a larger pour.
Extensive crack repair
For cracks wider than about 1/4", clean them out with a crack chaser blade on an angle grinder, vacuum the dust, and fill with a semi-rigid polyurethane caulk or a crack filler designed for concrete. For tight hairline cracks in otherwise-sound concrete, low-viscosity epoxy injection (available in DIY kits) penetrates and bonds the crack from within. For cracks in the crumbling zone, remove all the loose material first; don't try to fill a crack surrounded by soft concrete.
Full resurfacing and overlays: restoring the whole slab
If your slab is structurally sound but the surface is broadly worn, scaled, or pitted across a large portion, a bonded resurfacing overlay is the most cost-effective renovation. Done right, it gives you essentially a new surface on a solid base. Done wrong (over bad prep), it peels off within a season. Prep is everything here.
Surface preparation: getting the profile right
The International Concrete Repair Institute (ICRI) defines surface roughness using a Concrete Surface Profile (CSP) scale from 1 to 10. For bonded overlays and resurfacers, you typically need CSP 3-5. For thin skim coats and seal coats, CSP 1-3 is adequate. For heavier coatings or toppings, you may need CSP 5-7. Here's what each method achieves:
| Method | Typical CSP Achieved | Best For | DIY or Pro? |
|---|---|---|---|
| Acid etching | CSP 1–2 | Light cleaning, prep for sealers | DIY |
| Diamond grinding | CSP 2–4 | Smooth overlays, removing high spots, general resurfacing prep | DIY (rent equipment) |
| Scarifying (milling) | CSP 4–6 | Aggressive surface removal, correcting high spots | Pro or experienced DIYer |
| Shot blasting | CSP 4–7 | Best for large areas before thick overlays or coatings | Pro (rent Blastrac equipment) |
For a typical backyard patio, diamond grinding with a rented angle grinder or handheld grinder and a diamond cup wheel covers most of the prep work. For a larger patio (over 200-300 sq ft) or when applying a bonded overlay, renting a walk-behind shot blaster (Husqvarna Blastrac or similar) is worth the rental cost because it produces a consistent, repeatable profile across the whole slab. Select your diamond cup wheel to match your grinder's RPM; most 4-5" cup wheels are rated for 8,000-13,000 RPM depending on the wheel, so check the label.
Addressing remaining damage before overlaying
Before you apply any overlay, fill all remaining cracks, pits, and small spalls with a compatible patching compound or skim coat material. For detailed, step-by-step guidance specific to pitted patios, see how to fix pitted concrete patio. The overlay will not bridge over holes or cracks on its own. Anything deeper than about 1/4" needs to be filled first and allowed to cure. Grind down any high spots or ridges to keep the overlay at a consistent thickness.
Choosing your overlay system
There are three practical overlay categories for a patio: ACI 546R-14 Guide to Concrete Repair (overview of repair materials and overlays) describes practical overlay classifications, skim coats/microtoppings (1–3 mm), bonded overlays/toppings (≈1/4" to ~1"), and crowning/unbonded toppings or full replacement when thickness or structural demands exceed overlay capability.
- Skim coats and microtoppings: 1-3 mm thick, purely cosmetic, best for renewing the look of a surface that is otherwise in good condition. Not suitable for filling pits or cracks on their own.
- Bonded resurfacing overlays: typically 1/4" to about 1" thick depending on the product. These are the standard choice for a broadly scaled or worn patio. Products like Quikrete Concrete Resurfacer are in this category. Good for smoothing and renewing the full slab.
- Polymer-modified bonded toppings: up to about 1" thick, used when you need more body for leveling or when adding aggregate for texture and anti-slip performance.
Applying the overlay
Wet the slab surface thoroughly before applying the overlay, but don't leave standing water. A damp surface supports bonding by preventing the dry substrate from sucking moisture out of the overlay too fast. Apply your bonding agent per the product instructions, then pour and spread the overlay mix with a squeegee or long-handled gauge rake to a consistent thickness. Work in sections on hot days to avoid the material setting before you can finish it. For broom-finish texture, drag a stiff-bristle broom across the surface while it's still plastic. For aggregate texture (which also improves anti-slip performance), broadcast quartz sand or aluminum oxide aggregate into the wet surface.
Curing the overlay
Curing an overlay properly is critical and often rushed. Cover the entire overlay with plastic sheeting immediately after finishing and keep it in place for at least 24-48 hours. Avoid foot traffic for 24 hours minimum; full cure takes up to 28 days. In hot sun, mist the surface periodically or use a curing compound if you can't maintain moisture. An overlay that dries too fast will crack and delaminate regardless of how well you prepped the substrate.
Anti-slip and finishing options
A freshly repaired or resurfaced patio can actually be more slippery than the old worn surface, especially when wet, if you give it a smooth trowel finish. Here are the options for adding texture and protection. For step-by-step methods to improve traction, see our guide on how to fix slippery concrete patio.
- Broom finish: the simplest option, done by dragging a stiff broom across the wet surface. Depth of texture depends on how wet the concrete is when you broom it. Standard and effective.
- Broadcast aggregate: sprinkle aluminum oxide, silica sand, or polymer grit into a wet sealer or into the wet overlay surface. Very effective and long-lasting. Aluminum oxide is the most durable option.
- Anti-slip sealers: penetrating or topical sealers with anti-slip additives (fine grit or polymer) mixed in. Easy to apply, adds traction and weather protection simultaneously.
- Textured overlay systems: some overlay products are specifically formulated with built-in texture aggregate for slip resistance.
- Exposed aggregate: broadcast decorative aggregate into the wet overlay and lightly wash the surface after initial set to expose the tops of the stones. Both decorative and highly slip-resistant.
For sealing, a penetrating silane-siloxane sealer is the best long-term weather protection for a repaired or resurfaced patio in freeze-thaw climates. It repels water and chlorides without changing the surface appearance. Acrylic sealers add a mild sheen and are fine for warmer climates. Apply sealer after the repair has fully cured (wait at least 28 days for full cure, though most sealers specify a minimum of 7-14 days for new concrete). Reapply every 2-4 years depending on wear and climate.
Full tools, materials, and PPE checklist
| Category | Item | Notes |
|---|---|---|
| PPE | Safety glasses or goggles | Mandatory for all grinding and chipping work |
| PPE | N95 dust mask (minimum) | Silica dust is a serious health hazard; upgrade to P100 for grinding |
| PPE | Work gloves | Concrete is caustic; protect hands |
| PPE | Knee pads | For trowel work close to the surface |
| PPE | Hearing protection | For rotary hammer and grinder use |
| Tools | Rotary hammer with chisel bit | For removing unsound concrete |
| Tools | Angle grinder with diamond cup wheel | Surface prep and profile creation |
| Tools | Pressure washer (1,500+ psi) | Cleaning before repair and overlay |
| Tools | Margin trowel + steel finishing trowel | Applying and finishing patch and overlay |
| Tools | Mixing drill with paddle attachment | Consistent, lump-free mixing |
| Tools | Gauge rake or squeegee | Spreading overlay to consistent thickness |
| Tools | Stiff-bristle broom | Broom-finish texture |
| Tools | Hammer | Sounding/tap test |
| Materials | Polymer-modified patch mortar | Quikrete Vinyl Concrete Patcher or equivalent TDS |
| Materials | Bonding agent (latex-modified slurry or acrylic) | Check compatibility with patch product |
| Materials | Resurfacing overlay mix | For full-slab resurfacing; follow TDS for thickness limits |
| Materials | Non-shrink grout or structural repair mortar | For deep or large localized repairs |
| Materials | Concrete crack filler or polyurethane caulk | For wider cracks before overlay |
| Materials | Penetrating silane-siloxane sealer | Post-repair weatherproofing |
| Materials | Plastic sheeting or burlap | For wet curing patches and overlays |
Realistic costs, timelines, and lifespans
Here's a honest breakdown of what each repair approach costs and what you can expect from it. These are DIY material costs; hiring a contractor roughly triples the numbers for patching and resurfacing.
| Repair Approach | DIY Material Cost | Working Time | Curing Before Use | Expected Lifespan |
|---|---|---|---|---|
| Spot patching (small spalls/pits) | $50–$150 | 2–4 hours | 24–48 hours light; 28 days full | 8–15 years with proper prep |
| Larger localized repair | $100–$400 | 4–8 hours over 1–2 days | 3–7 days light; 28 days full | 10–20 years |
| Full resurfacing overlay | $300–$800 (materials + equipment rental) | 1–2 full days | 24–48 hours light; 28 days full | 10–20 years |
| Professional replacement | $3,000–$8,000+ (labor + materials) | 1–3 days for installation | 7 days light; 28 days full | 25–40 years |
Prevention and maintenance: keeping the repair lasting
The most common reason patios end up crumbling in the first place is preventable. Once you've repaired yours, a little maintenance goes a long way toward not doing this again in five years.
- Seal every 2-4 years: a penetrating sealer repels the water that drives freeze-thaw damage and chloride penetration. This is the single most impactful thing you can do for longevity.
- Never use rock salt (sodium chloride) or ammonium-sulfate/nitrate de-icers on concrete: these aggressively attack the surface and accelerate scaling. Use sand for traction, or calcium magnesium acetate (CMA) if you must use a chemical.
- Fix drainage before it fixes your patio for you: make sure water drains away from the slab, not under it. Extend or redirect downspouts. Grade soil away from the patio edges.
- Keep soil and mulch from piling against the slab edge: trapped moisture and organic acids are hard on concrete edges.
- Fill small cracks promptly: a hairline crack that gets water in it and freezes becomes a 1/4" crack by spring. Check and fill annually.
- Don't use wire snow shovels or metal-edged scrapers on a resurfaced or patched patio: plastic or rubber-edged tools only.
When to hire a pro (or just replace the slab)
I'm a big advocate for DIY on this stuff, but there are situations where calling a concrete contractor is the right move and trying to patch your way through them will cost you more in the long run. Here are the clear signs:
- The slab is moving, rocking, or has sunk more than about 1" in any section. No surface repair addresses a subbase or drainage problem.
- Rebar is exposed and corroding across multiple areas of the slab. Corrosion is expansive and will continue breaking the concrete apart regardless of surface treatment.
- More than 25-35% of the slab has structural (not just surface) deterioration. At that point, replacement is more cost-effective than piecemeal repair.
- The slab is full-depth spalled (crumbling all the way through) in multiple locations.
- You find voids under the slab that extend well beneath the surface. This needs compaction grouting or a new subbase, not a patch.
- The patio is adjacent to the house foundation and there are signs of water intrusion or foundation movement. Get a structural assessment before touching the concrete.
If you're on the fence, a one-hour consultation with a local concrete contractor is worth the time. Most will give you an honest assessment, and hearing 'just patch it' from a professional gives you real confidence to proceed. If fixing the pitting or old surface finish is what you're dealing with but not structural failure, the detailed repair steps above for pitted concrete will walk you through the whole process, and a fresh resurface can make a weathered old slab look almost new.
FAQ
How do I diagnose the type and severity of damage on my crumbling concrete patio?
Start with a visual and hands‑on inspection: look for surface scaling, pitting, spalling (flaky chunks), cracks, settlement/tilting, exposed or corroded rebar, and standing water or soft spots. Use a hammer or screwdriver to sound the slab—hollow sounds or loose pieces indicate delamination. Pry with a bar to test bond at suspect edges. If movement, sagging, full‑depth breaks, or rebar corrosion is present, treat as structural. For overlays, professionals use pull‑off tests (ASTM C1583) to confirm bond strength; for homeowner triage, map damaged areas and note depth, area percent affected, and drainage issues. Always try to identify cause (poor subbase/drainage, freeze–thaw, deicing salts, poor original curing) before selecting repairs.
What decision flow should I use: patch, resurface/overlay, or replace the slab?
Use a cause-and-area approach: - Patch: localized spalls, pitting, or <25% of slab area affected; depth typically shallow (≤1/2"–1" depending on product). - Resurface/overlay: widespread surface deterioration (pitting, worn finish) but stable slab with no significant settlement, movement, or rebar failure; overlay thickness depends on product (microtoppings mm-scale to bonded overlays ≈1/4" or more). - Replace: structural failure (large settlement, ongoing movement, full‑depth spalls, extensive rebar corrosion), or when >25–35% of slab area is deteriorated or subbase loss is suspected. Also replace if drainage/subgrade problems cannot be corrected with repair. When unsure, consult a pro or use diagnostic testing (sounding, pry, pull‑off, and subgrade evaluation).
What are the step‑by‑step instructions for small crumbles and pitted areas?
1) Expand repair to sound concrete: chisel or use an angle grinder to remove loose/unsound material, making clean vertical or slightly undercut edges. 2) Clean thoroughly: sweep, vacuum, and pressure‑wash; remove dust, oil, and salts; let surface dry per product instructions. 3) Roughen/profile surface if needed with a cup wheel or light shot‑blast. 4) Apply bonding agent: use a cementitious slurry, latex bonding admixture, or epoxy per manufacturer TDS (follow cure/temperature limits). 5) Mix a polymer‑modified patch mortar per TDS. 6) Place material in lifts if required (many products limit single‑lift thickness ≈1/2"—check TDS). Compact and trowel to match surrounding level. 7) Finish (broom, trowel, or texture to match). 8) Cure per product instructions (keep damp, apply curing compound, or follow latex/epoxy cure guidance). 9) Seal if recommended after full cure.
How do I perform larger repairs and full resurfacing/overlay?
1) Diagnose root causes and fix drainage/subgrade issues first. 2) Select appropriate overlay system and required final thickness per TDS and ACI guidance. 3) Surface prep to required CSP (ICRI 310.2R)—use diamond grinding for light profile, shot‑blasting or scarifying for moderate/heavy profiles. 4) Clean and remove dust/oil; perform pull‑off tests if required. 5) Apply bond coat or slurry per system (cementitious or epoxy as specified). 6) Place overlay in manufacturer‑specified thickness—microtoppings (1–3 mm) for cosmetic, bonded overlays (~1/4" up to manufacturer limits) for durability. 7) For leveling or thicker toppings, use polymer‑modified mortars, extend fibers or mesh reinforcement if indicated, and place in lifts per TDS. 8) Texture/finish and apply anti‑slip aggregate if desired. 9) Cure according to product guidance and protect from traffic for recommended timeframe.
What anti‑slip and finishing options work for repaired or resurfaced patios?
Options: - Broom finish or coarse brush for simple anti‑slip. - Broadcast silica sand or decorative aggregate into wet overlay/sealer for traction. - Textured coatings or acrylic/polyurethane deck coatings with non‑skid additives. - Exposed aggregate overlays or stamped/colored overlays for aesthetics and texture. - Penetrating or film‑forming sealers (silane/siloxane, acrylics) for protection—add non‑slip grit to topcoat. Choose systems compatible with the overlay/patch and follow manufacturer guidance for broadcast rates and sealer compatibility.
Which tools and materials will I need for DIY patching and resurfacing?
Basic tools: hammer, cold chisel, angle grinder with diamond cup, wire brush, pry bar, trowels, margin trowel, mixing bucket or mortar mixer, stiff broom, shop vacuum, pressure washer, measuring tools, gloves, eye protection. For larger jobs: diamond grinder, shot blaster (rent/hire), walk‑behind mixer, floats, finishing brooms, pull‑off test kit (optional). Materials: polymer‑modified patch mortar, cementitious resurfacer or overlay system, bonding agent (cement slurry/latex or epoxy per TDS), repair admixtures, non‑skid aggregate, sealers/stains, rebar/concrete reinforcement if structural repair required.