Precast concrete patio steps are factory-made stair units that you buy ready to set, rather than forming and pouring on-site. Concrete block steps for a patio are a different build than precast units, but the same measurements and code checks still matter concrete block steps for patio. With cement patio steps, the right base and joint treatment are what determine whether the install stays level and crack-free precast patio steps.
Precast Concrete Patio Steps: Install, Repair, and Plan

Silas Morrison
15 May 2026
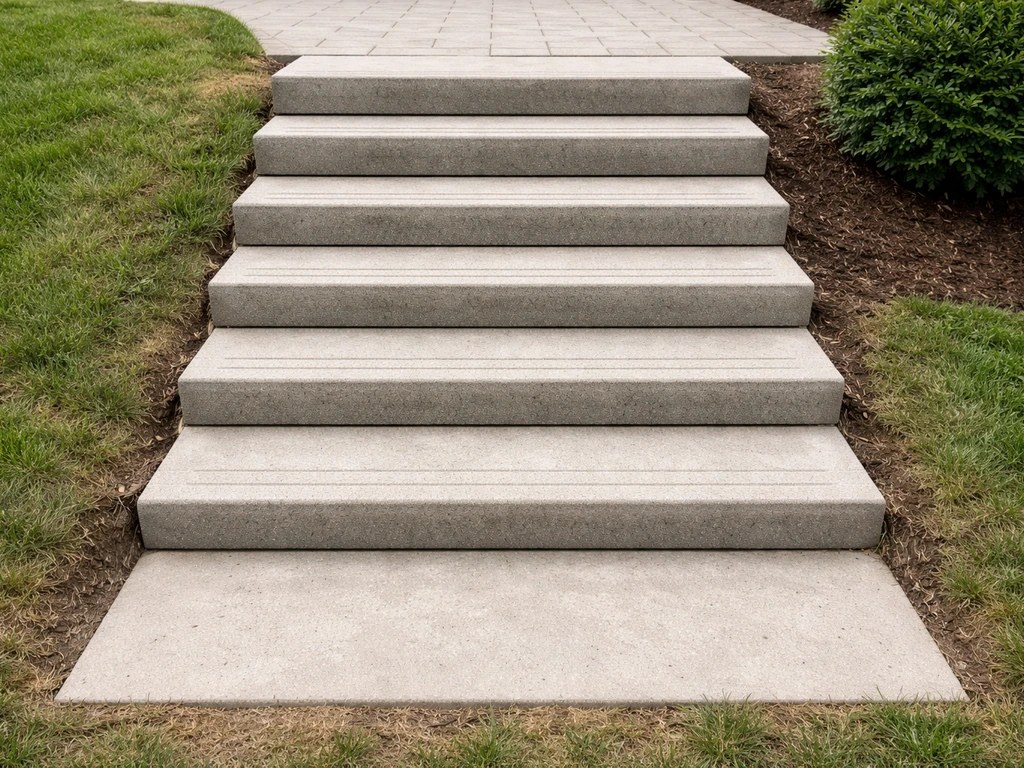
They come in standard widths from 3 to 8 feet, typically with a 7-1/2 inch riser height and a distinct nosing on each tread, and they're reinforced internally with 3/8" and 1/2" rebar so they arrive strong and cured. You drop them onto a prepared base, level them, bed them in mortar, and you're done in a day. That's the whole pitch, and honestly it's a good one for most homeowners.
What precast patio steps are and when to choose them
A precast step is cast in a controlled factory environment, which means consistent dimensions, predictable strength, and finishes like broom texture or diamond tread applied before delivery. Unlike forming and pouring steps yourself (which involves building wood forms, placing rebar, mixing or ordering concrete, and waiting days for curing), precast units arrive ready to install. The curing is already done.
Choose precast when you want the fastest path to a finished, code-compliant stair that doesn't require a lot of formwork skill. It's especially practical for single-flight entries with a rise of two to five steps, which covers the vast majority of residential patio situations. If your patio sits 14 to 30 inches above grade, precast is almost always the right call.
Where precast is less ideal: very wide openings beyond 8 feet, complex curved or L-shaped stairs, or situations where you need a landing mid-flight that's integrated into the structure. Multicrete Precast also notes that custom stair elements such as nosings and top or bottom landings may be included depending on the project, helping explain when precast fits well versus when customization is needed.
For those, forming and pouring or going with stamped concrete steps is worth considering. For those, forming and pouring or going with stamped concrete steps is worth considering, and you can also use this approach for how to pour a concrete patio with steps as an adjacent option. Similarly, if you want wood steps attached to an existing concrete patio, that's a different installation path entirely.
If you're building wood steps to a concrete patio, confirm fastener compatibility and plan for water management so the wood stays protected wood steps attached to an existing concrete patio. But for a straightforward replacement or new installation at a standard patio entry? Precast wins on speed, consistency, and ease.
Planning: measurements, rise/run, and step fit to your patio
Get the planning right and the physical install is almost foolproof. Rush the measurements and you'll end up with steps that are too tall, too short, or that dump you off the edge of your patio landing. Spend 20 minutes here and save yourself a lot of grief.
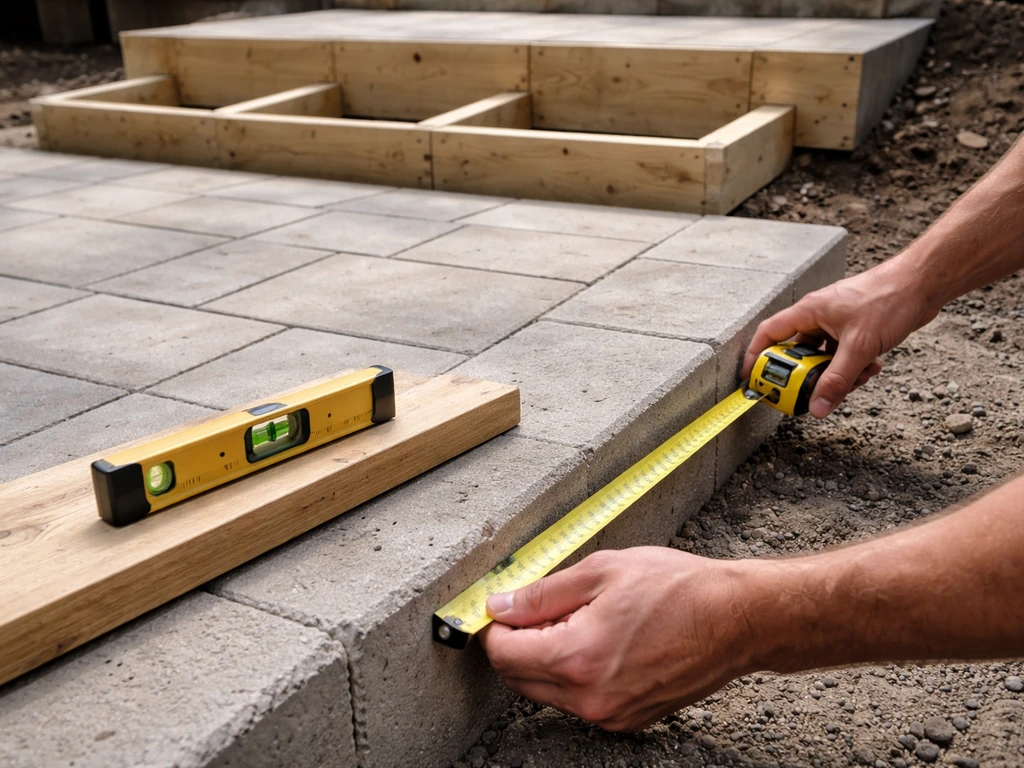
Measure your total rise first
Total rise is the vertical distance from the patio surface down to the finished grade at the base of the steps. Measure it with a level and a tape measure, running a level line out from the patio edge and measuring down to the ground. Be precise here. If your patio is 21 inches above grade, you need three risers at 7 inches each. If it's 22.5 inches, you still need three risers but at 7-1/2 inches each, which is right at the standard precast riser height.
Rise/run requirements from the IRC

The IRC sets the guardrails here: maximum riser height is 7-3/4 inches, minimum tread depth is 10 inches, and no riser within a single flight can vary from another by more than 3/8 inch. Landing depth in the direction of travel must be at least 36 inches for a straight-run stair. Most precast steps are manufactured close to the 7-1/2 inch riser standard, which keeps you comfortably under the 7-3/4 inch maximum. Check your local code, but IRC limits are a solid baseline almost everywhere.
Check your patio landing clearance
That 36-inch landing depth requirement matters more than people realize. Measure from the back of your door (or the edge of your patio slab) out to where the steps begin. If you're tight on landing depth, you may need to position the steps slightly differently or reconsider the unit width to stay compliant and safe.
Choose the right unit width and number of risers
Precast steps are sold by width and number of risers. Match the width to your patio opening, leaving a few inches on each side so the steps don't look pinched. Most suppliers offer units from 3 to 8 feet wide. Once you know your total rise, divide by the riser height of the unit you're considering to confirm the number of steps. If the math gives you a fraction, either adjust grade slightly at the base or choose a unit with a slightly different riser height.
Materials and tools you'll need
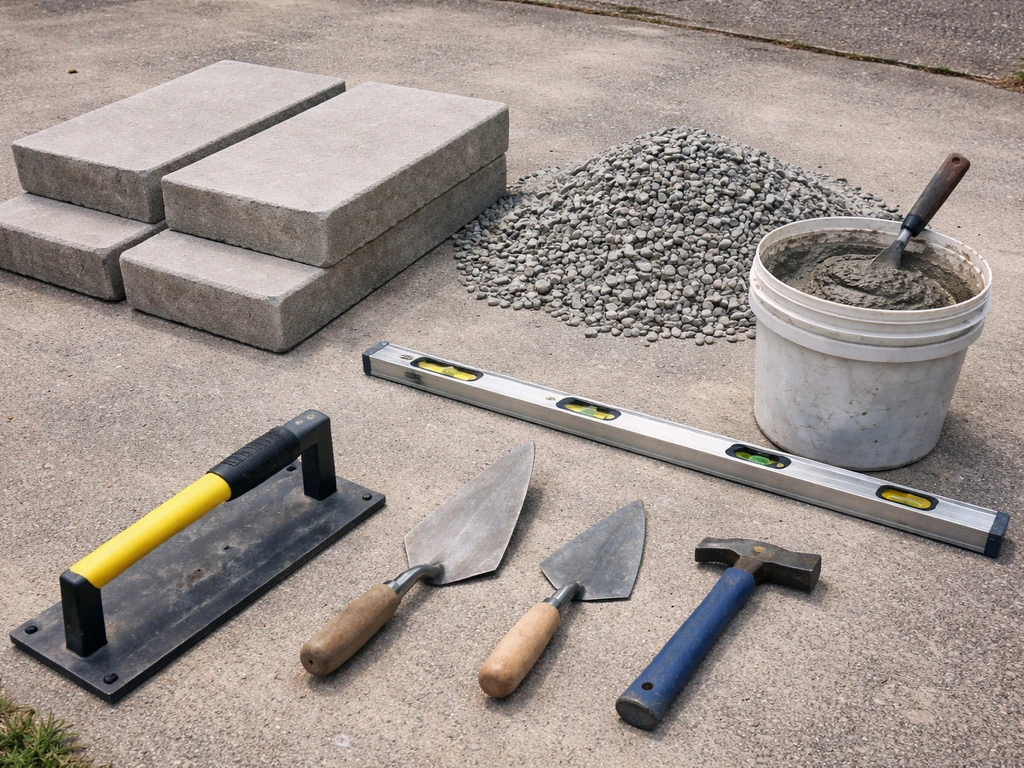
Most of what you need is basic, and you probably have half of it already. Here's a complete list so you're not making two trips to the hardware store.
- Precast concrete step unit(s), sized to your rise and width
- Compactable gravel (3/4" crushed stone), enough to fill the base area 6 to 12 inches deep
- Sand or concrete mix for leveling if needed under the gravel
- Type S mortar mix (for the mortar bed under and between the steps)
- Flexible joint sealant rated for exterior concrete (plus primer if recommended by the manufacturer)
- Plate compactor or hand tamper
- Level (4-foot level is ideal)
- Rubber mallet and pry bar
- Shovel and wheelbarrow
- Tape measure
- String line and stakes
- Safety gloves, eye protection, and steel-toed boots
- Concrete sealer (penetrating type recommended for exterior steps)
On tools: you'll need a way to move the precast unit into position. A single two-step unit can weigh 300 to 500 pounds or more. Rent a hand truck designed for heavy masonry, recruit two or three helpers, and use pipe rollers if you're moving across a patio surface. Don't underestimate this part. I've seen people get hurt because they tried to muscle a precast step with two people and no equipment.
Site prep: base, drainage, and leveling for stability
The base is where long-term stability is won or lost. Precast steps that settle, rock, or tilt almost always fail because the base wasn't done right, not because of the steps themselves. Take this section seriously.
Dig and grade the base area
Excavate the area where the steps will sit. Remove all organic material, topsoil, and any soft spots. The base needs to sit on stable subgrade. In general, plan to go at least 6 inches deep for your gravel base, and in freeze-thaw climates, extend the gravel base to at least 4 to 6 inches below your local frost depth. That extra depth is the difference between steps that stay level for a decade and steps that heave every spring.
Build the compacted gravel base
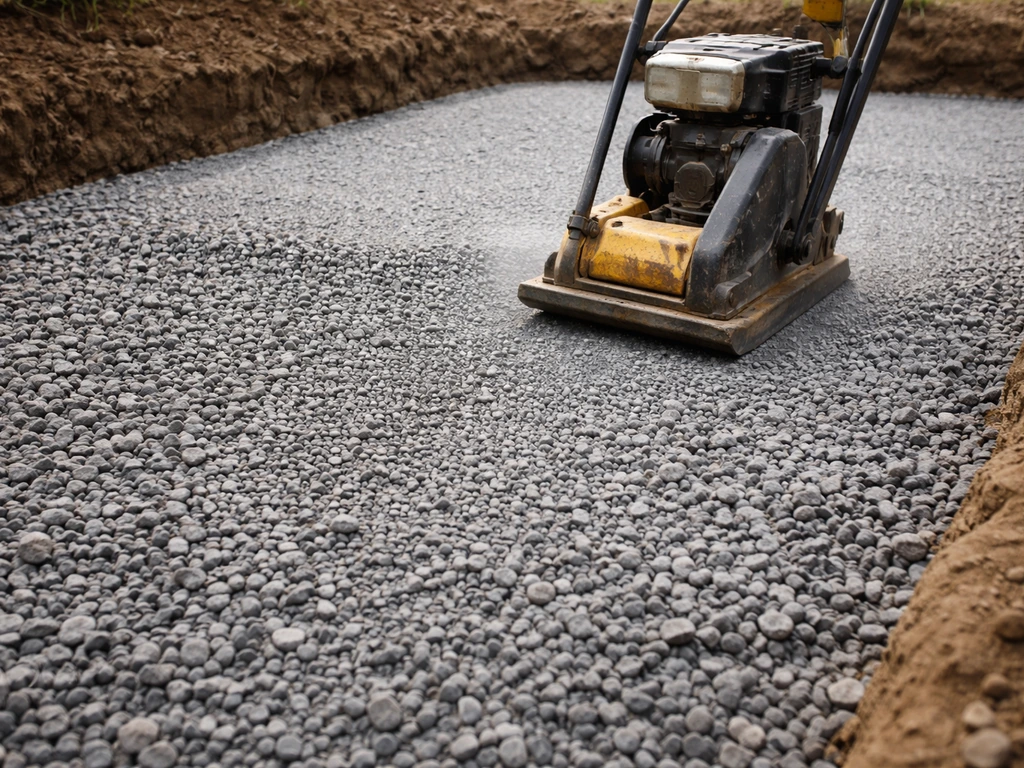
Fill the excavated area with 3/4-inch crushed stone and compact it in 3 to 4 inch lifts using a plate compactor or hand tamper. Don't dump it all in at once and tamp once. Each lift needs to be fully compacted before you add the next. When you're done, the surface should feel rock solid with no give. Make sure the grade slopes slightly away from the house (about 1/8 inch per foot) so water drains away from the patio foundation.
Final leveling surface
Once the gravel base is compacted and at the right height, you're ready for the mortar bed. Don't use loose sand as a final leveling layer for precast steps. The mortar bed you'll place during installation handles fine leveling. Your gravel just needs to be close to the right elevation.
Installing precast concrete patio steps
Here's where it all comes together. After the base is level and ready, follow the build steps on concrete patio to place the precast treads and finish the installation correctly. The process is straightforward but it moves fast once you start placing mortar, so have everything staged before you mix anything.
- Dry-fit the precast unit on the prepared base before adding mortar. Set it in position, check the alignment with your patio edge, and confirm the height is where you need it. Make any adjustments to the gravel base now.
- Mix Type S mortar to a stiff, peanut-butter consistency. Too wet and it won't hold the step; too dry and it won't bond. You're going for a 1/4 inch to 3/8 inch mortar bed layer under the step.
- Spread the mortar evenly over the gravel or concrete pad surface where the step will sit. Cover the entire footprint of the step, not just the edges.
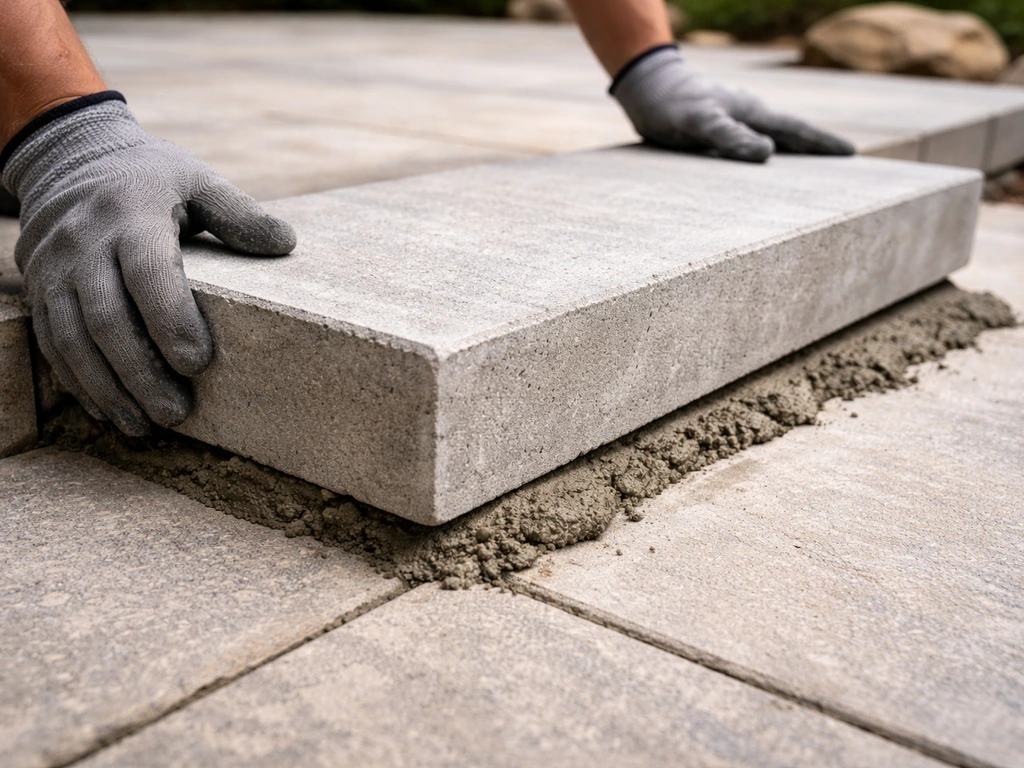
- With your helpers, set the precast unit onto the mortar bed in one controlled motion. Position it close to where you want it before setting it down, because sliding it on fresh mortar is harder than it sounds.
- Check level in both directions with your 4-foot level. Use a rubber mallet to gently tap the step into final position. Shim with small pieces of slate or tile if needed to get it perfect.
- Confirm the step-to-patio height transition: the top tread should be flush with or slightly below the patio surface, with no raised lip that could catch a foot.
- For multi-step units or stacked individual risers, check that each riser height is consistent. IRC allows no more than 3/8 inch of variation between risers in a single flight.
- Allow the mortar to cure for at least 24 hours before walking on the steps.
- Once cured, fill the joint between the precast steps and the patio slab with a flexible exterior-grade joint sealant (not rigid mortar). Use a primer if the sealant manufacturer requires it. A flexible sealant accommodates minor movement and prevents water infiltration far better than mortar alone at this joint.
That joint between the steps and the patio edge deserves extra attention. Rigid mortar at this joint cracks over time because the precast unit and the patio slab move independently, especially through freeze-thaw cycles. A flexible sealant rated for exterior concrete with good movement capability and adhesion is the right material here.
Fixing common problems in existing precast steps
If you're here because your existing precast steps are giving you trouble rather than installing new ones, this section is for you. Most precast step problems fall into a few predictable categories, and most of them are fixable without replacing the whole unit.
Settling and unevenness
Settling almost always means base failure. The gravel base compacted poorly, there's erosion underneath, or in cold climates, freeze-thaw heave shifted things over time. To fix it, you'll need to lift the step (a pry bar, pipe rollers, and helpers), re-excavate and re-compact the base, and reset the unit on a fresh mortar bed. It's more work than it sounds, but it's the only real fix. Shimming without addressing the base just delays the next failure.
Cracks
Surface cracks less than 1/4 inch wide can be cleaned out and filled with a flexible polyurethane or epoxy crack filler. Wider cracks, cracks that run through the full depth of a tread, or structural cracks in a load-bearing area are signs you should consult the NPCA's guidance on whether repair or replacement is appropriate. Don't just fill a major structural crack and call it done. If a tread is cracked through, it's a trip hazard and a liability.
Spalling
Spalling (surface flaking or pitting) is typically caused by freeze-thaw damage or deicing salt. Clean the area thoroughly, apply a concrete bonding agent, and fill with a polymer-modified repair mortar. Then seal the entire step surface to prevent future moisture intrusion. If spalling is deep or widespread, replacement may be more cost-effective than patching every inch of the surface.
Loose or misaligned steps
If the step rocks or has shifted out of alignment, the mortar bond has failed. Check whether the base is still solid. If it is, you can clean off the old mortar from both surfaces and reset the step with a fresh mortar bed. If the base has failed too, address that first as described above.
Failed joint sealant
The joint between the steps and the patio is the first thing to go. When it cracks, water gets in and speeds up every other type of damage. Remove the old sealant completely (a utility knife and wire brush do the job), clean the joint, apply primer if required, and refill with fresh flexible exterior sealant. PCI’s maintenance guidance includes inspecting precast joint sealants and removing and replacing damaged sealant as needed to keep water out replace damaged flexible exterior sealant. This is a 30-minute job that's absolutely worth doing at the first sign of failure.
Cleaning, sealing, and refinishing for durability and a better look
New or repaired precast steps will look and perform a lot better with proper sealing, and the process is simple. Don't skip this step.
Clean first, always
Pressure wash the steps thoroughly and let them dry completely before applying anything. For staining or efflorescence (the white mineral deposits that appear on concrete), use a diluted muriatic acid wash or a dedicated concrete cleaner. Rinse well and neutralize with a baking soda solution if you go the acid route. Don't seal over a dirty or damp surface.
Choose your sealer type
For exterior patio steps, you have two main categories to choose from: penetrating sealers and film-forming sealers. Penetrating (also called impregnating) sealers soak into the concrete and create a moisture barrier from within, without changing the surface appearance much. They're excellent for protecting against moisture, freeze-thaw damage, and deicers. Film-forming sealers sit on the surface and can add sheen or color, but they can also become slippery when wet and may peel over time on horizontal surfaces exposed to traffic.
| Sealer Type | How It Works | Best For | Appearance Change | Durability |
|---|---|---|---|---|
| Penetrating/Impregnating | Soaks into pores, creates subsurface barrier | Freeze-thaw climates, high foot traffic, deicing salt exposure | Minimal to none | Long-lasting, typically 5+ years |
| Film-Forming (Acrylic) | Sits on surface, forms protective film | Color enhancement, decorative look | Adds sheen, can enhance color | 2-5 years, may need more frequent reapplication |
| Epoxy/Polyurethane (Film) | Hard surface coating | High durability surfaces, color change | High gloss or satin | Very durable but can peel on exterior horizontals |
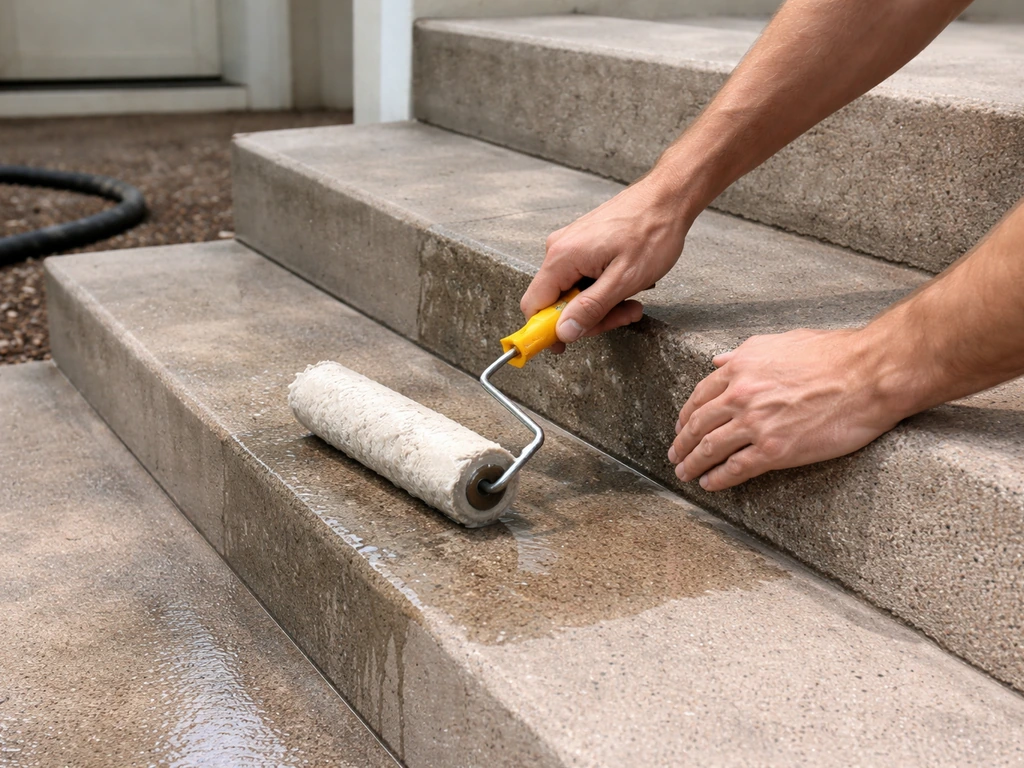
For most exterior patio steps, a penetrating silane-siloxane sealer is the practical choice. It protects without making the surface slippery or changing the look. Wait at least 30 days after new installation before sealing so the concrete is fully cured. After that, check the sealer condition every year or two and reapply when water stops beading on the surface.
Refinishing and staining
If you want your precast steps to match a stained or colored patio, acid staining or concrete overlays are both options. Acid stain reacts with the concrete chemistry to produce a mottled, variegated color that's permanent and won't peel. Overlays let you apply a thin new surface layer tinted to match. Both work well on precast surfaces as long as the concrete is structurally sound and properly prepared. If your existing patio already has a decorative treatment like stamped concrete or a colored finish, match the sealer type and sheen level on the steps to keep things cohesive.
Your next steps: what to buy, timeline, and a quick checklist
If you're ready to move forward, here's how to proceed efficiently. Start by measuring your total rise and your patio opening width today. Call two or three local precast suppliers with those numbers and ask for a quote on units that match. Precast steps are often a stock item, but custom widths may take a week or two to manufacture, so order early.
On timeline: expect to spend one day on excavation and base prep, and a second day on installation. Allow 24 hours for the mortar bed to cure before walking on the steps, and wait 30 days before sealing new concrete. Total elapsed time from measurement to sealed, finished steps is typically 5 to 7 days including curing waits.
Pre-installation checklist
- Measure total rise from patio surface to finished grade at the base of the steps
- Confirm patio landing depth is at least 36 inches in the direction of travel
- Choose step width to match your patio opening (3 to 8 feet available from most suppliers)
- Verify the unit's riser height keeps you at or under 7-3/4 inches per IRC
- Order your precast unit and allow lead time for custom widths
- Rent a plate compactor and heavy-duty hand truck
- Excavate and compact gravel base to below frost depth in cold climates
- Gather Type S mortar, joint sealant, primer, and sealer before install day
- Have at least two helpers available for the day of placement
- After install, wait 24 hours before traffic and 30 days before sealing
Precast concrete patio steps are genuinely one of the more manageable DIY projects in the concrete patio world. The heavy lifting (literally) is the challenging part, but the installation process itself is logical and forgiving if your base is right. Get the measurements correct, build a solid compacted gravel base, use a proper mortar bed, seal the joint flexibly, and seal the surface when curing is done.
If you are matching an existing decorative finish, a stamped concrete patio with steps may be a better fit than a precast-only approach a proper mortar bed. Do those things and you'll have steps that are solid, code-compliant, and good-looking for many years. For a full concrete patio step by step walk-through, follow the same planning, base prep, placement, and sealing sequence outlined throughout this guide.
FAQ
Can I install precast concrete patio steps directly onto existing concrete or pavers?
Usually no. Precast steps need stable subgrade and the correct base thickness, if you mortar onto existing concrete you risk trapping moisture and creating uneven support that can lead to rocking. If the existing slab is structurally sound and you can verify drainage and thickness for the mortar and joint area, you still typically need an engineered approach, often involving removal to expose subgrade for the gravel base.
What should I do if my total rise does not divide evenly by a typical 7-1/2 inch riser?
Don’t “cheat” by making one riser wildly different. Adjust the grade at the base slightly (within your drainage and code limits) or choose a unit with a riser height that matches your layout. If you end up outside guardrails like maximum riser height or tread depth, stop and re-plan rather than forcing the numbers.
How do I confirm the landing depth requirement if my steps sit next to a door or landing?
Measure from the finished edge of the patio slab (or the back of the door area you’re using as your reference point) out in the direction of travel, then compare it to the 36 inch minimum landing depth. If you are short, a wider unit can sometimes shift step placement, but only if it doesn’t violate the opening width allowance and keeps side clearances looking balanced.
Should I use sand or leveling screed to fine-tune the height during installation?
Avoid loose sand as the final leveling layer. Loose sand compresses unevenly and can cause settlement and misalignment. Use the gravel base to get close to elevation, then rely on the mortar bed for final leveling, with the base compacted rock-solid before you place mortar.
How much slope away from the house is enough for drainage on precast steps?
A gentle slope is the goal, commonly around 1/8 inch per foot away from the foundation. The key is consistency across the base, so the steps sit level left-to-right and only have the intended drainage slope front-to-back. Large or uneven slope can create an uncomfortable walking surface and accelerate joint failure.
What’s the best way to prevent the steps from getting slippery after sealing?
Choose a penetrating (impregnating) sealer for most exterior step use because it typically preserves traction. If you ever consider a film-forming product for color, test it on a small, out-of-sight area since some finishes can become slick when wet. Also ensure the tread nosing texture is unobstructed by excess sealer.
When can I use de-icing chemicals on new precast concrete steps?
Wait until the concrete is fully cured and the sealing system is established, and then choose de-icers that are less aggressive on concrete. If spalling has been an issue in your climate, prioritize a penetrating sealer and keep salt and brine runoff off the joint line. Avoid piling snow or salty slush at the step-to-patio joint.
Is it okay to patch surface cracks with epoxy or polyurethane if the steps keep settling?
Surface crack fillers can help for minor, non-structural cracking, but they do not fix movement. If the step rocks, tilts, or the joint is opening, you must address the base stability first. Filling cracks before correcting settlement is a common mistake because the repair often fails when the concrete flexes.
What signs tell me I need to repair the base instead of resetting the unit?
If you find active rocking, repeated joint cracking, or voids and washout underneath the base, the gravel and drainage layer likely failed. A fresh mortar reset is only appropriate when the base is still solid. If you suspect freeze-thaw heave or erosion, re-excavate, re-compact, and reset rather than shimming over old material.
How do I handle efflorescence and stains before sealing, especially if the steps look clean but white residue remains?
Efflorescence can be stubborn, even after pressure washing. Use a concrete-specific cleaner or a carefully diluted acid wash approach, then rinse thoroughly and neutralize if acid is used. The concrete must be fully dry before sealing, otherwise the sealer can trap moisture and accelerate discoloration or adhesion failure.
What’s the safest way to move and set a heavy precast step unit?
Plan for equipment and control, a heavy unit can exceed 300 to 500 pounds per run depending on size and design. Use a heavy-duty masonry hand truck and, if you must travel across the patio surface, use pipe rollers. Recruit enough helpers so nobody is “catching” the load with their feet, and keep hands clear of pinch points around the joint area.
How long should I wait after installation before sealing the joints and the step surface?
Treat joint sealing and surface sealing as separate timing decisions. Most guidance in the article is to wait at least 30 days before sealing new concrete so curing completes, and you should only seal joints when the installation mortar and surfaces are fully dry. If you seal too early, you can trap moisture and undermine adhesion.