
You can absolutely build a stamped concrete patio with steps yourself, and when it's done right, it looks like a professional landscape feature that ties the whole yard together. The keys are getting your step geometry right before you pour a single drop of concrete, choosing a stamp pattern and release color that actually works on both horizontal treads and vertical riser faces, and pouring the steps and patio in the correct sequence so you get tight, consistent joints. If you're starting from scratch, plan your cement patio steps layout and base so the stamped treads and risers come out level, durable, and safe. Miss any one of those and you end up with steps that look mismatched, crack at the edges, or become a slip hazard after the first winter.
Stamped Concrete Patio With Steps: DIY Guide and Ideas

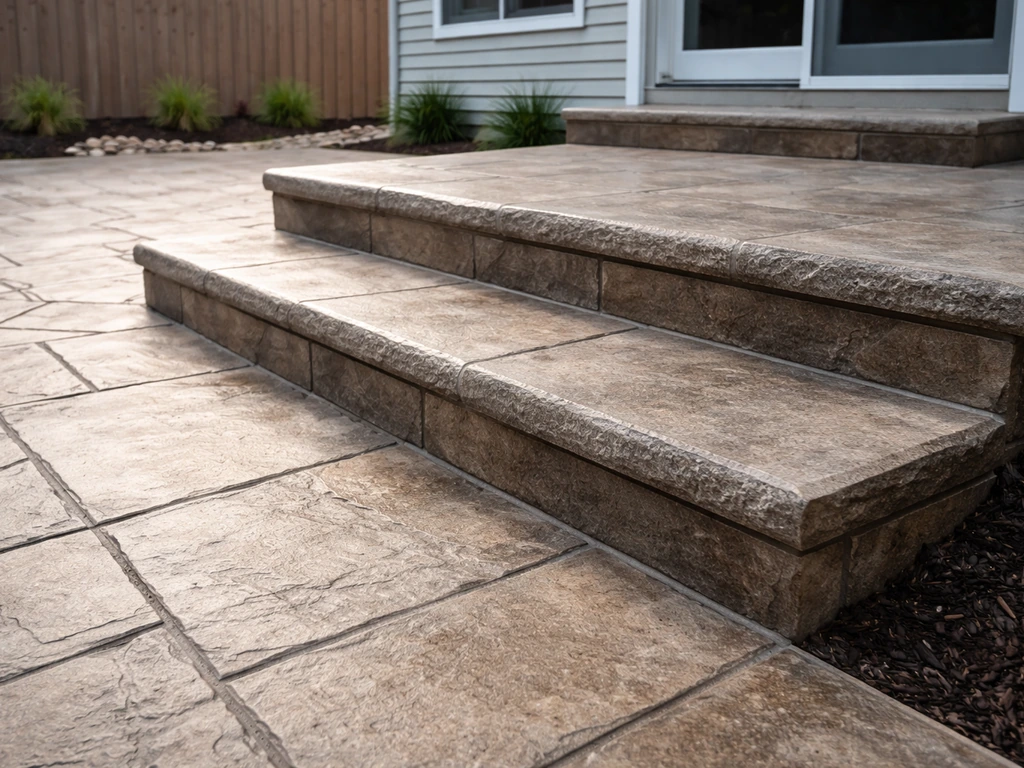
Plan your step layout first: treads, risers, landings, and slope
Before you order a bag of concrete, grab a tape measure and figure out your total rise. That's the vertical distance from the finished grade at the bottom of the steps to the finished surface of the patio. Divide that number by a comfortable riser height. The classic DIY rule of thumb is 7 inches of rise and 11 inches of tread depth, which creates a natural stride most people find comfortable. The IRC and ADA guidelines generally land in the 4–7 inch riser range with an 11-inch minimum tread depth, so the 7/11 formula keeps you safely inside those limits for a residential project.
Here's how the math works in practice. Say your total rise is 21 inches. That's exactly three 7-inch risers, each with an 11-inch tread, so your steps project 33 inches out from the patio edge. If your rise is 19 inches, don't try to squeeze it into three unequal steps, that's a trip hazard. Round to four risers at 4.75 inches each. Consistent riser height is non-negotiable. Even a quarter-inch variation between risers gets people stumbling.
Width matters too. A patio steps width of less than 48 inches feels cramped for everyday use. I usually recommend going 60 inches or wider if your budget allows, because wider steps look more intentional and give you room to stamp a full pattern repeat on each tread.
Plan a landing at the top of the steps where they meet the patio. The landing needs to slope slightly so water drains away from the house and off the steps rather than pooling at the top riser and seeping under the slab. [IRC 2021 says the walking surface slope in the direction of travel should be no steeper than 1 in 20 (5%) for a drainage slope](https://codes. iccsafe.
org/content/IRC2021P2/chapter-3-building-planning), but in practice you only need about 1/8 inch per foot (roughly 1%) to shed water reliably. [I aim for about 1/4 inch per foot (2%) on the landing and the patio field, which matches Building America's recommendation for slabs near the house. ](https://basc. pnnl.
gov/resource-guides/patio-slabs-porch-slabs-walkways-and-driveways-slope-away-house) That slight pitch is invisible to the eye but makes a big difference over 10 years of freeze-thaw cycles.
Picking a stamp pattern, color, and texture that works on steps
Stamped concrete on a flat patio slab and stamped concrete on a step tread are not the same operation. On a tread, the stamp has to wrap a horizontal surface that's only 10–11 inches deep. On a riser face, you're pressing into a near-vertical surface 4–7 inches tall. Both surfaces need to look cohesive, but they have different traction and safety requirements.
Patterns that look great and stay safe
Ashlar slate, random stone, and large-format flagstone patterns are the most popular for patios with steps because the joint lines on the tread naturally break up a smooth surface and add grip texture. Avoid very fine-texture patterns like smooth wood plank on the treads, they look beautiful on a flat slab but become dangerously slick when wet. Running bond brick is a solid middle-ground choice: it tiles cleanly across the tread width and the grout joint lines act as small drainage channels.
For the riser faces, you have a few good options. You can press a flex riser stamp (a dedicated thin mat designed for vertical faces) to carry the main pattern down the front of each step. Alternatively, you can leave the riser faces smooth with a contrasting color, this is actually a popular design choice that makes the steps read clearly from a distance and is easier to execute cleanly. A third option is a simple broom finish on the risers while stamping only the treads.
Color and release agent choices
Integral color (mixed into the concrete) is your baseline. For steps, pick a color that's one shade lighter than you think you want, steps get more wear and the sealer amplifies the tone significantly. Common choices are sandstone, terra cotta buff, or charcoal gray, depending on your house color.
On top of integral color, a powdered or liquid release agent is broadcast over the surface before stamping to prevent the mat from sticking and to add the secondary color that creates depth. On steps, I like to use a slightly darker release on the treads than on the flat patio field, this highlights the horizontal surfaces and makes each step visually obvious, which is a safety advantage.
If you want a bold contrast look, go with a dark charcoal or espresso release on the treads against a warm buff base. That combination reads as almost stone-like and photographs incredibly well.
A quick pattern comparison
| Pattern | Works on Treads | Works on Risers | Slip Resistance | Difficulty |
|---|---|---|---|---|
| Ashlar slate | Yes | Yes (flex mat) | Good | Moderate |
| Random flagstone | Yes | Yes (flex mat) | Good | Moderate |
| Running bond brick | Yes | Yes (flex mat) | Very good | Easy |
| Wood plank | Yes (flat only) | Not recommended | Poor when wet | Moderate |
| Smooth exposed aggregate | Yes | No | Excellent | Easy |
| Cobblestone | Yes | Yes (flex mat) | Very good | Hard |
Site prep and building the base for patio and steps
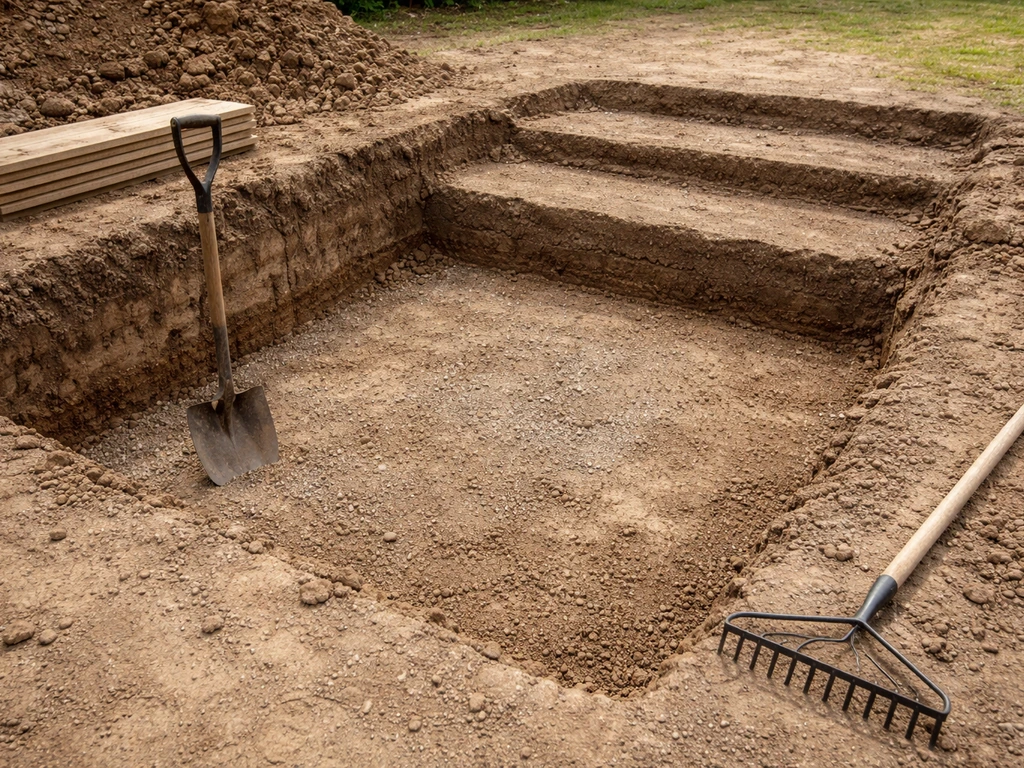
Good base work is what separates a patio that looks great for 20 years from one that starts cracking at the step edges within three years. I've seen too many DIYers rush this part because it's not glamorous, and they always regret it.
- Excavate the patio area to a depth of 8–10 inches below finished grade (4 inches of compacted gravel base plus 4 inches of slab, or 6 inches of slab if you want more durability). For the step area, excavate even deeper — the step footing needs to bear on undisturbed or heavily compacted soil.
- For the step footings specifically, dig down to at least 12 inches below finished grade, or below your local frost depth — whichever is deeper. In cold climates, this is the most important detail. Frost heave will crack steps that aren't deep enough.
- Lay 4 inches of compacted crushed stone (3/4-inch clean gravel or crusher run) across the entire patio area and the step footing area. Compact in two 2-inch lifts with a plate compactor. Don't skip the compaction — loose base material is the number one cause of slab settlement.
- Install edge forms for the patio perimeter at the correct finished height, accounting for your 1/4 inch per foot drainage slope away from the house.
- Set your step forms in place and verify all riser heights and tread depths before pouring anything.
- Add a vapor retarder (6-mil poly sheeting) over the gravel base under the main patio slab if the slab is near the house or in a damp location.
One thing I always do before pouring steps: I dig out a small pocket at the base of the bottom riser so the concrete has a footing below grade. This anchors the bottom step and prevents it from kicking out over time, which is a very common failure point on DIY steps that were just poured on top of the grade.
Forms, reinforcement, and the right pour sequence
Building the forms
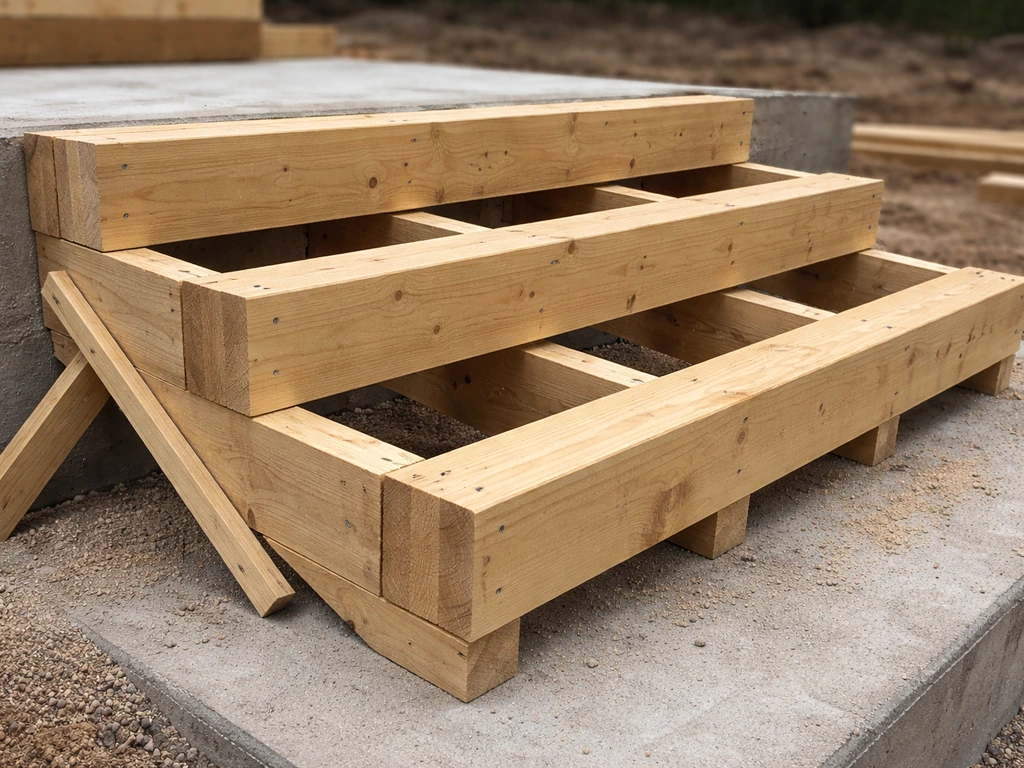
Use 2x8 or 2x10 lumber for step risers depending on your riser height. Brace every riser board firmly because wet concrete exerts enormous lateral pressure, if a riser form blows out mid-pour, you'll have a nightmare mess and no clean edges. Screw the forms together rather than nailing them so you can pull them off cleanly once the concrete sets. Coat the inside face of every form board with form release oil or cooking spray so you can strip them without tearing the concrete surface.
For the step profile, you want to create a slight nose (overhang) at the front of each tread, maybe 3/4 to 1 inch. This gives the step a finished, stone-like look and gives you a place to stamp a border or edge detail. Use a rounded edge form tool or a piece of half-round molding screwed to the inside of the riser form to create this profile. It also makes the tread edge easier to bull-float and stamp cleanly.
Reinforcement
For the main patio slab, #3 or #4 rebar on 18-inch centers in both directions is standard for residential work. For steps, run rebar through the entire step structure connecting it to the patio slab's rebar grid. This is critical, if the steps and patio aren't tied together with steel, they can separate at the joint and crack. I usually run two horizontal bars through each tread, tied to vertical bars that anchor into the footing below grade. Use dobies or rebar chairs to hold the steel 2 inches off the bottom of the form so it ends up embedded in the middle of the slab, not sitting on the ground.
Pour sequence: steps first, then patio
This is probably the most important technical decision in the whole project. Learn the full, step-by-step process for how to build concrete patio steps so your risers, treads, joints, and stamping all come out consistent. Pour the steps before the main patio slab. When you build steps on concrete patio surfaces, planning the pour order helps you avoid a weak cold joint.
Here's why: if you pour the patio first, you have to pour the steps against an already-set slab, which creates a cold joint that's structurally weaker and more likely to crack. By pouring steps first, you can tie the step concrete into the patio pour and get a monolithic structure. Use this concrete patio step by step approach to plan your layout, pour correctly, and finish the steps so they stay safe and consistent for years.
Pour each step from the bottom riser up, consolidating the concrete with a rod or vibrator to eliminate voids at the corners. Then pour the patio slab and consolidate it against the top of the step forms. The connection point at the top riser becomes a natural expansion joint location that you'll tool later.
Stamping the treads and risers without making the common mistakes
Stamping a flat patio slab is forgiving compared to stamping steps. You're working on narrow surfaces, fighting gravity on the riser faces, and racing the clock because the concrete sets faster in thin sections. Here's how to handle it without losing your mind.
Timing the stamp
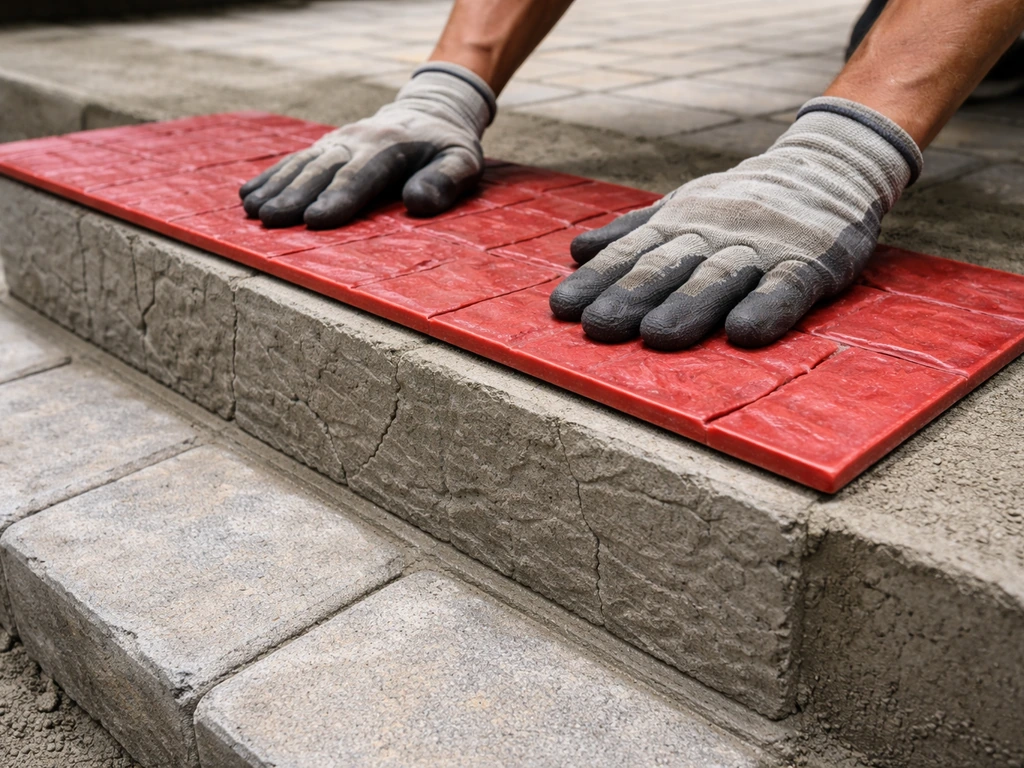
Concrete is ready to stamp when a footprint leaves an impression about 3/16 to 1/4 inch deep without sinking in further. On steps, the riser faces and the edges of treads set faster than the main slab because they have more exposed surface area. Start stamping the steps and step edges before you work toward the center of the patio field. If you let the tread edges get too firm before stamping, you'll get incomplete impressions right at the most visible part of the step.
Stamping technique on treads
Press the stamp mat firmly and evenly across the tread. Because treads are only 10–11 inches deep, you usually won't get a full pattern repeat, align the mat so the most prominent design element (the center of a stone or the middle of a plank) is visible, and let the edges trim naturally. Use a hand tamper or rubber mallet to get even pressure across the full mat. Don't rock the mat, that smears the pattern and creates double impressions. Lift straight up.
Stamping the riser faces
Use a flexible riser mat and work quickly. Press the mat against the riser face with your hand and a float, holding even pressure for 5–10 seconds. The concrete on the riser face is at a different cure stage than the tread, so test a small corner first. If the impression smears, wait another 5 minutes. If it barely dents, you're too late and should leave the riser smooth with a float finish or a light broom drag. Trying to stamp a riser that's too firm is worse than leaving it plain, it creates ugly, patchy texture.
Mistakes I've seen (and made)
- Starting on the patio field and running out of time to stamp the treads — always do steps and edges first.
- Using too much release agent powder on the tread surface, which builds up in the stamp joints and makes them look sloppy after sealing.
- Forgetting to re-broadcast release on the mat between impressions, causing it to stick and pull up the surface.
- Not having enough hands on site — stamping steps well really requires two people: one positioning and pressing the mat, one working the edges with a detail roller.
- Skipping the detail roller on the step nosing, which leaves a ragged edge right at the most visible part of the step.
Finishing for safety, grip, and durability
Traction treatments for treads
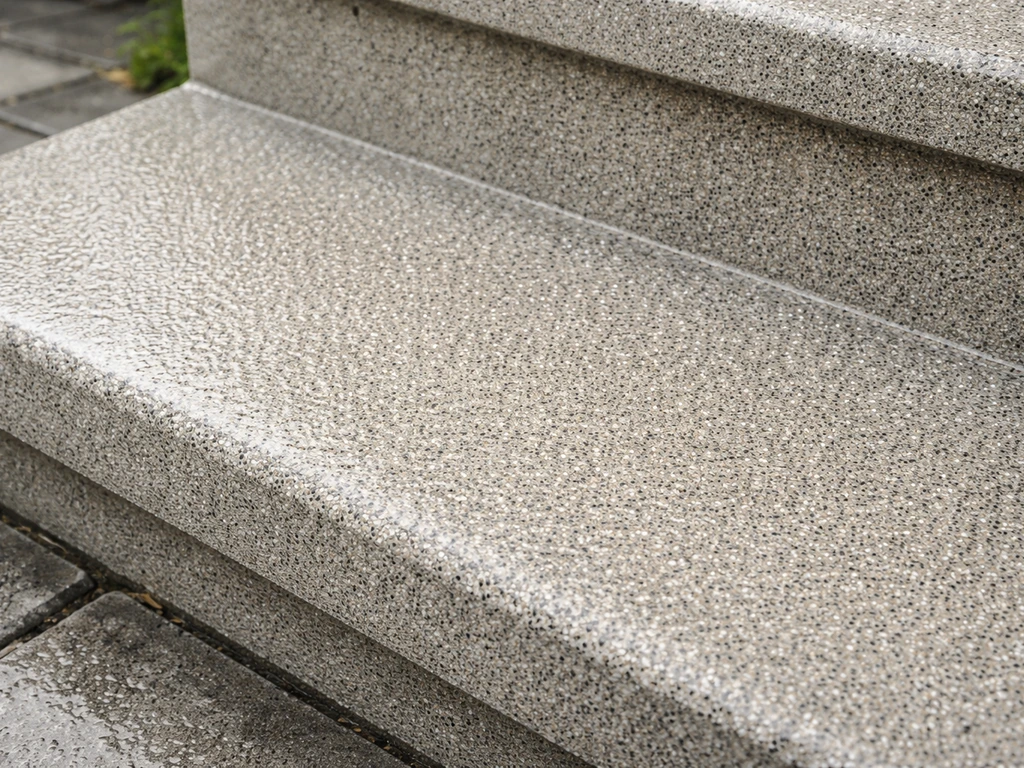
Even with a textured stamp, a sealed concrete tread can be dangerously slippery when wet. There are three ways to address this. First, add a shark-grip or aluminum oxide additive directly to the sealer before applying, this is the easiest method and the one I use on every project. Second, broadcast fine silica sand over a just-applied coat of sealer before it dries. Third, add a light broom drag across the tread surface after stamping but before the concrete fully sets, working perpendicular to the walking direction. The broom drag is subtle enough that it doesn't ruin the stamp pattern but adds measurable grip.
Bevel the tread nosing
After stripping the riser forms (usually 24–48 hours after the pour), run a hand edger or angle grinder with a diamond cup wheel along the front edge of each tread to create a small bevel, about 1/4 to 3/8 inch. This breaks the sharp corner, which would otherwise chip and spall within a season or two of foot traffic and freeze-thaw cycles. A beveled nosing also gives you a clean line to apply masking tape against if you're painting or staining the risers a contrasting color.
Control and expansion joints
Cut a control joint where the top step meets the patio slab within 12–24 hours of pouring using a circular saw with a diamond blade, cutting 1/4 of the slab depth. This is the most likely place for shrinkage cracking, and by sawing a joint there, you control where the crack happens. Fill the joint with a polyurethane or silicone caulk (not grout or rigid filler) so it can move with seasonal temperature changes. Also cut control joints in the patio slab on a grid of no more than 10 feet in each direction.
Sealing the steps and patio
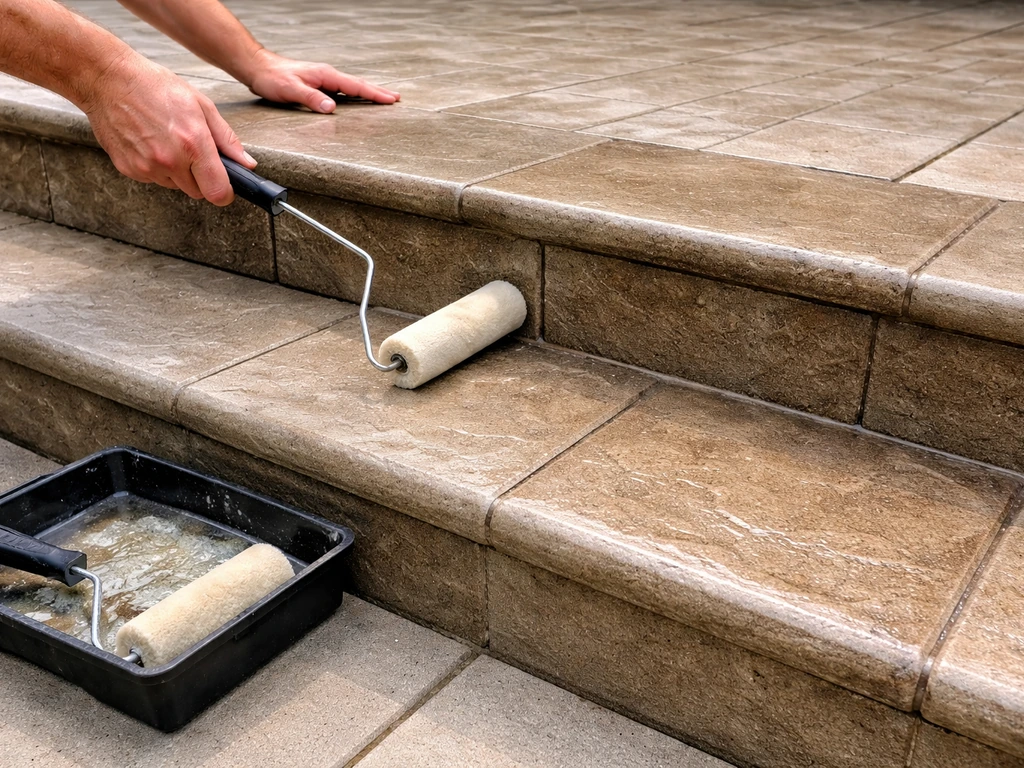
Wait at least 28 days after the pour before applying sealer, concrete needs to cure fully before you trap moisture under a sealer film. Use a solvent-based or water-based acrylic sealer rated for stamped concrete. On steps, I prefer a solvent-based sealer at around 25–30% solids content, which builds a slightly thicker film and provides better water and salt resistance. Apply two thin coats with a roller or sprayer, letting the first coat dry completely before the second. Don't apply in direct sun on a hot day, the sealer skins over too fast and traps bubbles. Reapply sealer every 2–3 years, or whenever water stops beading on the surface.
Design ideas worth trying
Once you understand the construction mechanics, there's a lot of room to make the steps genuinely beautiful. Here are some ideas that I've seen executed well and that tie the steps visually into the overall patio design.
- Pattern continuation: Use the same stamp pattern and release color on the treads and the patio field so the steps look like they grow organically out of the patio surface. This works especially well with large-format flagstone or random ashlar slate.
- Contrasting riser color: Stamp the patio and treads in a warm sandstone and leave the riser faces smooth with a charcoal or slate gray stain. The dark risers make each step edge pop visually — great for evening visibility too.
- Border treatment on treads: Stamp a 3-inch border along the outer edges of each tread using a smaller texture mat or a running bond brick pattern, keeping the center of the tread in the main patio pattern. This frames each step like a picture.
- Wood-look planks on wide steps: On a 6-foot-wide or wider step, a wood plank stamp running parallel to the riser creates a deck-like look that's popular with composite decking adjacent to the patio. Pair it with a brown or cedar stain for extra realism.
- Multi-level landings: If your grade change is large, consider breaking the steps into two flights of three risers each with a wider landing in between. The landing gives you space for a planter or lighting and makes the transition feel less steep.
- Integral color in the risers only: If you're using a neutral gray or buff for the main patio, adding a red oxide or terra cotta integral pigment to a separate riser pour (if doing risers as a separate pour) creates a rich accent that echoes brick or natural stone.
Fixing worn, cracked, or faded step areas
Steps take more abuse than any other part of a stamped concrete patio. Concentrated foot traffic, metal snow shovels, ice melt chemicals, and freeze-thaw cycles all attack the tread edges and riser faces. Here's how to handle the most common problems.
Spalled or chipped tread edges
Surface spalling and chipped nosing edges are the most common step failures. If the damage is less than 1/2 inch deep, you can patch with a vinyl concrete patcher or a polymer-modified repair mortar. Chip out any loose material with a chisel, clean the area with a wire brush, wet the substrate, apply a bonding agent (let it go tacky), then pack in the patching compound and finish to match the tread surface.
Feathered edges almost always fail, get at least a 1/4-inch-thick repair. For a stamped surface, press a piece of your original stamp mat into the fresh patch to texture it before it sets. Color-matching is the hard part. Use a concrete stain or tinted sealer over the patch after it cures to blend it into the surrounding surface.
Cracks at the step-to-patio joint
A crack running along the line where the top step meets the patio slab is almost always a control joint that was never cut, or a cold joint that moved. Fill it with a self-leveling polyurethane caulk in a color that matches your concrete. Don't use hydraulic cement or grout, it's too rigid and will crack out again within a season. If the crack is wider than 1/4 inch or has vertical displacement (one side is higher than the other), you have a settlement or heave issue that needs investigation before patching.
Faded color and dull surface
If the stamped pattern looks flat and faded, the sealer has failed or worn through. Start by pressure-washing the steps at low pressure (under 1500 PSI) to remove dirt and any remaining sealer residue. If old sealer is still bonded but hazy, use a xylene-based sealer rejuvenator, it re-emulsifies the existing film and restores gloss. If the sealer is completely gone, apply a fresh coat of compatible acrylic sealer.
If the color itself is faded (not just the sealer), apply a concrete stain in the original base color before resealing. Acid stains work on old concrete by chemically reacting with the surface, they give a more translucent, variegated look. Water-based stains give more opaque, consistent coverage, which is usually better for color correction.
Sealing failures and salt damage
If you see white efflorescence (salt deposits) or pitting on the step surfaces, deicing salt has been getting under a failed sealer. Strip the old sealer completely using a chemical stripper or mechanical grinder, neutralize and clean the surface, let it dry for several days, and apply a penetrating silane-siloxane sealer as a base coat before reapplying the topcoat acrylic. The penetrating sealer soaks into the concrete matrix and blocks water and chloride intrusion, which gives you a second line of defense when the topcoat eventually wears. Going forward, switch to sand or kitty litter for winter traction on the steps and avoid chloride-based deicers entirely on stamped concrete.
If you're approaching this project as a repair rather than a new build, and the existing steps are significantly uneven or structurally failed, it may be worth looking at your options for adding new steps off an existing patio slab, whether that's pouring new concrete steps, using precast units, or even building with block or wood. If you prefer to avoid a full pour, precast concrete patio steps can be a faster option that still matches your site prep and finishing plan. Each approach has its own tradeoffs in terms of cost, appearance, and how well it matches an existing stamped surface. But if the structure is solid, the repair and refinishing steps above can get you back to great-looking, safe steps without tearing anything out.
FAQ
Can I add stamped concrete steps to an existing stamped patio slab, or will it always crack at the joint?
Yes, but only if you can control the interface. Keep the new tread edge tight to the existing slab and tie the step reinforcement into the slab rebar grid, or drill and epoxy dowels into the slab if there is no rebar grid exposed. Then treat the joint as a moving connection, tool it for alignment, and use the same caulk approach (polyurethane or silicone) at the step-to-slab transition so the repair can expand and contract without opening.
What de-icers are safest for a stamped concrete patio with steps?
For winter traction, sand or kitty litter are the safest choices because they do not carry chlorides that can push through sealer failures. If you do use an additive, choose a non-chloride deicer and avoid dumping it in large piles that sit wet on the tread, since concentrated brine accelerates sealer breakdown along stamped edges.
How do I handle rail posts and anchoring on a stamped concrete patio with steps?
If your design needs a handrail, align the rail posts with solid framing and concrete reinforcement, not just the concrete skin. Plan to set sleeves or anchor hardware during the pour or drill after curing and use an epoxy anchor system rated for cracked or uncracked concrete as applicable. Also verify clearances so the tread nosing does not interfere with where feet land.
What’s the most common mistake that makes stamped step noses chip quickly?
Do not skip a small bevel on the tread nose. If you skip it, the sharp edge is the first place that chips during freeze-thaw and from shovels. When you bevel, also keep the stamped pattern aligned to the front edge so you do not end up with a “smudgy” lip where extra paste grabs the stamp.
Why does a repaired, stamped step look darker or lighter than the surrounding concrete?
If you see patch lines or shadowing after sealing, it usually comes from color mismatch between the integral base, release, and the patch topping used to blend repairs. The practical fix is to blend with stain or tinted sealer over the cured patch, then reapply sealer to the whole tread area (not just the patch) so sheen and tone age evenly.
Can I keep the risers smooth for looks but still make the steps safe?
Yes, but the riser design affects slip risk. For stairs, prefer a textured tread (even if the riser is smooth) and avoid very fine stamp textures on risers and treads if your climate gets frequent wet snow. If you leave risers smooth for contrast, add grip where people step (tread face) using either sand additive in the sealer or a light silica sand broadcast over the stamped surface.
What do I do if the stamp starts smearing on the step faces while other areas are still stamping fine?
If the risers and treads cure at different rates, you can end up with smearing or partial impressions. Start stamping on the step edges first, test a corner for readiness, and if the impression smears, delay and either proceed with a softer timing or finish the riser as a float or light broom texture rather than forcing a full stamp when it is too late.
Can I stain or tint over stamped concrete steps instead of re-stamping or re-sealing?
You can, but treat it as a system, not a cosmetic change. Matching the base color alone will not replicate the release-depth look, so plan to color-correct the entire step tread area with a tinted sealer or stain, then seal the full set of treads and adjacent patio field to keep the sheen and tone consistent over time.
How much slope should the top landing have to prevent water pooling at the top step?
Yes, and it is mainly about drainage path. Keep the landing pitch directed away from the house, avoid ponding at the top riser, and ensure the slope transition is continuous so runoff does not chase into the step joint. If water pools, expect efflorescence and early sealer failure along the riser-to-tread edges.
When a crack forms at the top step meeting the patio, when should I investigate the foundation instead of just filling it?
If you have a vertical displacement (one side higher), patching alone will not last. That indicates settlement or heave, usually from inadequate base or poor load transfer at the step footing connection. The decision aid is: if the crack moved or there is a noticeable height difference, stop and evaluate the support and joint reinforcement before applying caulk or patch.