You can absolutely build wood steps onto a concrete patio that will last years without rotting, shifting, or failing inspection, but the details matter more than most people expect. The keys are using properly rated pressure-treated lumber (UC4A or better for any ground or concrete contact), anchoring the stringers to the slab with expansion anchors or standoff hardware, flashing every wood-to-concrete interface to block trapped moisture, and hitting your rise/run numbers before you cut a single board. Get those four things right and you'll end up with steps that are safe, solid, and maintenance-friendly for the long haul.
Wood Steps to Concrete Patio: DIY Build and Fix Guide

Silas Morrison
19 May 2026
Planning wood steps attached to an existing concrete patio
Before you buy anything, spend 20 minutes standing at the job site thinking through the geometry and the load path. Where exactly will the steps land relative to the patio edge? How many steps do you need, and where does the top tread need to sit so it's flush with or slightly below the patio surface? Is there a door threshold or sliding door involved, because that changes your top landing elevation. Sketch it out roughly, even a napkin sketch helps.
The most important measurement is total rise: the vertical distance from the finished grade (or the lower landing surface) to the top of the patio surface. Measure that number in inches. From there, divide it into equal riser heights that fall between 4 and 7 inches (per ADA guidelines) or between 4 and 7-3/4 inches per the IRC, those two standards are close enough that staying under 7 inches puts you in the clear for both. Round numbers like 6 or 6.5 inches per riser work well for most residential patios. Pair that with a tread depth of at least 11 inches, and you have steps that feel natural to walk and pass a code inspection.
Also think about width. Standard exterior steps are at least 36 inches wide, but 48 inches is much more comfortable and is usually worth the extra lumber cost. Wider steps also look proportional against a full patio, which matters if you're putting any effort into the aesthetics. If the patio gets heavy foot traffic or you're connecting it to a formal entertaining space, go 48 to 60 inches wide and you won't regret it.
One planning detail that trips people up: the concrete patio itself may not be perfectly level or plumb at the edge. Before you commit to a layout, check the top edge of the concrete with a 4-foot level. If there's any slope or chipping at the lip, factor that into your stringer height or plan to fill and level it before attaching hardware. Attaching to a crumbling or uneven edge is one of the most common reasons wood steps fail early.
Materials, tools, and wood selection for outdoor use
For any component that contacts or comes close to concrete, soil, or standing water, you need pressure-treated lumber rated UC4A (ground contact) at minimum. This is the AWPA use category designation for above-ground-to-ground-contact situations, and it is the baseline for stair stringers, lower posts, and any framing within a few inches of the concrete surface. Do not substitute standard above-ground PT (UC3B) for those pieces, the retention level is lower and it will begin degrading much faster in a wet-contact environment.
Since 2004, nearly all PT lumber sold in the US uses ACQ (alkaline copper quaternary) or CA (copper azole) preservatives. These copper-based treatments are significantly more corrosive to hardware than the old CCA formulas, which means your fastener and connector choices are critical. Use only hot-dip galvanized (HDG) or stainless steel hardware throughout, including joist hangers, post bases, lag screws, structural screws, and any metal strap or bracket. Electroplated zinc screws (the standard cheap box-store screws) will corrode within a couple of years against ACQ or CA lumber, and you'll be left with stained wood and failing joints.
For tread boards, you have flexibility. Many builders use 5/4x6 PT decking for treads, which is a good practical choice. If you want something that looks nicer and accepts stain more cleanly, cedar or redwood (naturally rot-resistant) work well for treads even if the structural frame is PT. Just don't use cedar or redwood for the stringers or any ground-contact pieces.
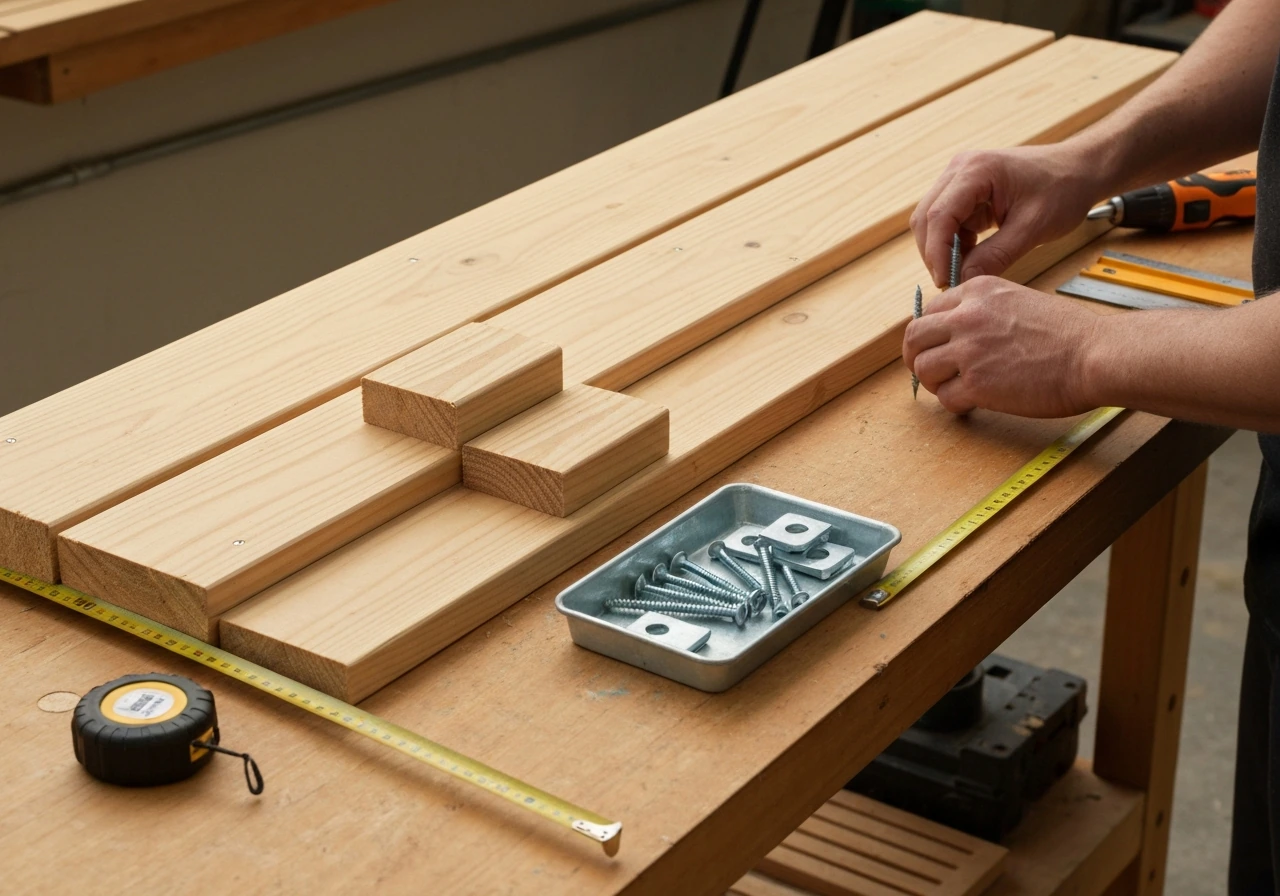
Material and tool checklist
- UC4A pressure-treated 2x12 lumber for stringers (typically three stringers for steps up to 48 inches wide)
- UC4A or UC4B PT lumber for any blocking, posts, or lower frame members near concrete
- 5/4x6 PT decking or cedar boards for treads
- PT 2x8 or 2x10 for riser boards (optional — open risers are allowed but closed risers look cleaner)
- Hot-dip galvanized or stainless steel structural screws (3-inch and 3.5-inch), joist hanger nails, and post bases
- Concrete anchor bolts: 1/2-inch diameter wedge anchors or sleeve anchors, at least 2.5-inch embedment depth
- Standoff post bases or stringer connector hardware (Simpson Strong-Tie SUR/LSSU series or similar) to keep wood off concrete
- Flashing tape or ledger barrier tape (self-adhesive, self-sealing type) for all wood-to-concrete interfaces
- Exterior wood sealer or penetrating oil finish for tread/riser surfaces
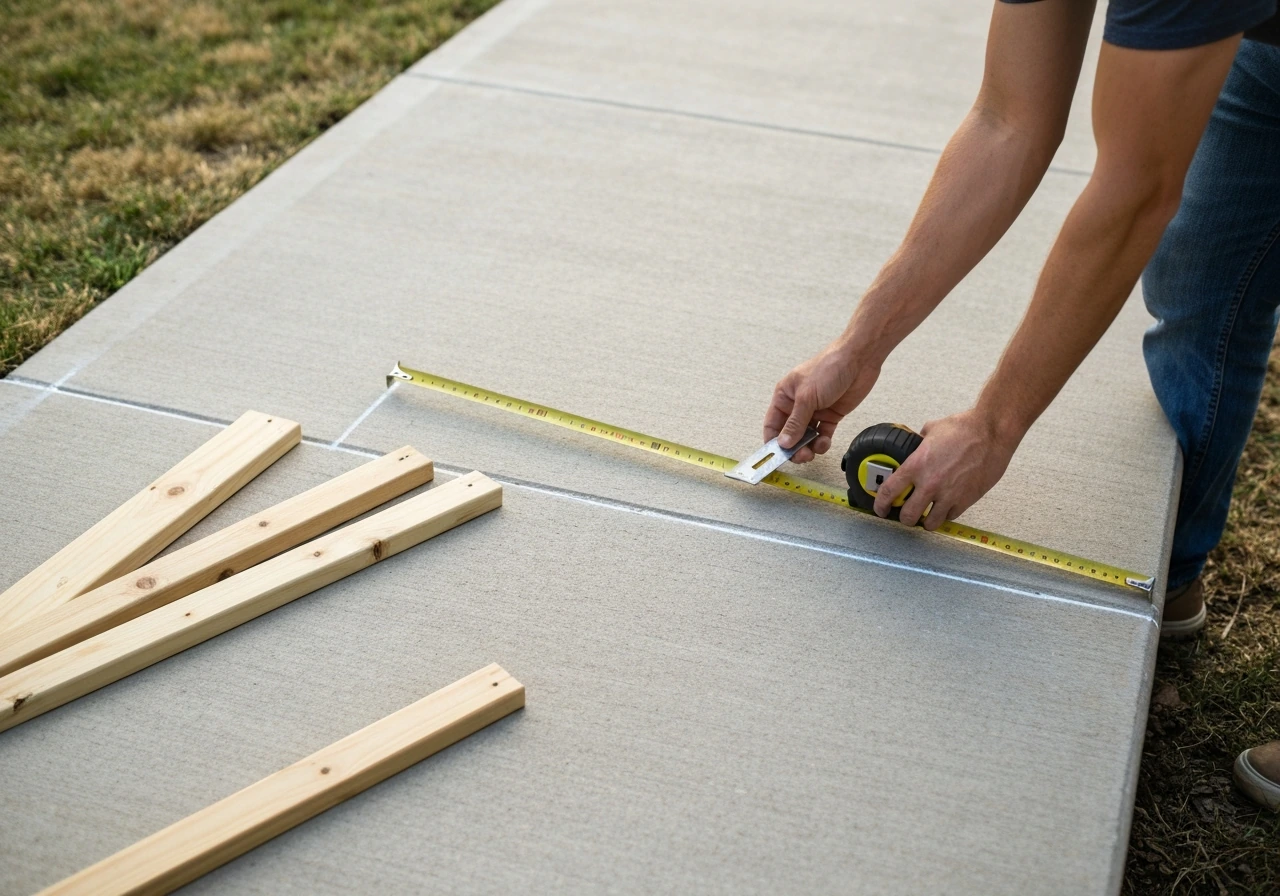
- Tools: circular saw, speed square, tape measure, 4-foot level, hammer drill with SDS bit, socket set, chalk line, pencil
Measuring, layout, and verifying your rise, run, and stringer fit
Start by nailing down your total rise precisely. Measure from the top surface of the patio slab down to the finished grade (or lower landing) at the exact spot where the bottom of the steps will sit. Cement patio steps need careful attention to rise, tread depth, and drainage so the wood framing performs long-term. Let's say it's 21 inches. Divide by your target riser height: 21 divided by 3.5 risers doesn't work cleanly, so try 3 risers at 7 inches each. That lands perfectly and is right at the IRC max. Or try 4 risers at 5.25 inches each for a gentler stair that feels easier to climb, both work, pick what fits the space.
Once you have riser count and height, calculate your total run: multiply the number of treads (always one fewer than risers) by your tread depth. With 3 risers and 2 treads at 11 inches each, your total run is 22 inches out from the patio edge. Mark that on the ground so you can see where the bottom of the stringers will land and confirm you have enough space. Watch for underground utilities, existing landscaping, or drainage that might be in that footprint.
For stringer layout, use a framing square with stair gauges clamped to it. Set one leg at your riser height and the other at your tread depth, then walk the square down a straight 2x12 to mark each step. The critical thing to get right: when you cut the bottom of the stringer, you need to reduce the bottom riser height by the thickness of one tread board so all risers end up equal once the treads are on. The IRC and most building guides call out a maximum 3/8-inch variation between any two risers in a flight, stay tighter than that if you can, because inconsistent risers are both a trip hazard and a code fail.
Once you've cut one stringer, test-fit it against the patio before cutting the others. Hold it in place, check that the top sits flush against the patio edge where you'll attach it, verify each tread notch is level with a small level, and measure the riser heights again. It takes 5 extra minutes and saves you from cutting three bad stringers. Cut the remaining stringers using the first one as a template.
Building and anchoring the wood step frame to concrete
Here's where most DIY wood step projects either succeed or quietly start failing. The connection to the concrete has to be solid and designed so water can't accumulate at the joint. The worst thing you can do is sit a stringer or a ledger board flat on concrete with no barrier and rely on a few screws to hold it. That assembly will wick moisture, the wood will rot from the bottom up, and in two or three wet seasons it'll be rocking or failing. With the right concrete block step layout and anchoring, you can avoid the most common failures and get long-lasting results concrete block steps for patio.
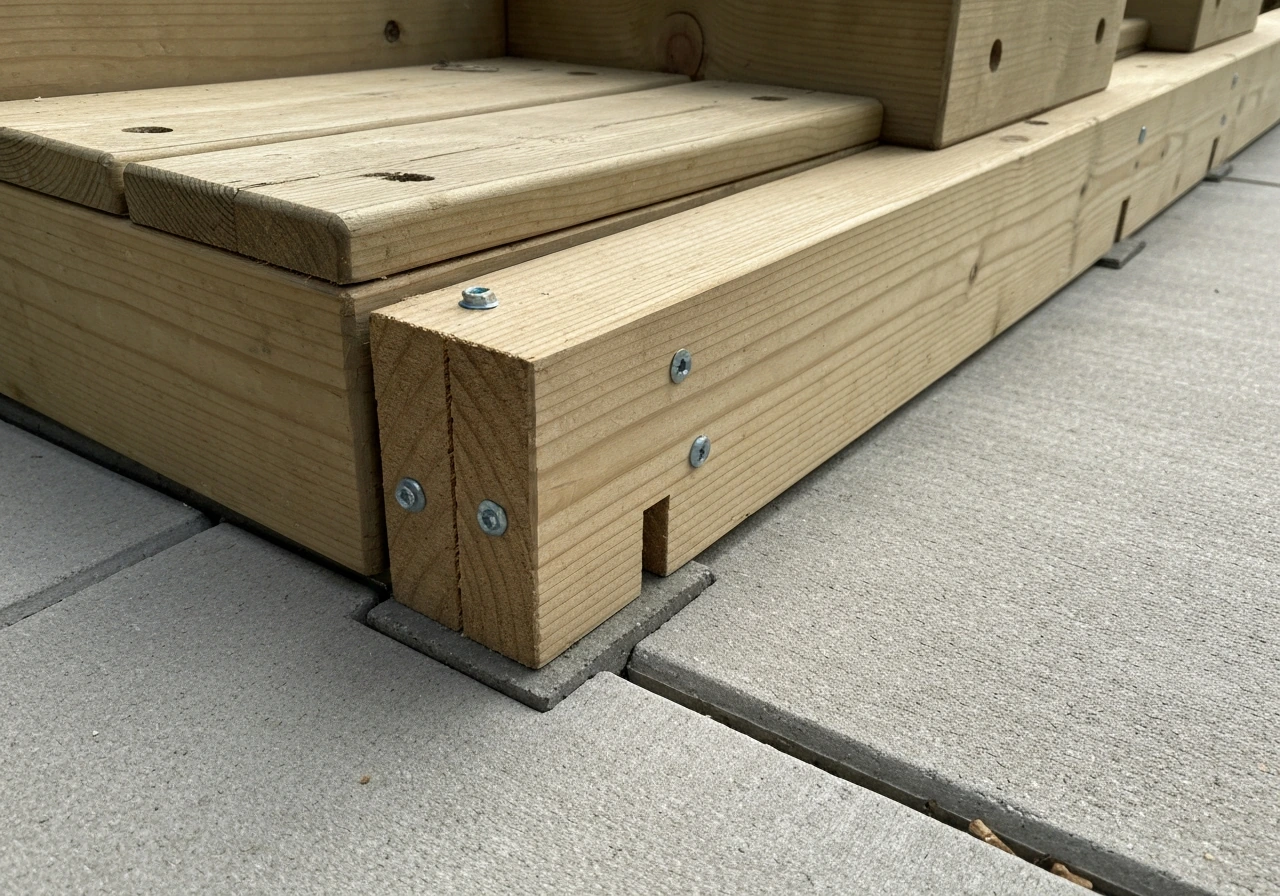
At the top, where the stringers meet the patio edge, attach a PT ledger board or a treated header flush against the concrete face (or the house rim joist if the patio is attached to the house). Use Simpson Strong-Tie or equivalent stringer connector hangers to hang each stringer from this header, this approach keeps the end grain of the stringer off the concrete and allows airflow. Before attaching the ledger to the concrete face, apply a self-adhesive flashing tape (like DeckWise WiseWrap or Deck Flash Barrier) between the wood and the concrete surface. This tape self-seals around screw penetrations and prevents water from sitting between the two surfaces.
For anchoring the ledger or any direct connection to the concrete slab, use 1/2-inch diameter wedge anchors or sleeve anchors. Drill into the concrete with a hammer drill, depth should be at least 2.5 inches of embedment, ideally 3 inches for a solid slab. Keep anchors at least 5 anchor diameters (2.5 inches for a 1/2-inch anchor) from any unsupported edge of the slab to avoid cracking or spalling the concrete edge. Typical spacing is 16 inches on center along a ledger. Torque them snug but don't overtighten, that can damage the anchor's expansion mechanism in the concrete.
At the bottom, where the stringers land on grade or on a lower concrete pad, use adjustable standoff post bases or elevated stringer shoes rather than setting wood directly on soil or concrete. These hardware pieces hold the stringer end an inch or more above the surface, which dramatically extends the life of the wood.
If you're landing on a concrete pad, anchor the standoff hardware the same way as above, wedge anchors into the pad, then bolt the stringer to the standoff. If you're landing on soil, pour a small concrete footing (at least 12x12 inches and at least 6 inches deep in non-freeze climates, deeper in freeze-thaw zones) and anchor standoffs into that.
If you also need to pour a new concrete pad or footing, plan the formwork, reinforce it, and cure it before anchoring the standoffs for your patio steps pour a concrete patio with steps.
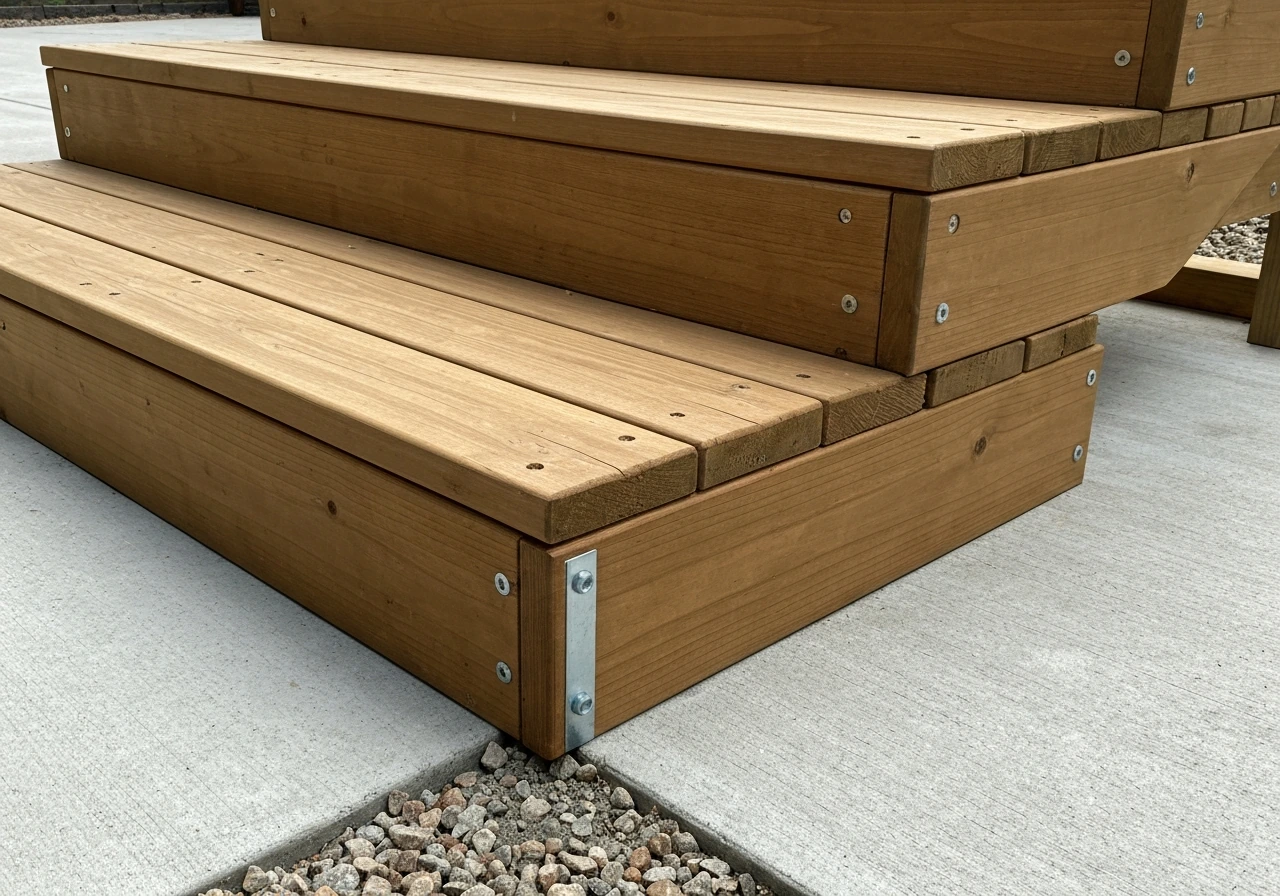
Once your stringers are anchored, install tread boards with a slight pitch of about 1/8 inch per foot toward the front edge so water drains off. Leave a 1/8-inch gap between adjacent tread boards if using two or more boards per tread, this lets water drain through rather than pooling. Fasten treads with two hot-dip galvanized or stainless screws per board per stringer, pre-drilled to prevent splitting. For a three-stringer setup with 5/4x6 treads, you'll typically use two or three 5/4x6 boards per tread, which gives you a finished tread depth of 11 to 13 inches.
Surface finishing, waterproofing, and preventing rot
Even with UC4A lumber, the long-term performance of your wood steps depends heavily on how well you manage moisture at every surface. End grain is the most vulnerable part of any wood piece, water wicks into cut ends at a rate roughly 10 to 15 times faster than face grain. Seal all cut ends with an end-grain sealer or heavy coat of exterior wood preservative before assembly. This one step makes a noticeable difference in how long your stringers hold up.
Once the steps are built, apply a penetrating exterior sealer or semi-transparent stain to all exposed wood surfaces, treads, risers, and visible stringer faces. For a longer-lasting look, a stamped concrete patio with steps can be finished so the wood landing and treads blend with the surrounding slab. Water-based penetrating sealers with UV inhibitors work well on PT lumber, but let the wood dry out for at least 30 days after installation before applying (freshly kiln-dried PT can still hold moisture). Re-apply the sealer every 1 to 2 years, or whenever water stops beading on the surface. This is the lowest-effort, highest-return maintenance task for wood steps.
At the wood-to-concrete interface, the flashing tape you installed behind the ledger is doing the heavy lifting, but also think about surface drainage at the base. Water should never pool at the bottom of the stringers. If your lower landing area is dirt or mulch, grade it so it slopes away from the steps at about 1/4 inch per foot. If it's a concrete pad, confirm it drains to a low point away from the steps. Standing water at the base is the primary cause of premature stringer failure, even with good PT lumber.
If you're building up against a house wall or a ledger attached to the house, treat the top of the ledger connection exactly like a deck ledger flashing detail: a z-flashing over the top of the ledger that directs water outward and down, not behind the board. This is the kind of detail that's easy to skip and expensive to fix later. Water intrusion behind a ledger on a house wall can cause structural damage that costs far more than the steps themselves.
Codes, safety considerations, and keeping things in good shape long-term
Most residential exterior stair projects fall under the IRC, and the key dimensional targets are ones you've already hit if you followed the layout guidance above: maximum 7-3/4 inch riser (7 inches is better), minimum 10-inch tread depth (11 is the ADA standard and a safer target), and no more than 3/8-inch variation between any two risers in the flight. That last one is easy to check before you finalize your stringer cuts, just measure all your riser heights on the cut stringer and confirm they're within 3/8 inch of each other.
Handrails and guards are required by code if your steps rise more than 30 inches above the adjacent grade or surface. For most patio step situations (2 to 4 steps connecting patio to yard), you're typically under that threshold, but check your local code because some jurisdictions require a graspable handrail on any stair with more than two risers regardless of height. If a handrail is required or desired, it needs to be graspable (1-1/4 to 2 inch diameter for round profiles) and extend at least 12 inches horizontally past the top riser nosing. Anchoring a wood or metal post to the concrete patio for a handrail uses the same wedge anchor approach described above.
Slip resistance matters especially on exterior wood treads, which can become slick when wet or covered in algae. A few good options: apply a non-slip additive (fine sand or rubber grit) mixed into your sealer coat, install adhesive non-slip stair strips along the front edge of each tread, or use grooved deck boards as treads. The front nosing area is where people's feet land and where most slips happen, so that's where to focus anti-slip treatment.
For ongoing maintenance, do a quick seasonal inspection each spring and fall. Check for soft or spongy wood (push a screwdriver tip into stringer ends and tread surfaces, if it goes in easily, rot is starting), loose fasteners, any wobble in the frame, and gaps opening up between treads and stringers. Tighten loose screws, re-seal any areas where the finish has worn through, and clear debris from between tread boards so water doesn't pool. This 20-minute inspection twice a year will extend the life of well-built wood steps to 15 or 20 years without any major repairs.
| Check | What to look for | Action if needed |
|---|---|---|
| Wood firmness | Soft/spongy spots on stringer ends or tread surfaces | Cut out rotted area; sister new PT lumber; treat with end-grain sealer |
| Fastener tightness | Any wobble in treads or frame when you push/step on it | Replace corroded screws with HDG or SS screws; re-tighten anchors |
| Flashing/sealer | Peeling flashing tape, worn sealer finish, water not beading | Re-apply penetrating sealer; re-tape any lifted flashing at ledger |
| Tread drainage | Debris packed between boards; standing water visible | Clear gaps; re-check slope of treads (should pitch forward 1/8"/ft) |
| Anchor integrity | Ledger or stringer base shifting, concrete cracking near anchors | Inspect anchor holes; re-anchor with larger anchor or new location |
| Slip resistance | Tread surface feels slick when wet | Apply non-slip stair strips or grit additive in fresh sealer coat |
Your next steps (literally)
If you're building new steps from scratch, start with your total rise measurement today and work out your riser and tread math before buying lumber. If you're redoing failing wood steps, start by diagnosing why they failed how to build concrete patio steps. Order UC4A stringers in 2x12 and confirm your hardware (wedge anchors, stringer connectors, HDG or stainless screws) is in hand before you start cutting. The job typically takes a weekend for a simple 2 to 4 step run, one day for layout, cutting, and anchoring the frame, and a second day for treads, risers, and finishing.
If you're redoing failing wood steps, start by diagnosing why they failed. If it's rot at the stringer base or where stringers meet the ledger, the fix is almost always inadequate flashing and wrong PT grade. If it's loose anchors, the original fasteners were likely electroplated (wrong) or set too close to the slab edge. Fix the root cause before rebuilding or you'll be doing it again in a few years.
If the idea of building wood steps feels like more work than you want to tackle, it's worth knowing that precast concrete steps and poured concrete step options are also viable for connecting a patio to grade, especially for permanent, zero-maintenance situations. But for most homeowners who want a good-looking, budget-friendly, DIY-buildable step solution onto an existing concrete patio, wood built the right way is a genuinely solid choice.
If you want a clear concrete patio step by step plan for building wood steps the right way, follow the walkthrough in this guide. If you are specifically planning cement patio steps, use the same measurements and focus on moisture control where the wood meets the slab. If you are aiming for a finished outdoor look, pairing your wood steps with a stamped concrete patio surface can add curb appeal while keeping the entry area durable.
FAQ
Can I attach wood steps to a concrete patio using regular zinc-plated screws if they are only temporary until summer?
Do not. ACQ or CA-treated lumber will corrode zinc-plated fasteners quickly, even in mild conditions, which can loosen stringers and stained wood. If you need a short-term fix, keep it truly temporary and plan to replace fasteners with HDG or stainless as soon as possible.
What if my concrete patio edge is chipped or spalled where the ledger will attach?
Anchoring into crumbling concrete is a common failure path. Remove loose material until you reach solid concrete, then consider patching and releveling, or shift the ledger location slightly. If the edge cannot be repaired reliably, use a different support approach such as standoff hardware on a secured pad rather than relying on the deteriorated edge.
How far from the slab edge should my wedge anchors be for a wood steps ledger?
Keep anchors well away from unsupported edges to prevent spalling. As a practical rule used for 1/2 inch anchors, keep them at least 5 anchor diameters from any edge (about 2.5 inches for a 1/2 inch anchor), and verify locally for your slab thickness and condition.
Should the treads sit directly on stringers, or should there be a gap for drainage?
Include a small separation where appropriate. Even with good moisture control, water can collect at flat interfaces. In practice, ensure treads have a slight pitch toward the front and do not fully trap water under tread seams, and when using multiple boards per tread, leave the small spacing needed for drainage.
Can I use cedar or redwood for stringers if I want the whole stair to look better?
Avoid it. Naturally rot-resistant woods still degrade where they are cut and where moisture persists, and they should not be used for stringers or any ground-contact pieces. Reserve cedar or redwood for treads if you want a nicer appearance, keep stringers and ground-near components pressure-treated and rated for that exposure.
What should I do if my total run does not fit the space when I choose an ADA-friendly riser height?
Recheck total rise and your riser count together before cutting. If the run becomes too long for the available yard area, you may need a different riser height within the allowed range, reduce tread depth targets carefully, or redesign the landing location. Changing only one dimension after cutting stringers almost always creates an uneven or noncompliant stair.
Is a stair guard or handrail required for a short set of wood steps from a concrete patio?
Often not, but it depends on your local interpretation and the measured rise above adjacent grade. Even for 2 to 4 steps, jurisdictions may require a graspable handrail if conditions trigger their rules. Measure the vertical rise from the adjacent walking surface and confirm with your local code office.
How can I test whether my wood steps are starting to rot before it becomes obvious?
Do a seasonal probe at vulnerable points, especially cut ends and the bottom of stringers. Press a screwdriver tip into the wood; if it penetrates easily or the wood feels soft compared to surrounding areas, rot may be starting. Address it early by locating the moisture source and replacing affected members rather than just tightening fasteners.
Can I build wood steps to concrete patio using only concrete anchors, no standoff hardware at the bottom?
You can, but it usually reduces lifespan. Setting stringer ends directly on soil or leaving them too close to standing water accelerates rot. Using adjustable standoff bases or elevated stringer shoes lifts the wood away from wet surfaces and is a key detail for long-term performance.
What is the correct way to seal cut ends on UC4A stringers after cutting?
Seal them before assembly, after all cuts are made. Use an end-grain sealer or heavy exterior preservative and make sure every cut face is coated, including notch areas. Skipping end-grain sealing is a frequent reason stringers fail earlier than expected.