
Water pooling on your concrete patio after every rain is a fixable problem, and most cases come down to one of three things: the slab lost its drainage slope, a low spot developed over time, or water simply has nowhere to go. Depending on how bad the ponding is and what's causing it, you can fix it yourself with a grinder, a patching mix, or a self-leveling overlay, often for under $200. Bigger issues, like a slab that's sunk because the soil underneath has eroded, may need slabjacking or a section replacement, but even those aren't automatically pro-only jobs if you're comfortable with the process.
How to Fix Water Ponding on a Concrete Patio: DIY Guide

Silas Morrison
11 Aug 2026
Why water ponds on a concrete patio (and why you should deal with it)
Concrete patios are supposed to drain on their own. A properly poured slab has a deliberate slope, typically at least 1/8 inch per foot (about 1%) and ideally 1/4 inch per foot (2%), directing water away from the house. The IRC (R401.3) actually requires the ground around a foundation to drop at least 6 inches within the first 10 feet, and impervious surfaces like patios within that zone must slope at least 2% away from the building. When that slope disappears, or when a section of the slab drops lower than the surrounding concrete, you get a puddle. Leave it sitting there long enough and it works its way into cracks, expands when it freezes, lifts the slab edge, speeds up surface scaling, and keeps moving toward your foundation. I've seen patios that looked fine on the surface but had years of water quietly soaking under the slab and washing away the subbase. Fixing the ponding early is always cheaper than fixing what comes after.
How to diagnose the problem before you pick a fix
Don't guess at the cause and throw money at a fix that won't work. A proper diagnosis takes maybe 30 minutes and saves you from doing the wrong repair. Here's how I work through it.
Check the slope
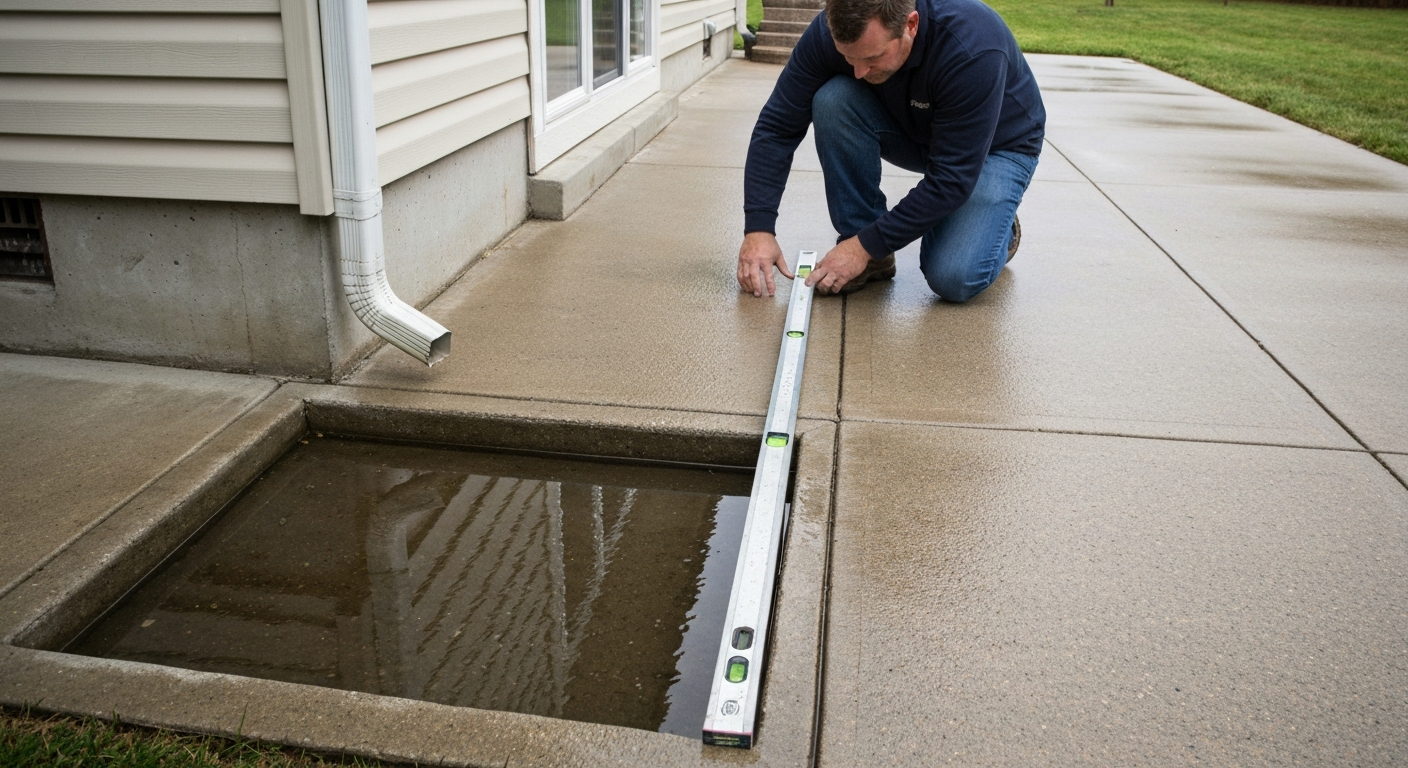
Grab a 6- to 8-foot straightedge or a long level and lay it across the patio in the direction water should drain. At the low end, measure the gap between the straightedge and the slab. You're looking for a fall of at least 1/8 inch per foot, so on an 8-foot board you want to see at least 1 inch of drop. If you see less than that, or if the board rocks because there's a hump in the middle with lower areas on both sides, you've found your problem. A stringline with a line level is even more precise, especially over longer runs.
Find specific low spots
Run a garden hose on the surface and watch where water stops moving. Mark those spots with chalk. Then do it again from a different direction. The wet patches that linger longest are your low spots, and that's exactly where your repair effort needs to go. For step-by-step guidance on how to fix low spot in concrete patio, see the related repair guide.
Check for blocked or missing drains
If there's a drain in the patio, pull the grate and see if it's clogged with debris, silt, or overgrown vegetation. Pour a bucket of water in and confirm it actually drains. While you're at it, look at where downspouts discharge. A downspout dumping directly onto or toward the patio is a major contributor to ponding that a lot of people completely overlook. For step-by-step guidance on how to drain a concrete patio and options for intercepting or routing runoff, see the how to drain a concrete patio guide.
Sound for voids under the slab
Walk the slab and knock on it with a hammer or drag a short length of chain across the surface. A hollow, drum-like sound compared to a solid thud tells you the concrete has lost support underneath. If you find hollow sections, especially near a low spot or crack, you're dealing with subgrade erosion or a void, not just a surface slope problem. That changes the repair approach significantly, and you'll want to address the void before you do anything to the surface. If you suspect soil erosion under the slab, read a step-by-step guide on how to fix erosion under concrete patio to restore support before doing surface repairs.
The common causes, explained plainly
- Improper original slope: The slab was poured without adequate pitch, or the forms weren't set right. This shows up on older patios or DIY pours where the slope was eyeballed instead of measured.
- Settlement and low spots: Sections of the slab gradually sink as the subbase consolidates or shifts, creating low areas that collect water even if the original pour was correct.
- Soil erosion and voids under the slab: Water running under the edges washes fine soil particles away over time. This leaves hollow pockets that allow the slab to flex, crack, and drop further. Once a void forms, it tends to grow.
- Clogged or poorly placed drains: Surface drains that collect debris stop working quickly. Drains installed without adequate fall toward the outlet back up in heavy rain.
- Downspout and roof runoff discharge: A downspout that dumps onto or near the patio can overwhelm any drain slope, especially during heavy rain events. I've watched a perfectly graded patio pond up simply because a downspout extension was too short.
DIY or hire a pro? Here's how to decide
Most ponding fixes are DIY-friendly if you're honest about the scope. The deciding factors are the size of the affected area, whether there's a void under the slab, and whether the slab has actually moved. Use this guide to match your situation to the right approach.
| Situation | Recommended approach | Skill level | Estimated cost (materials) |
|---|---|---|---|
| Small low spot, no void, shallow depth under 1/4" | Cementitious patching compound | Beginner | $20–$60 |
| Widespread shallow ponding under 1/2" over large area | Self-leveling overlay | Beginner–Intermediate | $80–$250 |
| Surface high point causing runoff blockage | Angle grinder or floor grinder | Intermediate | $0–$50 (rental: $40–$80/day) |
| Slab section dropped 1/2" or more, void suspected | Polyurethane foam injection or mudjacking | Pro recommended | $500–$2,500+ |
| Slab cracked and shifted at a joint | Section replacement | Pro or advanced DIY | $800–$3,000+ |
| No surface drain, wide patio, chronic overflow | Channel/trench drain installation | Intermediate–Pro | $200–$1,500 |
| Downspout discharging onto patio | Downspout extension or piped reroute | Beginner | $10–$150 |
| Active subgrade erosion with large void | Void fill + professional geotechnical review | Pro required | Varies |
My honest rule: if the slab has moved or there's a void, fix the foundation problem first. Putting an overlay on a slab that's still settling is just delaying the inevitable. But if the concrete is structurally sound and stable, the surface fixes below will hold for years.
Small-area fixes: grinding, patching, and overlays at a glance
Before the step-by-step instructions, here's a quick comparison of the three main surface correction methods so you can pick the right one for your situation.
| Method | Best for | Depth range | Key limitation |
|---|---|---|---|
| Grinding | Knocking down a high edge or hump blocking drainage | Removes 1/16"–1/4" per pass | Only removes material; can't fill low spots |
| Cementitious patching | Isolated low spots or shallow depressions under 1/2" | 1/8" to 1" depending on product | Requires good bond prep; visible patch line |
| Self-leveling overlay | Widespread shallow ponding across large areas | 1/8" minimum over high point, up to ~1-1/4" single pour | Requires priming; poor pour temperature control causes failures |
Step-by-step: grinding down a high spot to restore drainage
This fix applies when water is pooling because a raised edge or hump is blocking drainage flow, not because the low area itself dropped. You're not filling anything here. You're removing a raised obstacle so water can move past it. I use this technique at control joints where one slab edge has risen slightly above the other, which is a common result of minor frost heave.
What you'll need
- Angle grinder with a diamond cup wheel (4.5" or 5" works for small areas) or a walk-behind floor grinder for large sections
- Straightedge or level to identify the high point
- Chalk or lumber crayon to mark the area
- Safety glasses, dust mask (N95 minimum), hearing protection, and knee pads
- Shop vac or blower to manage dust
- Concrete sealer to refinish the ground surface after grinding
- Dry the surface completely. Grinding wet concrete clogs the diamond wheel fast and makes a mess. Give it at least 24 hours after rain.
- Lay your straightedge across the problem area and mark the high edge with chalk. Note how far the edge rises above the adjacent slab, and mark the transition zone you'll need to feather out over.
- Set your angle grinder to work at a low angle and make overlapping passes across the marked high point. You're not cutting down in one aggressive pass; you're taking a little at a time and checking with the straightedge frequently.
- Feather the grind outward at least 6–8 inches beyond the high point so the transition is gradual and not a visible step. Water will still catch on an abrupt grind line.
- Check drainage with a trickle of water as you go. Once water flows freely across the area without stopping, you're done.
- Blow or vacuum all dust off the surface, then apply a penetrating concrete sealer to protect the freshly exposed aggregate. Ground concrete is more porous than the surface crust and will absorb water and staining agents more readily if left unsealed.
A word of caution: grinding reduces the slab thickness at that point. Don't grind more than about 1/4 inch in a single zone, and avoid grinding near the slab edges where the concrete is thinnest. If the height difference is larger than 1/4 inch, you're better off cutting the slab at the joint and addressing the settled section rather than grinding the adjacent piece down.
Step-by-step: patching small low spots and shallow depressions
If you've got a low spot that's clearly defined, a few inches across or up to a couple of square feet, and it's not caused by a void underneath, a cementitious patching compound is your go-to. Products meeting ASTM C928 for rapid-hardening cementitious repair materials are what you want here. Look for that spec on the bag. Bond strength is the critical factor; a patch that delaminates after one freeze-thaw cycle is a waste of materials.
What you'll need
- Cementitious concrete patching compound (look for ASTM C928 compliance on the label)
- Concrete bonding adhesive or epoxy bonding agent (ASTM C881 compliant for structural bonds)
- Angle grinder with a diamond cup wheel or cold chisel and hammer
- Wire brush or stiff bristle brush
- Shop vac
- Margin trowel and finishing trowel
- Bucket and mixing paddle (or drill attachment)
- Water mister or damp curing cloth
- Concrete sealer
- Outline the repair area with a grinder or saw to create clean vertical edges at least 1/4 inch deep. A feathered edge with no defined boundary is the number one reason patches fail. The patch needs a mechanical ledge to hold onto.
- Chip out any loose, delaminated, or crumbling concrete within the repair zone. If the concrete sounds hollow when you tap it, keep chipping until you reach sound material.
- Vacuum the area thoroughly. Any dust, debris, or standing water will destroy the bond. Let the surface dry until it's surface-dry but still slightly cool to the touch (this is called saturated surface dry, or SSD, and it gives the patch the best bonding condition).
- Apply your bonding agent according to the manufacturer's instructions. For epoxy bonding agents (ASTM C881), apply a thin coat and let it become tacky before placing the patch. For acrylic bonding adhesives, apply and let it start to dry slightly until tacky.
- Mix your patching compound to the consistency specified on the bag. Don't add extra water to make it easier to spread; that reduces the final strength and causes shrinkage cracking.
- Apply the patch mix and press it firmly into the repair area, working it against the vertical edges. Build up to the surrounding slab level or very slightly above it.
- Strike off flush with a straightedge, then confirm drainage direction with a level. If you need to slope the patch slightly to redirect water, do it now with a trowel before the material sets.
- Finish the surface to match the surrounding texture. A broom drag or light brush finish is easiest and provides decent traction.
- Mist with water and cover with plastic sheeting or a damp burlap for at least 24 hours. Curing is what gives the patch its strength; skip this step and you'll see shrinkage cracks within a week.
- After full cure (typically 24–72 hours depending on the product), seal the patch and the surrounding area with a penetrating concrete sealer.
Step-by-step: applying a self-leveling overlay for widespread shallow ponding
When ponding is spread across a large area of the patio rather than concentrated in one defined low spot, and when the depth difference is shallow (roughly 1/2 inch or less across the affected zone), a self-leveling cementitious overlay is the most efficient solution. Products like ARDEX TL 1400, LATICRETE NXT Level, and QUIKRETE's self-leveling floor resurfacer all work on this principle: you prime the substrate, mix the product to a flowable consistency, pour it, and let it seek its own level while you guide it with a gauge rake. LATICRETE, NXT® Level product pages and datasheets (self‑leveling underlayments) note typical single‑lift placements from about 1/8" (3 mm) up to roughly 1¼" (32 mm) for many SKUs and list recommended substrate/ambient temperature ranges of approximately 40–90°F (4–32°C) blank" rel="noopener noreferrer">LATICRETE — NXT® Level product pages and datasheets (self‑leveling underlayments) note typical single‑lift placements from about 1/8" (3 mm) up to roughly 1¼" (32 mm) for many SKUs and list recommended substrate/ambient temperature ranges of approximately 40–90°F (4–32°C).. The key word is shallow. These products are designed for pours from about 1/8 inch minimum (over high points) up to roughly 1-1/4 inches in a single lift. For deeper corrections, you'd need multiple lifts or a different approach entirely. For a broader set of methods and step-by-step options for leveling and repairing slab drainage, see how to fix uneven concrete patio.
What you'll need
- Self-leveling cementitious underlayment/overlay product (sized for your square footage at your target thickness)
- Manufacturer-specified primer (don't skip this; it controls substrate absorption and dramatically affects adhesion)
- Gauge rake or smoother bar with depth pins set to your target pour thickness
- Heavy-duty drill with a mixing paddle
- Clean mixing bucket (5-gallon)
- Pump sprayer for applying primer
- Long-handled squeegee or float
- Painter's tape and foam backer rod or caulk to seal gaps at edges and control joints
- Knee boards if you need to walk on the pour mid-application
- Thermometer (surface and ambient temperature must be within the product's specified range, commonly 40–90°F / 4–32°C)
- Repair any cracks deeper than 1/8 inch and fill any holes before you pour. A self-leveling overlay will flow into a crack and cure there, but it won't bridge a structural crack. Address those first.
- Clean the surface aggressively. Pressure wash to remove all dirt, grease, curing compounds, and old sealers. Any contaminant between the overlay and the slab will cause delamination. Let it dry completely, or at least reach SSD condition.
- Seal control joints and perimeter gaps with foam backer rod or tape so the liquid mix doesn't pour off the slab or down into joints before it cures.
- Apply the manufacturer-specified primer with a roller or pump sprayer. Primer rate and drying time vary by product and substrate porosity. On a dry, porous slab, use the full-rate prime coat. On a denser or previously sealed slab, a diluted application may be specified. Follow the TDS exactly. This is not a step to rush.
- Mix the self-leveling compound according to the product instructions. Use the exact water ratio on the bag. Over-watering causes excessive shrinkage, surface weakness, and poor adhesion. Mix for the full specified time (typically 3–5 minutes) until the mix is smooth and lump-free.
- Pour the mixed compound immediately, starting at the farthest point from your exit. Self-leveling materials begin to set quickly, typically 15–30 minutes of working time depending on product and temperature. Work in manageable sections and have your next batch ready to go.
- Use the gauge rake to spread and control thickness. Don't expect the product to do all the work on a sloped exterior slab. You'll need to guide it with the rake, keeping more material in the low areas.
- Pop any air bubbles with a spiked roller before the surface starts to set. This also helps with surface uniformity.
- Keep foot traffic off the surface until the product reaches the minimum cure time for foot traffic, which varies by product (some fast-setting formulations allow foot traffic in 3–4 hours; standard products may require longer). Check the TDS.
- After full cure (typically 24–48 hours before any load), apply a quality penetrating concrete sealer over the entire patio surface. This protects the overlay and helps it shed water rather than absorb it.
A few things that trip people up with self-leveling overlays
Temperature is the most common killer of overlay projects. Below 40°F, hydration slows dramatically or stops, leaving you with a weak, crumbly surface. Above 90°F (or in direct sun on a hot day), the mix can flash-set before you've finished spreading it. If you're pouring in summer, work early morning. If cold weather is coming in overnight, don't pour late in the day. I poured a self-leveling overlay on an unseasonably warm March afternoon and the surface dried out too fast because I hadn't wetted down the substrate thoroughly enough. A damp substrate, not wet, not dry, is the target.
When the problem goes deeper: slabjacking, foam injection, and section replacement
If the slab has actually sunk because soil washed away beneath it, no surface fix will solve the problem long-term. Before assuming subsurface failure, check mapped soil types, drainage classes, and interpretive ratings using the USDA‑NRCS, Web Soil Survey (official soils data and interpretive ratings) as a recommended first step USDA‑NRCS — Web Soil Survey (official soils data and interpretive ratings). You need to restore support under the concrete first. There are two main approaches used for residential patios: mudjacking (cementitious grout pumped under pressure through drilled holes) and polyurethane foam injection (a two-component expanding foam injected through small-diameter ports). Research comparing the two methods, including peer-reviewed ASCE studies, shows that polyurethane foam can restore load transfer and fill voids rapidly with smaller injection holes and faster return-to-service times. Cementitious grout adds significant weight to the subbase, which can be a concern on unstable soils, but it's a well-established method and often costs less per project.
For most homeowners, the decision between mudjacking and foam injection comes down to contractor availability and budget. Both are typically professional jobs. Filling holes and voids under the slab is a related problem that warrants its own careful attention; once the void is filled, the surface repair becomes straightforward. If the slab is too cracked, shifted, or deteriorated to be worth lifting, removing and replacing the section is the cleanest long-term fix, though it's also the most disruptive and expensive option.
Drainage solutions that complement your surface repairs
Sometimes the slope is fine but the volume of water hitting the patio simply overwhelms it, especially if a large roof area drains toward the patio. In those cases, you need to intercept the water and route it away rather than just adjusting the surface.
- Channel/trench drains: A linear drain set flush with the patio surface at the low edge intercepts water before it ponds. Channel drains need a minimum slope toward the outlet of about 0.5–1% (roughly 1/16"–1/8" per foot) to ensure gravity flow. Manufacturer installation guides (Zurn, NDS, and similar) specify concrete surround, gravel bedding, and outlet pipe sizing. This is an intermediate to advanced DIY project that works especially well at the transition between the patio and the yard or at the house edge.
- Regrading the yard: If the lawn or garden beds adjacent to the patio are directing water toward it, regrading the surrounding ground to slope away from the patio helps significantly. This is free except for your time and possibly some topsoil.
- Downspout extensions and rerouting: Extending a downspout 4–6 feet away from the patio can dramatically reduce ponding on its own. Piped downspout runs buried below grade and daylighting in the yard well away from the house are more permanent. Many local stormwater guidelines (like Portland's stormwater manual) recommend moving downspout discharge at least 2 feet from a slab-on-grade foundation, and farther for basements.
- French drains: A gravel-filled trench with a perforated pipe around the perimeter of the patio intercepts groundwater moving toward the slab. These work best when subsurface moisture, not just surface runoff, is contributing to the problem.
Sealing and finishing after any repair
Every repair, whether it's a patch, a grind, or a full overlay, should be followed by sealing the entire patio surface, not just the repaired area. A penetrating silane/siloxane sealer is the best long-term choice for exterior concrete. It doesn't change the appearance noticeably but blocks water infiltration, slows freeze-thaw damage, and reduces the chance of you being back out there fixing ponding again in two years. Acrylic sealers are cheaper and easier to apply but need reapplication every 1–2 years on exterior surfaces. Apply sealer only after the repair has fully cured, the surface is completely dry, and temperatures are in the 50–80°F range for best adhesion.
Inspection and maintenance: keeping ponding from coming back
- Check patio slope once a year with a hose and a straightedge. Catch any new settlement early before it becomes a pooling problem.
- Clear surface drains every spring and fall before the heavy rain seasons hit. A clogged drain undoes any surface fix.
- Inspect caulk and sealant at the house-to-patio joint annually and reapply if it's cracked or missing. This joint is a major entry point for water under the slab.
- Walk the slab and listen for hollow sounds after any significant frost or wet season. Early void detection saves major money versus waiting for a crack to open up.
- Reapply concrete sealer every 2–3 years for acrylic products, or every 5–7 years for penetrating sealers, based on surface wear and water bead test results.
- Trim any plantings near the patio edge to prevent root intrusion and keep joints from cracking open.
Safety notes before you start
Concrete dust from grinding contains respirable crystalline silica and is a genuine health hazard with repeated exposure. Always wear an N95 or better respirator when grinding, not just a paper dust mask. Safety glasses are non-negotiable, and hearing protection is smart on any grinding work longer than a few minutes. For self-leveling and patching compounds, wear gloves throughout mixing and placing. Fresh cementitious materials are highly alkaline and will cause chemical burns on prolonged skin contact. If you're cutting the slab with a wet saw to define patch boundaries, know where any buried conduit or irrigation lines run before you cut.
FAQ
What causes water ponding on a concrete patio?
Common causes: insufficient slope away from the house (should target 1/8"–1/4" per foot), low spots from settlement, soil erosion or voids under the slab, blocked or missing drains, nearby downspouts discharging onto the patio, and poor initial compaction or drainage under the patio. Freeze/thaw cycles and tree roots can also distort slab elevation over time.
How do I diagnose why my patio is ponding?
Quick diagnostics: 1) Use a 6–10 ft straightedge and a line level or long spirit level to measure fall (look for 1/8"–1/4"/ft away from structures). 2) Flood-test: flood the patio with a hose and watch where water pools and how/if it drains. 3) Tap the slab with a hammer or drag a chain to detect hollow sounds (possible voids). 4) Inspect downspouts, gutters and drain grates for clogs. 5) Check surrounding grade and soil erosion. If you suspect deep subgrade failure, get a geotechnical or contractor inspection.
When can I fix ponding myself and when should I hire a pro?
DIY is reasonable for small low spots, surface grinding, patching cracks, adding a self‑leveling overlay in thin depths, or installing simple channel drains if you’re comfortable with basic tools. Hire a pro if there are large settled slabs, voids under the slab (you hear hollow sounds), active subgrade erosion, structural cracking, drainage that affects the foundation, or if the repair requires slab replacement, slabjacking/mudjacking, or routed and pumped undersealing—these often need specialty equipment and engineering input.
What immediate small-area DIY fixes work for low spots that pond water?
Options: 1) Concrete grinding to remove high ridges and re‑skim low spots (limited use). 2) Patching low spots with a polymer‑modified cementitious patch or fast‑setting cement repair for shallow depressions. 3) Applying a cementitious self‑leveling overlay (products have minimum thickness limits—typically 1/8"–1/4" and max single‑lift limits). Follow product TDS for primer, temperature and cure times.
How do self‑leveling overlays work and when should I use them?
Self‑leveling underlayments are pumpable or trowel‑applied cementitious products that flow to fill shallow depressions and create a uniform slope. Use them for surface repairs where the slab is sound and you need to correct up to the product’s maximum pour depth (typical single‑lift range ~1/8" to 1¼" depending on product). Prep includes cleaning, profiling, and priming. Not suitable if there are voids under the slab or major settlement—those need lifting or replacement.
What are the longer‑term repairs for settled slabs or voids under the patio?
Professional options: 1) Mudjacking (slabjacking) with pumpable cementitious grout to fill voids and lift the slab—heavier material, longer cure. 2) Polyurethane foam injection (polyjacking) to fill voids and lift quickly with small injection ports—fast cure and quick return to service. 3) Partial or full slab replacement when slab is broken, extensively cracked, or has failed reinforcing. Choice depends on void size, load needs, cost, and site access.