
The fastest way to make a concrete patio look noticeably better is to clean it thoroughly, fix any cracks or spalling, then apply a stain or coating followed by a good sealer. That sequence works whether you have a brand-new slab that looks boring or a 15-year-old patio that's cracked, discolored, and dull. The specific products you choose depend on your patio's current condition, but the order of operations is almost always the same: assess, clean, repair, color or coat, then seal. If you focus on the condition first, then clean, repair, choose the right color or coating, and seal properly, you can make concrete look great and last longer how to improve concrete patio.
How to Make a Concrete Patio Look Better: DIY Guide

Silas Morrison
22 May 2026
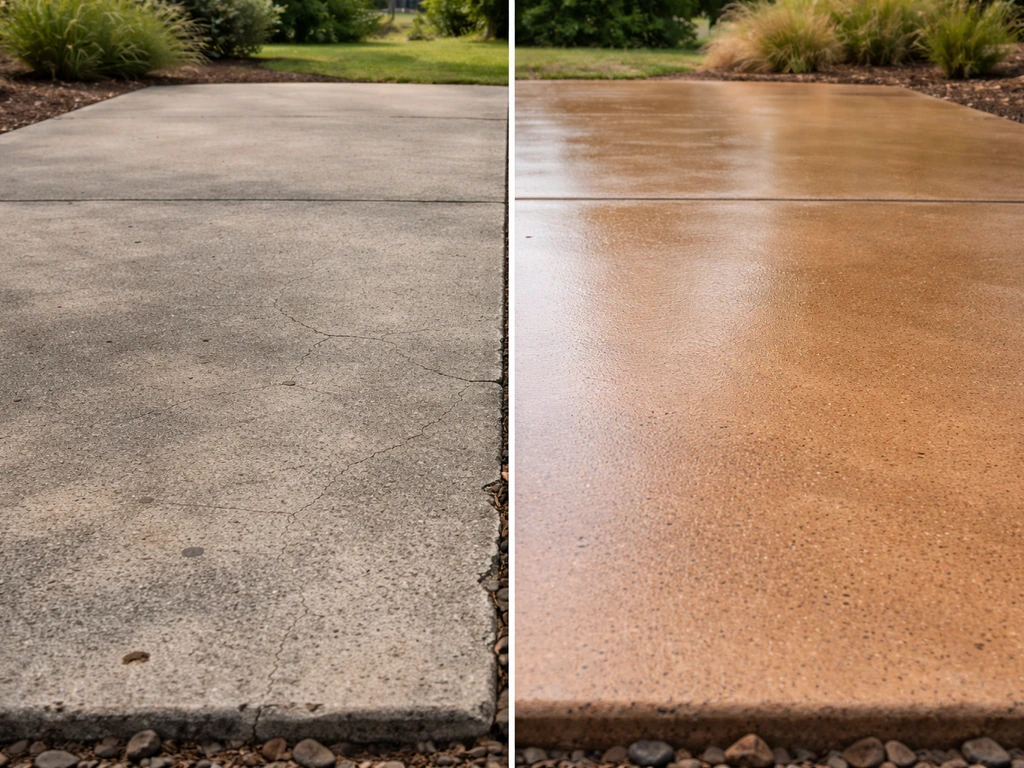
Start here: figure out why your patio looks bad
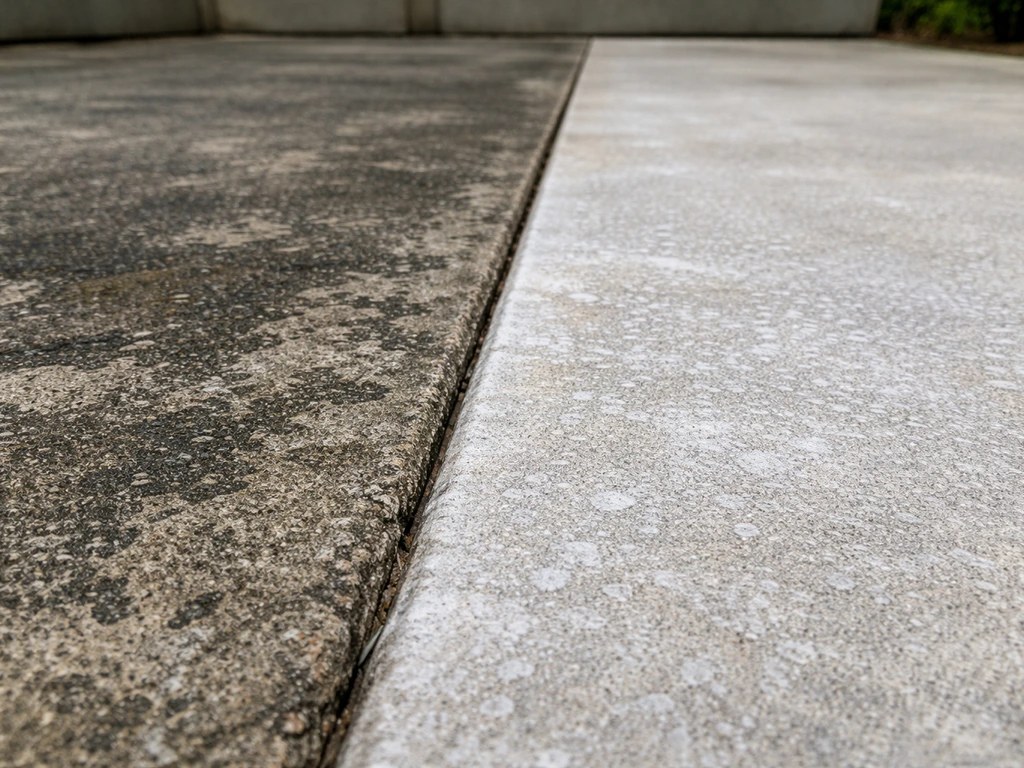
Before you buy anything or start scrubbing, spend five minutes actually looking at your slab. The right fix depends entirely on what's going wrong. Most dull or ugly patios fall into one of a few categories, and misreading the problem leads to wasted money and redone work.
- White chalky or crystalline patches: This is efflorescence, caused by water moving through the slab and depositing mineral salts on the surface as it evaporates. It signals a moisture issue and will come back if you just paint over it without addressing the source.
- Dull, grayish surface with no sheen: Either the concrete was never sealed, or the old sealer has worn off. Fresh sealer should cause water to bead; if water just soaks in flat, the sealer is gone.
- Blotchy or hazy spots: Often a sign that an old sealer is failing or that a new sealer was applied over an incompatible existing product. These spots form where the old film broke down unevenly.
- Rust-colored or brown stains: Metallic objects left on the slab, or iron-rich aggregate in the concrete reacting with moisture. These need specific treatment before any coating goes on.
- Oil or grease stains: Need a degreaser and targeted treatment before pressure washing, otherwise the stain gets pushed around instead of removed.
- Cracks, chips, or spalling: Structural or surface damage that must be repaired before you do anything cosmetic. Sealing over a crack just makes it more visible, not less.
- Uneven surface or low spots that collect water: May need grinding or a self-leveling overlay, not just cleaning and sealing.
If you see significant efflorescence or if the slab stays damp for a long time after rain, do a quick moisture check before applying any coating. Tape a 16-inch square piece of plastic sheeting flat to the concrete and seal all four edges with tape. Leave it for 24 hours (this is the ASTM D4263 plastic sheet method). If moisture has condensed under the sheet, a film-forming coating will likely peel. In that case, you either need to address the drainage/moisture source first, or switch to a penetrating sealer that allows vapor transmission.
Clean and prep the surface properly, this is the most important step
I cannot overstate this: bad prep is the number one reason DIY patio projects fail. Stain won't penetrate dirty concrete. Coating won't bond to an oily or dusty surface. Sealer over a failed old sealer just peels faster. Spend more time here than you think you need to.
Pressure washing
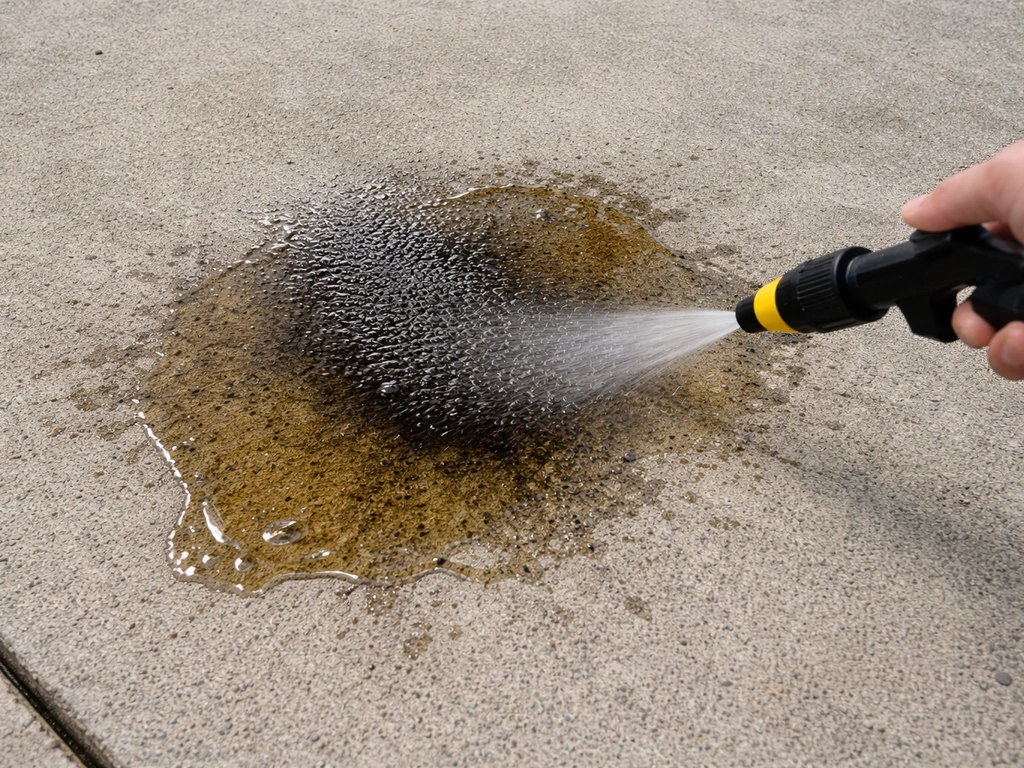
Rent or use a pressure washer in the 2,500 to 3,000 PSI range with a flow rate of at least 4 GPM for residential concrete cleaning. Use a 25-degree fan tip for general cleaning and a surface cleaner attachment if you have one (it prevents streaking). Work in overlapping passes and keep the nozzle moving so you don't etch the surface unevenly.
Tackling specific stains before washing
Oil or grease stains need a concrete degreaser applied first. Blot up any excess with old rags or paper towels, work the degreaser into the stain, then pressure wash. For rust stains, use an oxalic acid-based rust remover mixed into a thick paste with an absorbent filler like flour or diatomaceous earth, apply it to the stain, let it dwell for 15 to 30 minutes, then scrub and rinse.
Avoid generic acid-based patio cleaners for rust because the chemistry can sometimes make the stain darker, not lighter. Efflorescence usually scrubs off with a stiff brush, a diluted acid wash (muriatic acid at about 1:10 with water), and a thorough rinse. Always wet the surface before applying any acid and neutralize afterward with a baking soda solution.
Removing old sealer
If there's an old sealer on the slab and you're planning to apply a new coating or stain, you usually need to strip it. Applying a water-based product over a solvent-based sealer (or vice versa) causes compatibility problems, and stain won't penetrate through any sealer film. Use a chemical stripper rated for concrete sealers, scrub it in, then pressure wash and let the surface dry completely. For overlays or epoxy systems, you may also need to grind the surface to achieve adequate surface profile for adhesion.
Fix the damage before you make it pretty
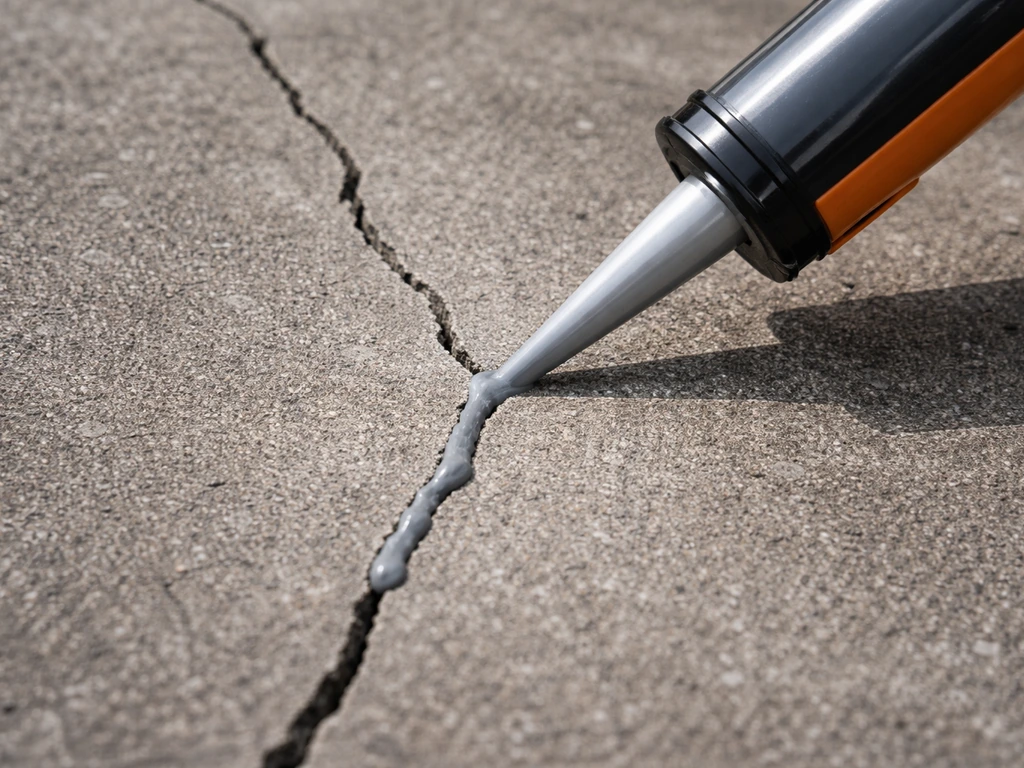
Cosmetic products can't hide structural problems, and trying to seal over cracks or spalling usually makes things worse. For tiling over concrete, Fine Homebuilding recommends filling cracks larger than 1/8 inch with concrete epoxy before applying an antifracture membrane fill cracks larger than 1/8 inch with concrete epoxy before applying an antifracture membrane. Sealer flows into hairline cracks and can actually make them more noticeable under raking light. Deal with damage first, then do the pretty stuff.
Cracks
For hairline cracks (under 1/8 inch wide), a concrete caulk or polyurethane crack filler is sufficient. For cracks wider than 1/8 inch, use a concrete epoxy injection system or an epoxy-based filler for a rigid, structural repair. Always clean out the crack with a wire brush and compressed air first so the filler bonds to concrete, not dust. Let epoxy repairs cure fully before doing anything else on top, typically at least 24 hours, longer in cooler weather.
Spalling and surface chips
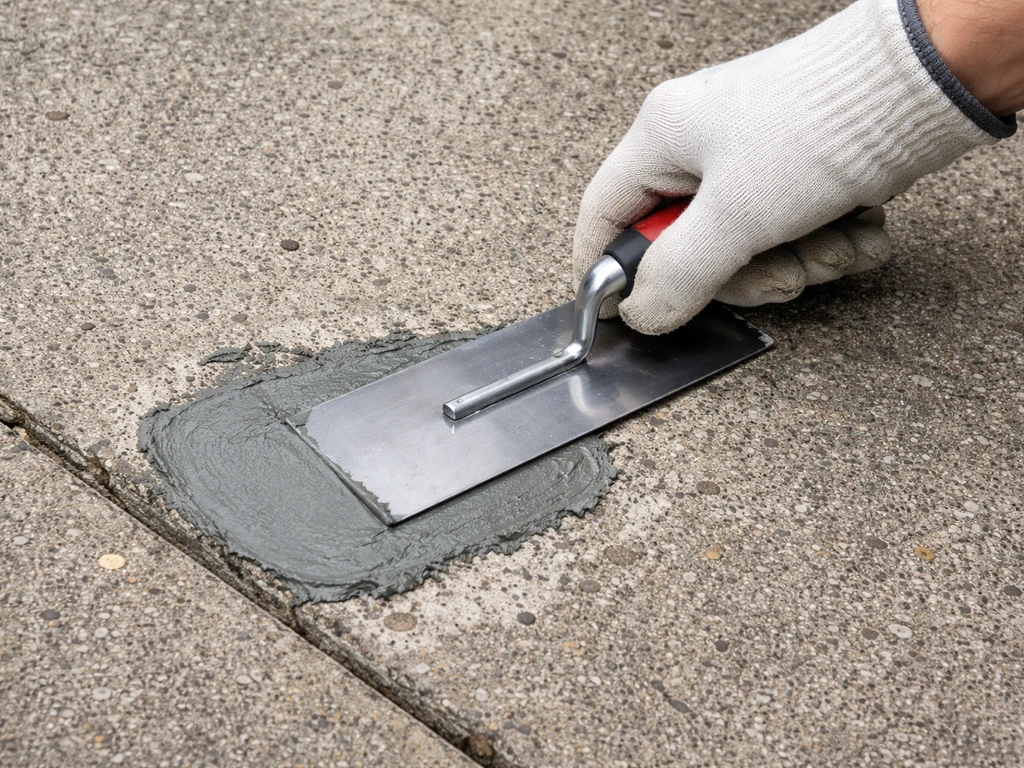
Spalling (surface flaking or pitting) is common on older slabs that were exposed to deicing salts or freeze-thaw cycles. For shallow spalls, a vinyl concrete patcher or a urethane repair mortar works well. Urethane mortars are particularly good because they cure through a chemical reaction rather than drying, which means they're dense, non-shrinking, and bond tightly even in thinner applications. Feather the edges of your patch so there's no lip, and let it cure before you walk on it or coat over it.
Unevenness and low spots
If your slab has low spots that collect water or a noticeably uneven surface, a self-leveling concrete overlay can fix this without demolition. These are polymer-modified materials you pour and spread; they flow flat on their own. They're a separate step from decorative overlays and are used specifically to restore a level plane before the decorative work begins.
Cosmetic upgrades: stain, paint, epoxy coatings, and decorative overlays
This is where you get to choose the look you actually want. If you want a true “dress up” makeover, start with the right cosmetic upgrades and then seal to keep the look from fading dress up makeover. Each approach has trade-offs in cost, durability, appearance, and DIY difficulty. Here's an honest breakdown. After you decide between stain, paint, epoxy coatings, or decorative overlays, you can choose the look you want and make it feel like a finished outdoor room, which is the heart of how to decorate a concrete patio.
| Approach | Appearance | Durability | DIY Difficulty | Best For |
|---|---|---|---|---|
| Acid stain | Translucent, variegated, natural-looking color | Very high when sealed | Moderate (chemistry involved) | Patios in good condition wanting a natural look |
| Water-based concrete stain | Translucent, more uniform than acid stain | Good when sealed | Easy to moderate | First-timers, color-specific looks |
| Concrete paint | Fully opaque, hides the concrete surface | Moderate (chips over time) | Easy | Covering ugly or heavily stained slabs |
| Epoxy/polyaspartic coating | Solid or flake finish, high gloss available | Very high, abrasion-resistant | Moderate to hard (moisture-sensitive) | Heavily used patios, garage-style finish |
| Decorative overlay | Unlimited: stamped, textured, troweled | Very high with proper prep | Hard (requires skill) | Old slabs needing a complete visual transformation |
Acid stain and water-based stain
Staining is my favorite approach for patios in decent shape because the result looks genuinely rich and intentional rather than painted. Acid stains react chemically with the minerals in the concrete to create color, which is why the look is translucent and variegated (no two slabs look exactly alike). Water-based stains don't react chemically; they penetrate and tint the surface, giving you more predictable color but a similar translucent quality. Both approaches leave the texture of the concrete visible and feel natural underfoot. You need bare, clean concrete for either to work, which is why the prep steps above are non-negotiable.
Concrete paint
Paint is opaque, so it covers the concrete completely. That's actually useful if your slab is heavily stained or patched in multiple places and you want a uniform look. The downside is that paint chips and peels over time, especially on exterior surfaces with temperature swings and UV exposure. If you go the paint route, use a masonry-specific paint rated for exterior use, prime the concrete first (skipping primer is one of the most common reasons paint fails), and plan to recoat every few years.
Epoxy and polyaspartic coatings
Epoxy and polyaspartic coatings give you a tough, hard-wearing surface that stands up to furniture, foot traffic, and weather. A common professional approach layers a polyurea basecoat, a vinyl chip flake broadcast for texture and grip, then a UV-resistant polyaspartic topcoat to lock everything in and protect from sun yellowing. Sika’s Sikafloor®-515 is described as an abrasion and UV resistant clear polyaspartic resin system UV-resistant polyaspartic topcoat. DIY epoxy kits are available at home centers, but be warned: moisture is the enemy here. Applying over a damp slab or in high humidity causes bubbling and peeling. The plastic sheet moisture test mentioned earlier is worth doing before you commit to an epoxy system.
Decorative overlays
A decorative overlay is a thin layer of polymer-modified cement (typically 1/8 to 1/4 inch thick) applied over the existing slab. Once cured, it can be stamped, textured, troweled smooth, or scored to look like tile or stone. This is the most dramatic transformation you can get without tearing out the slab. Products like stampable overlay systems let you get a stamped concrete look on an existing patio for a fraction of the cost of full replacement.
The key requirement is surface prep: the slab must be clean, sound, and profiled to the right texture (ICRI CSP guidelines) so the overlay bonds properly. Most systems also require a base coat first to fill in surface voids and blend any repairs before the decorative layer goes on.
Seal it to lock in color and protect your work
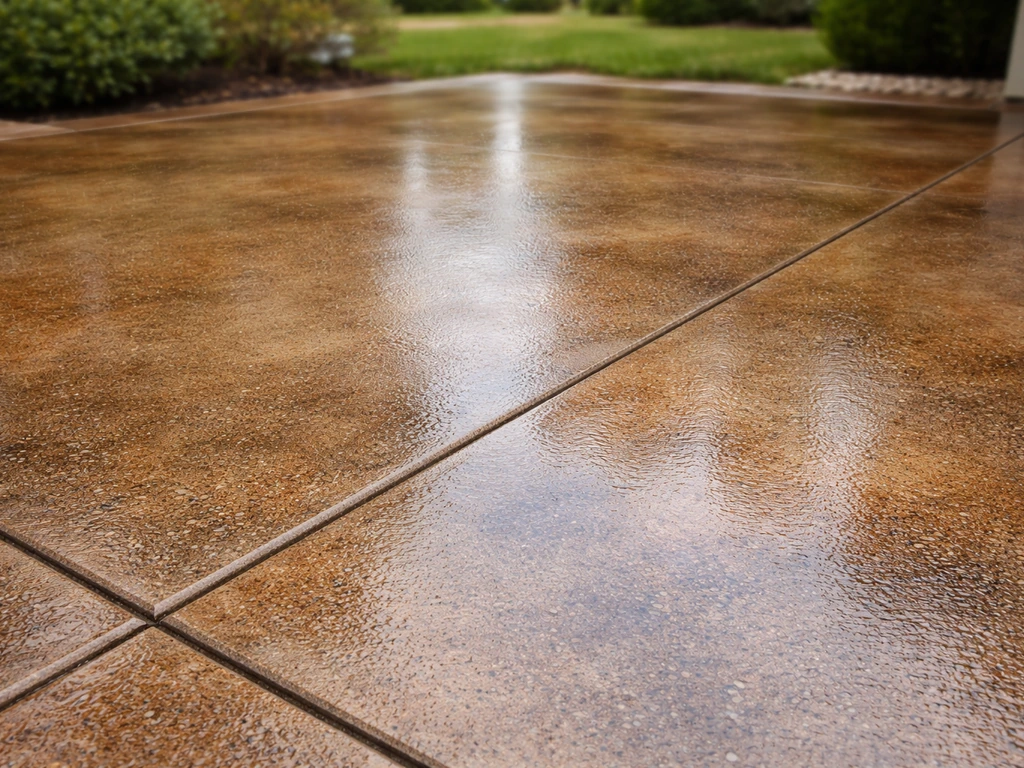
Whatever cosmetic approach you chose, sealing is what makes it last. An unsealed stained patio will fade and absorb stains within a season. An unsealed painted patio will wear through quickly. Sealer is not optional.
Film-forming vs. penetrating sealers
Film-forming sealers (acrylic, epoxy, polyurethane) sit on top of the concrete and create a visible sheen ranging from matte to high gloss depending on the product. They enhance color well and provide a barrier that's easy to clean. Penetrating sealers (silane, siloxane, siliconate) soak into the concrete without leaving a surface film, so they don't change the appearance much.
They're better for patios where traction is important or where you want the natural look, but they don't enhance color the way film-formers do. When it comes to how to make a concrete patio dog friendly, focus on traction and durability, and seal and repair the slab so it resists wear and moisture. For a stained or coated patio where you want color depth and protection, a film-forming acrylic or polyurethane sealer is typically the right choice.
For a natural gray concrete patio where you just want moisture protection without changing the look, go penetrating.
Application tips that actually matter
- Never apply sealer to wet concrete. At minimum, wait until the surface is dry to the touch and the slab has had adequate cure time (30 days at around 72°F and 50% humidity is the common standard for new slabs).
- Two thin coats beat one thick coat every time. Thick coats trap air and moisture, which causes bubbling and a milky white appearance.
- Check the temperature and humidity before you start. Extreme heat causes rapid drying and air entrapment; high humidity slows curing and can cause a hazy finish. Most sealers specify an application window between 50°F and 90°F.
- Overlap your roller or sprayer passes by about 50% to avoid lap marks and dry edges.
- Let the first coat cure to the manufacturer's spec before applying the second coat, usually 2 to 4 hours for acrylics.
Optional upgrades that take it further
Once the surface work is done, design enhancements can dramatically change how the space feels. These aren't necessary for a better-looking patio, but they're worth considering if you want a real transformation rather than just a cleaner version of what you had.
Texture and pattern
You can add texture to a smooth slab with a texture broadcast (sand mixed into a topcoat), a broom finish applied during a resurfacing project, or a texture coat overlay system. Texture adds traction and breaks up the visual monotony of a flat gray surface. If you're doing an overlay, stamps can create brick, slate, flagstone, or tile patterns at a cost typically in the $6 to $10 per square foot range for installed work, though DIY brings that down significantly.
Borders and scoring
Scoring a decorative border around the perimeter of the slab with a concrete saw or angle grinder is one of the cheapest ways to make a plain slab look intentional. You can cut a 4 to 6 inch border, fill the score lines with a contrasting color stain or grout, and suddenly the slab looks designed. This works well in combination with staining: stain the field one color and the border a complementary color.
Pavers and inlays
If your concrete patio is in bad enough shape that you'd rather cover it than fix it, laying thin pavers or porcelain tiles directly over the slab is a legitimate option. The slab needs to be reasonably level and structurally sound (cracks in the slab will eventually telegraph through if they're active/moving), but this approach can turn a tired gray patio into something that looks completely new with relatively little concrete work involved.
Edging and borders with pavers
Even if you keep the existing concrete surface, adding a paver or brick border around the perimeter of the slab grounds the space visually and creates a cleaner transition to the lawn or garden. It's a design detail that adds a lot of polish for relatively little cost or effort.
Picking the right path and avoiding the mistakes that undo all your work
The best approach for your specific patio comes down to its current condition. If you’re wondering what to do with a concrete patio that looks worn out, start by figuring out what’s wrong and then match the repair and finish to that cause. Use this as a quick decision guide before you buy anything.
| Patio Condition | Recommended Approach |
|---|---|
| New slab, looks plain/gray | Clean, stain or seal with a tinted sealer, add a border score |
| Old slab, good condition but dull | Strip old sealer, clean, restain or re-seal with a film-forming sealer |
| Old slab with surface stains | Targeted stain removal, pressure wash, acid stain or paint to unify appearance |
| Old slab with cracks and spalling | Repair all damage first, then resurface or apply decorative overlay, then seal |
| Old slab that's heavily damaged or ugly | Decorative overlay system (stamps, texture), or cover with thin pavers |
| Slab with moisture problems | Address drainage, use penetrating sealer only, or use a vapor-permeable coating |
The mistakes worth avoiding
- Skipping the moisture test before applying epoxy or a thick coating system. This is the most common cause of peeling and bubbling.
- Applying new sealer over an incompatible old sealer without stripping first. It causes the blotchy, hazy look many people have seen on driveways.
- Using a single thick coat of sealer instead of two thin coats. Thick coats don't cure evenly and trap air.
- Patching cracks with the wrong product and then sealing over them right away. Let repairs cure fully, and for new concrete, wait the full 28 to 30 days before applying any coating.
- Applying stain or coating in direct sun on a hot day. The material dries too fast, traps air, and won't bond properly. Early morning or overcast days are ideal.
- Forgetting to prime before painting. Primer is what actually bonds to the concrete; paint bonds to the primer. Skip it and you're repainting within a year.
- Ignoring efflorescence and painting over it. The salts will push through whatever you put on top. Clean it off and find the moisture source first.
If your goal goes beyond surface improvements and into full redesign territory, thinking through how you want to decorate and furnish the space alongside the surface work will save you from redoing things. The surface treatment you choose should complement the furniture, lighting, and landscaping you're planning, not just look good on its own. Whether you're doing a minimal refresh or a full transformation, the steps above give you a clear, practical path to a patio that looks genuinely better, not just cleaner.
FAQ
How do I tell if my patio has moisture issues beyond what a plastic sheet test shows?
The plastic test is a snapshot. If your patio shows recurring darkening after rain, moldy patches, or dampness that returns within days, treat it as a continuing moisture problem and avoid film-forming coatings until you correct drainage or grading. Penetrating sealers usually fail less often than coatings, but they are still not a fix for active water intrusion.
Can I clean a concrete patio with soap or detergents instead of pressure washing?
You can use mild detergent, but you still need to remove residue thoroughly. Leftover soap can interfere with stain penetration and cause coating adhesion failure. If you do chemical cleaning, rinse until runoff is free of suds, then let the concrete dry fully before repairs and finishing.
What if the surface is already coated but I am not sure what type it is?
Do a small test area. If water beads or forms a slick film quickly, it may be a film-forming sealer. If a solvent test cleaner or stripper doesn’t etch anything, you may be dealing with a different system than expected. In doubt, strip and profile to avoid “new product over old product” peel-offs.
Is it okay to stain over minor paint overspray or old patch repairs?
Usually not. Paint residue and some patch materials can block chemical staining or create blotchy color. Remove loose or glossy areas, feather repairs, and ensure you are staining bare, sound concrete. If the patch is a different cementitious mix, expect some color variation and plan a test spot first.
How long should I wait after repairs before staining, painting, or sealing?
Follow the repair product’s cure time, but as a practical rule, epoxy repairs typically need at least 24 hours of full cure, and colder weather can extend that. For cementitious patches, give them enough time to dry through, not just set. If you seal too early, you can trap moisture and risk peeling or discoloration.
What sheen or finish should I choose so a sealed patio looks better instead of looking too shiny?
If you want “better looking” without glare, start with a matte or satin sealer rather than high gloss. Gloss can emphasize surface imperfections and make certain stains look uneven. Use the same sealer type across the patio and apply consistently to avoid lap marks.
Can I use one sealer to fix both color enhancement and traction concerns?
Yes, but be deliberate. Film-forming sealers improve color, yet they can get slick when glossy. If traction matters, choose a lower-sheen finish, consider a sealer marketed for slip resistance, or use a penetrating sealer and boost aesthetics with staining or texture instead of relying on gloss.
Why does my stained concrete look blotchy even though I prepped it?
Blotchiness often comes from uneven absorption caused by residue, curing compounds, patch materials, or moisture variations. Make sure the slab is bare and evenly clean, let it dry fully, and run a small test patch before staining the whole area. If you see patch-by-patch differences, a penetrating wash or targeted treatment may be needed, not just more stain.
Can I apply a concrete overlay or decorative overlay over an existing coating or sealant?
Only if the existing surface is fully compatible and sound, which is uncommon. Most overlays require clean, profiled, bare concrete with proper bonding. If there is any remaining sealer film, the overlay can delaminate. When uncertain, grind to achieve a proper surface profile and verify adhesion with a manufacturer-approved test.
What is a safe way to apply stain or sealer without lap marks or darker edges?
Work small sections with a “wet edge” approach, keep a consistent application rate, and avoid over-brushing after material begins to tack. Plan your start point so you do not end mid-wall in a visible area. Also avoid applying when the slab is warming up quickly under direct sun, which increases streaking.
How often should I reseal my patio depending on the finish type?
Penetrating sealers generally need reapplication less frequently for appearance, but they still lose water repellency over time. Film-formers typically wear and can fade faster, especially with heavy traffic and UV exposure. A good tactic is to do periodic water-bead checks, resealing when water no longer beads uniformly.
Are pavers or tiles over concrete a good option if my slab has cracks?
It can be, but only if the cracks are not actively moving. If the slab is unsettled, cracks can telegraph through and break joints or cause unevenness. Before installing, evaluate crack activity, confirm the slab is reasonably level, and use an installation method designed for overlaying concrete.