Whether you refinish or fully resurface your stamped concrete patio depends on one thing: how deep the damage goes. If the problem is mostly at the surface (fading color, dull sealer, minor staining, or a sealer that's peeling in spots), you can refinish by stripping the old sealer, cleaning well, and reapplying color and a fresh sealer coat. If you're dealing with flaking concrete, widespread cracks, or serious scaling with exposed aggregate, you need a true resurfacing overlay. Both are DIY-doable, but they follow different paths and use different products. If you are looking for a do it yourself concrete patio plan, this guide is a great place to start DIY-doable. This guide walks you through the whole decision and process from start to finish.
How to Refinish a Stamped Concrete Patio Step by Step

How to Tell If You Need Refinishing vs Resurfacing
Start by walking your patio slowly and looking for specific signs. The difference between refinishing and resurfacing is basically the difference between a cosmetic fix and a structural repair of the surface layer.
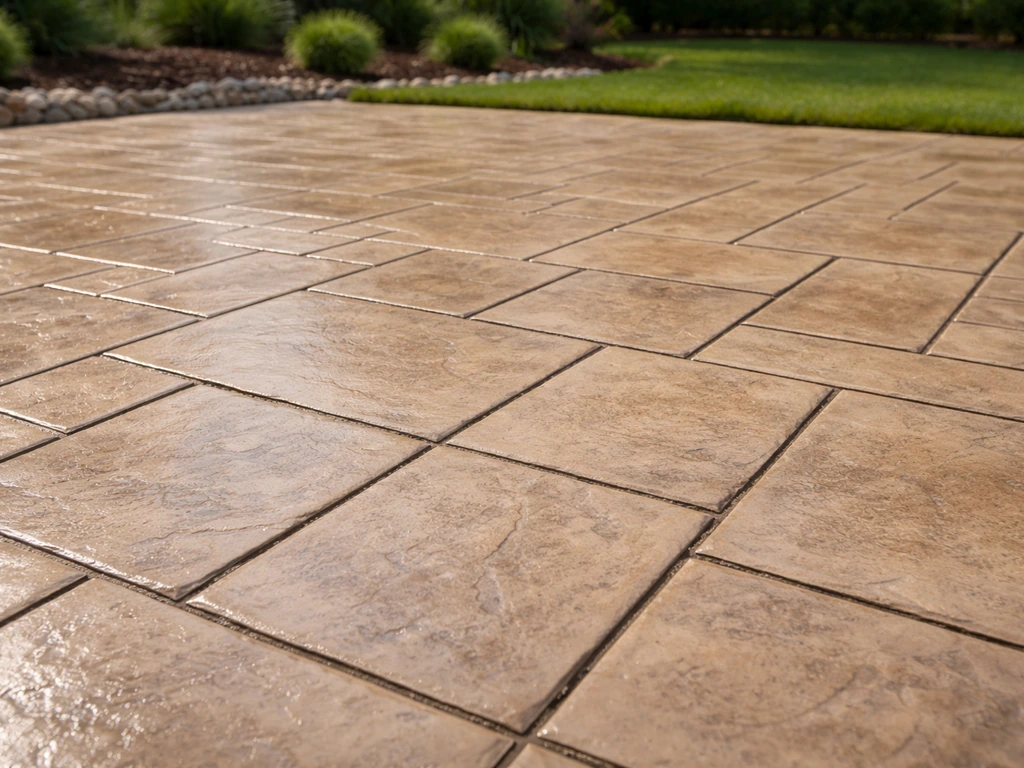
Refinishing is the right call when you see fading color, a dull or hazy appearance, water that no longer beads on the surface, minor sealer peeling in a few spots, or light surface staining. These are all signs that the sealer has broken down from UV exposure, moisture cycles, and general wear. The concrete underneath is still structurally sound. If the pattern is still clearly visible and nothing is coming up in chunks, you are a refinish candidate.
Resurfacing becomes necessary when you find scaling (local flaking and peeling where aggregate is starting to show through), delamination (white or hazy patches where the sealer and surface layer have lifted together), widespread cracking, or soft/crumbling areas. Efflorescence, which looks like white salt deposits forming on the surface, also points to a moisture problem that needs to be addressed before any new coating goes down. If more than about 25 to 30 percent of the surface is damaged, a stampable overlay will give you a much better long-term result than trying to patch and seal over broken concrete. If you’re wondering can an existing concrete patio be stamped, the key is checking how much of the slab is damaged and whether an appropriate overlay system is suitable.
| Condition | What It Looks Like | What It Needs |
|---|---|---|
| Sealer breakdown | Water soaks in instead of beading; surface looks dull | Clean, strip old sealer, reseal |
| Color fading | Stamped pattern visible but washed out | Cleaning, color reintroduction, reseal |
| Sealer peeling/flaking | Sealer lifting in sheets or bubbling | Full sealer strip, surface prep, reseal |
| Delamination (hazing) | White/milky patches where sealer lifted | Strip, assess for overlay need |
| Scaling | Surface flaking; aggregate becoming visible | Resurfacing overlay |
| Cracks | Hairline to wide cracks across surface | Rout and seal or fill before overlay |
| Efflorescence | White crystalline salt deposits | Chemical clean, address moisture, then overlay or seal |
Prep: Cleaning, Degreasing, and Stripping Old Sealer
This is the step that most DIYers rush, and it is the single biggest reason refinishing and resurfacing jobs fail. Any new coating, sealer, stain, or overlay needs a clean, bare, open concrete surface to bond to. If you are aiming for the right stamped finish, a properly prepared, clean surface is just as critical for a stamped concrete patio as it is for refinishing or resurfacing. Residual sealer, grease, or loose material will cause peeling again within one season. Homeowners discussing stamped concrete sealer flaking often point to improper surface prep and residual sealer or loose material as key causes of bond failure improper prep and residual sealer interfering with bond.
Cleaning and Degreasing
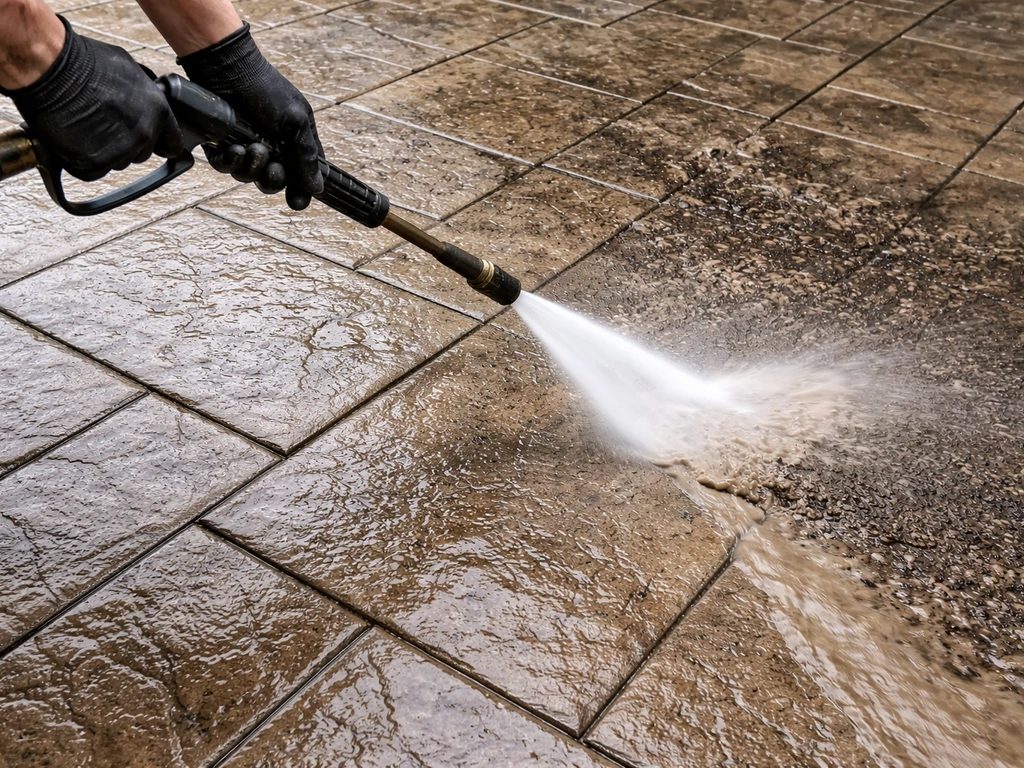
Start with a thorough pressure wash at 2,500 to 3,500 PSI to blast off dirt, loose sealer, and surface debris. Hit oil spots or grill grease with a concrete degreaser first, let it dwell for 10 to 15 minutes, then rinse completely. Any contamination left on the surface will prevent bonding, so take this part seriously.
Stripping the Old Sealer
If the sealer is peeling, bubbling, or you are planning to apply an overlay, the old sealer has to come off entirely. You have two options: chemical stripping or mechanical removal. For most DIYers, a gel-based chemical stripper works well because it clings to vertical stamped edges and gives you control. Apply it, let it dwell per the product instructions, then scrub and rinse. The critical follow-up step that gets skipped: after using a chemical stripper, you must rinse the surface thoroughly with clean water to neutralize and remove any remaining stripper residue. Leftover stripper chemistry will interfere with everything you apply next.
For more stubborn coatings or if you are going to apply a cementitious overlay, mechanical removal with a concrete grinder is the more reliable option. Grinding and shot blasting are the preferred methods for any situation where you need a true surface profile for bonding. One important note: pressure washing and acid etching alone are not sufficient to remove laitance (the weak surface layer) or old coatings when you are planning an overlay. Some overlay manufacturers, including those making stampable products, specifically say not to acid etch because it can weaken the surface. Stick to grinding or shot blasting if you are going the overlay route.
Final Surface Check Before Moving On
Once cleaned and stripped, let the concrete dry completely. For sealing, that typically means at least 24 hours of dry time. Moisture trapped under a new sealer coat causes cloudiness and peeling, and it is completely avoidable. Do a simple water drop test: if water still beads after cleaning, there is still a residual coating somewhere. Keep working until water soaks in evenly.
Repairing Stamped Concrete Damage: Cracks, Spalling, and Loose Edges
Repairs happen after cleaning and stripping but before any new material goes down. Do not skip this step thinking an overlay will hide cracks or soft spots. It will not. Movement in the concrete below will telegraph right through a new overlay within a year.
Crack Repair
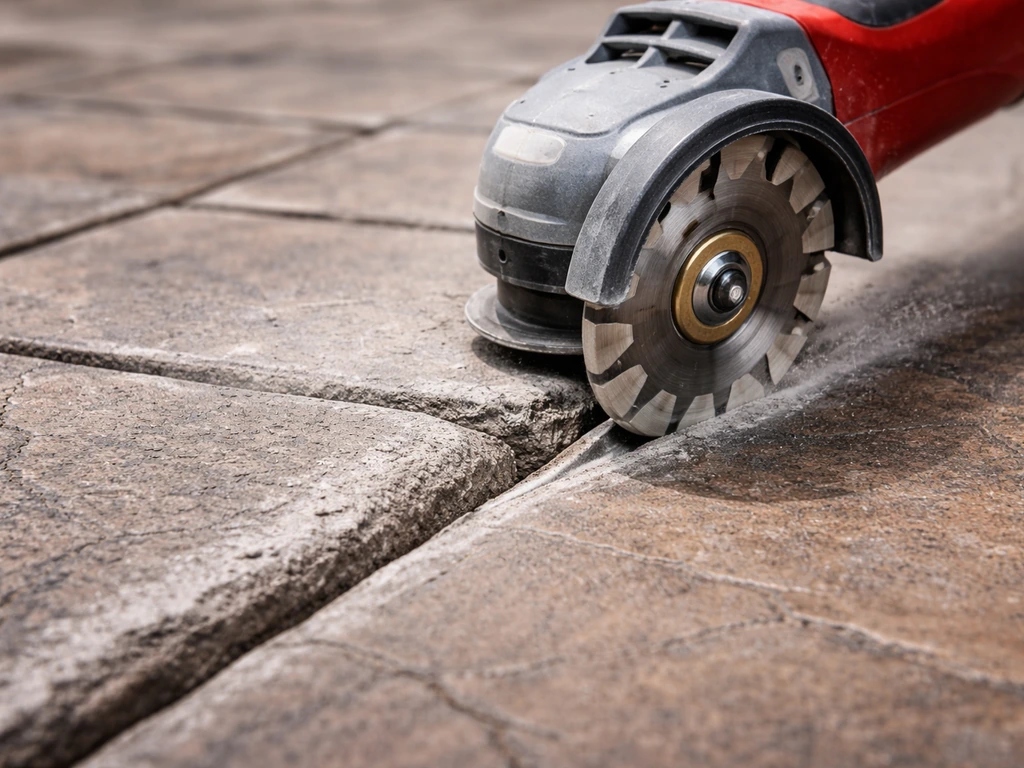
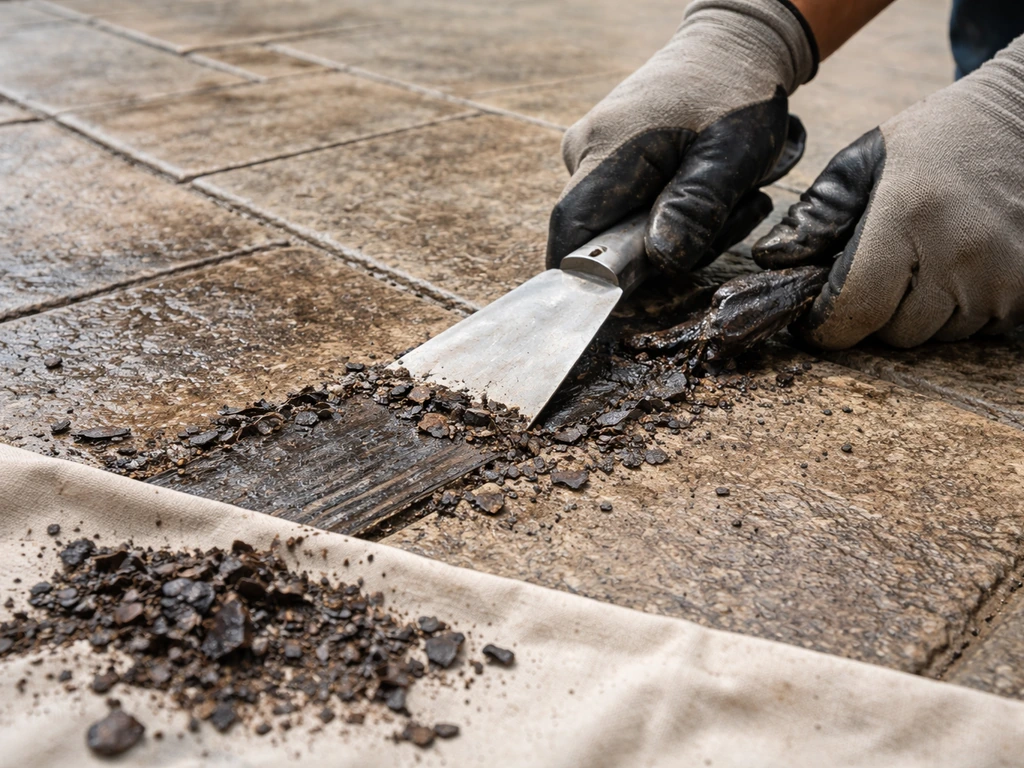
For cracks wider than a hairline, routing is the right approach. Use a handheld angle grinder with a crack chasing blade or a concrete saw to open the crack into a V-shaped groove, with the crack centered at the bottom. The geometry matters here: a proper V-groove creates an engineered reservoir with enough width and depth to hold a flexible sealant. Once you have routed the groove, clean it out thoroughly with compressed air or a water jet to remove all dust, grease, and debris, because contamination in the groove will prevent the sealant from bonding. Fill the prepared groove with a polyurethane or epoxy crack sealant appropriate for outdoor concrete. For very fine hairline cracks that are stable, you can often work them into the prep by grinding lightly and letting the overlay material fill them.
Spalling and Scaling
Chipped, flaking, or spalled areas need to be ground back to sound concrete. Loose concrete around the edges of spalled areas must be removed completely before patching. Use a polymer-modified concrete patch or the primer/overlay system you will be using on the rest of the patio to fill these areas, and feather the edges so there is no lip. For delaminated sections, remove all the lifted material, grind the area smooth, and treat it like the rest of the prep surface.
Loose or Raised Edges
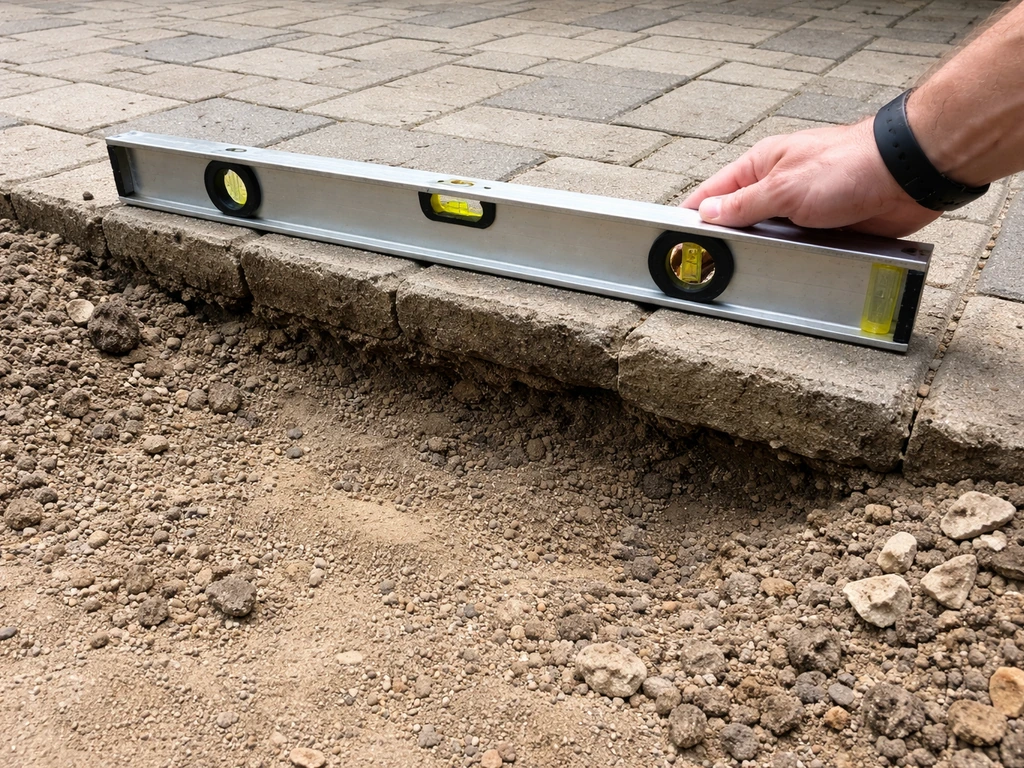
Walk the perimeter and check for any sections that have lifted or heaved slightly. If a section is loose due to soil settlement, that is a bigger problem that an overlay will not fix. But if you have raised seams or edges from freeze-thaw movement, grind them flush before proceeding. A surface that is not relatively flat will create thin spots in an overlay that will fail early.
Choosing Your Refinishing or Resurfacing System
This is your main decision point, and it comes down to the extent of damage you found in the first step. Here is how to think through the options.
Option 1: Clean, Recolor, and Reseal (Light Refinishing)
If your patio is in decent structural shape and the main problems are fading, dullness, and light staining, this is your path. After thorough cleaning and stripping the old sealer, you reintroduce color using a concrete stain or a tinted sealer system, then apply a fresh topcoat sealer. Products like acrylic concrete stain sealers are designed specifically to restore dull-looking stamped concrete and bring back color depth and sheen. This is the least invasive and most budget-friendly option. If you want to do it yourself, follow a concrete patio how to do it yourself guide that matches your level of damage and the coating system you choose.
Option 2: Stampable Overlay (Full Resurfacing)
If you have scaling, widespread cracking, or more than minor surface damage, a stampable overlay is the right move. For homeowners searching for a stamped concrete patio do it yourself option, this is the point where an overlay system can transform the look without tearing everything out. This is a thin cementitious layer (typically 3/16 to 3/8 inch, matched to the depth of the stamp pattern you are re-imprinting) that you trowel or pour over the prepared surface, then stamp before it sets. Products like the T1000 stampable overlay system from Sika/Marshalltown are common DIY-accessible choices. These systems typically require a dedicated primer applied to the prepared concrete first. The overlay is applied within a defined window after the primer (often up to 24 hours), then stamped and finished. Thickness is important: apply the overlay at a depth equal to the mortar joint depth of the stamp pattern you are using, so the stamps press in cleanly and evenly.
Option 3: Micro-Topping or Thin Resurfacer
For situations between light refinishing and a full stampable overlay, a thin concrete resurfacer can fill surface porosity, minor scaling, and small imperfections while restoring a uniform base for staining and sealing. Once the surface is properly prepped, you can focus on how to recolor a stamped concrete patio using stain or a tinted sealer to refresh the look restoring a uniform base for staining and sealing. These products are not thick enough to re-stamp, but they smooth out surface wear and give you a fresh bonding surface for color and sealer.
| System Type | Best For | Can Re-Stamp? | DIY Difficulty | Relative Cost |
|---|---|---|---|---|
| Clean + Stain + Reseal | Fading, dullness, minor sealer failure | No (keeps existing pattern) | Low | $ |
| Thin Resurfacer + Stain + Seal | Surface wear, minor scaling, no pattern need | No | Low-Medium | $$ |
| Stampable Overlay | Scaling, widespread damage, wants new pattern | Yes | Medium-High | $$$ |
Applying the Overlay or Refinishing Coatings Step by Step
Work on a day when the temperature is between 50°F and 90°F, humidity is moderate, and rain is not forecast for at least 24 to 48 hours. Extreme heat speeds up set time and makes stampable overlays very difficult to finish correctly. Wind also accelerates drying, which is a problem. Early morning is often the best time to start.
For a Stampable Overlay
- Apply the specified primer evenly across the entire prepared surface and let it reach the tack stage per the product instructions before applying the overlay.
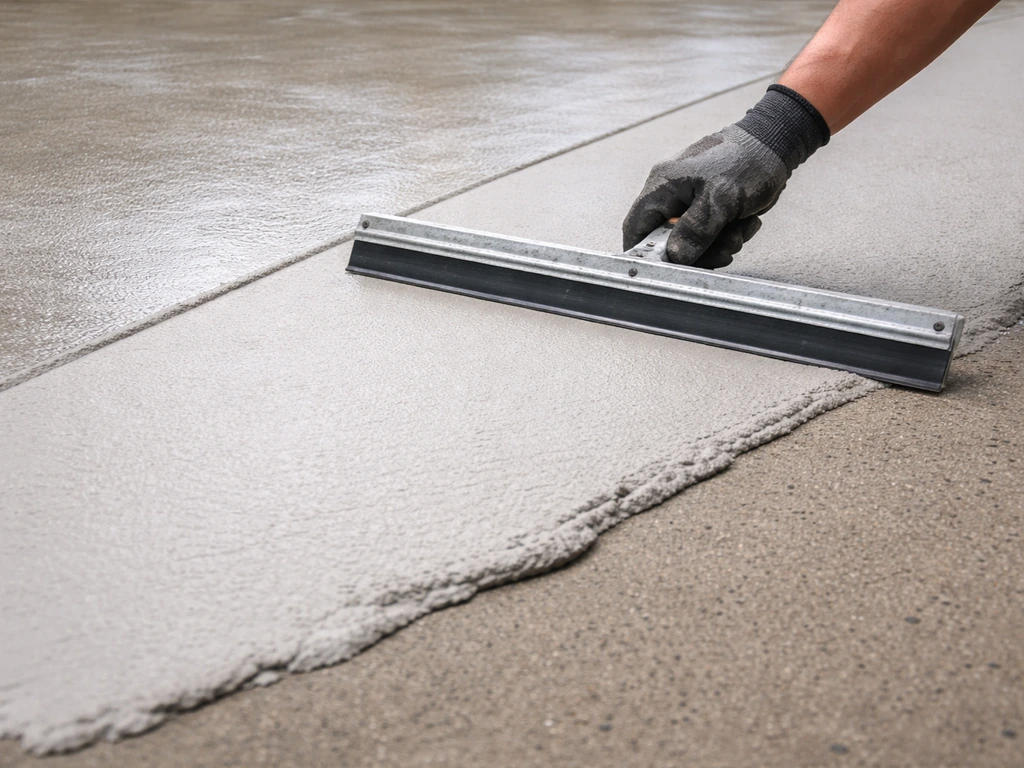
- Mix the overlay material in a clean bucket using a drill with a paddle mixer. Mix for at least 3 minutes to make sure the water and overlay powder are fully combined. Under-mixed material will have weak spots and inconsistent workability.
- Pour the mixed overlay onto the primed surface and spread it with a gauge rake or trowel to the target thickness, which should equal the mortar joint depth of your stamp. Work in manageable sections so you can stamp before the material sets.
- When the overlay has firmed up enough to hold a footprint without sticking (the fresnel-film window, typically 20 to 45 minutes depending on temperature and humidity), begin stamping with your pattern tools. Work row by row in the same direction, pressing stamps firmly and evenly. Use a hand tamper for uniform depth.
- Let the stamped overlay cure. Do not apply sealer earlier than 72 hours at 70°F. Applying sealer too soon can weaken the overlay surface. In cool or humid conditions, extend that wait time further.
For a Thin Resurfacer or Refinishing Coat
- Dampen the concrete surface lightly with clean water so it is damp but not standing wet. This prevents the dry concrete from pulling moisture out of the resurfacer too quickly.
- Mix the resurfacer per instructions and pour it in a ribbon across the surface. Use a squeegee or trowel to spread it evenly, working it into the texture of the existing stamp pattern.
- For a pure refinish (no resurfacer, just stain and seal), skip to the coloring step once the surface is fully prepped, clean, and dry.
Coloring and Restoring the Stamped Look
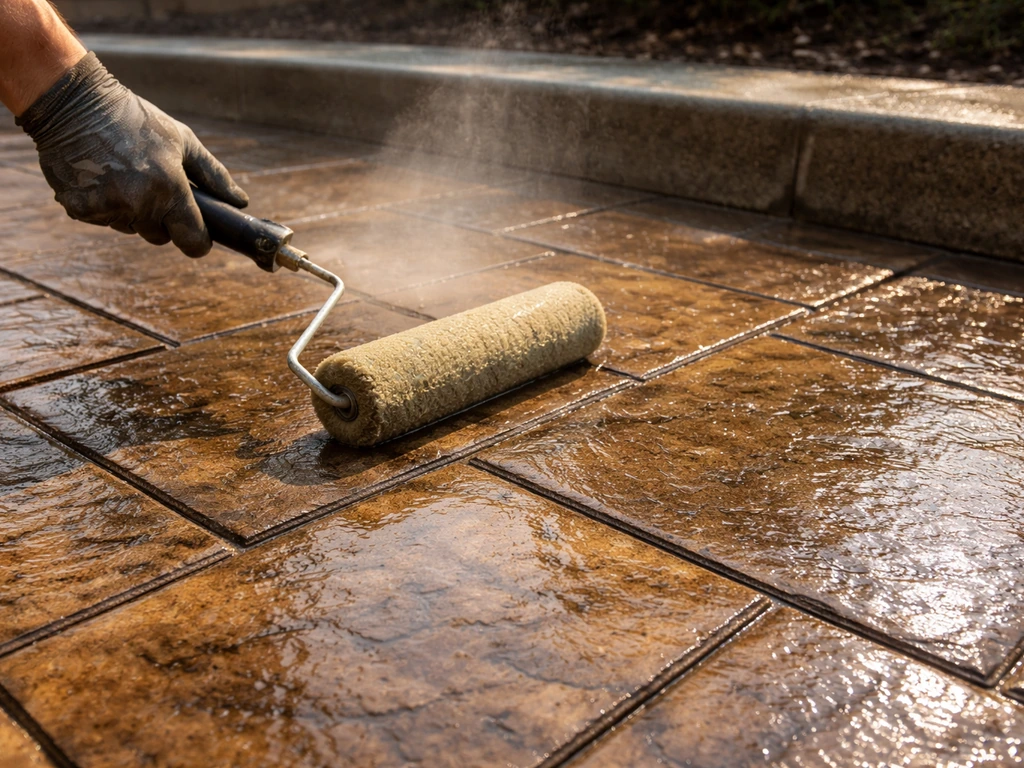
If you applied a stampable overlay, color is typically introduced in one of three ways: integral color mixed into the overlay itself, color hardener broadcast onto the surface before stamping, or an antiquing release applied during stamping. For most DIY refinishing projects where you already have a stamped pattern and just want to restore it, a concrete stain or tinted sealer is the practical approach.
Using Concrete Stain to Restore Color
Water-based acrylic stains are the easiest option for DIYers and are well-suited to bringing back the look of faded stamped concrete. Apply with a low-pressure sprayer or a roller, working the product into the stamp pattern recesses. A second coat is almost always worth it for more even coverage and depth. Water-based products are also more forgiving if you need to adjust or blend color across the surface.
To get the two-tone look that stamped concrete is known for, apply a base color first and then use a darker antiquing wash or tinted sealer in the joints and low points. This highlights the depth of the pattern. Wipe back the excess from the high points while it is still wet, leaving the color concentrated in the recesses. It is similar to how furniture staining works, and it really brings a stamped pattern back to life.
Recoloring with a Tinted Sealer
Tinted or stain-sealer combination products handle both color restoration and protection in one step. These are a practical choice for a refinishing project where you are not doing a full overlay. Products in this category are specifically formulated to restore dull-looking concrete while providing water and stain resistance. Euclid Chemical’s INCRETE Concrete Stain Sealer WB is described as an acrylic latex sealer formulated to restore dull-looking concrete and provide water- and stain-resistant protection while sealing masonry or concrete restore dull-looking concrete while providing water and stain resistance. They work best over clean, stripped concrete where there is no old sealer blocking penetration.
Sealing, Curing, and Keeping the Finish Looking Good
Choosing the Right Sealer
For stamped concrete outdoors, film-forming acrylic sealers are the standard choice. They sit on top of the surface and provide the gloss or sheen that stamped concrete is known for, and they protect color from UV fade and weather. Acrylic sealers come in water-based and solvent-based formulas. Solvent-based acrylics typically penetrate slightly better and give a higher-gloss, wet look, but they require more ventilation and careful application. Water-based acrylics are easier to work with and have lower VOCs, and they form a solid film through a coalescing process as the water evaporates.
Penetrating sealers (silanes, siloxanes, silicates) fill the pores but do not create a surface film, so they do not affect sheen or color. They are better suited for plain concrete or situations where you want moisture protection without changing appearance. For a stamped patio where color and pattern depth matter, a film-forming acrylic is almost always the right call.
On sheen level: high-gloss gives the most dramatic color pop but shows footprints, water spots, and surface imperfections more. Satin or low-gloss finishes are more forgiving for everyday outdoor use and are a safer choice if the surface is not perfectly uniform. For a quick self-check before buying a sealer, do a water drop test: if water darkens the surface in under a minute, the concrete is ready to seal and will accept a penetrating component well.
Applying the Sealer
- Confirm the surface is completely dry. For a new overlay, wait at least 72 hours at 70°F before sealing. For a refinishing project on existing concrete, wait at least 24 hours after any cleaning or staining.
- Apply the sealer with a low-nap roller (3/8 inch) or a pump-up garden sprayer. Thin, even coats are better than one thick coat. A thick sealer coat traps moisture and is one of the main causes of cloudiness and peeling.
- Apply a second coat when the first is dry to the touch but not fully cured, typically 2 to 4 hours depending on temperature and humidity. Low temperatures and high humidity extend drying time significantly.
- Keep foot traffic off the sealed surface for at least 24 hours. Wait 72 hours before moving furniture back. For solvent-based sealers, follow the manufacturer's specific re-coat window, as applying outside that window can cause adhesion problems between coats.
Maintenance to Protect Your Investment
The most important maintenance habit is checking the sealer annually. Do the water bead test every spring: pour a small amount of water on the surface and watch what happens. If it beads up and holds, the sealer is still doing its job. If it soaks in and darkens the concrete within 30 to 60 seconds, it is time to reseal. Most outdoor stamped concrete in a high-traffic or harsh-climate area needs resealing every 2 to 3 years. If you live somewhere with heavy UV exposure, snow and ice, or frequent wet-dry cycles, err on the side of every 2 years.
Avoid using deicing salts on stamped concrete in winter. They accelerate sealer breakdown and cause the scaling and surface damage that leads to the kind of resurfacing project you just finished. Sand is a better option for traction. For regular cleaning, a mild detergent and a soft-bristle broom or low-pressure hose rinse is all you need. Avoid pressure washing above 1,500 PSI once the sealer is down, as it can erode the surface film over time.
If you keep up with resealing and basic cleaning, a well-done refinishing or resurfacing job should give you 10 or more years before any major work is needed again. The prep and the sealer choice are what determine longevity. Get those two things right and the rest takes care of itself.
FAQ
Can I refinish a stamped concrete patio without stripping all the old sealer?
Yes, but only if the concrete surface is still sound and the sealer is either still intact or can be removed cleanly. If water no longer beads due to a failing topcoat and you do not have flaking or delamination, refinishing over the existing slab is usually fine, but you still must strip off any remaining sealer that is blocking penetration.
What happens if I don’t neutralize or fully rinse after chemical stripping?
It usually fails sooner. If a coating is applied over residual stripper, old sealer, or loose debris, you can see blistering, peeling, or hazy areas within a season. After stripping, rinse until runoff water looks clear and there is no slippery film, then do the water-bead or water-soak check again.
Is acid etching enough surface prep before applying a stampable overlay?
For overlays, you generally need grinding or shot blasting, because acid etching typically does not remove old coatings or laitance to the bonding level manufacturers want. If you were told to acid etch, confirm the specific overlay system allows it, otherwise plan on mechanical removal to create the right surface profile.
How do I decide between stain or an overlay if the patio looks faded?
If the patio is only faded or dull and the pattern is still crisp, tintable sealers or water-based acrylic stains can restore color. If the pattern edges are breaking up due to scaling, or you have white hazy patches from delamination, a stain or tinted sealer will not re-create a stable stamped look, resurfacing is the better choice.
Can I fix raised areas or loose sections with a stampable overlay?
Do not use an overlay to “level” heaved or loose areas. If you find sections that rock, have hollow spots, or have lifted seams from movement, you must address the underlying issue first, usually by removing the failed area and repairing or re-supporting the slab.
How much grinding is “enough” before refinishing or resurfacing?
Aim for an even bond-ready surface, not maximum roughness. If you grind too aggressively and expose too much aggregate or create deep spalls, you can end up with thin overlay areas or a blotchy finish. Follow the overlay system’s prep guidance, then do a visual check for uniform texture.
Should I repair hairline cracks before sealing or overlaying?
If hairline cracks are stable, they can often be incorporated by the overlay or filled after light grinding. For cracks that open and close, or widths that exceed hairline, routing and filling is safer to prevent the sealant from breaking and showing through after curing.
What’s the biggest weather mistake when refinishing or stamping an overlay?
For stampable overlays, temperature control affects both stamping and curing. In extreme heat, the overlay can set too fast for clean stamping, and in cool weather it can take too long and lead to distorted impressions, plan your start time and avoid windy conditions that drive uneven drying.
Can I apply a new sealer over tinted sealer that’s still in good shape?
Usually not. If a past sealers layer is still present and bonded, many refinishing systems will not penetrate and will cure on top, which can lead to peeling. The water-bead test and a physical scrape in a hidden spot help confirm whether stripping is required.
Is it safe to refinish if rain is possible within 24 hours?
Yes, but only if the surface dries completely and you can avoid getting the patio wet during the first cure window. Water left to pool during or right after application can cause color variation, dull spots, or early sealer failure, especially with film-forming acrylics.
How do I get back the two-tone pattern look without making the whole patio too dark?
If you want to restore a two-tone look, you generally build color by applying a base color first and then adding darker material in the recesses with either antiquing techniques or a joint wash, then wipe back before it dries. Trying to “paint it all at once” often leaves high points too dark.
What’s the best way to deal with winter traction on stamped concrete?
Salt can accelerate sealer breakdown, drive moisture into the surface, and contribute to scaling. If you must winterize, use sand or grit for traction and keep the surface clean so you are not constantly re-wetting salted residue.
How often should I reseal, and how can I tell before it fails?
The most practical approach is annual testing, plus spot checks after storms. Re-seal when water no longer beads reliably (or soaks in quickly), and avoid waiting for visible color loss since once UV and moisture penetrate, it can require more aggressive resurfacing prep.