
You can absolutely build and stamp a concrete patio yourself. The basic process goes like this: plan your layout and drainage, excavate and compact a gravel base, build your forms, pour and screed the concrete, broadcast color hardener, apply release agent, stamp the surface while the concrete is still in its plastic stage, let it cure, rinse off the release agent, and seal it. The whole thing takes a weekend or two if you plan well, and the results can look genuinely impressive. That said, timing the stamping window is the part that trips most people up, so it's worth understanding the full sequence before you mix a single bag.
How to Stamped Concrete Patio DIY: Step-by-Step Guide

Silas Morrison
9 Jun 2026
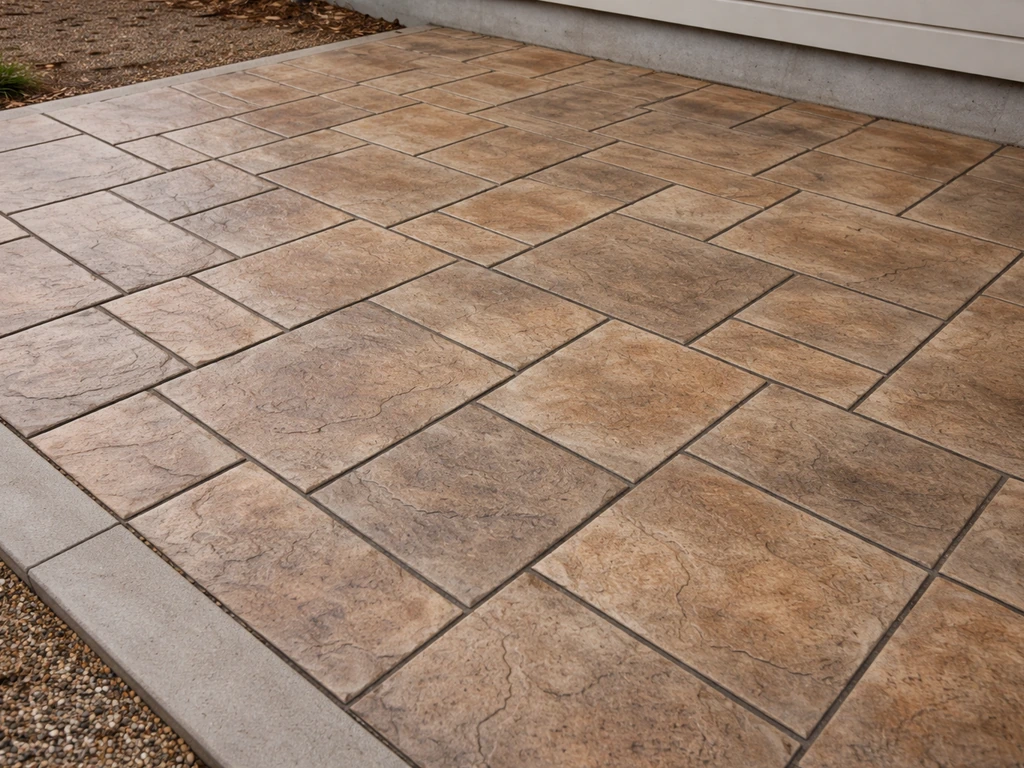
Planning and design decisions
Start by nailing down the size, shape, and purpose of your patio before you buy anything. Sketch it out on paper with actual dimensions. Think about furniture placement, traffic flow from the house, and how the patio will drain during rain. A 10x12 or 12x16 slab is a manageable DIY size for a first project. Anything larger starts to demand a bigger crew and faster hands when it's time to stamp.
Slope is critical. Your finished slab needs to drain away from the house, ideally at a 1/8 to 1/4 inch drop per foot. If water pools against your foundation, you'll have bigger problems than a plain-looking patio. Mark the high and low points of your layout before you excavate so you're building slope in from the start, not trying to compensate later.
Check local permit requirements. Many municipalities require a permit for concrete flatwork above a certain square footage or within a certain distance from a property line. It takes 20 minutes to check, and skipping it can mean tearing out your work later. While you're at it, call 811 (in the US) to have underground utilities marked before you dig.
Decide on your pattern and color early. The stamp pattern, the base concrete color (if any), and the release agent tone all need to be coordinated before pour day. If you're combining multiple patterns (like a field pattern with a border), sketch out where each stamp will be used. Indecision on pour day is a disaster.
Tools, materials, and choosing the stamp/finish
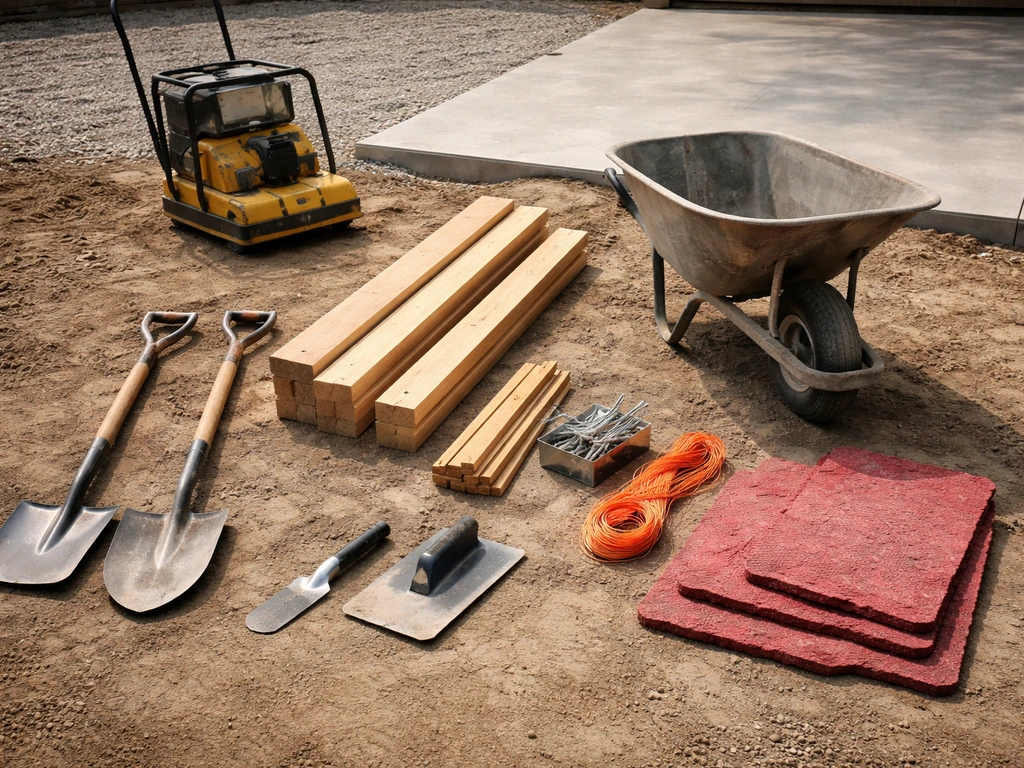
Here's a practical rundown of what you'll need for a standard stamped concrete patio pour:
- Excavation tools: flat spade, round spade, wheelbarrow
- Compactor (rent a plate compactor for the gravel base)
- Form lumber: 2x4 or 2x6 boards, stakes, screws
- String lines and a line level for grading
- Concrete (ready-mix truck delivery is strongly recommended for anything over about 1 cubic yard)
- Rebar or wire mesh for reinforcement
- Screed board (straight 2x4 works fine)
- Bull float and handle
- Magnesium hand float and fresno trowel
- Color hardener (dry-shake, broadcast method)
- Powdered or liquid release agent
- Stamping mats or skins (rent or buy — see below)
- Texture roller or flex skin for tight borders and edges
- Concrete sealer (cure-and-seal acrylic is typical)
- Roller and pump-up sprayer for sealer
- Stiff-bristle brush and garden hose for release agent cleanup
Choosing your stamp tools
Stamping mats are large rubber or polyurethane pads with a texture pattern molded into them. You press them into the concrete surface to create the impression. Semi-rigid mat stamps are the most common choice for DIYers because they flex slightly and conform to minor contours in the slab. For borders, tight corners, or areas where a full mat won't fit, seamless texture skins are the answer. These are thinner, more flexible, and can be cut or folded to fit awkward areas. You don't need to buy all your stamps outright. Many concrete supply houses rent sets, which is a smart move until you know which patterns you'll actually use again.
Color options: integral color vs. color hardener
| Color Method | How It Works | Cost | Best For |
|---|---|---|---|
| Integral color | Pigment mixed throughout the entire batch | Higher (pigment is in the whole slab) | Consistent color if the surface chips or wears |
| Color hardener (dry-shake) | Broadcast onto wet surface before stamping | Lower upfront cost | Most stamped concrete projects; vibrant colors |
| Acid stain (post-cure) | Chemical reaction applied after 28-day cure | Moderate | Adding color to an existing or already-poured slab |
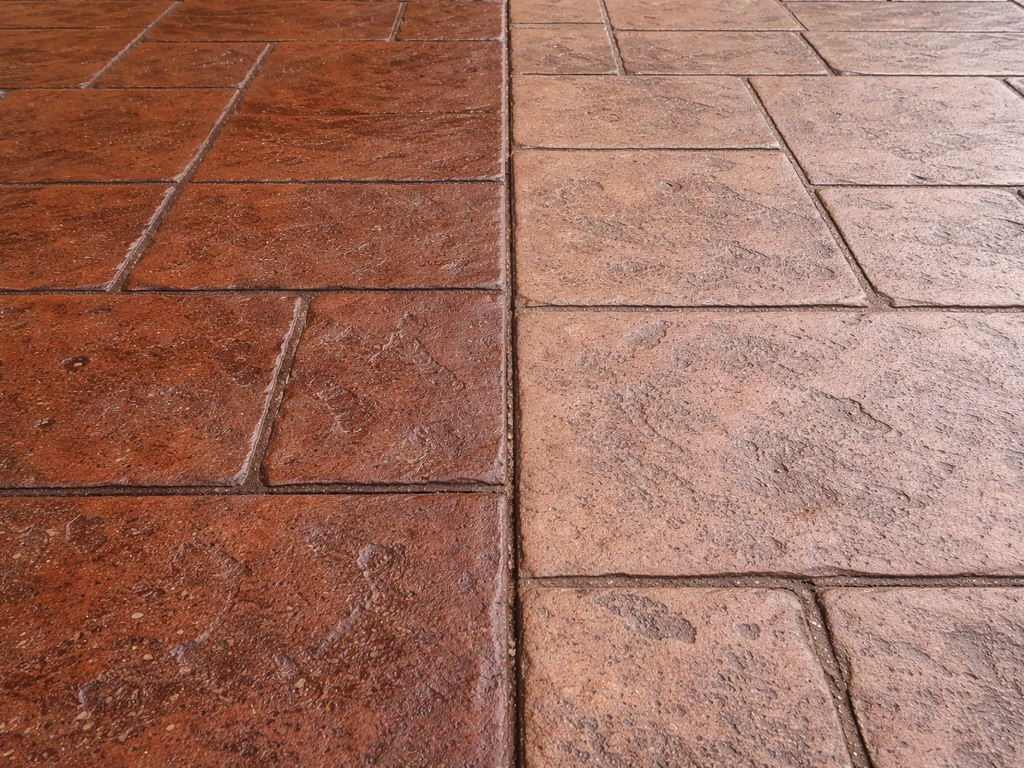
For most DIY stamped patios, color hardener is the practical choice. It's less expensive than integral color, it adds surface hardness, and it gives you a richer base tone to work with. You then layer a release agent on top (usually a contrasting powder color) to create the two-tone, natural look that makes stamped concrete actually look like stone or brick.
Site prep and base construction
Good base prep is what separates a patio that lasts 30 years from one that cracks in three. Don't cut corners here.
- Excavate the area to a depth of about 7 to 8 inches below your desired finished slab surface. That gives you 4 inches of gravel base and a 4-inch slab.
- Remove all organic material, roots, and loose soil. Any soft spots need to be dug out and filled with compactable gravel or crushed stone.
- Add 4 inches of compactable gravel (crushed limestone or road base material works great) and compact it in two lifts using a plate compactor. Don't compact 4 inches all at once.
- Check your grade with a string line. The surface of your gravel base should already have your drainage slope built in — typically 1/8 to 1/4 inch drop per foot away from the house.
- Build your forms from 2x4 or 2x6 lumber staked securely every 2 feet or so. The top edge of the forms is your screed guide, so they need to be level (or on your planned slope) and solidly staked.
- Install rebar (3/8-inch rebar on 18-inch grid is solid for a residential patio) or wire mesh on chairs or dobies to keep the reinforcement in the middle of the slab, not on the ground.
- Wet the gravel base before the concrete truck arrives. Dry gravel pulls moisture out of your concrete mix too fast.
Pouring and finishing the concrete
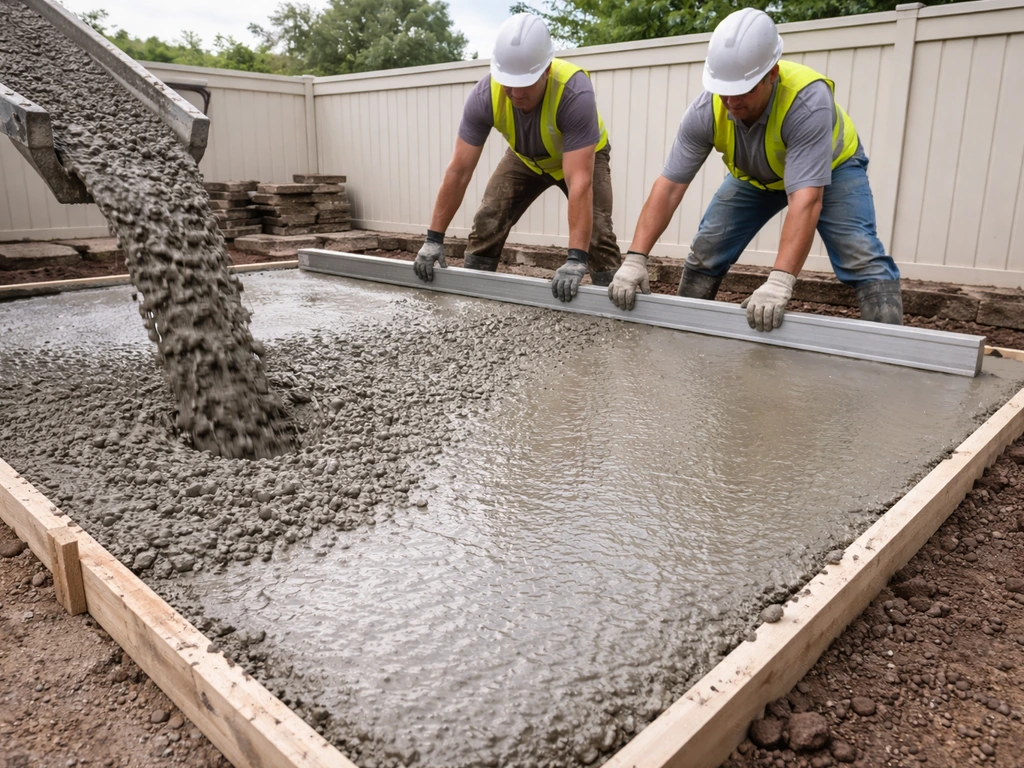
Order ready-mix concrete for any patio larger than a very small area. For stamped work, a 4,000 PSI mix is recommended over standard 3,000 PSI. Ask your ready-mix supplier specifically about a mix designed for decorative flatwork. Avoid air-entrained concrete for stamped surfaces. The air bubbles interfere with color hardener adhesion and can cause a pitted surface after stamping.
Have at least 2-3 people on site for pour day. Brickform also recommends using at least 2 people (ideally 3) for stamping so the surface doesn't stiffen before the mats and skins are fully placed. This isn't a one-person job. One person can guide the chute and move concrete, while others screed and follow up with the bull float.
- Direct the concrete starting at the farthest point from the truck, working back toward it. Fill the forms to just above the top edge.
- Screed the concrete immediately. Pull the screed board across the tops of the forms in a sawing motion to level the surface and knock down high spots.
- Bull float the surface right after screeding. Push the float at a low angle on the way out (blade flat) and raise the leading edge slightly on the way back. This embeds aggregate, fills voids left by screeding, and leaves you a smoother base to work with.
- Wait for bleed water to disappear from the surface before doing any additional floating or broadcasting color. Working too early traps bleed water and weakens the surface.
- Once the bleed water is gone, broadcast your color hardener evenly. Scatter the first pass, let it absorb moisture for a minute or two, then float it in with a magnesium float. A second application adds depth and ensures full coverage. Float again after the second coat.
- Apply release agent next. Powder release is the most common method — sprinkle or broadcast it evenly across the surface. It serves two jobs: it acts as a bond breaker so stamps don't stick and tear the surface, and it adds a secondary color tone that creates that realistic, variegated look.
Stamping, texturing, releasing, and timing control
Timing is everything here, and it's also the part that can't be reduced to a single number. Air temperature, humidity, sun, and wind all affect how fast the concrete stiffens. A hot sunny day can shrink your window from 2-3 hours to 45 minutes. A cool cloudy day can stretch it out. The key test: press your thumb into the surface. If the impression is about 3/4 of an inch deep, you're still too early. If it's about 1/4 inch deep and holds its shape cleanly, you're ready to stamp.
Start in one corner and work in rows across the slab. Lay your first mat down, step on it firmly and evenly, then pick it up and move it to the next position, overlapping the alignment tabs or pattern edges. Work consistently in one direction, don't jump around. If you start at the corner near the house and work away from it, you won't be standing on already-stamped concrete. Keep 2-3 mats in rotation so one is always being cleaned and re-coated with release while another is in use.
Apply release agent to each mat before it hits the surface. A light, even coat on the mat face is all you need. This is what prevents the stamp from picking up and disturbing the texture it just created. Skipping or skimping on this step is one of the most common reasons stamped concrete surfaces end up torn or blurry-looking.
Use a texture skin or flex skin along the edges and borders where the full mats won't fit. These are also useful for touching up any spots where the impression came out unclear. A hand tamper tool lets you add pressure on specific areas of a mat without walking on it.
If the concrete starts getting too stiff partway through, don't panic and don't add water. Keep stamping with firm, steady pressure. You may need to go back over early-stamped sections with a hand texture tool to sharpen up any soft impressions. If sections truly get away from you and harden before you get to them, that's a genuine problem, which is exactly why having 2-3 people on site matters so much.
Curing, cutting control joints, and sealing
Curing and the release agent rinse
After stamping, the concrete needs to cure undisturbed. Don't rinse off the release agent the same day as placement. Wait until the next day at minimum. When you're ready, rinse the surface with a garden hose and a stiff-bristle brush to remove the release agent powder. The rinse water will run off tinted, and that's normal. Let the surface dry completely before moving to the next step.
If you're using a cure-and-seal product (which most DIYers should, since it simplifies the process), you can typically apply it within 1-2 days after stamping once the release agent has been rinsed off and the slab is dry. Cure-and-seal products were designed specifically for this workflow on freshly stamped surfaces. If you plan to use a traditional acrylic or penetrating sealer instead, wait the full 28 days for the concrete to cure before applying it.
Cutting control joints
Control joints give the concrete a place to crack in a controlled, straight line rather than randomly across your patio. For a 4-inch slab, space control joints no more than 8 to 12 feet apart (that's the ACI guideline of 2 to 3 times the slab thickness in feet). You can hand-tool control joints during finishing before stamping, which blends them into the pattern, or cut them with a saw after the concrete hardens. On a stamped patio, hand-tooling during the plastic stage is usually the better-looking option.
Sealing the finished surface
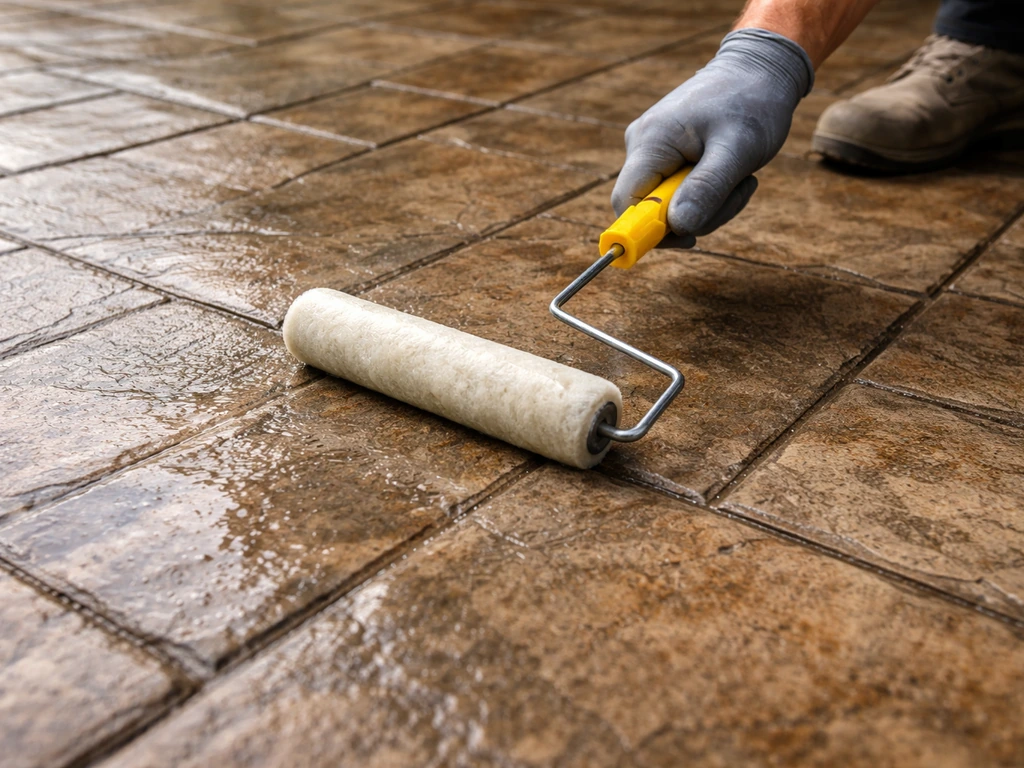
Apply sealer with a roller or low-pressure pump sprayer in a thin, even coat. Two thin coats beat one thick one every time. Thick sealer coats can turn white or bubble, especially in heat. Most acrylic sealers dry to the touch in 4-6 hours, with full cure taking 24-72 hours depending on temperature and humidity. Avoid foot traffic until it's dry to touch, and keep cars off it for at least 72 hours. Plan to reseal every 2-3 years to keep the color looking fresh and the surface protected.
DIY installation vs. stamping an existing concrete slab
A lot of people search for how to stamp existing concrete because they already have a slab and want to upgrade it without tearing it out. If you want the concrete patio how to do it yourself approach, the rest of this guide walks you through planning, stamping, curing, and sealing step by step how to stamp existing concrete. Here's the honest answer: you generally can't stamp bare hardened concrete.
Once concrete cures, it won't accept a stamp impression. If your stamped concrete already looks good but the color has faded, learn how to recolor a stamped concrete patio instead of starting over with an overlay. What you can do is apply a stampable overlay, which is a thin cementitious product engineered to bond to existing concrete. You stamp the overlay while it's fresh, just like you would new concrete.
Can your existing slab handle an overlay?
The slab needs to be structurally sound. Cracks that move (structural cracks) or a slab with serious settlement problems will telegraph right through the overlay. Cosmetic cracks can often be addressed with filler before overlaying, but do a test area first because patched spots can absorb overlay differently and cause 'ghosting' (visible outlines of the old repair). The surface must also be completely clean and free of sealers, paint, oil, grease, or curing compounds. Any of those will prevent the overlay from bonding properly.
Steps for stamping an existing slab with an overlay
- Assess the slab condition. Fill structural cracks, address any soft or spalling areas, and pressure wash the entire surface.
- Strip any existing sealer using a chemical stripper or mechanical grinding. The overlay must bond to bare, clean concrete.
- Profile the surface with a grinder or shot blaster to open the concrete pores and give the overlay mechanical grip.
- Mix and apply a bonding primer if specified by your overlay product. Let it become tacky before applying the overlay.
- Mix the stampable overlay per the manufacturer's specs and apply it at the recommended thickness (typically 3/8 to 1/2 inch).
- Broadcast color hardener and release agent, then stamp the overlay using the same timing-check method as fresh concrete — wait for the right firmness, then stamp in rows.
- Allow the overlay to cure per the product specs. Most stampable overlays accept foot traffic within 24 hours, though full cure and sealing timelines vary.
- Rinse release agent the following day, let it dry, then apply cure-and-seal or wait for the full cure window before applying a standard sealer.
If you're dealing with an existing slab that was previously stamped and needs refreshing rather than replacement, that's a different job. Recoloring, resealing, or refinishing a worn stamped patio is a much simpler process than starting over with an overlay.
Common mistakes to avoid
- Stamping too early (concrete still too wet): impressions won't hold and the surface deforms. Do the thumb test, not the clock.
- Stamping too late (concrete too stiff): stamps won't penetrate cleanly and you'll tear the surface trying to force them.
- Skipping or skimping on release agent: stamps stick, lift the texture, and ruin the impression. Apply it to every mat, every pass.
- Working alone: you need 2-3 people minimum. Stamped concrete doesn't wait for one person to catch up.
- Using air-entrained concrete: the micro air bubbles in the mix interfere with color hardener and create surface pitting.
- Sealing too soon with a traditional sealer: if the concrete hasn't cured fully (28 days for standard sealers), moisture gets trapped and the sealer turns white or peels.
- Applying sealer too thick: always go thin and apply two coats instead of one heavy coat.
- Rinsing release agent the same day as placement: the slab isn't ready, and you risk disturbing the surface and introducing water into uncured concrete.
Your next steps today
If you're building a new stamped patio, start with your plan and your permit check. Sketch the dimensions, confirm your drainage slope, and call 811 before you dig. Then price out ready-mix concrete, stamp rental, and color materials at your local concrete supply house. Don't skip the supply house in favor of a big box store for this one. They'll have the right color hardener, release agents, and stamps, and the staff usually knows the products well enough to save you from rookie mistakes.
If you're looking at an existing slab and wondering whether it's a candidate for overlaying and stamping, the first thing to do is clean a test section and really look at the concrete. Is it solid? Does it have moving cracks? Is there existing sealer (water beading test: drop water on it, if it beads, there's a sealer on it)? That assessment tells you whether you're heading into an overlay project or whether the slab needs more serious work first.
Either way, do a small test area before you commit. Overlay products specifically recommend it, and it gives you a chance to dial in your timing and technique before you're working on the entire patio. One test section done right is worth more than all the research in the world.
FAQ
How do I tell if my existing concrete is truly ready for an overlay before I try to stamp it?
Use a stiff-bristle broom and, if the slab is old, plan on a degreaser or mild pressure wash to remove embedded oils. After cleaning, do the water-bead test again, if water beads quickly there is likely an existing sealer or coating that will block bonding, which means you may need stripping before overlaying.
Can I stamp a patio by myself, or do I really need multiple people?
Yes, but you still need a realistic work time plan. Make a staging area, keep stamp mats arranged in a fixed rotation, and assign roles (pour handling, screeding, finishing, stamping). The goal is to keep concrete in the stamping window without rushing or letting one section freeze while you catch up elsewhere.
What should I do if I stamp and the pattern looks blurry, or the texture is too shallow?
If the stamp impressions turn out soft or blurry because you stamped too early, wait for the section to firm up and then re-texture immediately with a hand texture tool (same day) to sharpen edges. If the concrete has already gone past the workable stage, you usually cannot fix it cleanly without leaving a visible patch, so focus on preventing it next run by verifying the thumb-depth test at multiple points on the slab.
Why shouldn’t I add water to make the concrete easier to stamp? What if my mix feels too stiff?
Avoid adding water to the truck, even if the concrete feels stiff. Extra water increases shrinkage and weakens the surface, which leads to cracking and poor color hardener performance. If you need workability, rely on the concrete supplier for the right decorative mix and proper slump, and adjust your workflow instead (faster pour progression, more hands, fewer idle minutes).
How do I get crisp edges and corners on a stamped patio when full mats do not fit?
For DIY, most failures that come from bad edge treatment show up as lifting, fraying, or poor-looking borders. Use flex or texture skins at borders and corners, and apply release agent to those smaller pieces the same way you do mats. Also, don’t overwork the edge, once the concrete starts setting, repeated troweling and re-pressing can distort the border lines.
Why does my sealed stamped concrete sometimes turn white or look streaky, and how can I prevent it?
Only apply sealer after the release agent has been rinsed and the slab is fully dry. If you trap moisture, you can get whitening, hazing, or uneven sheen. Let the surface air dry until it looks uniform and feels dry, then apply thin, even coats (two coats over one thick coat), and keep foot traffic off until it is dry to touch.
Do control joints ruin the look of a stamped patio, and when should I add them?
Control joints should be planned before you stamp, because they influence where cracking will happen. If you hand-tool during the plastic stage, keep them straight and aligned with the slab layout, then stamp across them carefully so the joints blend into the pattern. Spacing that is too wide increases random cracking risk, so follow the slab thickness based limits from your finishing plan.
How do I decide when it is time to reseal my stamped concrete patio?
If you plan to reseal, do it based on condition, not the calendar alone. Before resealing, clean the surface and check how the sealer behaves with water (beading versus soaking). If water no longer beads evenly or the surface looks dull and worn, that is a good sign it is time to reseal, even if you are not exactly at the last scheduled interval.
What are the most common reasons stamped overlay projects fail on existing patios?
A practical option is to use the provided stampable overlay method, but only if the slab is sound and cracks are not moving. Perform a thorough inspection, if you have structural, shifting cracks, overlay will usually telegraph. For cosmetic cracks, test a small patch first because repaired areas can absorb overlay differently, causing visible ghost lines.