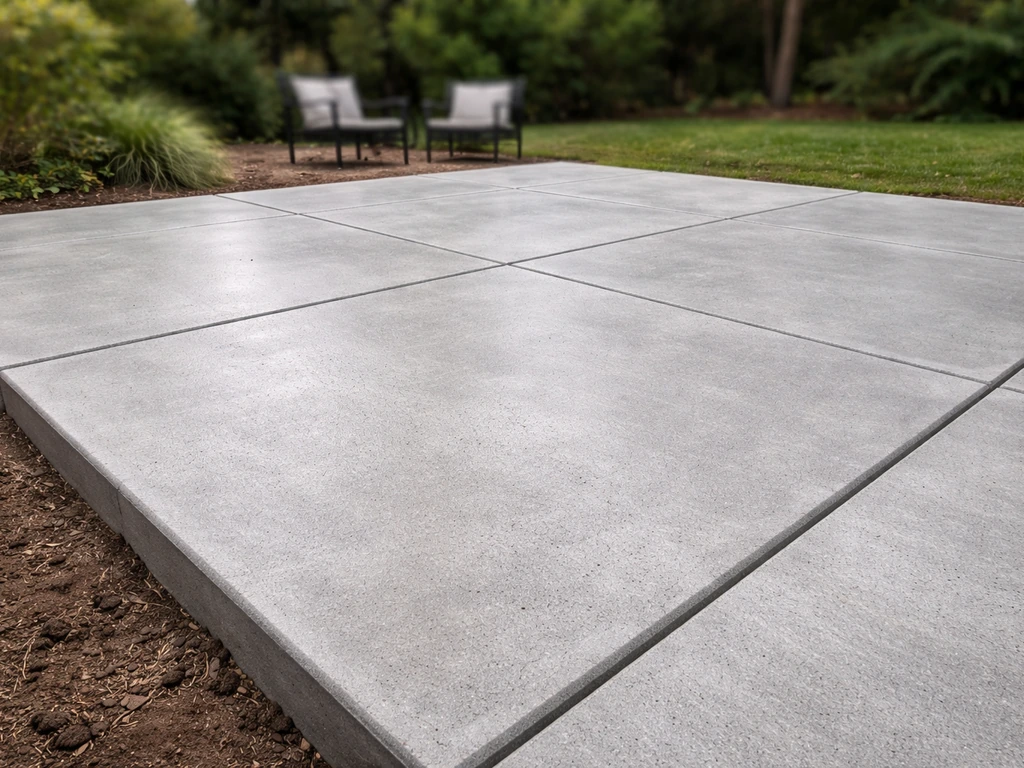
Yes, you can DIY a concrete patio, and for a straightforward rectangular slab on stable soil, it's one of the most rewarding weekend projects a homeowner can tackle. The honest caveat is that concrete is unforgiving. You get one shot at pouring and finishing it, so planning, timing, and base prep matter a lot more than most people expect. Get those right and you'll have a durable slab that lasts 20-plus years.
Concrete Patio DIY: How to Do It Yourself Step by Step

Silas Morrison
2 Jul 2026
Rush them, and you'll be back out there patching cracks within a couple of seasons. This guide walks you through the entire process from scratch, including how to fix and refresh the patio after it's built. Then, if you want a fresh look without pouring a new slab, you can also use a resurfacing or recoloring step like how to recolor a stamped concrete patio.
Can You Actually DIY a Concrete Patio? Honest Feasibility Check
Most homeowners can handle a basic concrete patio without hiring a contractor, but 'basic' has a real definition here. The project is DIY-friendly when the slab is simple in shape (rectangular or close to it), the ground is stable and drains well, and you're not planning to park vehicles on it. When those conditions aren't met, the design gets into engineering territory that's easy to get wrong.
Run through this quick checklist before you commit. If you check all of these boxes, you're in good shape to DIY:
- The area is relatively flat or has a gentle, manageable slope
- The soil is stable — no fill, organic material, expansive clay, or recent landscaping disturbance underneath
- Drainage is clear: water flows away from the slab and the house foundation
- The patio will carry foot traffic and patio furniture only (not vehicles or heavy structures)
- The shape is rectangular or simple enough to form with straight lumber
- You have access to rent a plate compactor and can physically handle the labor
- You've checked local codes and know whether a permit is required
Here's when you should seriously consider hiring a pro instead: unknown or soft subgrade (the soil sinks or shifts when you probe it), poor drainage that would require regrading or a French drain system, a complex shape with curves or multiple levels, a large pour over roughly 400 square feet where timing becomes critical, or freeze-thaw conditions where you're unsure about air-entrained mix design. Unstable subgrade is the single biggest hidden risk, slab performance depends on soil support more than almost anything else, including concrete thickness.
Planning: Size, Layout, Permits, Drainage, and Mix Selection
Size and layout
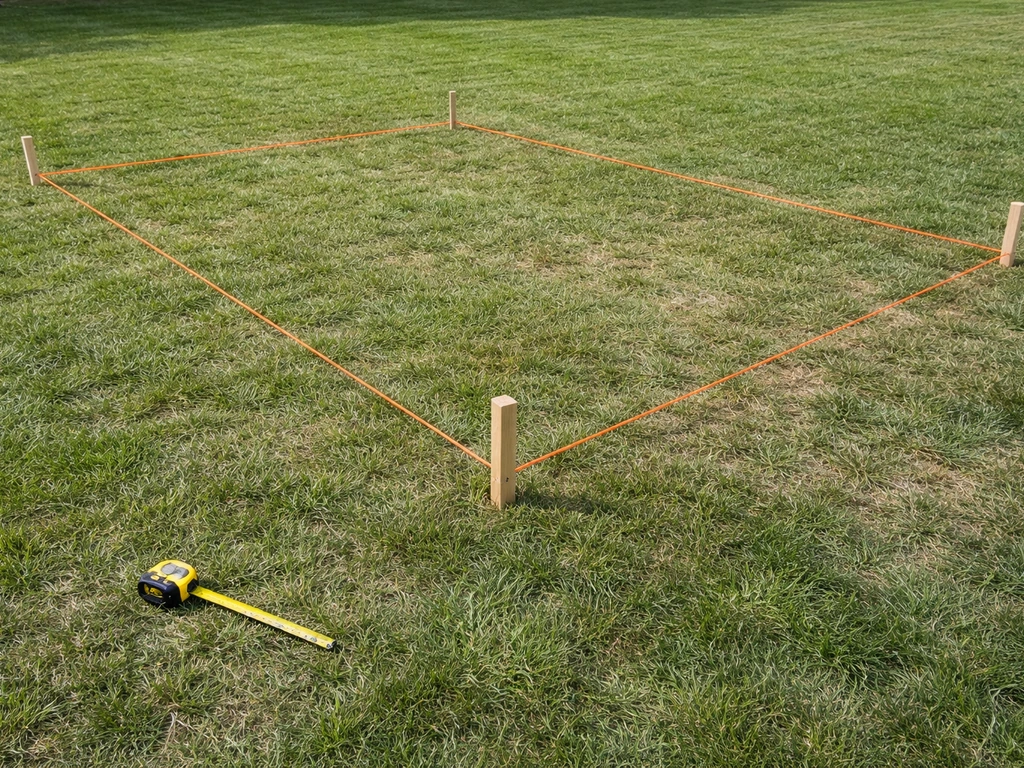
A 10x12 or 12x16 foot slab is a comfortable first DIY pour. Much larger and you'll struggle to finish the concrete before it starts setting, especially in warm weather. Sketch the layout on paper first and stake it out on the ground. Account for a slight slope away from the house, roughly 1/8 inch per foot is the standard for drainage. Don't skip this; pooling water under or around a slab is a fast track to freeze-thaw damage and settlement.
Permits and codes
Many municipalities require a permit for concrete flatwork over a certain size, and some have setback rules from property lines. Call your local building department before you dig. It takes 10 minutes and saves potential headaches when you sell the house. Also, call 811 (in the US) to have underground utilities marked before any excavation.
Choosing the right concrete mix
For a residential patio, a mix with a compressive strength of 3,500 to 4,000 PSI is appropriate. If you're in a climate with freezing winters, you need air-entrained concrete, the tiny air bubbles give water space to expand during freeze-thaw cycles and prevent surface scaling. If you're ordering ready-mix, ask specifically for air-entrained concrete and mention it's an exterior flatwork application. If you're mixing bags yourself (only practical for very small areas), look for products labeled for exterior slabs with air-entraining agents. Don't add extra water at the jobsite to make mixing easier; it weakens the mix significantly.
How much concrete do you need?
Multiply length x width x thickness (all in feet) and divide by 27 to get cubic yards. For a 12x16 slab at 4 inches thick: 12 x 16 x 0.333 / 27 = roughly 2.4 cubic yards. Always order 10% extra to account for waste and spillage. Ready-mix trucks typically have a minimum order of 1 cubic yard, so for anything under about 50 square feet you may be better off with bags.
Site Prep and Building the Base
This is where most DIY patios succeed or fail, and it's the part that gets skipped or rushed most often. A concrete slab is only as good as what's underneath it.
Excavation and grading
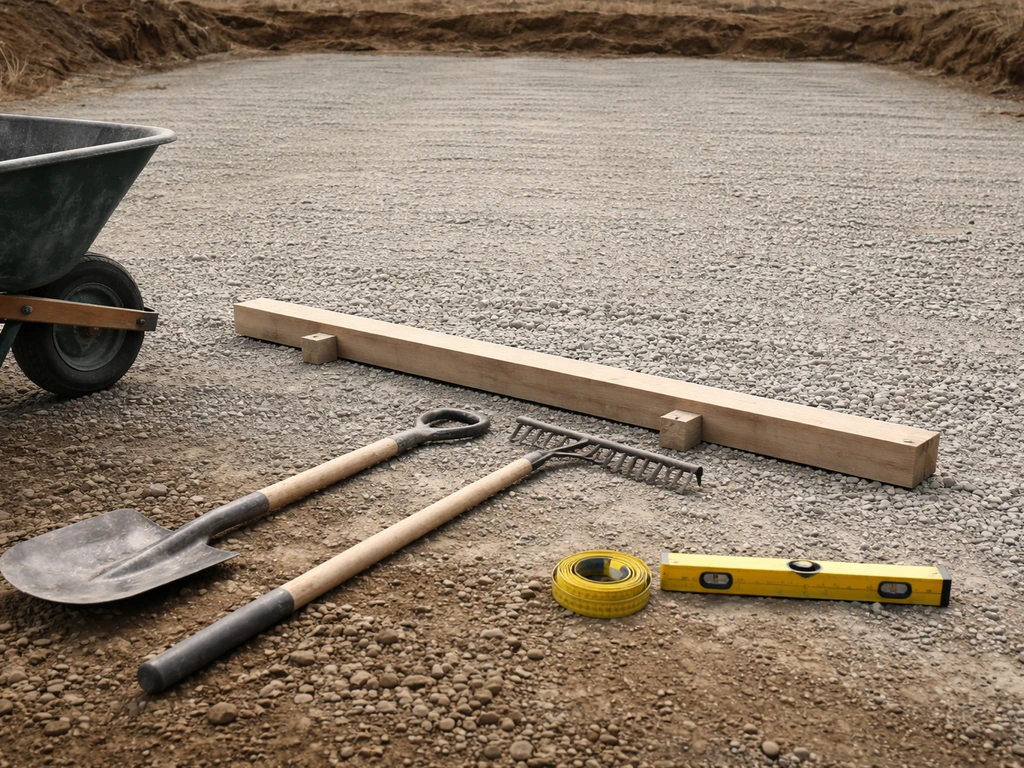
Excavate to a depth that accommodates your gravel base plus slab thickness. For a 4-inch slab with a 4-inch gravel base, that's 8 inches down from finished grade. Remove all sod, roots, and organic material, organics compress over time and cause settlement. Slope the excavated area away from the house at the same 1/8 inch per foot grade you want in the finished slab.
Gravel base and compaction
Spread a layer of compactable gravel (crushed limestone, Class II base, or road base, not pea gravel or decorative stone) in the excavated area. Place it in lifts no more than 4 to 6 inches thick and compact each lift with a plate compactor before adding more. Compaction is non-negotiable: loose or improperly compacted base is a leading cause of slab settlement and cracking. You can rent a plate compactor from any equipment rental shop for around $75 to $100 per day. Water the gravel lightly before compacting to help it bind.
Vapor retarder
Lay a vapor retarder over the compacted gravel before pouring. Use 10-mil or 15-mil polyethylene sheeting. It acts as a capillary break that prevents ground moisture from wicking up through the slab, which is especially important if you plan to seal or coat the surface later. Overlap seams by at least 6 inches and tape them. The poly should extend up to the forms on all sides.
Forms, Reinforcement, and Setting Up Control Joints
Building your forms
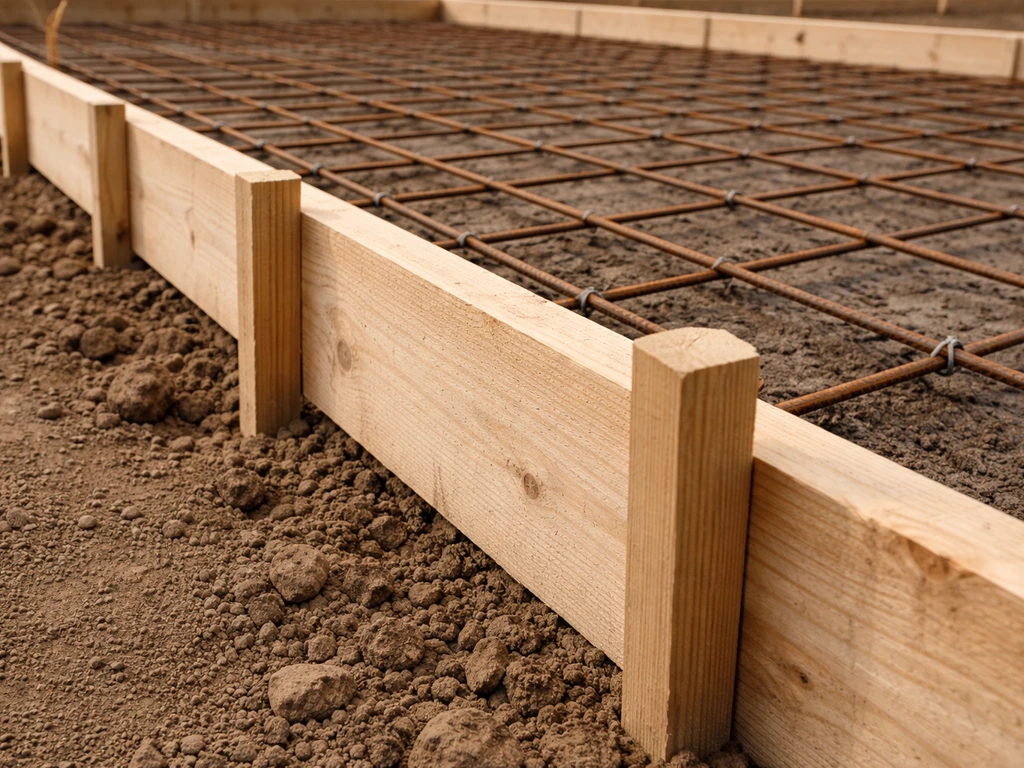
Use straight 2x4 or 2x6 lumber for forms, depending on your slab thickness. For a 4-inch slab, 2x4s work fine. Drive wooden stakes every 2 to 3 feet on the outside of the forms and screw the boards to the stakes. Check that the forms are level (or at your planned drainage slope) with a long level or a string line. Double-check your square by measuring corner to corner diagonally, both measurements should match. Coat the inside face of the forms with a light oil or form-release agent so they pull away cleanly after the pour.
Reinforcement: rebar, wire mesh, or fiber?
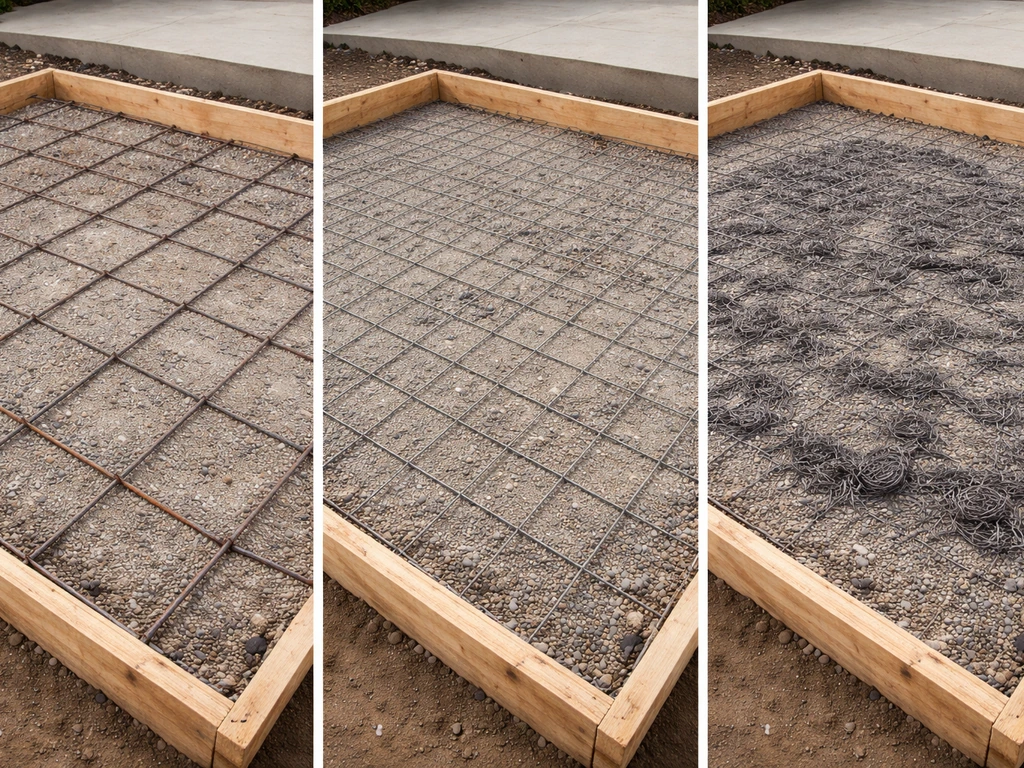
For a residential patio slab, you have three main options. Rebar (3/8-inch or #3 bar on 18-inch grid) gives the best crack control if the slab ever does settle unevenly. Wire mesh (6x6 welded wire fabric) is lighter and easier to handle but provides less resistance to differential settlement. Fiber-reinforced concrete (polypropylene or steel fibers mixed in) helps reduce plastic shrinkage cracking during the early curing stage.
The important thing to know: none of these replace proper jointing and base prep. Reinforcement holds cracked sections together; it doesn't prevent cracks. For a DIY patio on stable ground, wire mesh or a fiber-reinforced mix is usually sufficient. If you use mesh or rebar, position it at the middle to lower-third of the slab depth (about 1.
5 to 2 inches from the bottom), supported on plastic chairs or dobies, not resting on the ground.
Slab thickness
Four inches is the standard minimum for a residential patio under light foot traffic. If your soil is soft, you live in a cold climate, or you want extra durability, go to 5 or 6 inches. Thicker slabs cost more but are meaningfully more forgiving of subgrade imperfections.
Control joints: the step most DIYers skip
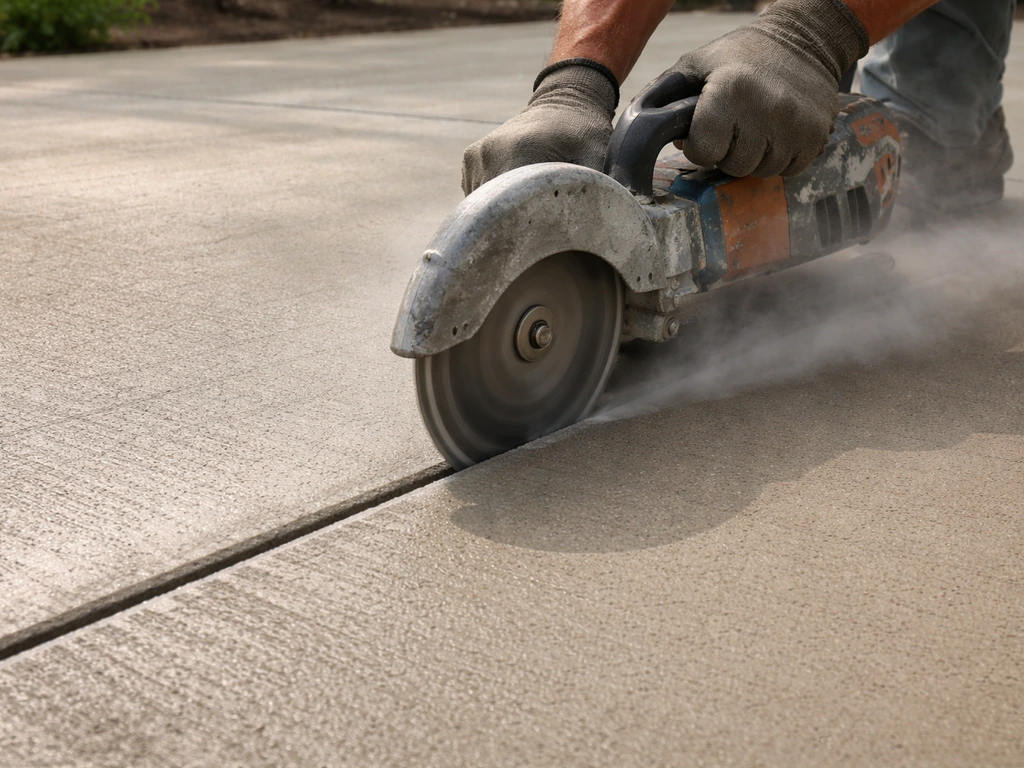
Control joints are intentional weak points that guide where the slab cracks as it shrinks during curing. Without them, the slab will still crack, just randomly, and not where you want. Plan control joints so no panel exceeds about 10 to 12 feet in any direction.
The general rule is that joint spacing should not exceed 2 to 3 times the slab thickness in inches, converted to feet, so for a 4-inch slab, that's 8 to 12 feet maximum between joints. You can either tool the joints with a groover immediately after screeding (for very small slabs) or saw-cut them after the pour. Saw cutting is more accurate: [cut joints to a depth of at least 1/4 of the slab thickness](https://www. concretecuttingpro.
com/articles/how-to-cut-expansion-joints/) (1 inch deep for a 4-inch slab) within 4 to 12 hours of finishing, before random cracks start forming. The exact timing depends on temperature, humidity, and how fast the slab is setting, check it by pressing your finger in; when it leaves a slight impression but doesn't sink, it's time to cut.
Pouring, Finishing, and Texturing: Step by Step
This is the part where everything comes together, and where you have the least margin for error. Have all your tools ready before the truck arrives or before you mix your first batch. Once concrete starts going in, you don't stop. After it’s cured, you can add stamped concrete texture for a more decorative surface while keeping the same patio base you just built stamped concrete patio.
Tools you'll need
- Concrete chute or wheelbarrow for moving concrete from truck to forms
- Square shovel or concrete rake for spreading
- 2x4 or magnesium screed board (at least 2 feet longer than your form width)
- Bull float (large magnesium or wood float on a long handle)
- Hand float or mag float for edges
- Edger tool for rounding slab edges
- Groover (if tooling control joints by hand)
- Stiff-bristle push broom for texture
- Rubber boots (concrete is caustic — protect your skin)
- Garden hose and plastic sheeting for curing
The pour sequence
- Start filling from the farthest corner and work toward the truck or mixer. Don't move concrete a long distance with a rake — that segregates the mix. Get it close to its final position, then spread.
- Work the concrete into corners and against forms with a shovel. Run a spade or rod along the inside of the forms to consolidate the mix and eliminate voids.
- Screed the surface: drag your screed board across the top of the forms in a sawing back-and-forth motion to level the concrete flush with the form tops. Fill low spots and screed again.
- Float the surface: once screeded, use a bull float in long, overlapping passes to embed large aggregate and close the surface. This is not the final finish — just an initial leveling pass.
- Wait for bleed water: after floating, water will rise to the surface (called bleed water). Do not start final finishing until all surface sheen from bleed water has disappeared. Working into bleed water weakens the surface and causes scaling — one of the most common DIY mistakes.
- Edge the slab: run an edger tool along all form edges to round them and prevent chipping. Do this after bleed water disappears.
- Final finish: for a broom finish (the standard for slip resistance), drag a stiff-bristle push broom lightly across the surface in one direction — typically perpendicular to the house. This gives you the texture you need for safe outdoor footing.
- Cut control joints as described above, within the 4 to 12-hour window.
Weather and timing considerations
Ideal pouring conditions are between 50°F and 85°F with low wind and moderate humidity. Hot, dry, or windy conditions accelerate surface drying and can cause plastic shrinkage cracking before the concrete even sets. If it's over 85°F or very windy, pour early in the morning, keep the subgrade damp (not wet) before pouring, and have your evaporation retarder spray and plastic sheeting ready to cover sections as soon as you finish them. Below 40°F, you're in cold-weather concreting territory, protect the fresh slab from freezing for at least the first 24 to 48 hours, and keep it above 50°F for the full curing period.
Curing and Sealing the Slab
Curing is what most people rush, and it directly determines how strong and durable the finished slab is. Concrete doesn't dry, it cures through a chemical reaction that requires moisture. If you let it dry out too fast, that reaction stops early and you get a weaker surface.
How to cure
Start curing as soon as you've finished the surface and cut your control joints. The easiest method for a DIY slab is covering it with plastic sheeting or burlap kept continuously wet. Wet burlap topped with plastic is the most reliable approach, the burlap holds moisture against the surface and the plastic prevents evaporation. Keep it covered and moist for at least 7 days. If that's not practical, apply a liquid membrane-forming curing compound immediately after finishing. These spray-on products seal the surface moisture in and are available at any home center. Follow the label instructions, most require two coats applied perpendicular to each other.
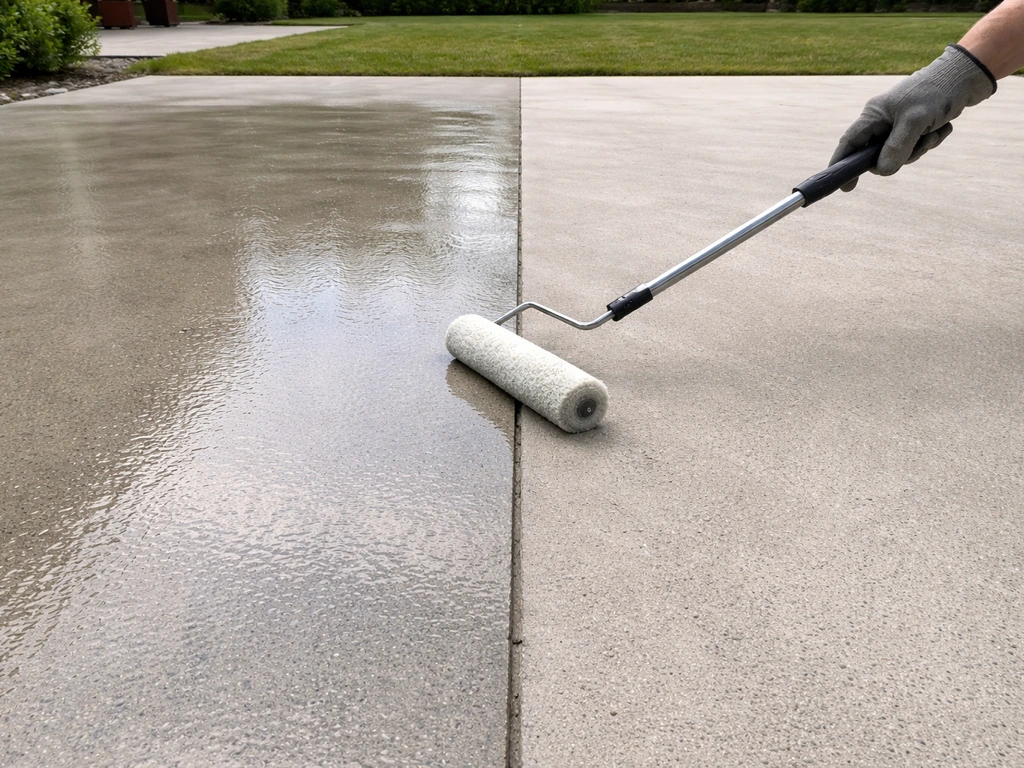
When to apply sealer
Wait at least 28 days after the pour before applying a concrete sealer. At 28 days, the concrete has reached most of its design strength and the residual moisture has dropped to a level that won't trap under the sealer and cause adhesion failure or cloudiness. For an exterior patio, a penetrating silane/siloxane sealer is a good all-around choice, it repels water and deicers without changing the appearance. Film-forming acrylic sealers give a glossy or satin sheen and are fine but require reapplication every 2 to 3 years. Apply in dry conditions above 50°F and let the surface cure fully between coats.
Fixing and Refreshing Your Patio: DIY Repairs and Refinishing
Even a well-built patio will eventually need attention. Stamped concrete overlays and stamps can refresh an existing concrete patio, but the surface must be properly cleaned, repaired, and prepped first patio maintenance. Whether it's hairline cracks, surface spalling, staining, or just a look you're tired of, most patio maintenance is well within DIY range, with a few important exceptions.
Cracks: what to do and what to watch for
Hairline cracks (under 1/8 inch wide, not growing) are cosmetic. Clean them out with a wire brush, flush with water, let dry, and fill with a self-leveling polyurethane or epoxy crack filler. Wider cracks or cracks with vertical displacement (one side higher than the other) suggest subgrade movement, don't just patch the surface. Address the root cause first, which may mean soil stabilization, drainage correction, or a pro evaluation before resurfacing.
Patching over a moving crack is a short-term fix that will fail again. A Reddit thread on concrete mottling and scaling similarly warns that refinishing or patching should not be used to conceal movement or deeper durability problems like freeze-thaw effects [Patching over a moving crack is a short-term fix that will fail again. ](https://www. reddit.
com/r/HomeImprovement/comments/1tjov9p/whatstherootcauseconcretemottlingand/).
Surface spalling and scaling
Spalling (flaking or pitting of the surface) typically comes from freeze-thaw damage, deicing salt use, or finishing that was done into bleed water. To repair it properly, remove all loose and deteriorated material down to sound concrete, never patch over soft or delaminated areas. Use a chisel and wire brush or a small angle grinder. The substrate needs to be clean, sound, and properly profiled before applying a bonding agent and patching mortar. A vinyl concrete patcher or polymer-modified repair mortar works well for spall repairs. Feather-edging thin repairs typically fails, keep patch areas at least 1/4 inch deep.
Leveling low spots or uneven sections
Minor unevenness (under 3/4 inch) can sometimes be corrected with a self-leveling concrete overlay or a cement-based skim coat applied to a properly prepared surface. Larger differential settlement usually means a subgrade problem that needs to be solved first. Mudjacking or polyurethane foam injection can lift sunken sections, but both are typically contractor jobs for anything beyond a very small area.
Cleaning before any repair or refinishing
Surface prep is everything. Before any patch, stain, or coating, clean the slab thoroughly: pressure wash at 2,000 to 3,000 PSI and use a concrete degreaser for oil stains. Acid etching (dilute muriatic acid or phosphoric acid) opens the surface pores for better coating adhesion, always follow safety precautions and neutralize the acid wash before rinsing. Allow the surface to dry completely before applying any product.
Staining and changing the look
If the surface is sound but you want a better appearance, concrete stain is one of the most cost-effective upgrades available. Acid stains create permanent, variegated color that soaks into the concrete and won't peel. Water-based stains offer a wider color range and are easier to apply. Either way, prep is the key: the slab must be clean, sound, and free of existing sealers.
For more dramatic texture and pattern changes, microtoppings and overlays can completely transform an old gray slab, including stamped or decorative patterns if you want that look without pouring a new slab. If you want a stamped concrete patio do it yourself look, the stamped concrete process you choose will affect the final texture and long-term durability stamped or decorative patterns.
If you're thinking about a stamped look on an existing surface, that's a specific process covered in more detail in the stamped concrete guides on this site.
Repair and refinishing: a quick comparison
| Problem | DIY Solution | When to Call a Pro |
|---|---|---|
| Hairline cracks (stable) | Self-leveling polyurethane or epoxy filler | Not needed unless cracks multiply quickly |
| Wide or moving cracks | Address subgrade issue first; then repair | When displacement or heaving is present |
| Surface spalling/scaling | Remove loose material, patch with polymer mortar | Severe widespread delamination |
| Sunken section | Mudjacking/foam for small areas | Large sections or subgrade failure |
| Dull or stained surface | Clean, acid etch, apply concrete stain + sealer | Not needed for most cosmetic work |
| Full resurfacing | Concrete overlay or microtopping | When structural integrity is in question |
Your DIY Patio: Putting It All Together
The complete DIY concrete patio process is genuinely manageable for most homeowners on a straightforward site. The difference between a patio that lasts and one that fails almost always comes down to three things: proper base compaction, timely control joints, and not rushing the finish into wet concrete. Get those right and the rest of the process, forms, pour, broom finish, curing, is very learnable.
Start with your soil assessment and drainage plan, get your permit sorted, and order your ready-mix from a local supplier who can guide you on the right air-entrained mix for your climate. Once the slab is in and cured, the sealing, staining, and repair side of patio ownership is even more beginner-friendly, and there's plenty you can do to keep the surface looking great for decades.
FAQ
How do I make sure my patio layout is square before I build the forms?
For a DIY patio, “square” is the critical dimension check, not just the overall length and width. Measure diagonals from corner to corner and make sure they match within about 1/2 inch across a typical 10 to 16 foot span, then re-check after driving stakes and tightening forms, since forms can rack slightly while being screwed down.
Can I pour my patio directly up to the house, or do I need a gap?
Yes, but you need a workable joint strategy between the patio slab and any house foundation elements. Keep the patio slab independent, typically with a thin compressible gap (for example, foam backer rod) and do not grout rigidly to the house, otherwise small foundation or soil movements can push stresses into the slab edge and trigger cracking.
What if my yard is mostly solid, can I shorten the excavation and gravel base depth?
If you can find stable, well-draining material, you can sometimes reduce base thickness, but never substitute questionable soil for proper gravel support. A fast rule: the slab only “floats” as long as the base holds shape; if you can’t achieve consistent compaction in lifts and the area firms up when walked on, do not pour yet, add more excavation and base.
Why can’t I use decorative stone for the base under a concrete patio?
Do not use pea gravel or decorative stone. It won’t lock together, it migrates under load, and it prevents the base from acting like a uniform support layer. Stick to compactable base materials like crushed limestone, Class II base, or road base, and keep the lift thickness to the 4 to 6 inch range before compacting.
Do I really need a vapor retarder, and can I just put down a single sheet of plastic?
You can, but it’s risky to rely on thick plastic alone without correct layering. The vapor retarder needs seams overlapped and taped, and it should extend up to the forms so water vapor cannot bypass the edges. If water is pooling around the slab due to grading problems, plastic will not fix that, you must correct drainage first.
What happens if I cannot pour the entire patio in one session?
If your pour timing is uncertain, the better approach is staging and teamwork, not partial pours. Plan the pour so you can finish screeding, edging, and broom texture promptly, and have a second helper to keep concrete moving. If you end up with cold joints, you will often see visible lines and those joints can become leak paths and maintenance points.
How should I broom-finish a patio for good traction without causing surface defects?
For exterior slabs, aim for a finish that is slightly textured and uniform, a broom finish that leaves consistent micro-roughness helps slip resistance. Avoid overworking the surface after it begins setting, over-troweling can seal the surface too much and increase scaling risk in freeze-thaw areas.
How do I tell the difference between cosmetic cracks and cracks that need subgrade troubleshooting?
If the slab has hairline cracks, patching the surface is usually fine, but if any crack has height differences or is actively opening, the cause is subgrade movement and the repair may fail. For vertical displacement, you may need to address drainage, soil stabilization, or a professional evaluation before resurfacing so you are not locking in movement under a new coat.
Why does my sealer turn cloudy or peel, and when is the wrong time to seal?
For sealing, the key is dry, fully cured concrete and a surface moisture check in practice. If you seal too early or seal over residual moisture, you can trap water and get cloudy appearance, poor adhesion, or faster deterioration of the coating. Even if it “feels dry,” follow the full cure window before sealing and apply only when the surface is clean and weather conditions are stable.
How do I know the right time to saw-cut control joints so cracking stays where I want it?
For joint cutting, do not wait too long after finishing, and do not cut so shallow that joints don’t provide a real weak plane. Test timing by watching the surface response to a gentle finger press, when it marks slightly without tearing or sinking, it’s usually close to the window for saw-cutting. If you miss the window, random cracking becomes much more likely.
What’s the best way to protect a concrete patio from salt damage in winter?
Deicing salt is a major driver of spalling and surface scaling in many climates. If you need winter traction, use sand or deicer products labeled safer for concrete when possible, and minimize how much salt gets broadcast repeatedly. Also keep the slab edge drainage working so meltwater doesn’t sit in the same spots.