
Putting in a concrete patio is a full weekend (or two) of hard physical work, but it's completely doable as a DIY project if you follow the right order of operations. The short version: excavate and compact your subgrade, lay a gravel base, build your forms, pour and screed the concrete, finish the surface, cut control joints, then cure it for at least 7 days. Miss any of those steps or rush through them, and you'll be staring at cracks, puddles, or a surface that scales apart within a few winters. This guide walks you through the entire process from an empty patch of yard to a solid, long-lasting patio slab. If your goal is to replace that old surface with a finished patio, the rest of this guide covers how to turn a concrete slab into a patio step by step. If you want a step-by-step walkthrough, this guide explains how to construct a concrete patio from start to finish.
How to Put in a Concrete Patio: Step by Step DIY Guide

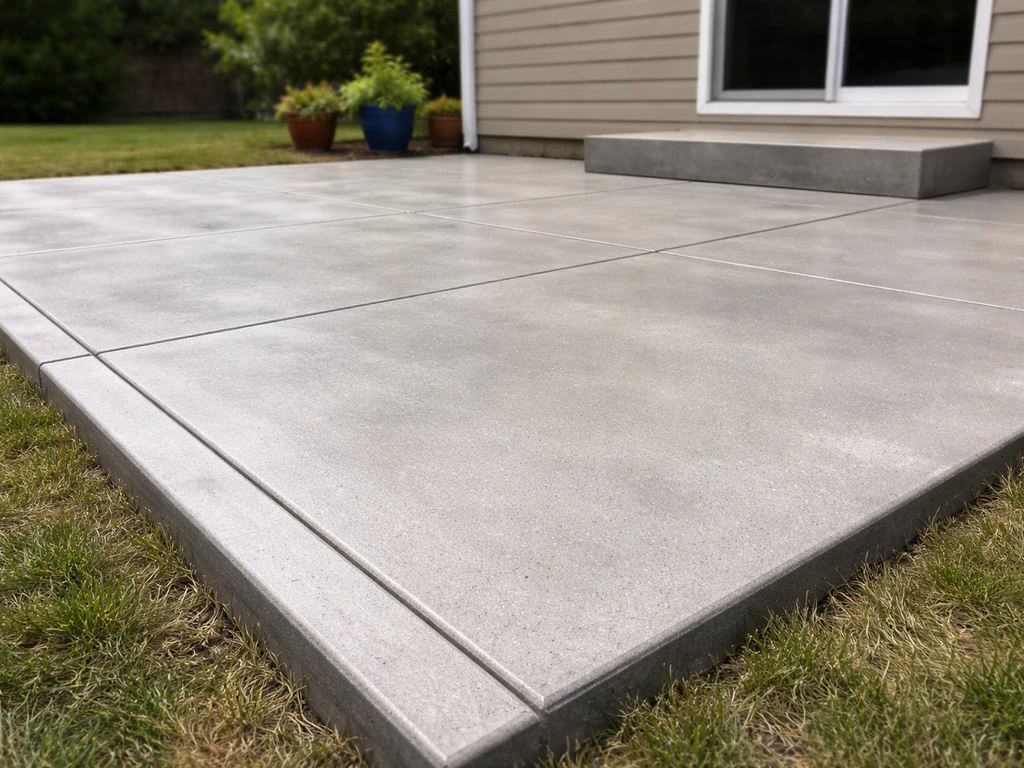
Planning and site prep
Before you touch a shovel, do two things: call 811 (Call Before You Dig) at least two full business days before you start excavating, and check with your municipality about permits. Most areas require a permit for patios over a certain square footage, and HOAs often have approval processes too. Don't skip this. Hitting a buried gas line or getting a stop-work order after you've poured is an expensive mess. This gives you a solid foundation and helps prevent the common cracks, puddles, and scaling problems people hit when learning how to concrete patio slab the hard way.
Now measure your patio area and stake out the corners. Use batter boards and string lines to define your perimeter and check that it's square (measure diagonally corner to corner in both directions; equal measurements mean square). Mark the finished grade on your stakes. The critical number here: you need a slope of 1/4 inch per foot away from your house. On a 12-foot-deep patio, that's a 3-inch drop from the house side to the far edge. This keeps water from sitting against your foundation and prevents the infamous patio puddle problem.
Once your layout is marked, start clearing. Remove any sod, roots, and organic topsoil. You typically need to excavate 7 to 8 inches deep to account for your gravel base and the concrete itself. Organic soil compresses over time and causes slabs to settle and crack, so get all of it out. After excavating, compact the native subgrade with a plate compactor. Make multiple passes until the soil stops moving. If you've got soft or wet spots, those need to be addressed now, either by removing and replacing with compacted fill or adding extra base material.
Choosing the right base, thickness, and drainage
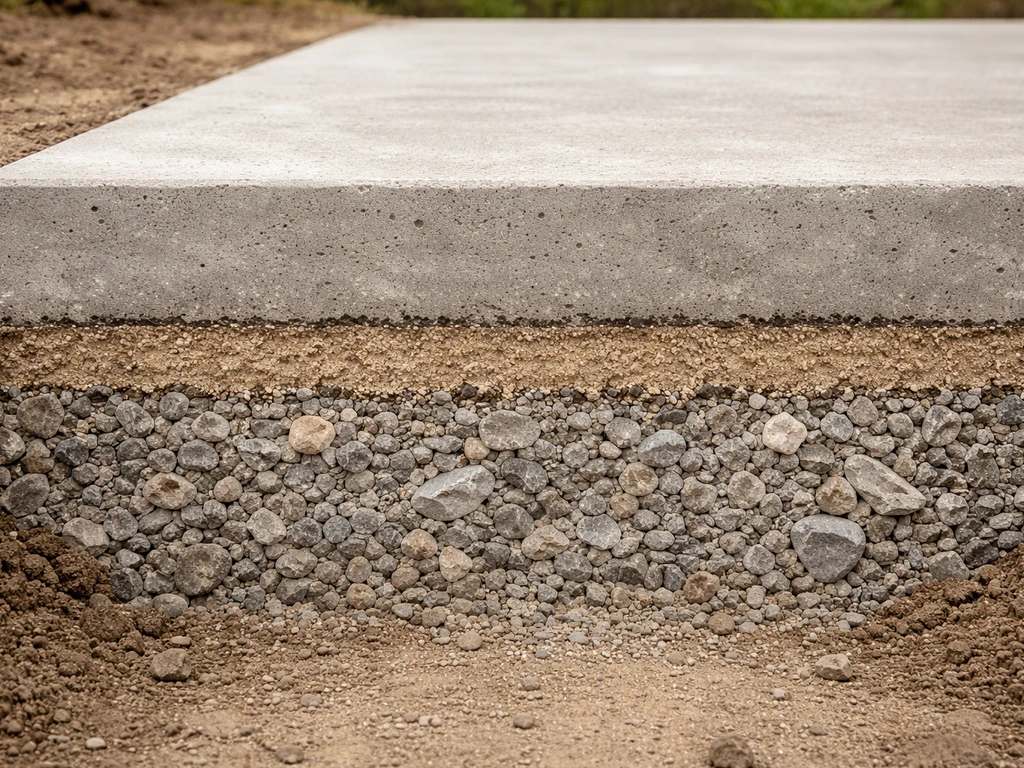
A 4-inch concrete slab is the standard for residential patios. If you're parking a vehicle on it or you have soft soil, bump that up to 5 or 6 inches. The thickness you choose drives several other decisions downstream, including joint spacing, so pick it now and stick with it.
Under the concrete, you want 4 inches of compacted gravel base, typically crushed stone or road base material. Compact it in two 2-inch lifts, not all at once. Each lift gets several passes with the plate compactor before you add the next layer. This base serves two purposes: it provides a stable, uniform surface for the concrete to rest on, and it helps with drainage by allowing water to move away from the slab bottom.
If you're building in an area with high moisture or you're tying into a basement or crawl space, lay a polyethylene vapor retarder (at least 10-mil) over the gravel before pouring. blank" rel="noopener noreferrer">Overlap seams by at least 6 inches and tape them. For a simple outdoor patio with good drainage below, you can skip the vapor barrier, but it never hurts to include it. Double-check that your finished concrete surface, once poured, will still maintain that 1/4-inch-per-foot slope away from the house.
Building your forms and setting up reinforcement
Forms are the wooden frames that hold wet concrete in place until it hardens. Use 2x4 or 2x6 lumber depending on your slab thickness. For a 4-inch slab, 2x4s work. For anything thicker, use 2x6s. Stake the forms firmly into the ground every 2 feet or so, and double-check that your form tops follow the correct slope using a level and measuring tape. This is your last chance to get the slope right before concrete goes in.
At corners and anywhere your new slab butts up against an existing structure (the house foundation, a step, an existing walkway), install expansion joint material, which is a compressible foam or asphalt-impregnated fiber strip. This lets the two concrete masses move independently without forcing a crack through the slab.
For reinforcement inside the slab, you have two main options: #3 or #4 rebar on a grid, or 6x6 welded wire mesh (WWM). Rebar gives stronger crack resistance and is worth it for larger patios or anywhere vehicle weight is possible. Wire mesh is easier to handle and fine for average foot-traffic patios. Either way, support the reinforcement so it sits at the middle of the slab depth, not on the ground. Use small plastic chairs or chunks of leftover gravel. Reinforcement sitting on the ground contributes nothing. Also add rebar dowels where your new slab connects to the house foundation or an existing slab, to tie them together and prevent differential settling.
Mixing, pouring, and finishing the concrete
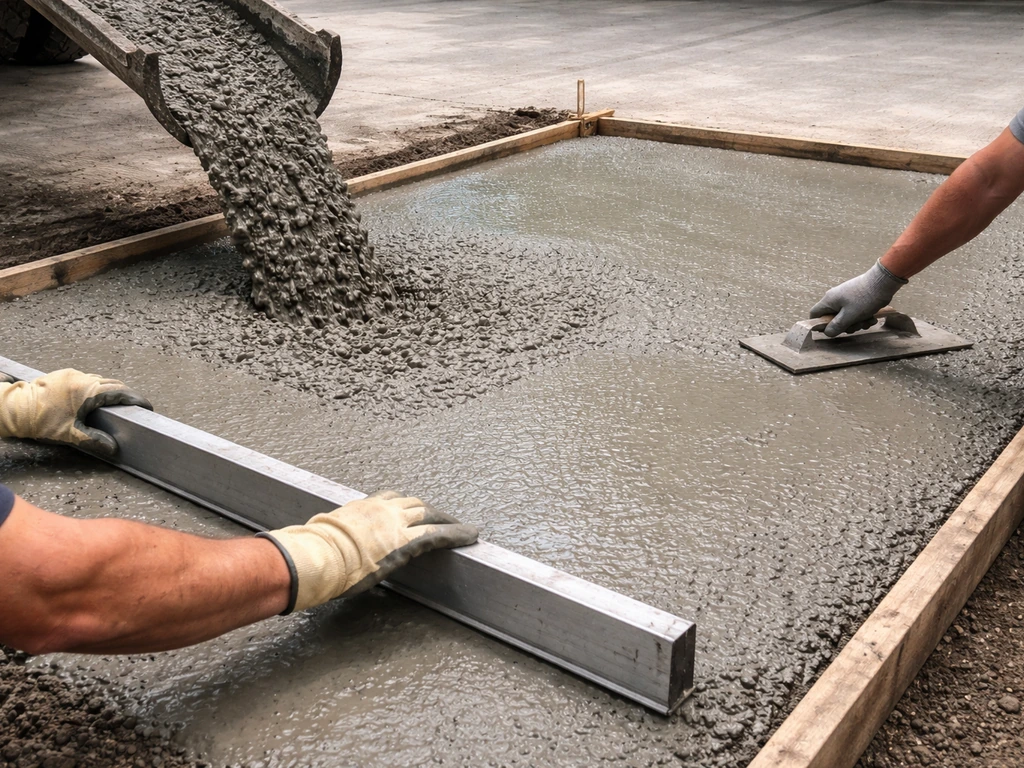
For anything larger than about 50 square feet, order ready-mix concrete from a local plant rather than mixing bags by hand. The labor and time savings are enormous, and you'll get a consistent, higher-quality mix. For exterior flatwork in a climate with freeze-thaw cycles, spec at least 4,500 psi concrete with a maximum water-to-cement ratio of 0.45 and about 6% air entrainment (plus or minus 1.5%). Air entrainment is what protects concrete from scaling when it freezes. If you're in a mild climate without hard freezes, a standard 4,000 psi mix is typically fine. For small repairs or patches, bagged concrete from a home center works.
When the truck arrives, start placing concrete at the far end of the patio and work back toward the chute. Use shovels and a concrete rake to spread it into the forms. Don't let the driver add extra water to make it more workable; every extra gallon of water weakens the concrete. Once the concrete is roughly level with the form tops, use a 2x4 screed board spanning across the forms and drag it back and forth in a sawing motion to level and consolidate the surface. Have a helper shovel concrete into low spots ahead of the screed.
After screeding, run a bullfloat over the surface in long overlapping passes to push aggregate down and bring cream to the top. Then wait. This is the part beginners mess up. Bleed water, a thin sheen of water on the surface, will appear and then disappear. Do not touch the surface until all bleed water is gone and the concrete can support light foot pressure without leaving more than a 1/4-inch impression. Finishing over bleed water traps it under the surface layer, which causes delamination and a weak, dusty surface that flakes apart. Once the surface is ready, use a hand edger along the forms to create a rounded edge that resists chipping, then finish the surface with a push broom dragged across to create a broom texture. A broom finish gives good traction and is the standard for residential patios.
Curing, sealing, and weather dos and don'ts
Curing is the process of keeping the concrete moist and at the right temperature so it reaches full strength. This is not optional. Concrete that dries out too fast is weak concrete. The ACI standard is a minimum of 7 days of curing at temperatures above 50 degrees F. There are two practical ways to do this at home. The first is wet curing: cover the slab with burlap or curing blankets and keep them wet for the full 7 days. The second is a liquid curing compound sprayed on right after the broom finish, which forms a membrane that traps moisture. Curing compounds are easier, especially on larger slabs. Either method works. What doesn't work is just leaving the slab bare and hoping it rains.
Temperature matters a lot. Don't pour concrete when air temperatures are below 40 degrees F or are expected to drop below 40 in the 24 hours after placement. Cold slows hydration and freezing water in fresh concrete will destroy it. On the flip side, pouring in hot, dry, windy conditions causes the surface to crust over before the interior cures. If you must work in summer heat, pour early in the morning, have your crew ready to move fast, and apply the curing compound quickly after finishing.
After the curing period is complete, apply a penetrating concrete sealer. For exterior patios, a silane-siloxane penetrating sealer is the best choice because it repels water without changing the surface appearance and doesn't peel. Apply it with a pump sprayer or roller once every 2 to 3 years. If you want a glossy look or more stain resistance, an acrylic sealer works, but it needs reapplication more often and can get slippery when wet unless you add a non-slip additive.
Control joints and long-term crack management
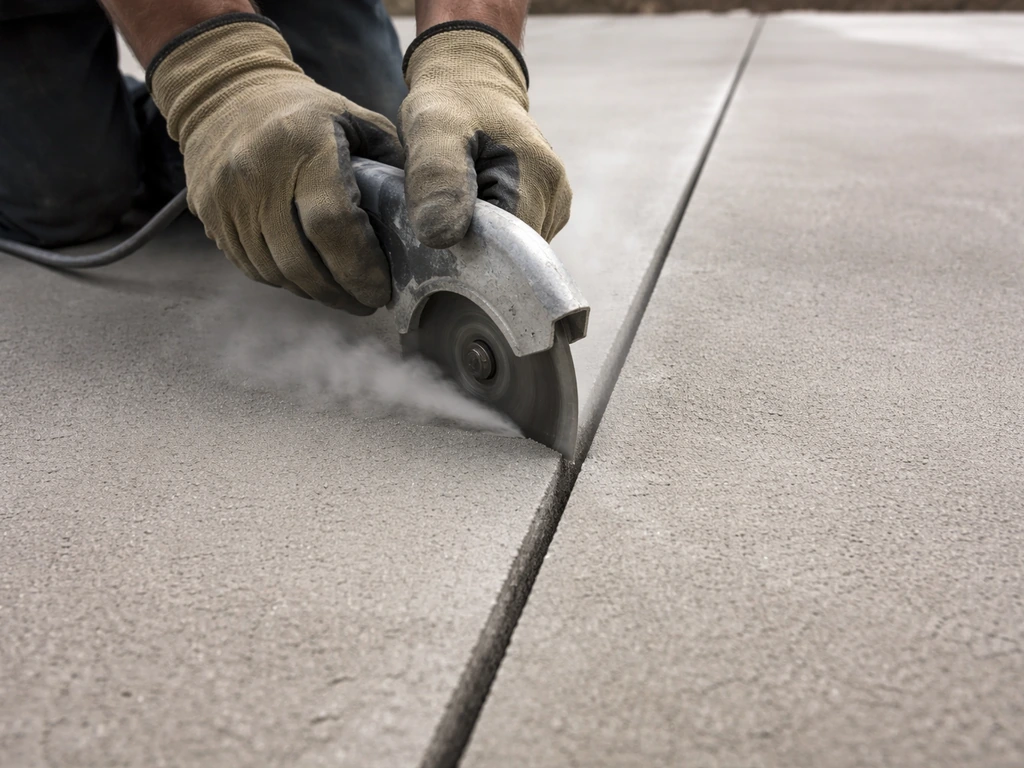
Concrete shrinks as it cures, and that shrinkage causes cracking. You cannot prevent concrete from cracking; you can only control where it cracks. That's the job of control joints. These are grooves cut or tooled into the slab surface that act as intentional weak points, directing cracks to happen in a straight line where you want them rather than randomly across the surface.
The standard spacing rule: space control joints no more than 2 to 3 times the slab thickness in feet. For a 4-inch slab, that means joints every 8 to 12 feet. For a 10x12-foot patio, you might only need one joint down the middle. For a larger 16x20-foot slab, you'd lay out a grid of joints. The joints need to be at least 1/4 of the slab depth, so for a 4-inch slab, cut or tool them at least 1 inch deep.
Timing for saw-cut joints is critical. Cut too late and the concrete has already cracked randomly on its own. Cut too early and you'll tear the edges. The window is typically 4 to 12 hours after placement, depending on weather and the mix used. Watch for the surface to be firm enough that the saw doesn't ravel the edges. If you're using a hand grooving tool instead of a saw, you can tool the joints right after the broom finish while the concrete is still workable. Either method works, but saw cutting gives cleaner, more precise joints.
Common mistakes and how to fix them
Even experienced people run into problems. Here are the most common failures and what to do about them.
| Problem | Likely Cause | Fix or Prevention |
|---|---|---|
| Water pooling on surface | Insufficient slope or low spot in forms | Regrade forms before pouring; for existing slabs, grind high spots or apply a self-leveling overlay |
| Random cracking | Control joints missing, spaced too far apart, or cut too late | Saw-cut joints within 4-12 hours; space at 8-12 ft for a 4-inch slab |
| Surface scaling or flaking | Finishing over bleed water, or no air entrainment in freeze-thaw climate | Wait for bleed water to dissipate; use air-entrained mix in cold climates |
| Weak, dusty surface | Too much water added to the mix | Never exceed the specified w/cm ratio (0.45 max for exterior work) |
| Crumbling or spalling edges | Forms removed too early, thin edge coverage, or impact damage | Leave forms 24-48 hours; keep reinforcement 2 inches from edges |
| Slab settling or cracking at seams | Poor subgrade compaction or inadequate base | Compact subgrade in lifts; use 4 inches of compacted gravel base |
| Surface delamination | Finishing too early while bleed water is present | Wait until bleed water is gone and the surface shows proper stiffness |
If your existing patio has wide cracks (wider than 1/4 inch), address them before sealing. Clean the crack out with a wire brush and compressed air, then fill with a polyurethane or epoxy concrete crack filler. For structural cracks or significant settling, the underlying cause (usually subgrade failure) needs to be fixed, which may mean lifting and releveling the slab with mudjacking or foam lifting, or replacing the section entirely.
Your maintenance plan going forward
A well-built concrete patio can last 30 to 50 years with basic upkeep. The maintenance schedule is simple: reseal every 2 to 3 years (or when water stops beading on the surface), inspect control joints annually and re-fill with backer rod and sealant if they've opened up, and deal with small cracks before they widen. In freeze-thaw climates, avoid using rock salt or calcium chloride deicers on the surface, especially in the first year. Sand is safer for traction.
If your patio is already in good structural shape but looks dull or stained, you don't have to tear it out. Concrete staining, resurfacing with a thin overlay, or applying a decorative coating are all viable paths to a fresh look without starting over. The key is that the base slab needs to be solid, well-bonded, and free of active settling or moisture issues before any refinishing product will stick properly.
If this guide covers more than you want to tackle in one go, there are more focused breakdowns available on specific stages: how to lay concrete for a patio covers just the pour and finishing in more depth, and turning an existing concrete slab into a finished patio addresses refinishing and surface upgrade options for those who already have the slab in place. Take it one stage at a time, don't rush the curing, and the slab you pour this weekend can still be solid in 2056.
FAQ
Do I need to call 811 and get a permit even for a small patio?
It depends on what you mean by “patio.” If you are creating new slab area on bare soil, you typically need an 811 call and often a permit, especially for larger footprints. For overlays or resurfacing of an existing slab, requirements can be different, but you still should check locally before you cut concrete or excavate near utilities.
What if my patio needs to be level with my house or porch?
You can, but you must prevent water from collecting at the house. Keep the 1/4-inch-per-foot slope away from the structure, and do not bury the slab into landscaping in a way that traps runoff against it. If the patio abuts a porch or foundation wall, plan for expansion and flashing-style drainage detailing so the joint does not become a moisture channel.
Can I reuse wire mesh or rebar I already have, and does it need to be lifted off the ground?
Yes, just keep reinforcement correctly placed. The most common mistake is letting rebar or wire mesh sit on the ground or on the gravel base, which leaves it too low in the slab to protect against cracking. Use plastic chairs or concrete supports so the steel is centered (or close) to mid-depth, and add dowels at connections to existing concrete if applicable.
What happens if the concrete seems too dry, can I ask for extra water at the site?
The goal is consistent workability without adding water. If the mix arrives too stiff, do not have the driver add extra water, instead manage the placement and finishing timing, and ensure you have enough manpower to spread and screed promptly. If you used too much water, the slab may look fine at first but will be weaker and more prone to scaling and dusting.
How do I know when to cut control joints so I do not get random cracking?
For control joints, do not wait until you see random cracking. Plan the layout before the pour using the spacing rule (no more than 2 to 3 times the slab thickness in feet) and cut or tool at least 1 inch deep for a 4-inch slab. If you miss the timing window for saw-cut joints, a hand grooving tool may be your option while the surface is still workable, but the joint will be less precise than a saw cut.
Can I cover the slab with plastic and walk away instead of wet curing it?
It is a bad idea. A common failure is covering the slab too early in a way that traps bleed water or moisture unevenly, then the surface can scale or delaminate. If you cure with burlap or blankets, keep them moist continuously, do not let them dry out, and ensure the covering does not tear loose or leave dry spots.
What deicer is safest for a new concrete patio in winter?
In freeze-thaw areas, do not use salt or calcium chloride on the fresh surface, especially in the first year. Those products can accelerate surface deterioration and scaling. If you need traction, use sand (and minimize the amount used), and avoid letting meltwater refreeze against the slab edges and joints.
Can I pour a concrete patio that a car will drive on?
If the patio will see vehicle weight, upgrade both slab and reinforcement decisions. Increase thickness (commonly 5 or 6 inches instead of 4), and use rebar or other engineered reinforcement rather than relying on light wire mesh alone. Also ensure the subgrade and base are thoroughly compacted, because pavement failures often trace back to support, not just concrete thickness.
Can I stain or resurface my patio if it already has cracks or discoloration?
If the patio is clean, sound, and not actively settling, sealing and resurfacing can work. However, if there are structural or widening cracks, settlement, or moisture issues, you must fix the underlying problem first, otherwise the new coating can fail. Look for moving cracks, hollow sounds, or water coming up from the base area before deciding on stain or overlay products.
If water pools on my new patio, what should I check first?
If puddling happens after a pour, the cause is usually grade, base drainage, or joint detailing, not a “surface” fix. Confirm the slope at multiple points, check for low areas, and inspect joints and edges for trapped water. Minor surface irregularities can sometimes be corrected later with grinding or patching, but repeated puddles usually signal a drainage or base problem that may require more work.